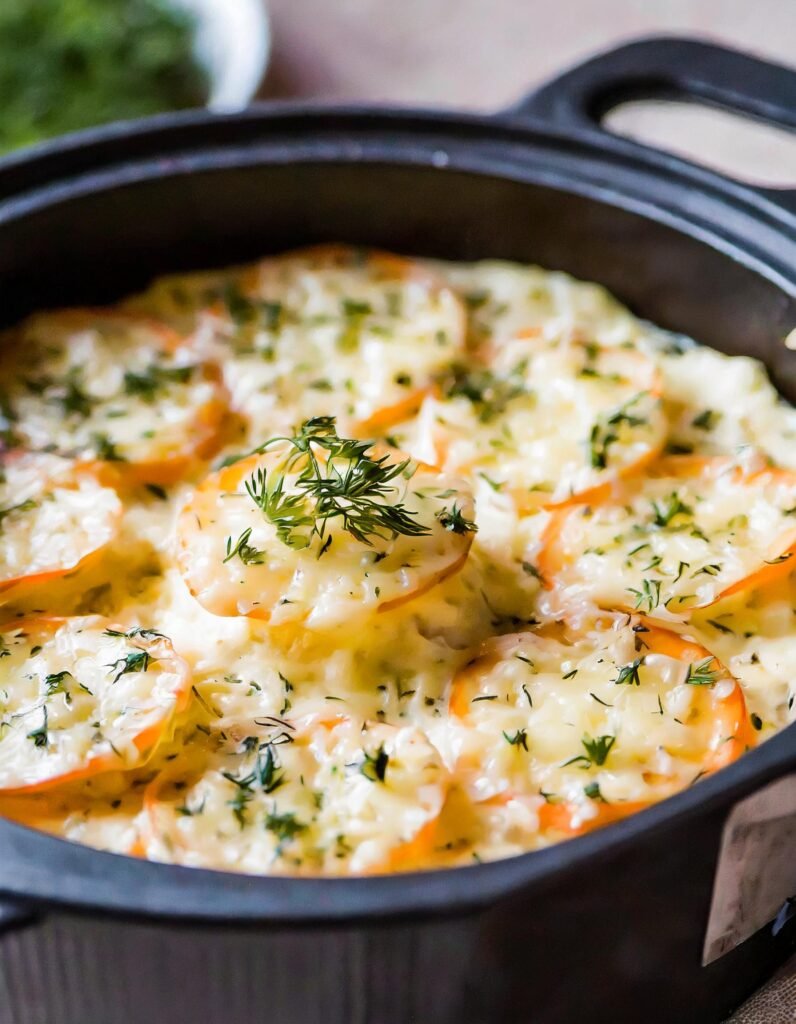
Crack Chicken Noodle Soup

Crack Chicken Noodle Soup


Big bowls of noodle soup are soothing. But adding chicken, bacon, ranch dressing, and cheddar cheese makes Crack Chicken Noodle Soup remarkable. A cheesy, savory touch makes this soup a comforting treat and a comfort food hit.

What makes Crack Chicken Noodle Soup good?

This chicken noodle soup is heartier, richer, and tastier. Its enticing combination is:

  • Cheddar cheese melts perfectly into the broth, creating a rich, creamy texture.
  • Bacon, which adds a smoky, savory depth.
  • The tangy kick of the ranch dressing mix enhances the overall flavor profile.

 It isn’t just soup; it’s a full experience in a bowl. Check out our Hawaiian Chicken in a Crock-Pot for more delicious chicken recipes.

Frequently Asked Questions 

Can I make this soup ahead of time?

You can prepare it in advance, but add the noodles when you reheat the soup to avoid soaking up too much broth.

Is Crack Chicken Noodle Soup freezable?

Freeze without the noodles and add fresh ones when reheating for the best texture.

How can I make my soup less salty?

Use low-sodium broth and homemade ranch seasoning to reduce the salt content.

Overview of Ingredients

Crack Chicken Noodle Soup’s basic, savory ingredients make it magical. What you need:

  • Chicken: cooked and shredded, rotisserie chicken is perfect for convenience and flavor.
  • Cheese soup and shredded cheddar cheese: for that creamy, cheesy goodness.
  • Bacon: cooked and chopped, adding a touch of smokiness.
  • The ranch dressing mix combines all the flavors with its herby and tangy profile.
  • Vegetables: typically carrots and celery, sliced thin.
  • Egg noodles cook quickly in the broth, absorbing all the delicious flavors.
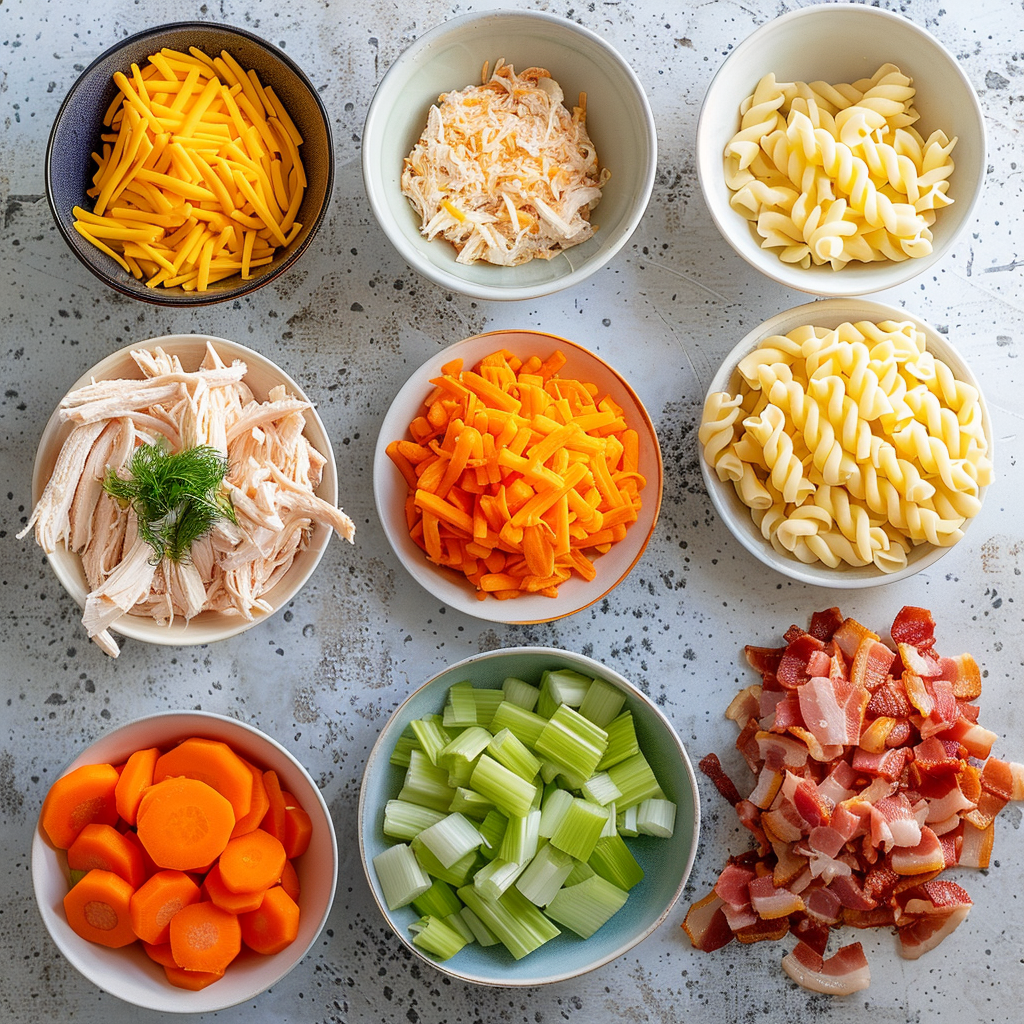
Overview of Ingredients

Enhance your chicken dishes using the best spices from our Best Seasoning for Chicken Breast guide.

Chef’s Tips for Perfect Crack Chicken Noodle Soup

Improve your chicken cooking technique.

  • Poaching the Chicken: Consider poaching your breasts or thighs directly in the broth for tender, juicy chicken. This method infuses the chicken with flavor and keeps it moist.
  • Shredded vs. Diced: While shredded chicken is traditional, you can also dice it into bite-sized pieces for a different texture and a more even distribution of chicken in every spoonful.

Enhance Flavor with Base Ingredients

  • Saute Aromatics: Before adding your liquids, sauté onions, garlic, and celery to deepen the flavors. Simply boiling these ingredients doesn’t achieve the richness that this caramelization adds.
  • Broth Quality: Use high-quality or homemade chicken broth as the base for your soup. The better your broth, the more flavorful your soup will be. If you’re using store-bought, opt for a low-sodium version to control the salt level better.

Use authentic ranch flavors.

  • Make Your Ranch Mix: Mix dried herbs and spices instead of store-bought ranch seasoning packets. Allows you to adjust the flavors to your liking and reduce unnecessary preservatives and additives.
  • Fresh vs. Dry Herbs: Incorporate fresh herbs like dill, parsley, or chives towards the end of cooking for a fresh flavor that complements the creamy soup base.

Cooking noodles to perfection

  • Cook Noodles Separately: To avoid soggy noodles, especially if you anticipate leftovers, cook your noodles separately and add them to each bowl when serving. Keeps them firm and prevents them from absorbing too much broth.
  • Choosing the Right Noodles: Opt for thicker noodles, like egg noodles, or even pasta, like farfalle or fusilli, which hold up better in a hearty, rich broth.

Balancing the creaminess

  • Adjusting Creaminess: If the soup is too thick, thin it with additional broth. To achieve the desired consistency, add a mixture of cornstarch and water if the soup is too thin.
  • Dairy Substitutions: For a lighter version, substitute full-fat dairy products with low-fat or non-dairy alternatives like almond, soy, or oat milk. Keep in mind that non-dairy options might alter the flavor slightly.
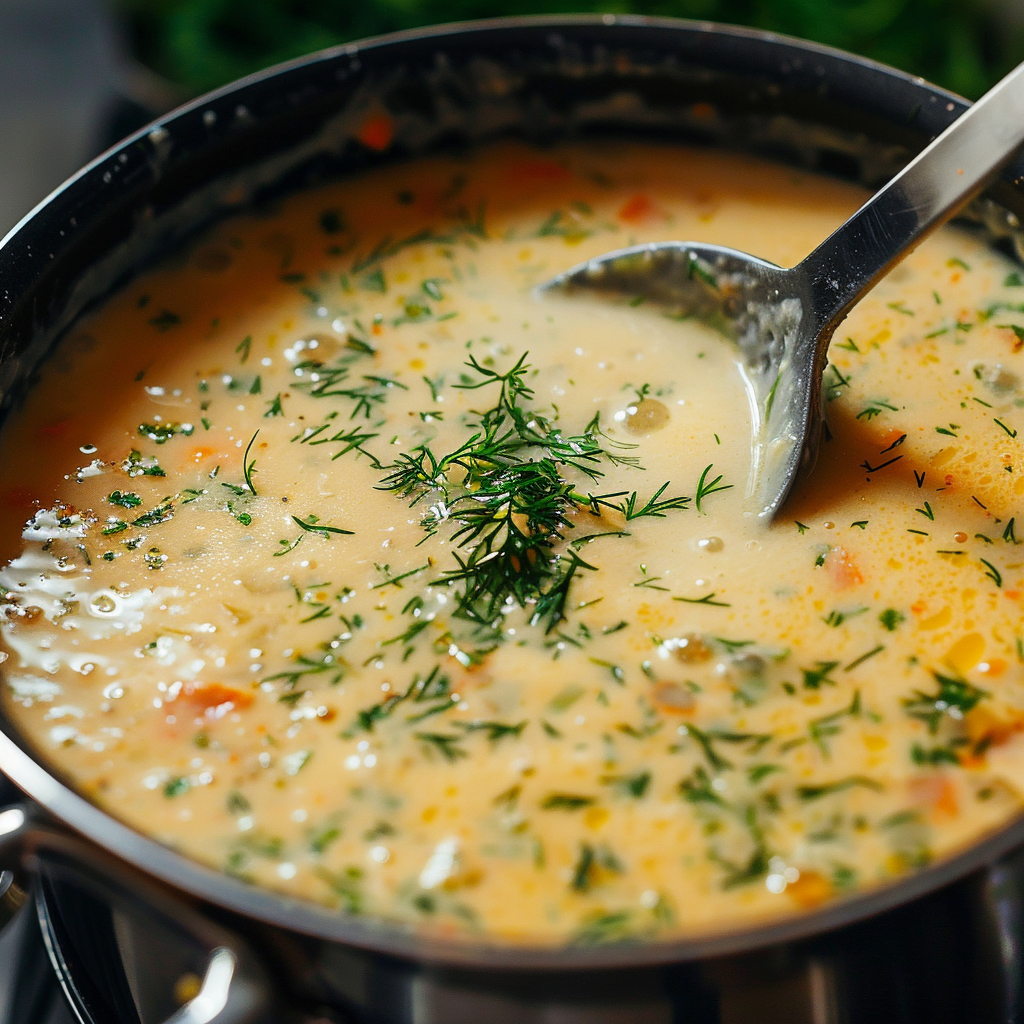
preparation

Finishing Touches

  • Taste and season: Always taste your soup before serving, and adjust the seasoning with salt and pepper as needed. Sometimes, a pinch of sugar can balance the flavors perfectly.
  • Garnishing: Garnish with crispy bacon, extra shredded cheese, or a drizzle of melted butter for a restaurant-quality finish.

Adding more vegetables to Crack Chicken Noodle Soup

Enhancing the nutritional value and flavor profile of your Crack Chicken Noodle Soup.

  • Spinach or Kale: During the last few minutes of cooking, add fresh spinach or kale to ensure they wilt but retain their vibrant color and nutrients.
  • Mushrooms: Add an earthy flavor and add sliced mushrooms with the base vegetables, like celery and carrots.
  • Peas and Corn: Mix frozen peas and corn with the noodles during the final minutes of cooking to add a sweet pop of flavor.


These additions help transform the soup into a more balanced meal, appealing to those seeking healthier options.

Making Crack Chicken Noodle Soup Creamier

If you prefer a creamier texture, consider these adjustments to the standard recipe:

  • Cream Cheese: Mix in a block of cream cheese with the cheddar for an extra creamy and tangy flavor.
  • Heavy Cream: Replace milk with a splash of heavy cream or half-and-half to achieve a richer, more luxurious texture.
  • Pureed Vegetables: Blend some of the cooked vegetables with broth and reintroduce it to the soup to thicken it naturally.

Ideal Toppings for Crack Chicken Noodle Soup

To enhance both texture and flavor, customize your Crack Chicken Noodle Soup with these delightful toppings:

  • Green Onions or Chives: Add a sprinkle of chopped green onions or chives on top for a sharp, oniony bite.
  • Croutons: For a satisfying crunch, try homemade or store-bought croutons.
  • Extra Cheese: Offer more shredded cheddar or a sprinkle of Parmesan just before serving to delight cheese enthusiasts.
  • Sour Cream: Place a dollop of sour cream on each serving for a creamy tang that complements the rich flavors of the soup.

What goes best with Crack Chicken Noodle Soup?

This hearty soup pairs well with various sides. Consider these:

  • A crisp green salad with a light vinaigrette.
  • Garlic bread or a crusty baguette for dipping.
  • A side of steamed vegetables for a healthier touch.

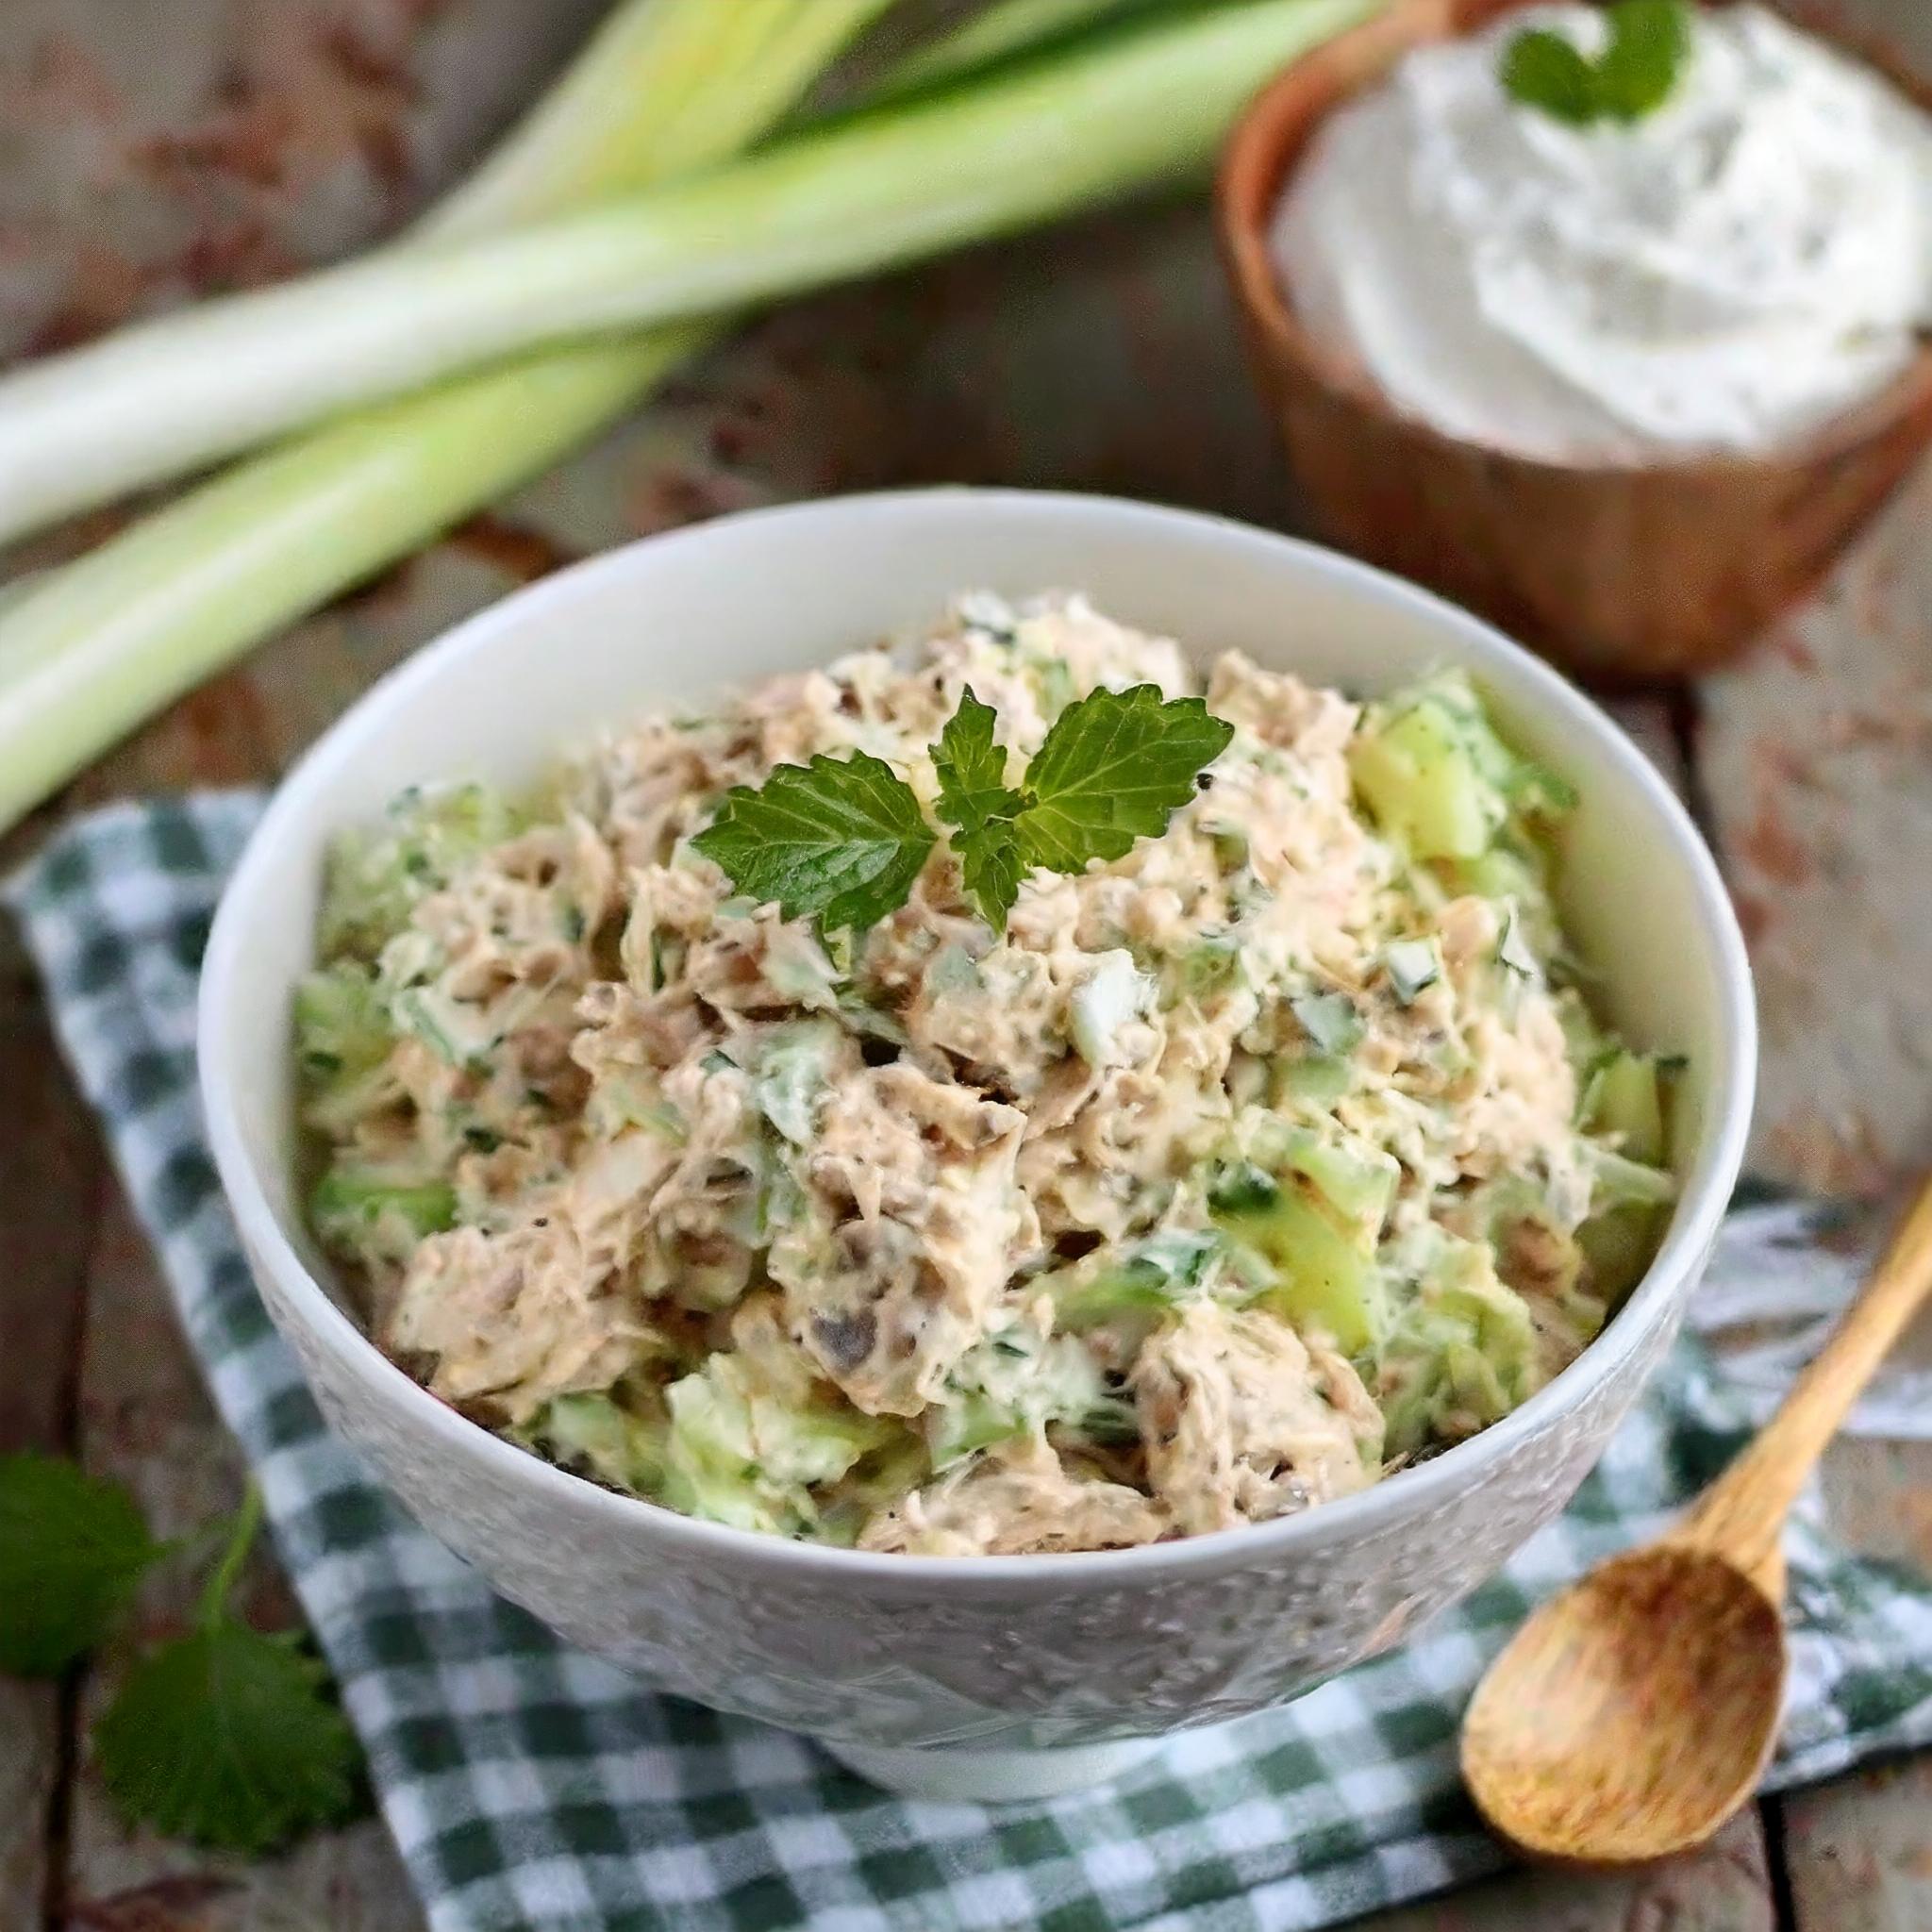
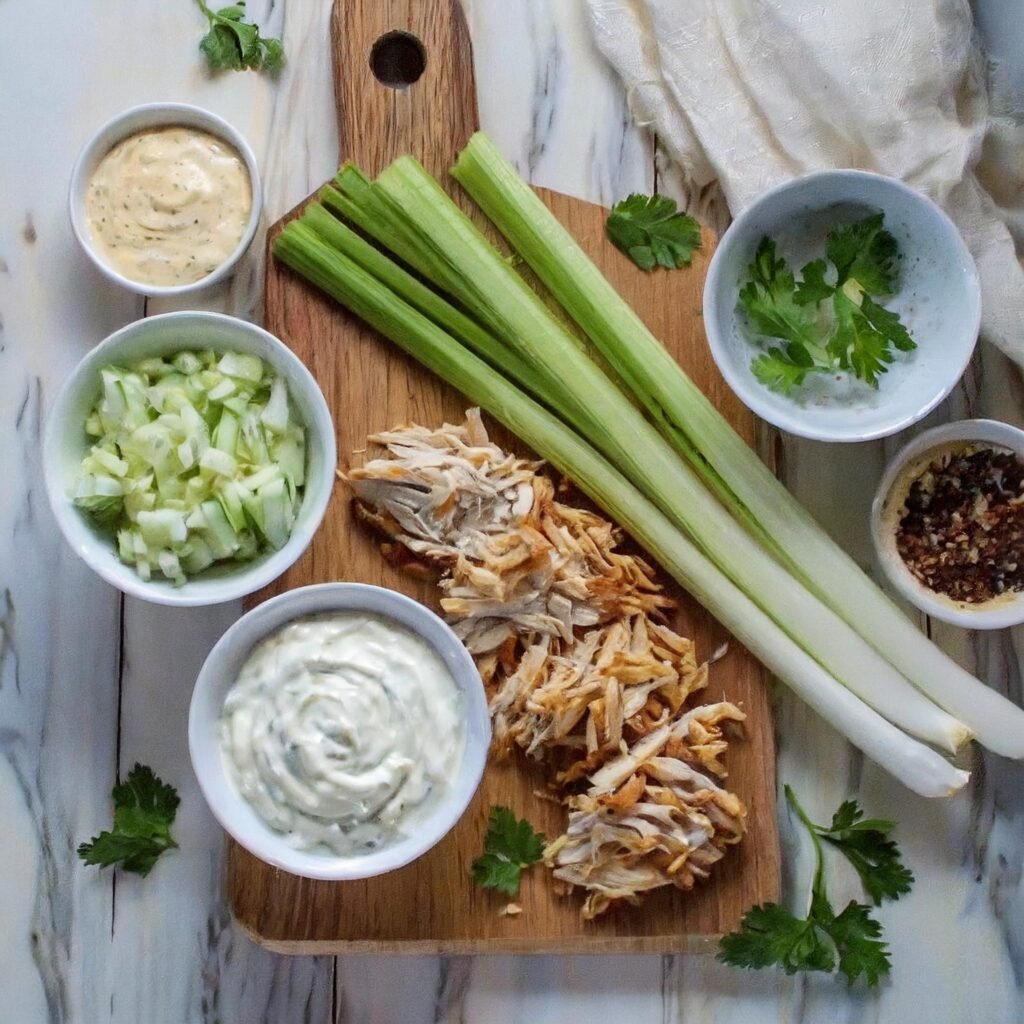
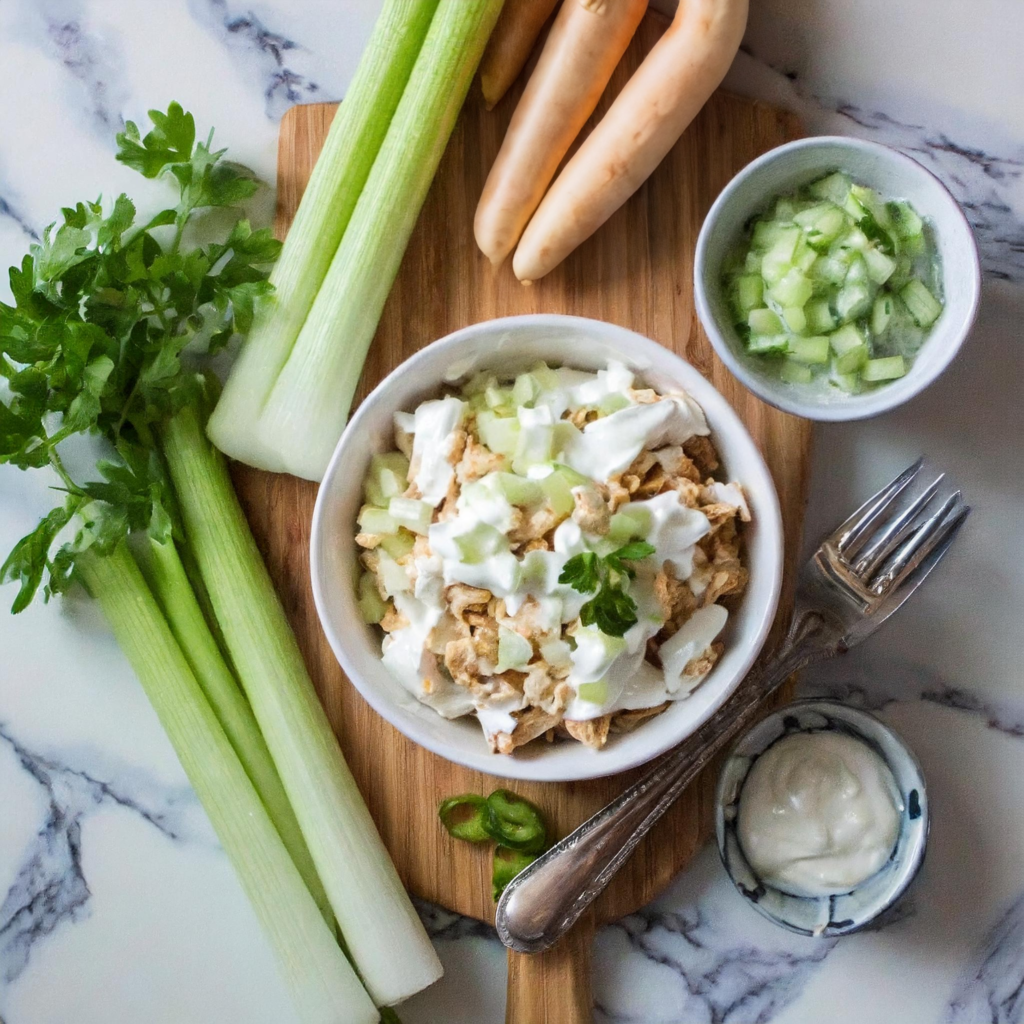
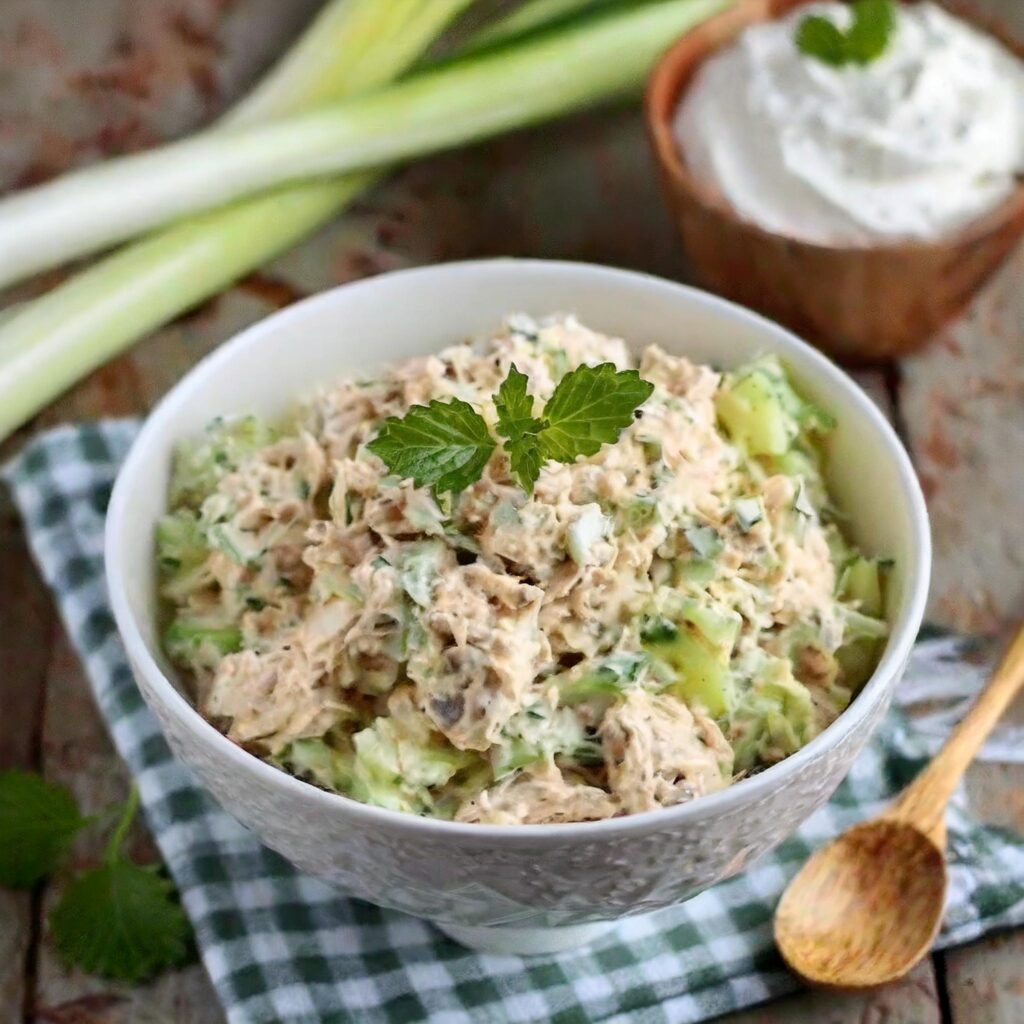
A colorful 4-ingredient Chicken Salad is a healthy alternative to the soup’s heartiness. 

Health Benefits

While Crack Chicken Noodle Soup is a comfort dish, it also offers several benefits:

  • Protein-rich: Chicken and cheese make it a good protein source, essential for muscle repair and growth.
  • Carrots and celery: Add vitamins and fiber, which are great for digestion and health.

For more detailed information on the nutritional content of your ingredients, visit the Nutritional Information Guide.

Why It’s a Must-Try

Why You Should Try It Crack Chicken Noodle Soup offers comfort in a bowl, elevating moods and satisfying tummies. Whether you’re a beginner or an expert, this soup will wow.

Print

Crack Chicken Noodle Soup

Indulge in the savory goodness of Crack Chicken Noodle Soup, a rich blend of chicken, bacon, cheese, and ranch for ultimate comfort.

  • Author: Gabriela cardenas
  • Prep Time: 15 minutes
  • Cook Time: 30 minutes
  • Total Time: 45 minutes
  • Yield: 4
  • Category: Soup
  • Method: Mixing
  • Cuisine: American

Ingredients

  • 2 cups cooked and shredded chicken (rotisserie chicken recommended)
  • 1 cup shredded cheddar cheese
  • 1 cup cheese soup
  • 6 slices bacon, cooked and chopped
  • 1 packet ranch dressing mix
  • 2 carrots, thinly sliced
  • 2 celery stalks, thinly sliced
  • 1 onion, diced
  • 2 cloves garlic, minced
  • 6 cups chicken broth (low-sodium preferred)
  • 2 cups egg noodles
  • Optional fresh herbs (dill, parsley, chives) for garnish

Instructions

Ingredients Preparation

  • Prepare Chicken: If you haven’t already, cook and shred 2 cups of chicken. Rotisserie chicken is recommended for its flavor and convenience.
  • Prepare Bacon: Cook 6 slices of bacon until crispy, then chop into small pieces.
  • Chop Vegetables: Thinly slice 2 carrots and 2 celery stalks. Dice 1 onion and mince 2 cloves of garlic.

Cooking Process

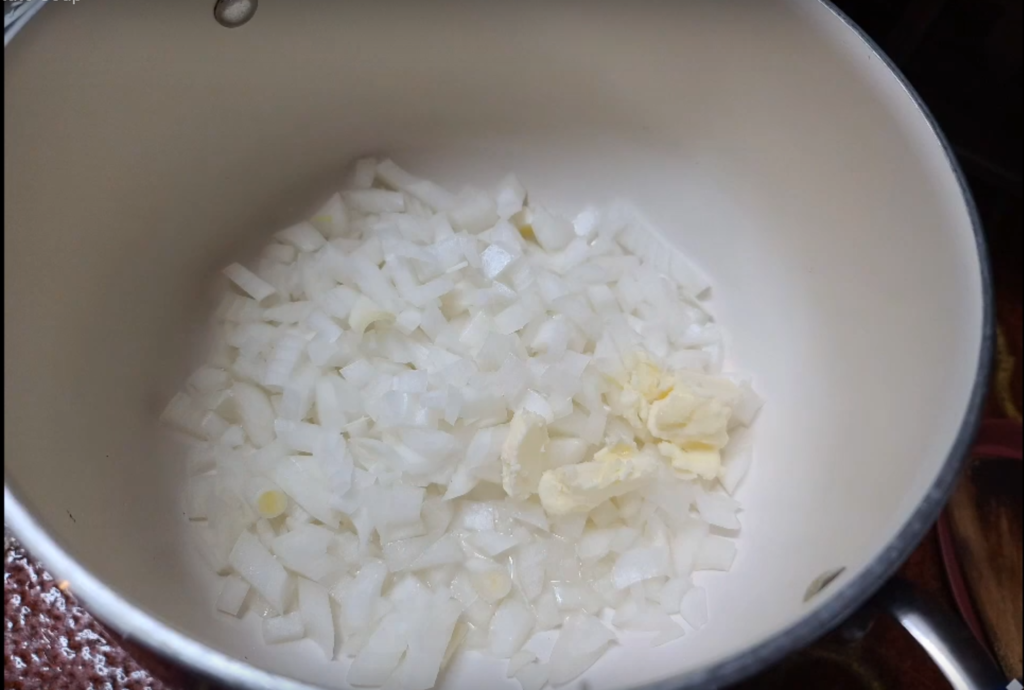
  • Sauté Vegetables: In a large pot, heat a bit of oil over medium heat. Add the diced onions, minced garlic, sliced carrots, and celery. Sauté until the onions are translucent and the vegetables are beginning to soften, about 5-7 minutes.
  • Add Broth and Seasonings: Pour 6 cups of low-sodium chicken broth into the pot. Stir in the ranch dressing mix and bring the mixture to a boil.
  • Simmer Soup: Once boiling, reduce the heat and let the soup simmer for about 10-15 minutes to allow the flavors to meld.
  • Add Chicken and Bacon: Add the cooked, shredded chicken and chopped bacon to the pot. Stir well to combine.

Final Touches

  • Incorporate Cheese and Noodles: Add 1 cup of cheese soup and 1 cup of shredded cheddar cheese to the soup, stirring until the cheese is completely melted and incorporated. Add 2 cups of egg noodles and continue to simmer until the noodles are tender, about 10 minutes.
  • Adjust Seasonings: Taste the soup and adjust the seasoning with salt and pepper if needed. If the soup is too thick, add more broth to achieve your desired consistency.

Garnish and Serve

  • Garnish and Serve: Ladle the soup into bowls. Garnish with fresh herbs such as dill, parsley, or chives for added flavor and a pop of color. Serve hot with crusty bread or a side salad.

Notes

  • Poaching the Chicken: For extra flavor and tenderness, consider poaching the chicken breasts or thighs in the broth before shredding.
  • Noodles: Cook the noodles separately and add to the soup just before serving to avoid them becoming soggy.
  • Creaminess Adjustment: If the soup is too thick, thin it with additional broth. If too thin, thicken with a cornstarch-water mixture.
  • Dairy Alternatives: Use low-fat or non-dairy milk products to reduce calories without compromising creaminess.

Keywords: Cheesy Chicken Noodle Soup, Creamy Chicken Soup with Baco

Did you make this recipe?

Share a photo and tag us — we can't wait to see what you've made!

French Onion Mac and Cheese Recipe

French Onion Mac and Cheese Recipe


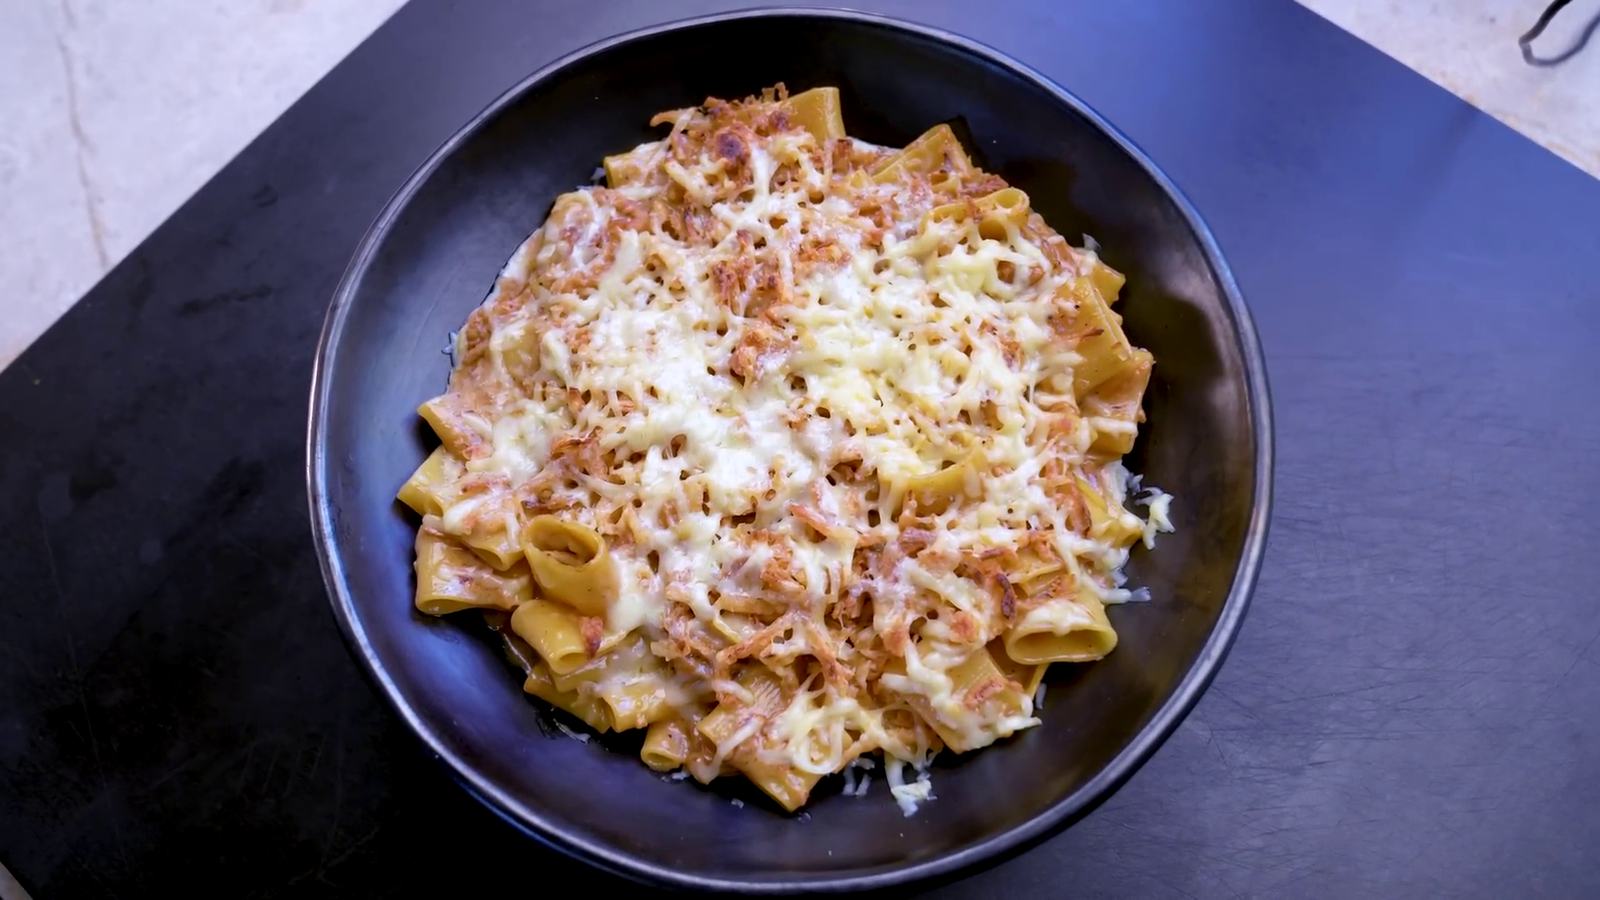
Think French onion soup and mac & cheese together. French Onion Mac & Cheese is a culinary adventure that will transport your taste buds to a glorious planet.french onion, mac and cheese

Why does this recipe turn out so well?

French onion mac and cheese is unique because it uses a mix of simple items to make mac and cheese taste even better than usual. When the caramelized onions and Gruyere cheese melt together, they have a taste that is both familiar and sophisticated. Find out more about the different kinds of cheese that can make your food taste better.

It has a thick, creamy texture that sticks to every pasta piece.
The onions give it a deep, sweet flavor, and the cheese makes it taste sharp.

Frequently Asked Questions 

What type of cheese works best for French Onion Mac and Cheese?

The best type of cheese for French Onion Mac and Cheese is Gruyere because of its excellent melting properties and rich flavor, which mimics the classic French onion soup. You can add Parmesan for a saltier, sharper taste, which enhances the overall flavor profile of the dish.

Is it possible to prepare French onion mac and cheese in advance?

Yes, you can prepare French onion mac and cheese ahead of time. Assemble the dish up to the point of baking, and store it covered in the refrigerator. When ready to serve, bake it according to the recipe instructions, adding a few extra minutes to compensate for starting from a cold state.

For the recipe, how can I keep the onions from burning while caramelising?

To prevent the onions from burning during caramelization, cook them slowly over low heat. Stir frequently, and add a splash of water or broth if they start to catch. This method will help to develop the deep, sweet flavour required for the dish without burning the onions.

Overview of Ingredients

Each ingredient in this dish plays a pivotal role in crafting the ultimate comfort food experience:

  • Cheeses: Gruyere for its creamy melt and nutty flavor; Parmesan for a salty bite.
  • Pasta: short-cut pasta like penne or elbows, perfect for holding onto the sauce.
  • Onions: large, sweet onions, caramelized to perfection.
  • Seasonings: Fresh thyme, salt, and pepper enhance the natural flavors of the other ingredients.
  • Breadcrumbs: For a crunchy topping that adds texture contrast.

Chef’s Tips for Perfect Gourmet Mac and Cheese

Creating the perfect French Onion Mac and Cheese involves more than just following a recipe; it requires attention to detail and a bit of culinary finesse. Here are some tips from the kitchen to ensure your dish turns out wonderfully every time:

  • Caramelizing Onions: The key to getting the rich flavor profile typical of French onion soup is properly caramelizing onions. Cook them slowly over low heat, stirring frequently. It might take up to an hour, but patience is essential. The onions should turn a deep golden brown without burning.
  • Consistency of the Cheese Sauce: Achieve a smooth and velvety cheese sauce by adding the cheese to the béchamel slowly and stirring constantly. If the sauce gets too hot, the cheese can separate and become grainy, so keep the flame low and gentle.
  • Pasta Perfection: Cook your pasta al dente since it will continue to cook in the oven. Overcooked pasta can become mushy after baking, so draining it a minute or two before the package’s recommended cooking time is a good trick.
  • Baking Tips: To get that irresistible crispy top without overcooking the interior, broil the mac and cheese for a few minutes after baking. Watch it closely to ensure it doesn’t burn.

Making Gluten-Free French Onion Mac and Cheese

Choose your favorite gluten-free pasta to make French Onion Mac & Cheese. Use a gluten-free all-purpose flour mix in the roux. Keep all other components, including broths and spices, gluten-free to prevent cross-contamination and follow gluten-free diets. Gluten-sensitive people may enjoy traditional comfort foods with this alteration.

Customizing Your french onion mac and cheese

French onion mac and cheese is wonderfully adaptable, and tweaking it to your liking can be a delightful culinary experiment.

  • Cheese Variations: While Gruyere is traditional, feel free to mix in other cheeses, such as sharp cheddar for more tang or a smoked gouda for a deep, smoky flavor.
  • Add-ins: Consider adding elements like crispy bacon or sautéed mushrooms to introduce new textures and flavors. For a vegetarian twist, roasted garlic or caramelized shallots can add depth.
  • Make It Lighter: For a less guilty indulgence, substitute half of the cheese in the sauce with pureed butternut squash or cauliflower. It’ll reduce calories and add nutrients without compromising the creamy texture.
  • Gluten-Free Options: Use gluten-free pasta and thicken the sauce with a gluten-free flour blend or cornstarch instead of regular flour to make this dish celiac-friendly.
  • Meat Lovers: Incorporate unique flavors like those in our Sloppy Joe Recipes.

What to Serve with french onion mac and cheese

While rich and hearty, French Onion Mac and Cheese can be part of a balanced meal with the right accompaniments:

  • Explore Upscale Options: For a similarly indulgent dish, check out our Lobster Pasta guide.
  • Salads: A light, acidic salad can balance the richness of the mac and cheese. Opt for a salad with arugula, vinaigrette, and perhaps some fresh fruit like apples or pears to introduce a sweet and tart element.
  • Protein: If using the mac and cheese as a side dish, pair it with a protein like grilled steak, roasted chicken, or even seared scallops. The protein will complement the creamy pasta without overpowering it.
  • Vegetables: Roasted vegetables like Brussels sprouts, asparagus, or carrots provide a nice contrast in both flavor and texture. Season them simply with olive oil, salt, and pepper to let the main dish shine.
  • Bread: A side of crusty bread can be perfect for scooping up any leftover cheese sauce. Opt for garlic bread if you want to add a flavorful crunch.

Health Benefits

While many consider French Onion Mac and Cheese to be a comfort food indulgence, careful ingredient selection can also provide a number of health benefits, including:

  • In addition to being excellent for heart health, onions are abundant in antioxidants. Learn more about the positive effects that onions have on your health.
  • Gruyere Cheese: Gruyere cheese, another key ingredient, is more than just a flavor enhancer. It contains a good amount of calcium, which is essential for bone health, as well as phosphorus, zinc, vitamin A, and vitamin B12. These nutrients help in the maintenance of bone and cardiovascular health and the proper functioning of the nervous system.
  • Whole Grain Pasta: Opting for whole grain pasta can significantly enhance the dish’s fiber content, which is crucial for digestive health. Whole grains are known to help improve cholesterol levels and lower the risk of heart disease, stroke, obesity, and type 2 diabetes.
  • Garlic: Often used in seasoning the dish, garlic has numerous health benefits. It is well known for its effects on the immune system and its ability to help fight the common cold. Garlic also has anti-inflammatory properties, can reduce blood pressure, and may lower LDL cholesterol levels.
  • Fresh Herbs: Adding fresh herbs like thyme not only boosts the flavor without extra calories but also provides various antioxidants that are great for overall health. Thyme, for instance, contains vitamins C and A, which are beneficial for immunity, vision, and skin health.
  • Olive Oil: Using olive oil for cooking in this recipe contributes to a healthy dose of monounsaturated fats, known to lower cholesterol levels and lower the risk of heart disease. Olive oil is also rich in antioxidants called polyphenols, which help protect the body from oxidative stress.

Considering these factors, French Onion Mac and Cheese may be a tasty and healthy lunch. To make this meal healthier, limit portions and eat it with vegetables and lean meats as part of a balanced diet.


Ready to make French Onion Mac & Cheese? Get your apron and supplies, and get ready to create one of the best meals ever. We enjoy seeing your delicious creations online, so tag us!

Print

french onion mac and cheese

By following this straightforward recipe, you will be able to create the ideal French Onion Mac & Cheese. Recipe for a gourmet cuisine that can be prepared at home with a few easy steps.

  • Author: Gabriela cardenas
  • Prep Time: 20 minutes
  • Cook Time: 1 hour 10 minutes
  • Total Time: 1 hour 30 minutes
  • Yield: 4-6
  • Category: Main Course
  • Method: Baking
  • Cuisine: American
  • Diet: Vegetarian

Ingredients

  • 4 large sweet onions, thinly sliced
  • 3 tablespoons olive oil
  • 1 teaspoon salt
  • 1 pound short-cut pasta (like penne or elbow macaroni)
  • 3 tablespoons unsalted butter
  • 3 tablespoons all-purpose flour
  • 2 ½ cups milk
  • ¼ teaspoon freshly ground black pepper
  • ¼ teaspoon nutmeg
  • 12 ounces Gruyere cheese, grated
  • 4 ounces Parmesan cheese, grated
  • ⅓ cup seasoned breadcrumbs
  • Fresh thyme for garnish

Instructions

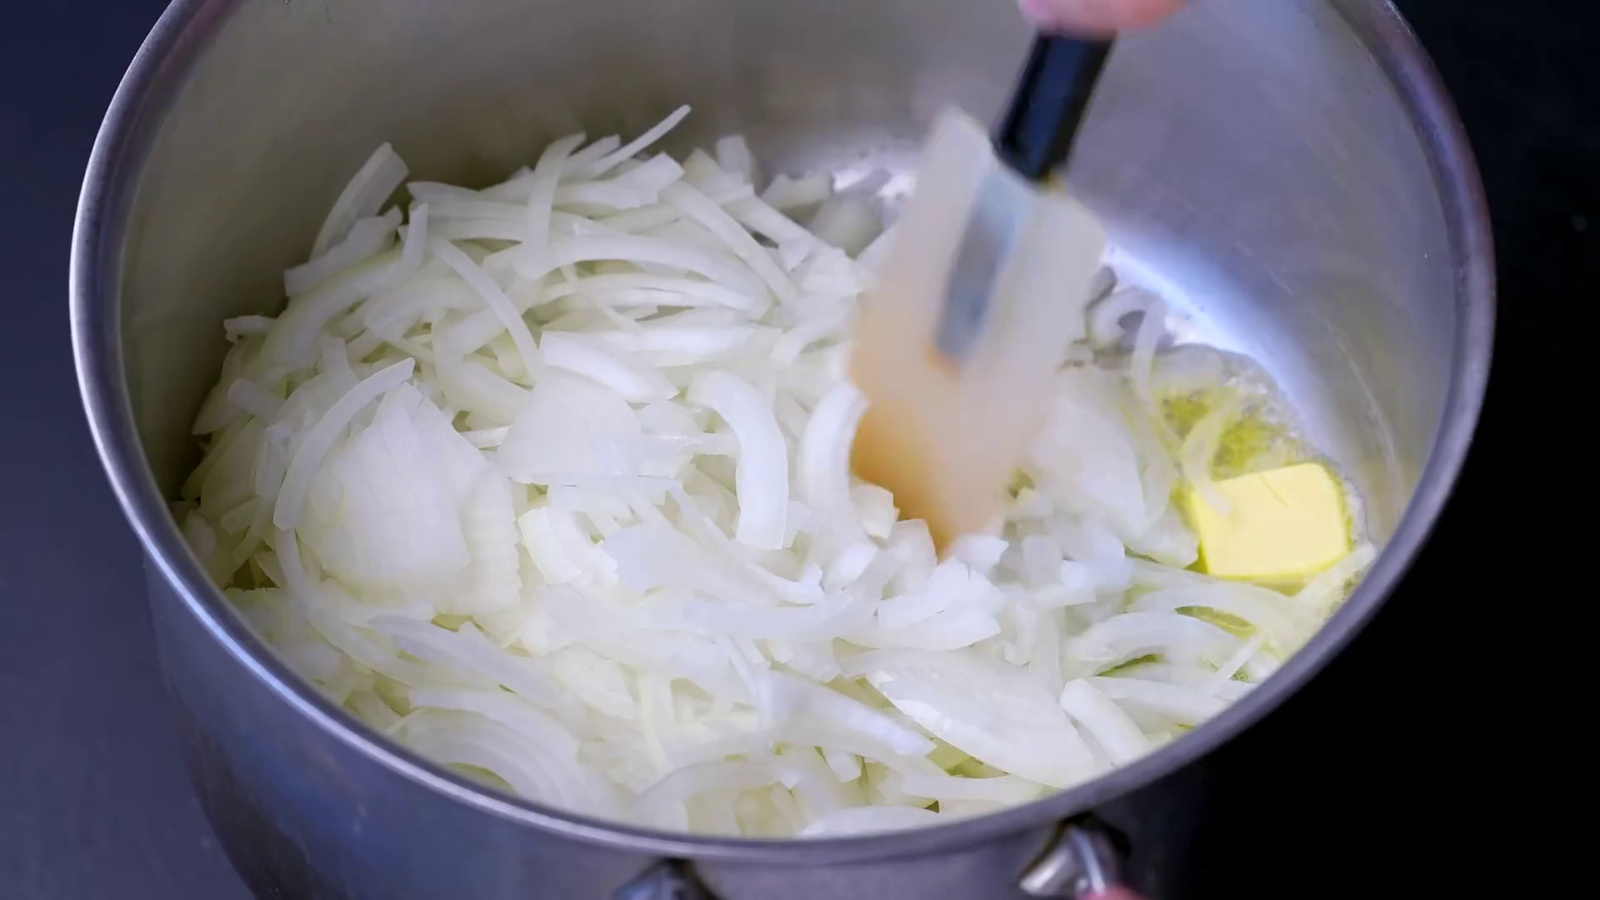
  1. Prepare the Onions: In a large skillet over medium heat, heat the olive oil. Add the onions and salt, and cook, stirring frequently, until onions are deeply caramelized, about 50 minutes.
  2. Cook the Pasta: While onions cook, boil the pasta according to package instructions until al dente, drain, and set aside.
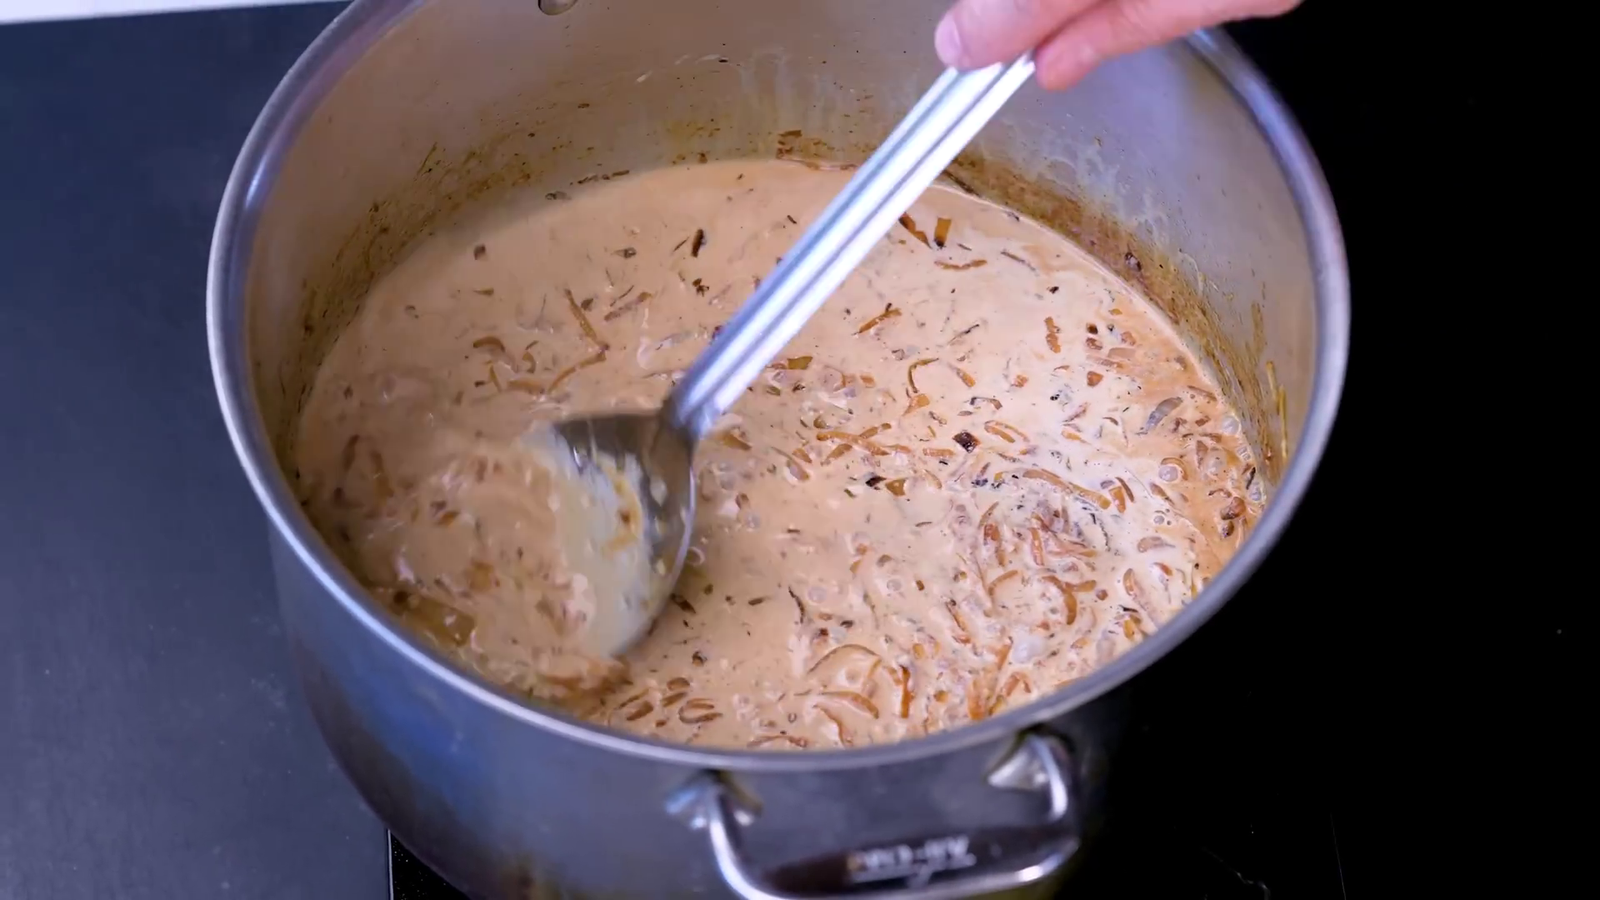
  3. Make the Sauce: In the same skillet, melt the butter over medium heat. Stir in the flour and cook for 2 minutes. Slowly whisk in the milk until smooth. Cook until the sauce thickens, about 5 minutes.
  4. Combine Ingredients: Add the Gruyere and Parmesan cheeses to the sauce, reserving a little for topping. Stir until the cheese is melted and the sauce is smooth. Add the caramelized onions and the cooked pasta, mixing well.
  5. Bake: Transfer the mixture to a greased baking dish. Top with reserved cheese and breadcrumbs. Bake in a preheated 375°F oven for 20 minutes or until bubbly and golden.
  6. Garnish and Serve: Remove from oven, garnish with fresh thyme, and serve hot.

Notes

  • Cheese Variations: Experiment with different cheeses for new flavors; smoked gouda adds a nice touch.
  • Make Ahead: Assemble the dish ahead and refrigerate. Bake before serving, adding 10 minutes to the baking time.
  • Serving Suggestions: Pair with a light arugula salad and a crisp white wine for a balanced meal.

Keywords: French Onion Mac and Cheese, French Onion Macaroni and Cheese, Gourmet Mac and Cheese, Caramelized Onion Mac and Cheese

Did you make this recipe?

Share a photo and tag us — we can't wait to see what you've made!

spicy lasagna soup

spicy lasagna soup


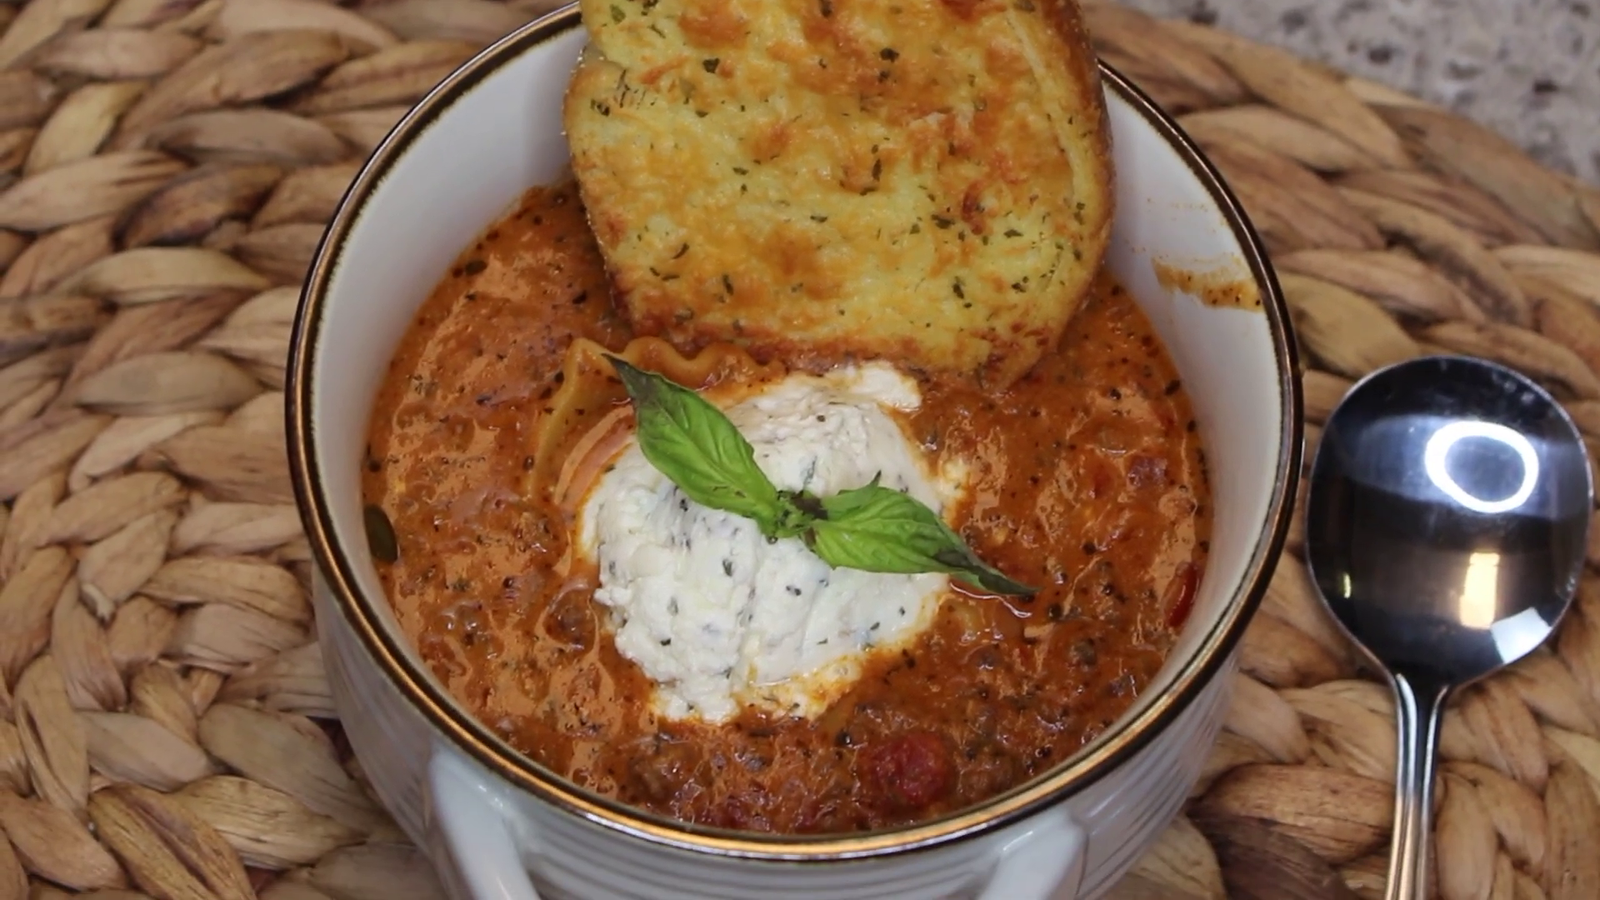
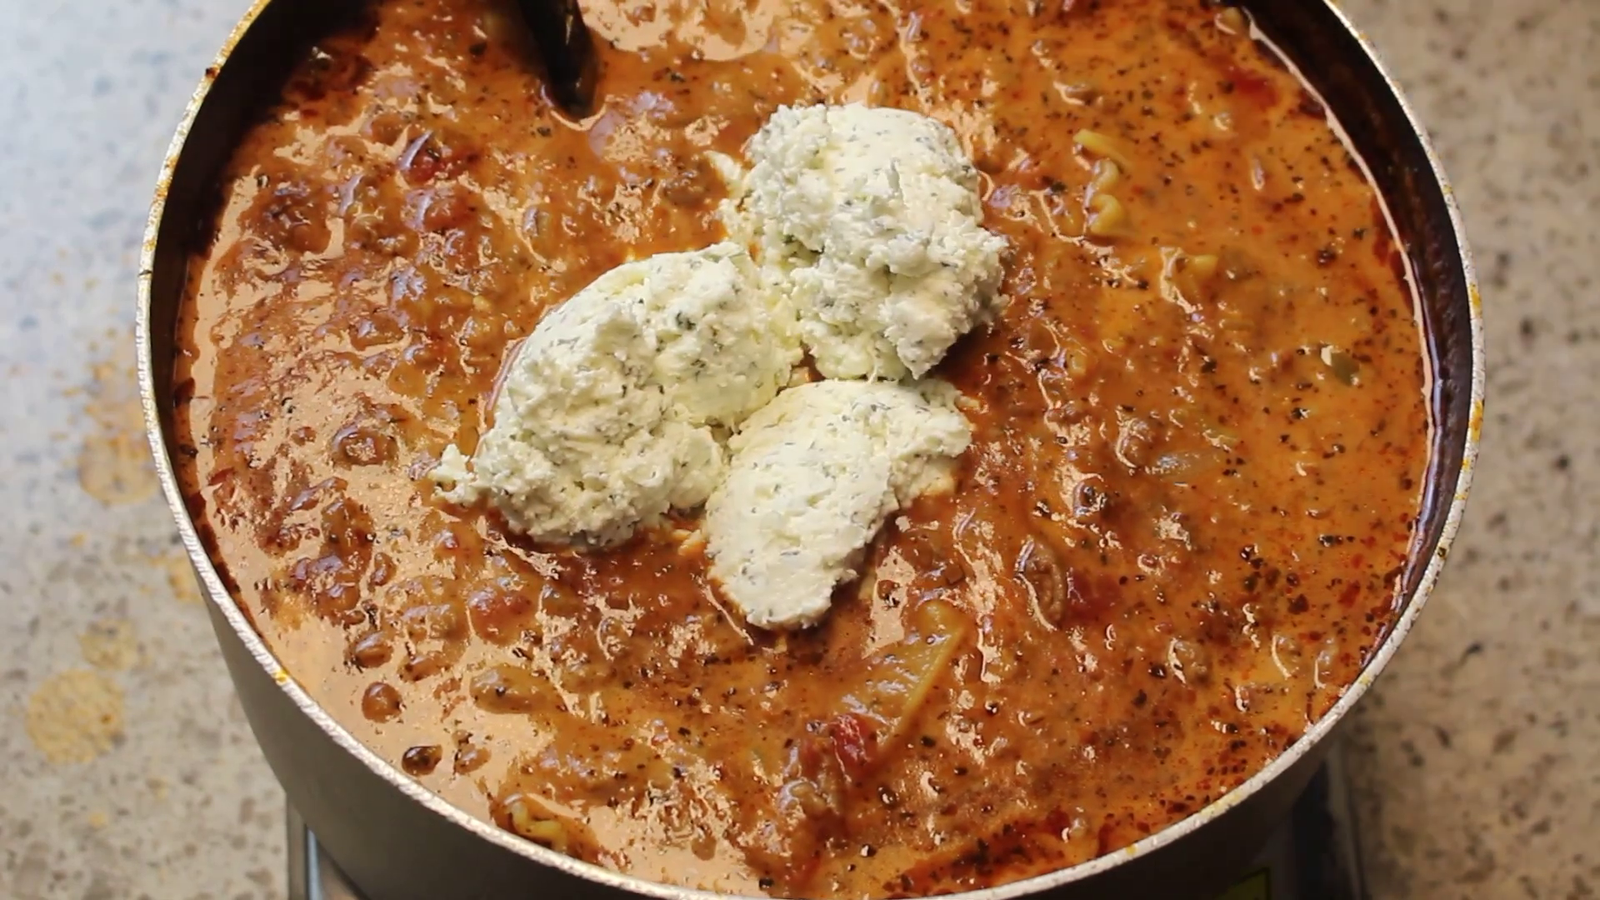
Spicy lasagna soup is one of the best comfort foods because it has so many great tastes and textures. This soup-like dish has all the standard ingredients of lasagna: pasta, cheese, and a tasty tomato-based meat sauce. It’s great for cold nights when you want something filling but not as much work as traditional lasagna.

Overview of Ingredients for Spicy Lasagna Soup

Spicy Lasagna Soup combines the comforting flavors of traditional lasagna with the hearty warmth of soup. Here’s what you’ll need to create this delicious dish:

  • Ground Meat: Traditionally, people use ground beef or Italian sausage, but for a healthier option, you can also use leaner meats like ground turkey or bison.
  • Onions and garlic are essential for building the soup’s foundational flavors.
  • Bell peppers add a sweet note and a pop of color. Feel free to use any color you prefer.
  • Tomato Base: A combination of crushed tomatoes and tomato paste forms the rich, tangy broth that characterizes lasagna soup.
  • Broth: Chicken or vegetable broth works best, enhancing the soup with more depth and flavor.
  • Lasagna Noodles: Traditional lasagna noodles are broken pieces, but you can use any type of pasta if necessary.
  • Cheese: A mix of ricotta, Parmesan, and shredded mozzarella cheese mirrors the classic lasagna filling.
  • Seasonings: red pepper flakes for heat, along with Italian seasoning or a blend of basil, oregano, and thyme to emulate classic lasagna herbs.
  • Olive Oil: for sautéing the vegetables and meat, adding a subtle richness to the dish.

FAQs

Can I make this soup vegetarian?

Absolutely! Substitute the meat with plant-based alternatives or more vegetables.

Which type of noodles are best for the soup?

Broken lasagna noodles add authenticity, but any pasta can work.

How can I make the soup spicier or milder?

Adjust the amount of red pepper flakes to taste.

Why You’ll Love This Recipe

Spicy lasagna soup is a dish that effortlessly wins hearts and satisfies cravings with its robust flavors and comforting warmth. Here are a few reasons why this recipe will become a staple in your culinary repertoire:

  • Versatility: Whether you’re a meat-lover, vegetarian, or have gluten sensitivities, this soup can be adapted to suit your dietary needs without compromising on taste.
  • Ease of Preparation: Unlike traditional lasagna, this soup simplifies the process, making it accessible for cooks of all skill levels. It’s a one-pot meal that doesn’t require layering or extensive baking time.
  • Comfort in a Bowl: The spicy, creamy, and cheesy characteristics of this soup make it the ultimate comfort food, perfect for cold weather or when you’re in need of a culinary hug.
  • Perfect for Any Occasion: Whether it’s a casual family dinner, a festive holiday meal, or a cozy night in, spicy lasagna soup fits the bill, pleasing crowds and palates alike.

Make-Ahead and Storage Tips

  • Advance Preparation: Cook the soup base ahead of time for convenience, adding noodles just before serving to save time.
  • Storage: Properly store the soup to maintain freshness and flavor, ensuring it remains tasty for subsequent meals.

Serving Suggestions

  • Garlic Bread: Serve the soup with garlic bread for a crunchy, flavorful side.
  • Winter Salad: Pair with a winter salad to add variety in texture and flavor, creating a balanced and satisfying meal.
  • Salad Inspiration: Look for winter salad ideas to find the perfect complement to the warmth of the soup.

Tips for Crafting the Perfect Spicy Lasagna Soup

It takes more than just following a plan to make the best hot lasagna soup. You have to change things about the dish to make the flavors pop and get the ultimate comfort food experience. Here are some tips from experts on how to make sure your soup tastes great:

Select high-quality ingredients

he foundation of a great dish begins with its components. Use fresh, high-quality vegetables and meats. If opting for alternatives like bison or plant-based meats, ensure they come from reputable sources. This not only enhances flavor but also ensures you’re cooking with the best nutrients.

Mind the Pasta

To avoid mushy noodles, cook them until just al dente before adding them to the soup. Since the noodles will continue to cook once they hit the hot broth, stopping the cooking process a bit early ensures they maintain the perfect texture.

Layer Flavors

Build depth in your soup by sautéing the onions, garlic, and other aromatics until they are golden and fragrant before adding the broth and other ingredients. This caramelization adds a rich layer of flavor that simple boiling can’t match.

Use Fresh Herbs

Incorporate fresh herbs, such as basil or oregano, towards the end of cooking to preserve their vibrant flavor and color. This small addition makes a big difference in bringing the dish closer to its lasagna inspiration.

Cheesewise

Opt for freshly grated cheese rather than pre-packaged shredded cheese. Fresh cheese melts better and doesn’t contain anti-caking agents, which can affect the texture and flavor of your soup.

Simmer Slowly

After adding all the ingredients, let your soup gently simmer. A slow simmer helps the flavors meld together beautifully without overcooking the vegetables and meat.

Serve Creatively

On top of each serving, add a dollop of ricotta cheese, a sprinkle of grated Parmesan, or a few fresh basil leaves to enhance the presentation and taste. This not only adds layers of flavor but also makes each bowl visually appealing.

Taste and Adjust

Before serving, give your soup a final taste and adjust the seasoning as needed. Sometimes a splash of acidity from a lemon or a dash of salt can elevate the entire dish.

By following these tips, you’ll turn a simple pot of soup into a memorable meal that captures all the cozy, comforting essence of a spicy lasagna in every spoonful.

Customizing Your Spicy Lasagna Soup

Adding your own touches to your hot lasagna soup can make it even more enjoyable and fit your taste or dietary needs. You can change the dish in these ways:

  • Vegetarian Version: Replace the meat with plant-based ground substitutes or bulk up the soup with a variety of vegetables like mushrooms, zucchini, and spinach.
  • Choosing Pasta: While broken lasagna noodles offer authenticity, you can use any pasta you have on hand. For a gluten-free option, choose a suitable gluten-free pasta.
  • Adjusting Spice Levels: Control the heat by managing the amount of red pepper flakes. Add more for a spicier kick or reduce it for a milder taste.
  • Dairy-Free Modifications: Substitute ricotta and mozzarella with dairy-free alternatives or nutritional yeast for a cheesy flavor without the dairy.
  • Adding Creaminess: Stir in a splash of cream or a spoonful of sour cream to the soup before serving to add a rich, creamy texture.
  • Extra Vegetables: Increase the nutritional value by incorporating carrots, celery, or kale for added texture and fiber.
  • Herbs and Spices: Experiment with fresh herbs like parsley or basil added at the end of cooking for freshness. Simmering a bay leaf with the soup can also enhance its flavor.
  • Cheese Toppings: Customize each bowl upon serving with a dollop of ricotta, a sprinkle of grated Parmesan, or shredded mozzarella that will melt into the hot soup beautifully.
  • Protein Variations: Besides traditional meats, consider using chunks of chicken or even seafood for a different flavor profile.

By varying these things, you can make your hot lasagna soup fit any event, taste, or dietary need. This makes it a dish that can be used for any meal.

Nutritional Benefits

Not only is spicy lasagna soup delicious, but it also offers various nutritional benefits, making it a wholesome choice for a meal.

  • Protein-Rich: With ingredients like ground meat or plant-based alternatives, this soup is a great source of protein, essential for muscle repair and growth.
  • Vegetable Servings: Packed with onions, celery, and bell peppers, it’s an easy way to sneak more vegetables into your diet, contributing to your daily vitamin and mineral intake.
  • Customizable: For those watching their calorie intake or requiring specific nutritional adjustments, this soup can be easily modified. Use lean meats and low-fat cheeses, and adjust the amount of olive oil to suit your dietary needs.

Try our Air Fryer Sesame Chicken if you like trying new flavors and foods. It’s a great recipe that will please you with how easy it is to make and how good it tastes.

Happy cooking!

Print

spicy lasagna soup

  • Author: Gabriela cardenas
  • Prep Time: 15 minutes
  • Cook Time: 30 minutes
  • Total Time: 45 minutes
  • Yield: 6
  • Category: Soup
  • Method: Simmering
  • Cuisine: Italian

Ingredients

  • 2 tablespoons extra virgin olive oil
  • 1 yellow onion, chopped
  • 2 cloves garlic, minced
  • 1/2 pound ground beef or ground turkey
  • 1/2 pound spicy Italian sausage, casing removed
  • 1 red bell pepper, chopped
  • 1 can (28 ounces) crushed tomatoes
  • 4 cups low-sodium chicken broth
  • 1 teaspoon dried oregano
  • 1 teaspoon dried basil
  • 1/2 teaspoon red pepper flakes (adjust to taste)
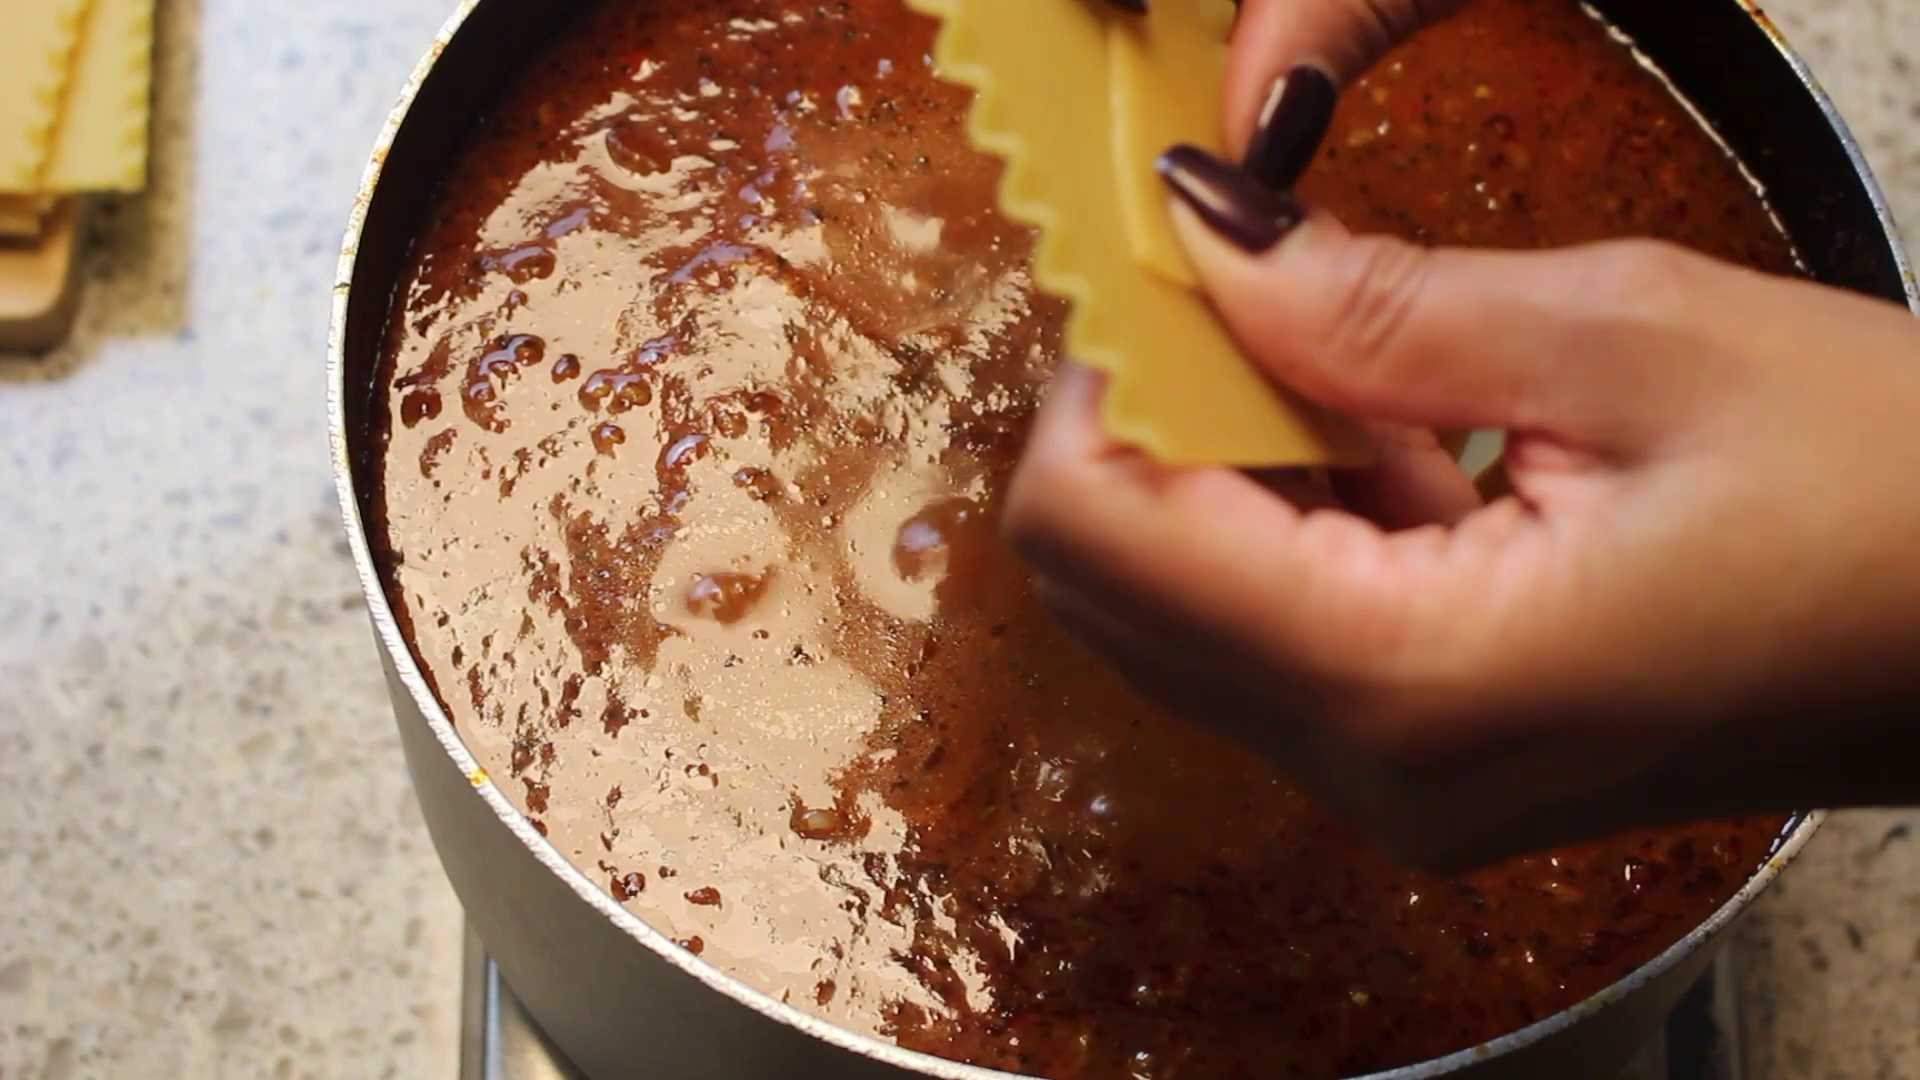
  • 8 lasagna noodles, broken into pieces
  • 1 cup shredded mozzarella cheese
  • Salt and pepper to taste
  • Fresh basil for garnish

Instructions

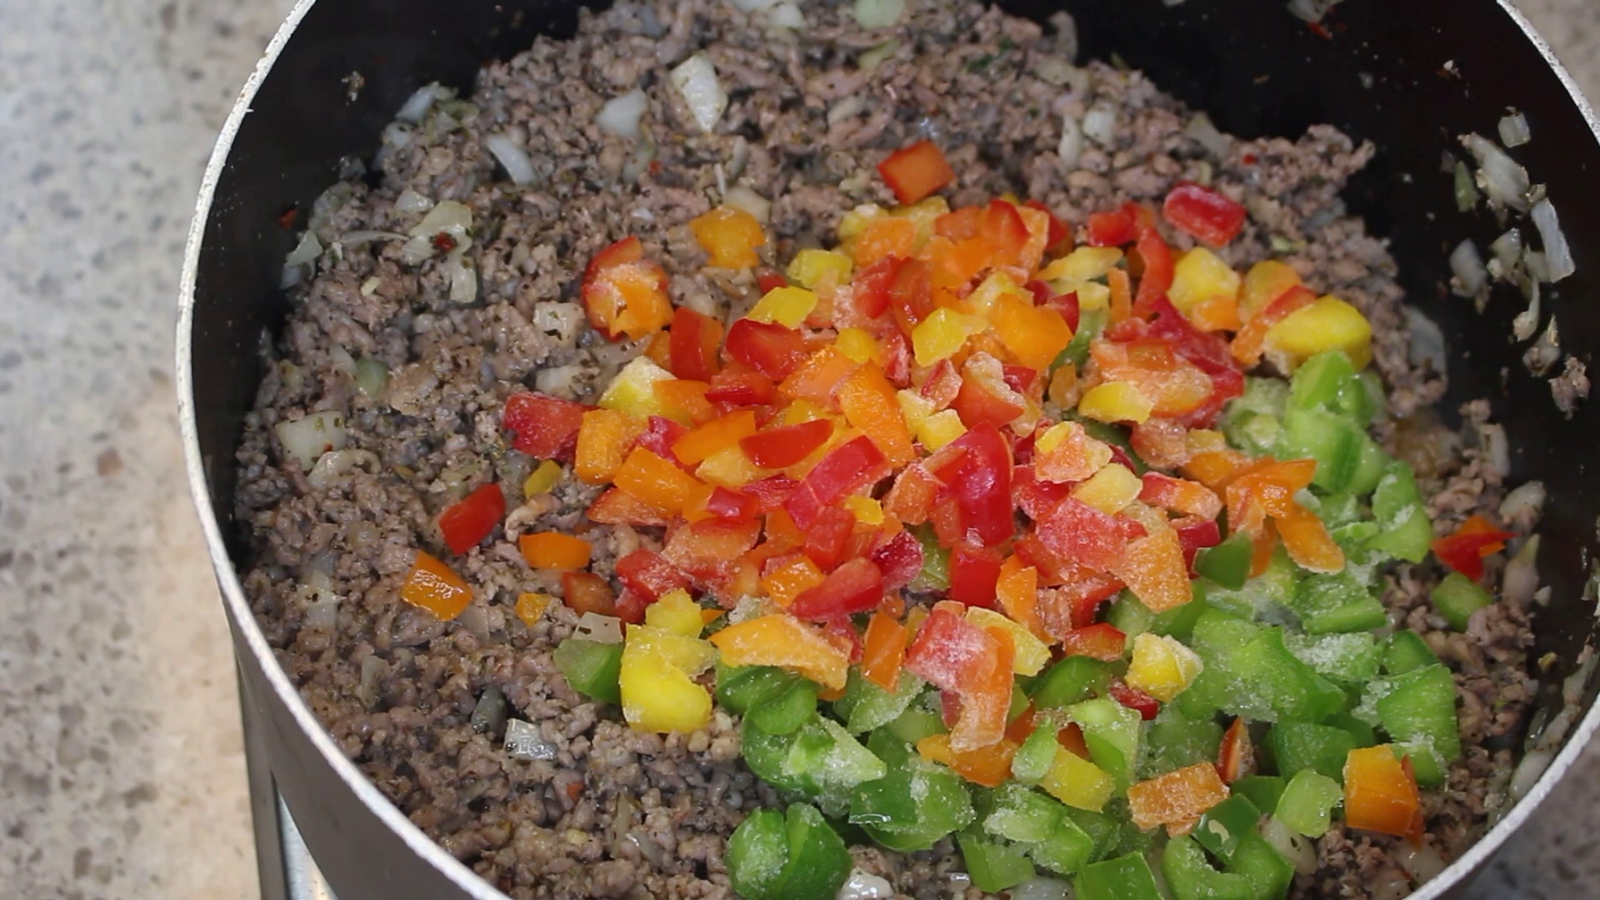
  1. Heat olive oil in a large pot over medium heat. Add onion and garlic, sautéing until soft.
  2. Add ground meat and sausage, cooking until browned. Drain excess fat.
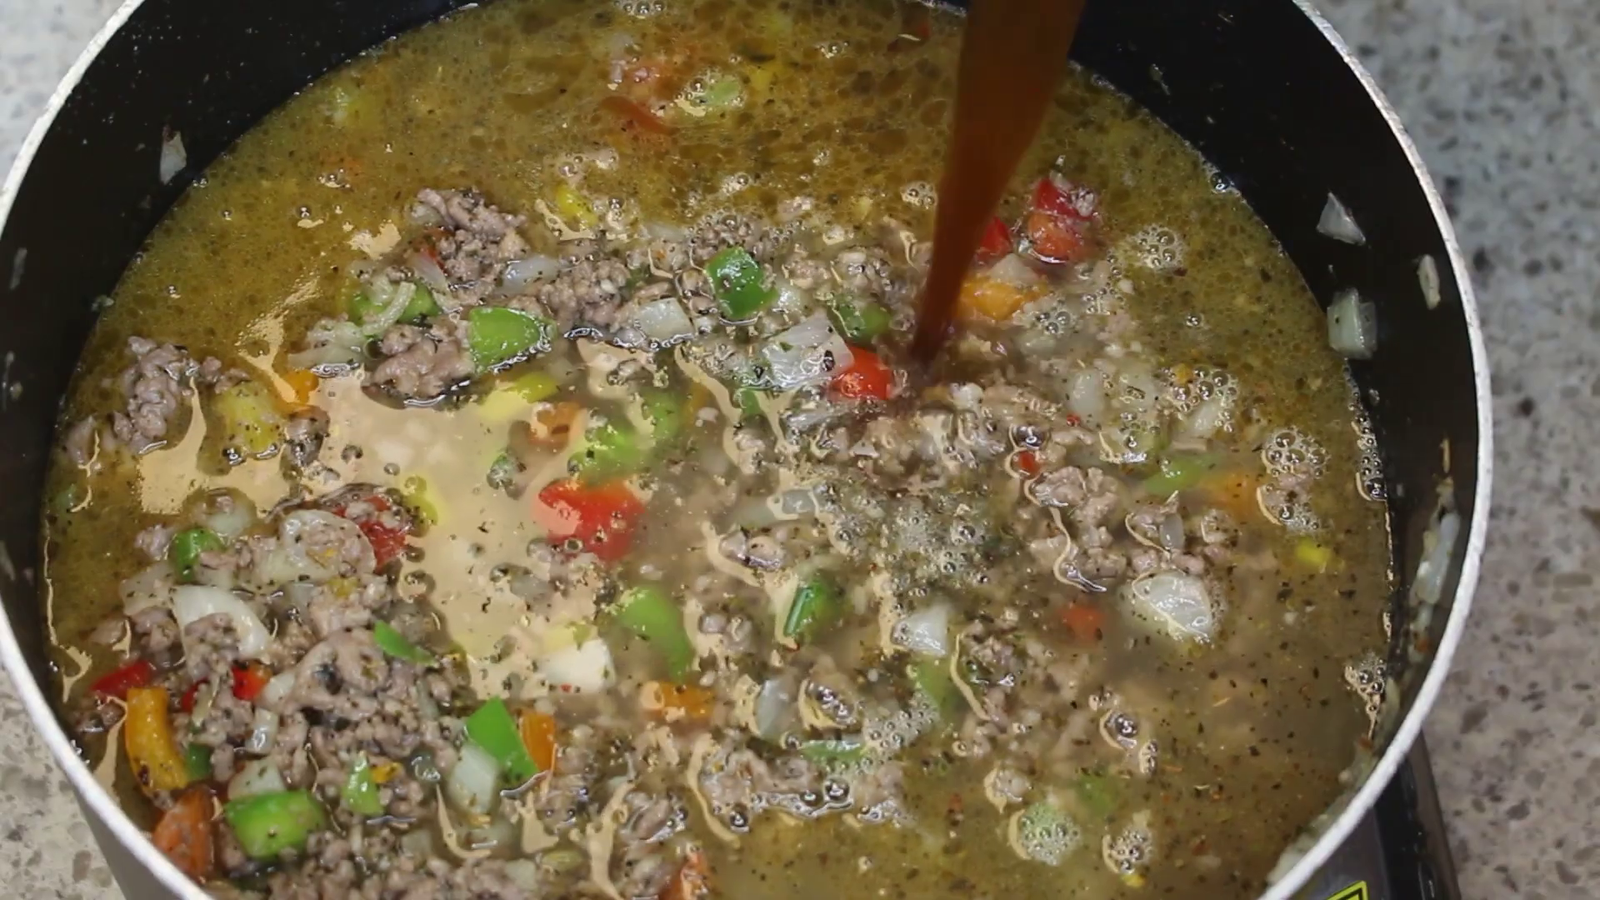
  3. Stir in the red bell pepper, crushed tomatoes, chicken broth, oregano, basil, and red pepper flakes. Season with salt and pepper. Bring to a boil, then reduce heat and simmer for 20 minutes.
  4. Add broken lasagna noodles to the pot, cooking until noodles are tender, about 10 minutes.
  5. Stir in mozzarella cheese until melted and well incorporated.
  6. Serve hot, garnished with fresh basil.

Notes

  • For a vegetarian version, omit the meat and add more vegetables like mushrooms and zucchini.
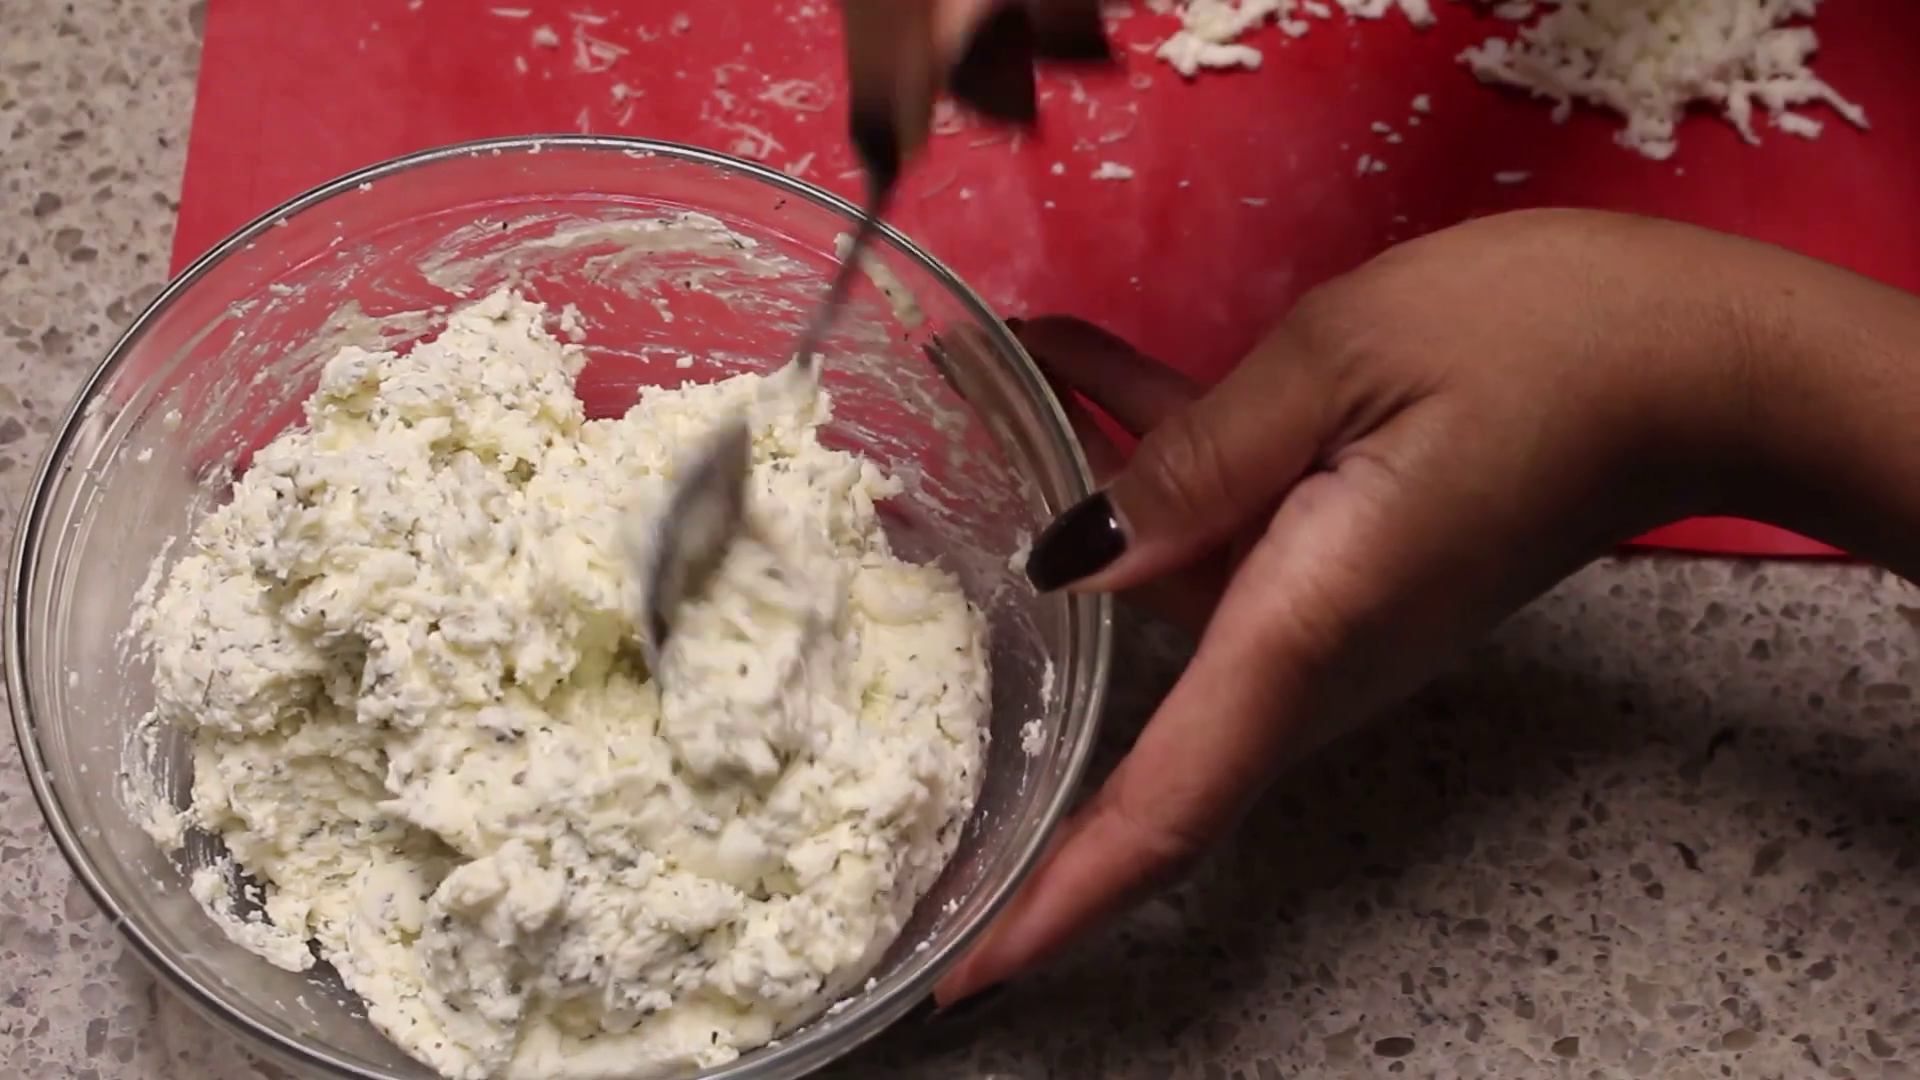
  • If you prefer a creamier soup, stir in a half cup of ricotta cheese before serving.
  • Leftovers can be stored in the refrigerator for up to 3 days or frozen for up to 3 months.

Keywords: spicy lasagna soup

Did you make this recipe?

Share a photo and tag us — we can't wait to see what you've made!

Air Fryer Baked Beans

Air Fryer Baked Beans


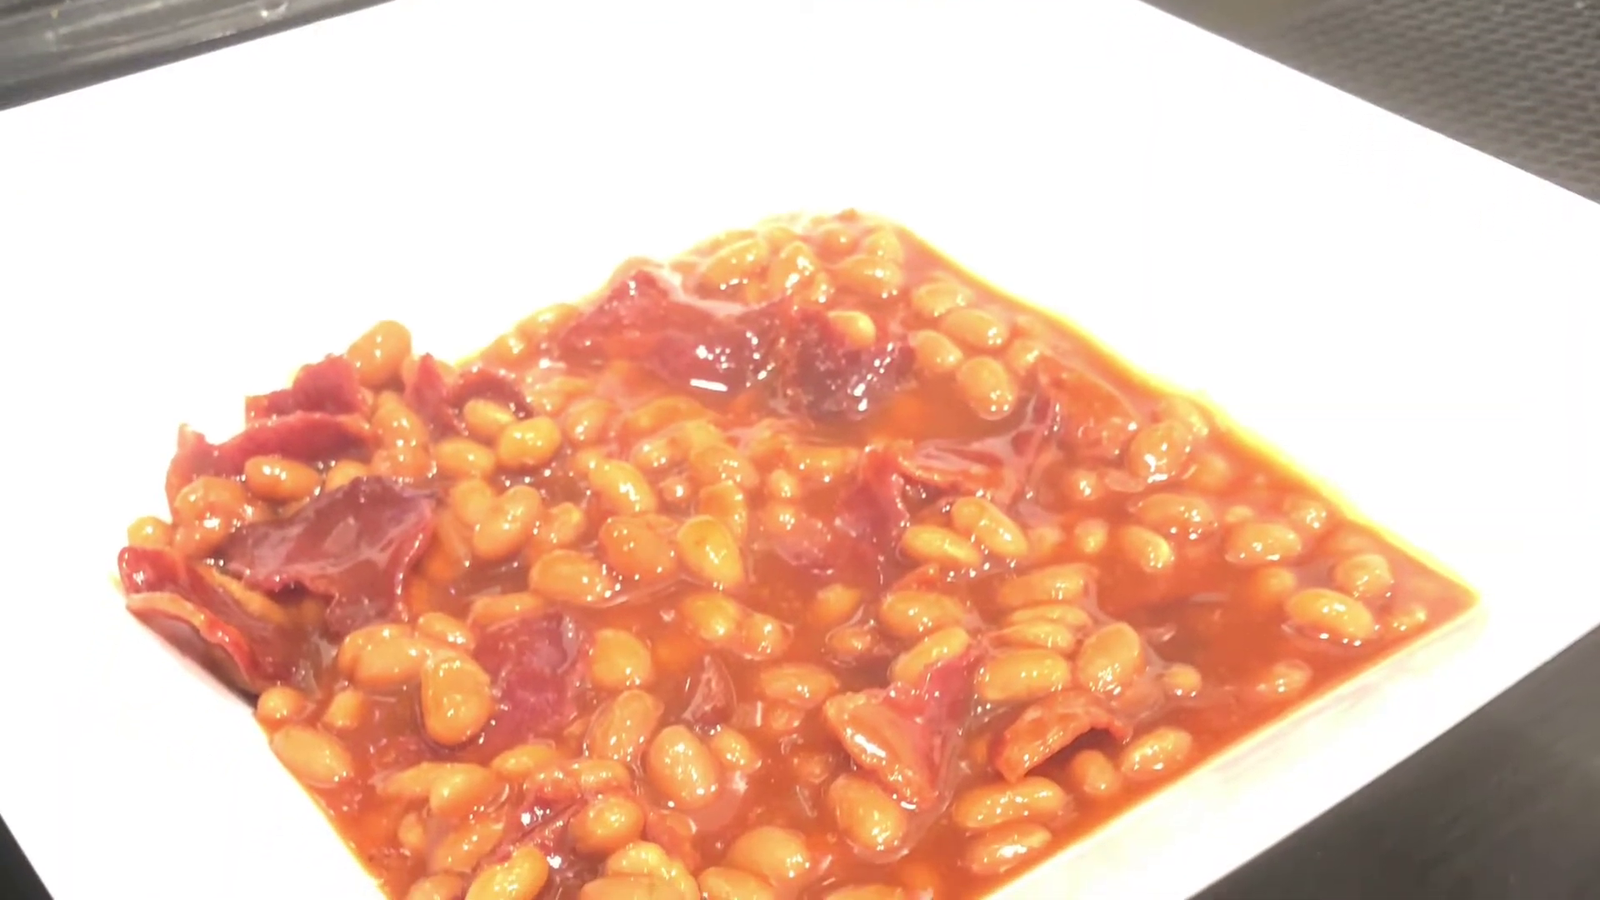
As a foodie looking for healthier and faster meals, I found the air fryer, which changed my cooking routine. My air fryer baked bean discovery was one of my faves. We always had slow-cooked, rich-flavored baked beans at family gatherings. I was skeptical—could this contemporary gadget manage such a traditional meal without compromising flavor?

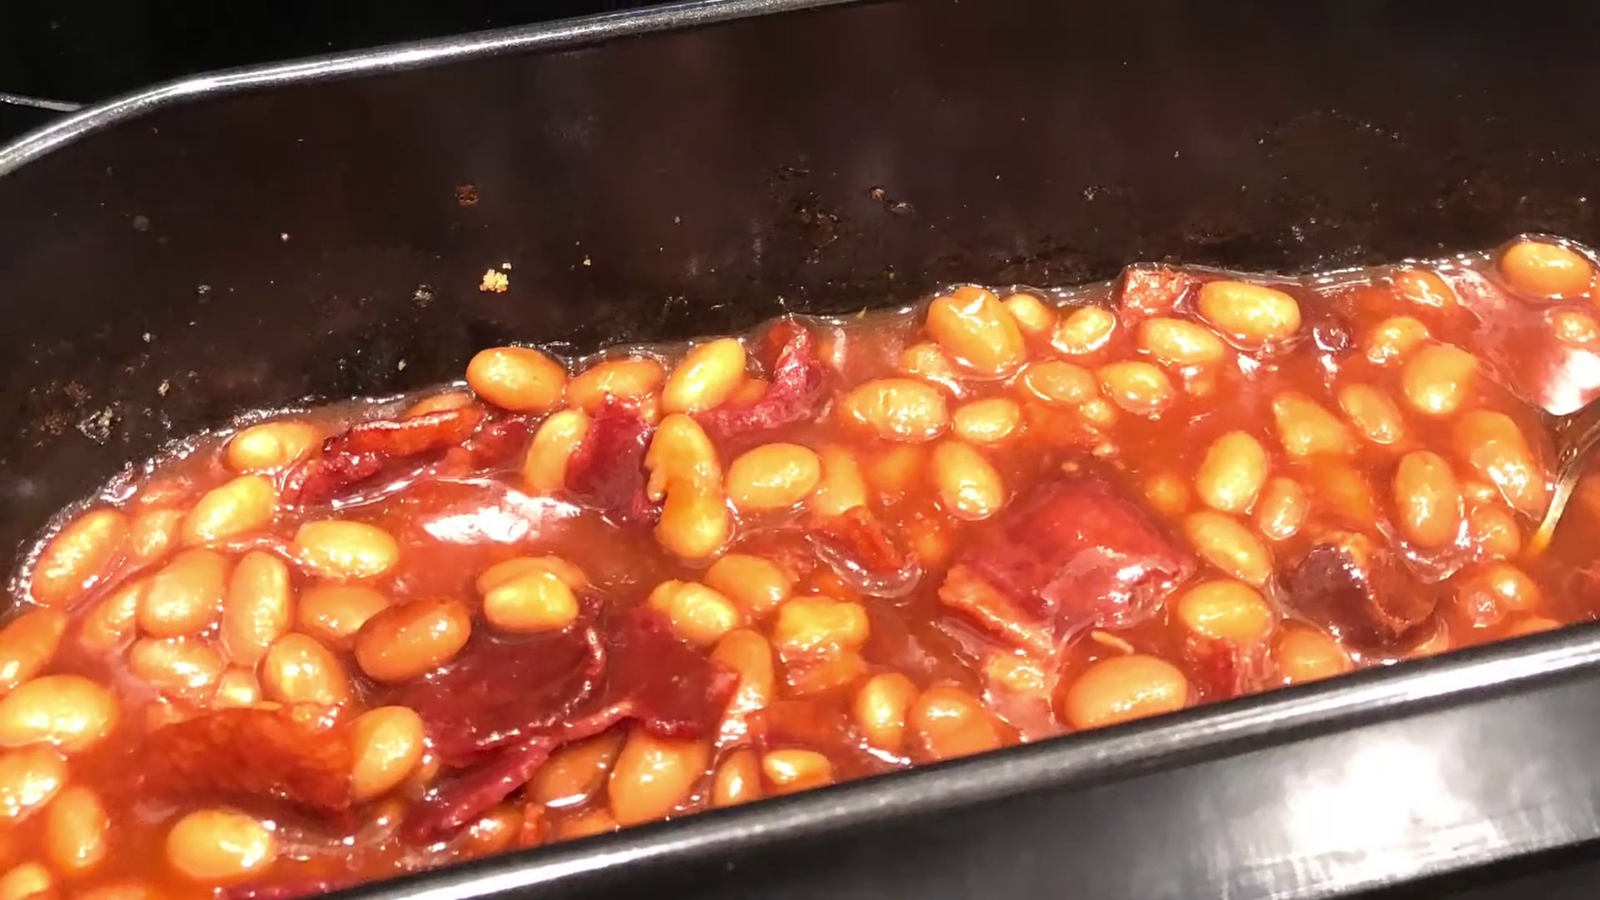
To my amazement, the air fryer produced a meal full of flavor and kept the beans’ typical texture while reducing cooking time and oil consumption. This event changed my life by showing me that even the most delicious foods may be made healthy without sacrificing flavor. I’ll show you how to use the air fryer to make baked beans healthy and tasty, exactly like I did.

Frequently Asked Questions 

Should baked beans be fried?

Frying baked beans isn’t a common cooking method for them, as they are typically already cooked and only need to be heated. However, you can add a crispy edge or incorporate them into a dish that involves some frying (like a stir-fry with other ingredients). Just be mindful that traditional baked beans have a sauce that might splatter when fried.

Is it okay to cook baked beans in a can?

It is not recommended to cook baked beans in the can, especially if the can is lined with plastic or if you’re thinking of heating it directly in the fire or stove. When heated, the plastic coating lining most cans can release harmful chemicals. Additionally, cooking in a sealed can may cause pressure to build up, posing an explosion risk. Always transfer the beans to a suitable cooking vessel before heating.

How long do you heat the baked beans for?

When heating baked beans on the stove, it usually takes about 10 minutes over medium heat to ensure they are warmed through. In a microwave, it takes about 2–3 minutes on high power, stirring halfway through. In an air fryer, as mentioned, 5–10 minutes at 350°F or 175°C should be sufficient, depending on the quantity.

A Brief Overview of the Ingredients

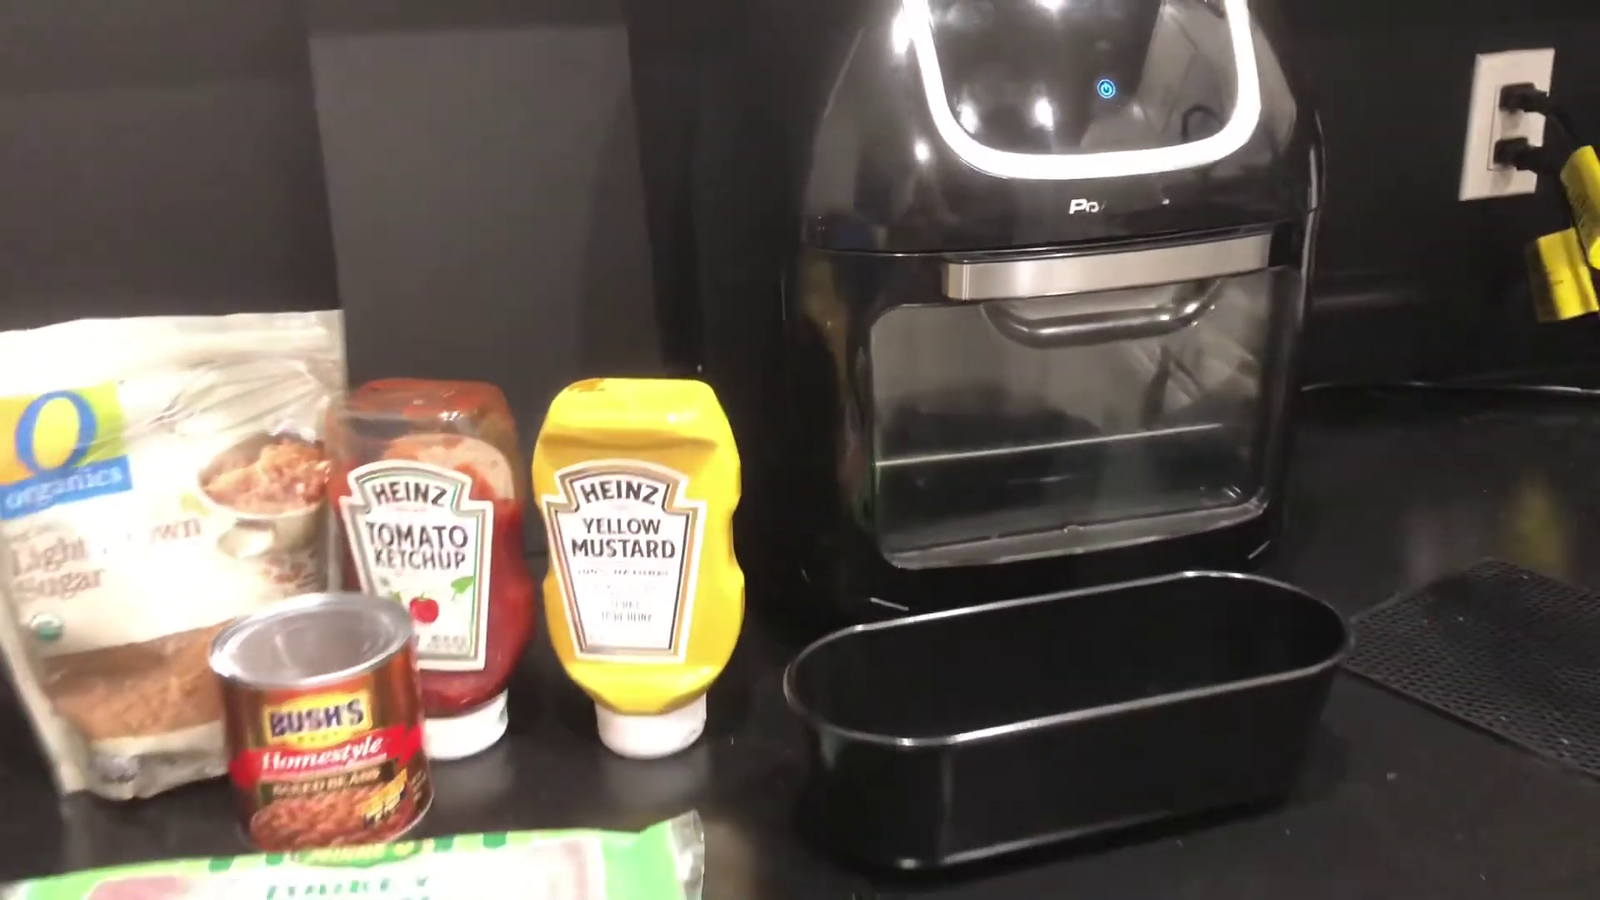
A simple yet flavorful Air Fryer Baked Beans recipe includes:

  • Beans: For a base, you can use canned baked beans.
  • Sweeteners and spices: brown sugar, mustard, and perhaps a dash of cayenne pepper for heat.
  • Extras: Onions, garlic, and bacon (or vegan alternatives) enhance depth and flavor.

Do you have your own secret ingredient that makes your air fryer baked beans stand out? Share your tips in the comments below or on our social media pages!

Chef’s Advice on How to Make the Best Air Fryer Baked Beans

Creating the perfect batch of oven-baked beans goes beyond just following a recipe. Here are some expert tips to help you achieve great results every time:

Preheat Your Air Fryer

Just like an oven, preheating your air fryer ensures a consistent and even cooking temperature. Aim for about 3–5 minutes of preheating at the cooking temperature you plan to use.

Choose the right accessories

Use an air fryer-safe dish or a non-stick baking pan that fits well within the basket. If you’re using aluminum foil for easier cleanup, ensure it’s lightly tented to allow for air circulation.

Avoid overcrowding

To cook evenly, the hot air in the air fryer must circulate around the beans. Avoid filling the dish to the brim; instead, leave some space for the air to move freely.

Stir Midway Through Cooking

Give your baked beans a good stir halfway through the cooking process. This not only helps with even heating but also integrates the flavors more thoroughly.

Check Seasoning Before Final Cooking

Taste your mixture before the final stint in the air fryer. This is your chance to adjust the seasoning, adding more salt, sugar, or spices as needed.

Add a Touch of Smoke

For a deeper, smoky flavor, add a small amount of liquid smoke or smoked paprika before cooking.

Manage Moisture

If you find the beans drying out, add a tablespoon or two of water or broth during cooking to maintain the right consistency.

Experiment with Flavors

Don’t hesitate to experiment with different ingredients, like maple syrup for sweetness or a splash of bourbon for depth. Ingredients like diced bell peppers, jalapeños, or apple chunks can add interesting textures and flavors.

Tried any of these tips in your kitchen? We’d love to hear how they worked for you! Share your stories or ask a question about your air fryer technique, and we’ll get back to you with advice

Tailoring Your Meal

Making changes to your air fryer-baked beans to suit your tastes or to mix things up can make this traditional dish even more fun. Here are a few ways you can change and improve your baked beans:

Adjust the sweetness

Depending on your preference for sweetness, you can adjust the levels by adding more or less brown sugar, honey, or even maple syrup. For a sugar-free version, consider using sweeteners like stevia or monk fruit extract.

Spice It Up

For those who enjoy a bit of heat, incorporating spices like chili powder, cayenne pepper, or diced jalapeños can add a nice kick. Smoked paprika can also lend a subtle heat and a smoky flavor.

Herbs and Spices

Try different herbs and spices to find your favorite combination. Adding a bay leaf, thyme, or cumin can subtly alter the flavor profile of your dish.

Meaty Additions

Bacon is a common ingredient in baked beans, but you could also try chopped chorizo, smoked sausage, or leftover pulled pork for a meaty boost.

Vegetarian and Vegan Variations

To make vegetarian or vegan baked beans, omit any meat and use a plant-based sweetener. Add smoked tofu or tempeh for added protein and texture.

Richness and Depth

A splash of Worcestershire sauce (use a vegan version if necessary), a spoonful of molasses, or a bit of barbecue sauce can add layers of flavor and richness.

Global Flavors

Introduce ingredients from different cuisines to transform the dish. Consider adding coconut milk for creaminess, curry powder for warmth, or a touch of soy sauce for umami depth.

Fresh Toppings

Before serving, top your baked beans with fresh herbs like cilantro or parsley. A sprinkle of green onions or crispy fried onions can add a pleasant crunch and freshness.

Cheesy Twist

For a cheesy variation, stir in some grated cheddar or smoked gouda during the last few minutes of cooking, allowing it to melt through the beans.

By experimenting with these suggestions, you can turn your air fryer-baked beans into a customized dish that caters to your unique tastes and preferences.

How do you like to customize your baked beans? Whether it’s a spicy kick or a sweet twist, tell us about your favorite variations!

What to Eat With Beans Baked in an Air Fryer

Air Fryer Baked Beans are versatile and pair well with a variety of dishes, making them an excellent addition to any meal. Here are some suggestions on what to serve with your delicious beans:

  • Grilled Meats: The smoky flavor of grilled chicken, pork chops, or sausages complements the rich taste of baked beans perfectly. For a classic pairing, try them with BBQ ribs.
  • Sandwiches and Burgers: For a filling meal, serve baked beans as a side dish with a pulled pork sandwich or a classic beef burger.
  • Breakfast Plates: Baked beans are a staple in a traditional English breakfast. Serve them alongside eggs, toast, and bacon.
  • Seafood: For a lighter pairing, consider serving baked beans with grilled fish or shrimp.
  • Vegetarian Options: They pair well with grilled or roasted vegetables, veggie burgers, or a hearty addition to a vegetarian buffet.
  • Potato Dishes: Whether it’s baked potatoes, potato salad, or mashed potatoes, the creamy texture pairs nicely with the sauciness of baked beans.
  • Rice and Grains: Serve them over rice or alongside quinoa for a gluten-free meal option that’s still hearty and satisfying.
  • Salads: For a summer meal, pair baked beans with a crisp salad to add some protein and heartiness.

What are your favorite dishes to pair with baked beans? Let’s swap some recipes and ideas to keep our meals exciting!

Explore more delicious pairings by checking out our Air Fryer Sesame Chicken recipe for an Asian-inspired twist.

Health Benefits of Air Fryer-Baked Beans

Air Fryer Baked Beans not only provide convenience and taste, but they also have several health benefits, making them a worthwhile addition to your diet:

  • High in Fiber: Beans are an excellent source of soluble and insoluble fiber, which helps in digestion and can aid in cholesterol management.
  • Rich in Protein: As a plant-based protein source, beans provide essential amino acids without the saturated fats found in some animal proteins, making them ideal for vegetarians and meat-eaters alike.
  • Low in Fat: Air frying requires little to no oil, reducing the fat content significantly compared to traditional frying methods.
  • Heart Health: The high fiber content in beans is beneficial for heart health, as it helps to lower cholesterol levels and reduce the risk of heart disease.
  • Weight Management: High-fiber foods like beans can help you feel full longer, which can aid in weight management.
  • Rich in Vitamins and Minerals: Baked beans are a good source of several vitamins and minerals, including iron, potassium, magnesium, and B vitamins, which are vital for energy production and overall health.
  • Beans have a lower glycemic index, which means they have a lesser impact on blood sugar levels, making them a good option for people with diabetes.
  • Antioxidant Properties: Beans contain antioxidants, which help combat the effects of free radicals in the body, contributing to better health and the prevention of some diseases.

The Top Benefits of Using an Air Fryer to Make Cooking Healthier

Here are the benefits of using an air fryer, along with an external link for more detailed information:

  • Reduces Calorie Intake: Air frying cuts calories by 70% to 80% compared to traditional frying, helping in weight management.
  • Less Fat: This cooking method significantly reduces fat content, promoting healthier eating habits.
  • Lowers Acrylamide Formation: Air-frying reduces the amount of acrylamide, a potentially harmful chemical, in fried potatoes by 90%.
  • Versatility: Air fryers can cook a wide range of foods, from chicken and vegetables to pizza and doughnuts.
  • Convenience: Offers quick cooking times and easy cleanup, fitting well into busy lifestyles.

For a comprehensive look at the health benefits and potential drawbacks of air frying, visit WebMD’s article on air fryers.


Are you ready to give these techniques a try? We encourage you to cook up your version of air fryer-baked beans and share your creations with us. Your feedback not only inspires us, but it also helps others in our cooking community. Let’s get frying!

Print

Air Fryer Baked Beans

Discover how to make quick and healthy air fryer baked beans. Perfect for a nutritious meal or side dish. Try now!

  • Author: Gabriela cardenas
  • Prep Time: 10 minutes
  • Cook Time: 15 minutes
  • Total Time: 25 minutes
  • Yield: 4
  • Category: Side Dish
  • Method: Air Frying
  • Cuisine: American

Ingredients

  • 1 can (28 oz) baked beans
  • 1/2 cup onion, finely chopped
  • 1/3 cup bell pepper, diced (optional)
  • 2 tablespoons brown sugar
  • 1 tablespoon Worcestershire sauce
  • 1 teaspoon mustard
  • 1 teaspoon smoked paprika
  • 4 strips bacon, cooked and crumbled (optional)
  • Salt and pepper to taste

Instructions

  1. Preheat your air fryer to 375°F (190°C).
  2. In a mixing bowl, combine baked beans, onion, bell pepper, brown sugar, Worcestershire sauce, mustard, smoked paprika, and half of the crumbled bacon.
  3. Season with salt and pepper according to taste.
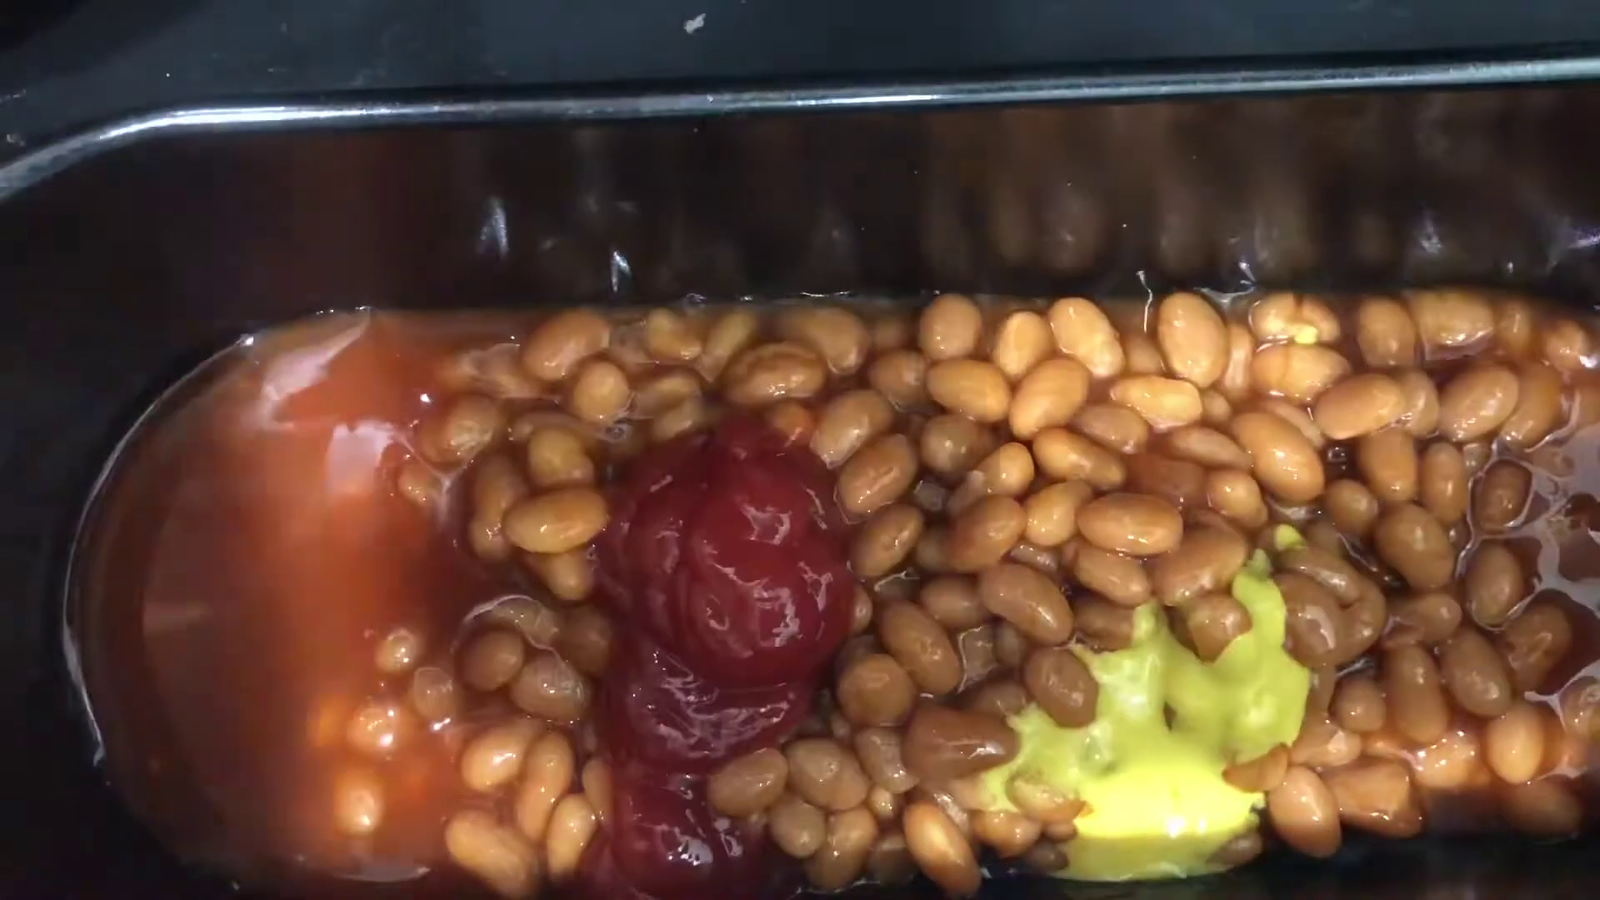
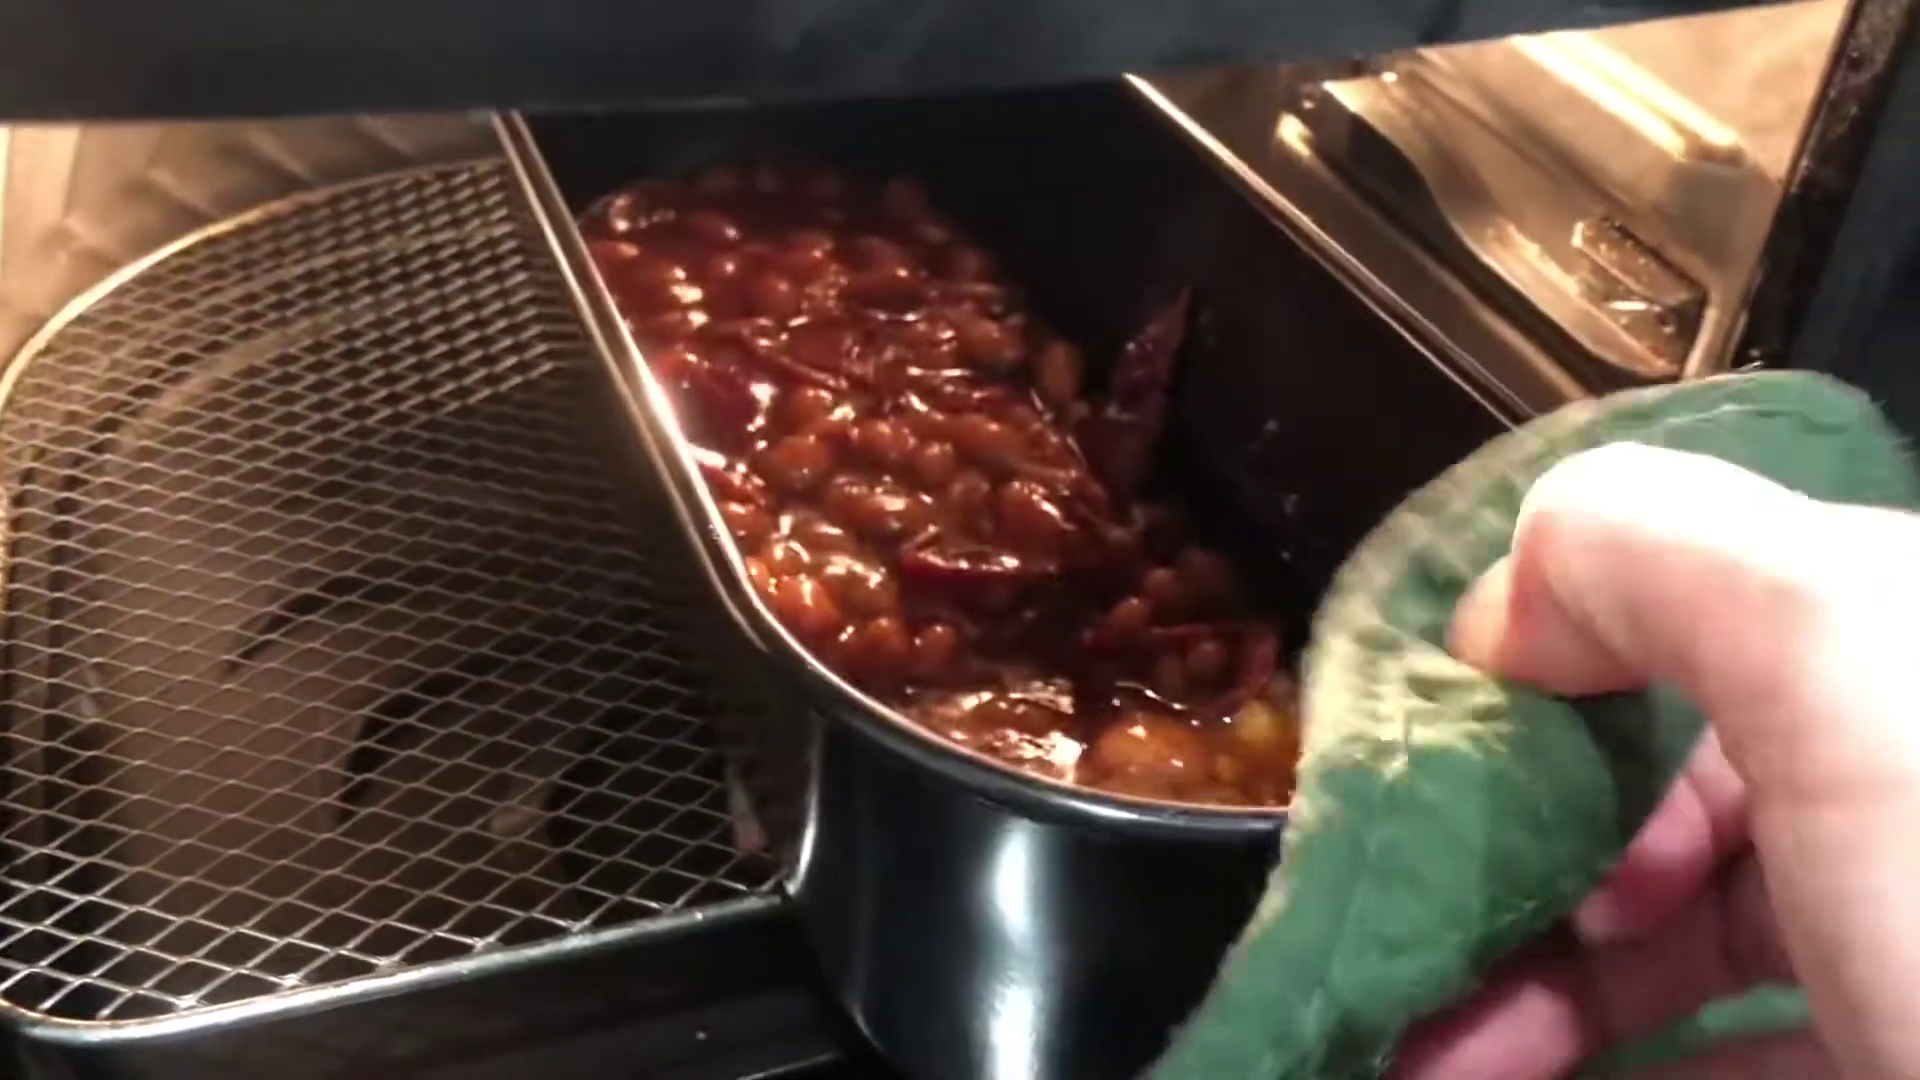
  4. Transfer the mixture to an air fryer-safe dish or foil pan.
  5. Place the dish in the air fryer and cook for 15 minutes, stirring halfway through.
  6. Garnish with the remaining bacon crumbles before serving.

Notes

  • For a vegetarian version, omit the bacon and add a dash of liquid smoke for that smoky flavor.
  • Adjust the sweetness and spiciness by varying the amount of brown sugar and smoked paprika.
  • If the beans start to dry out, you can add a few tablespoons of water during cooking to keep them moist.

Keywords: air fryer baked beans,air-fried baked beans, easy baked beans recipe, healthy air fryer beans"

Did you make this recipe?

Share a photo and tag us — we can't wait to see what you've made!

Chicken Salad Chick Broccoli Salad

Chicken Salad Chick Broccoli Salad


Introduction to Chicken Salad Chick Broccoli Salad

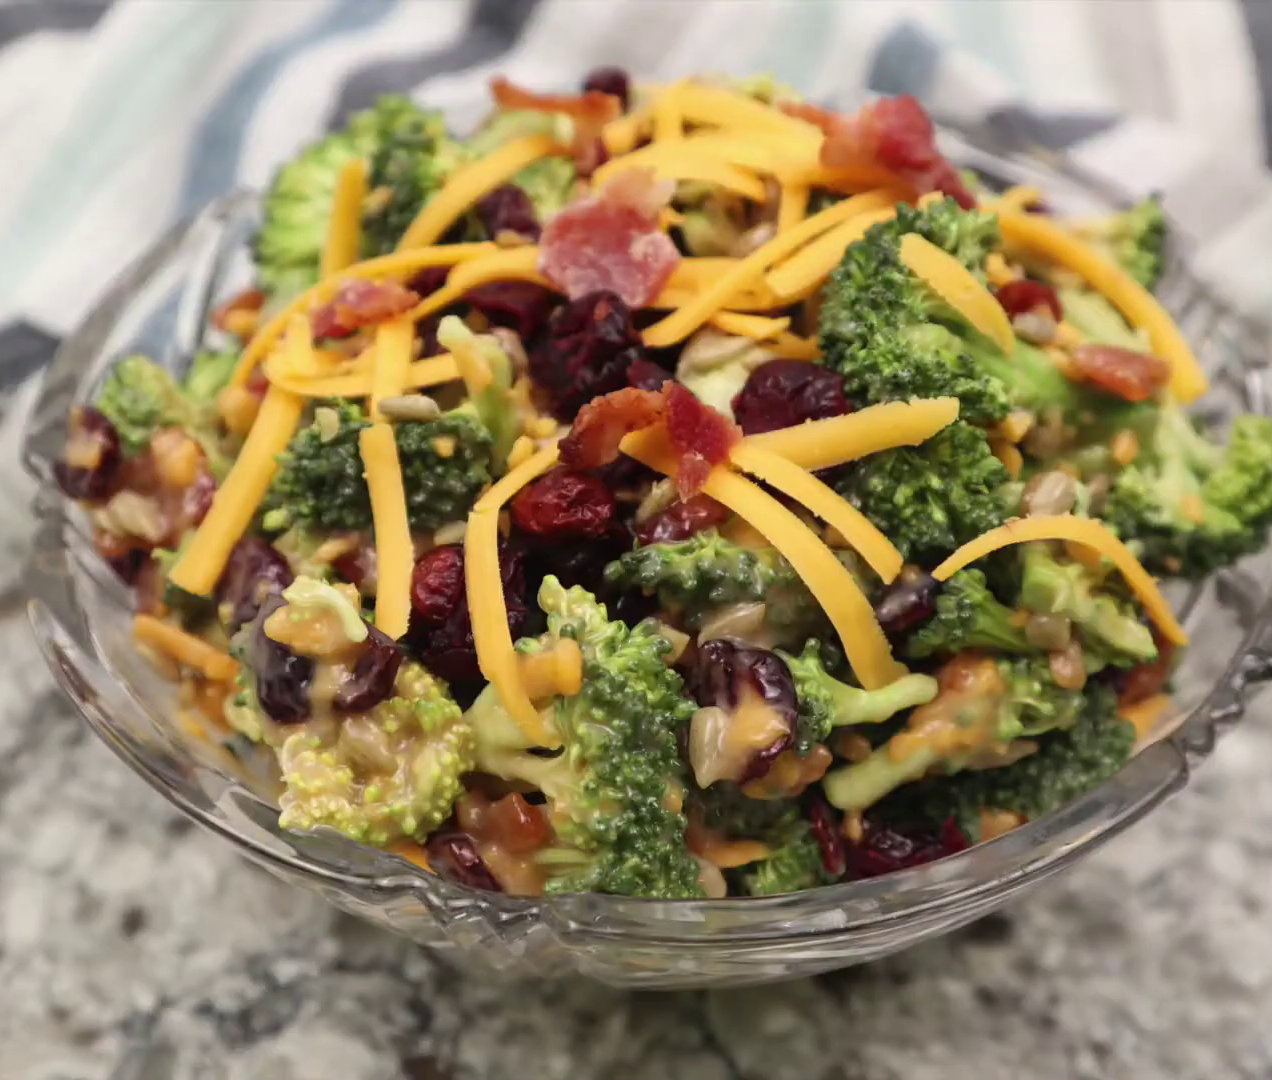
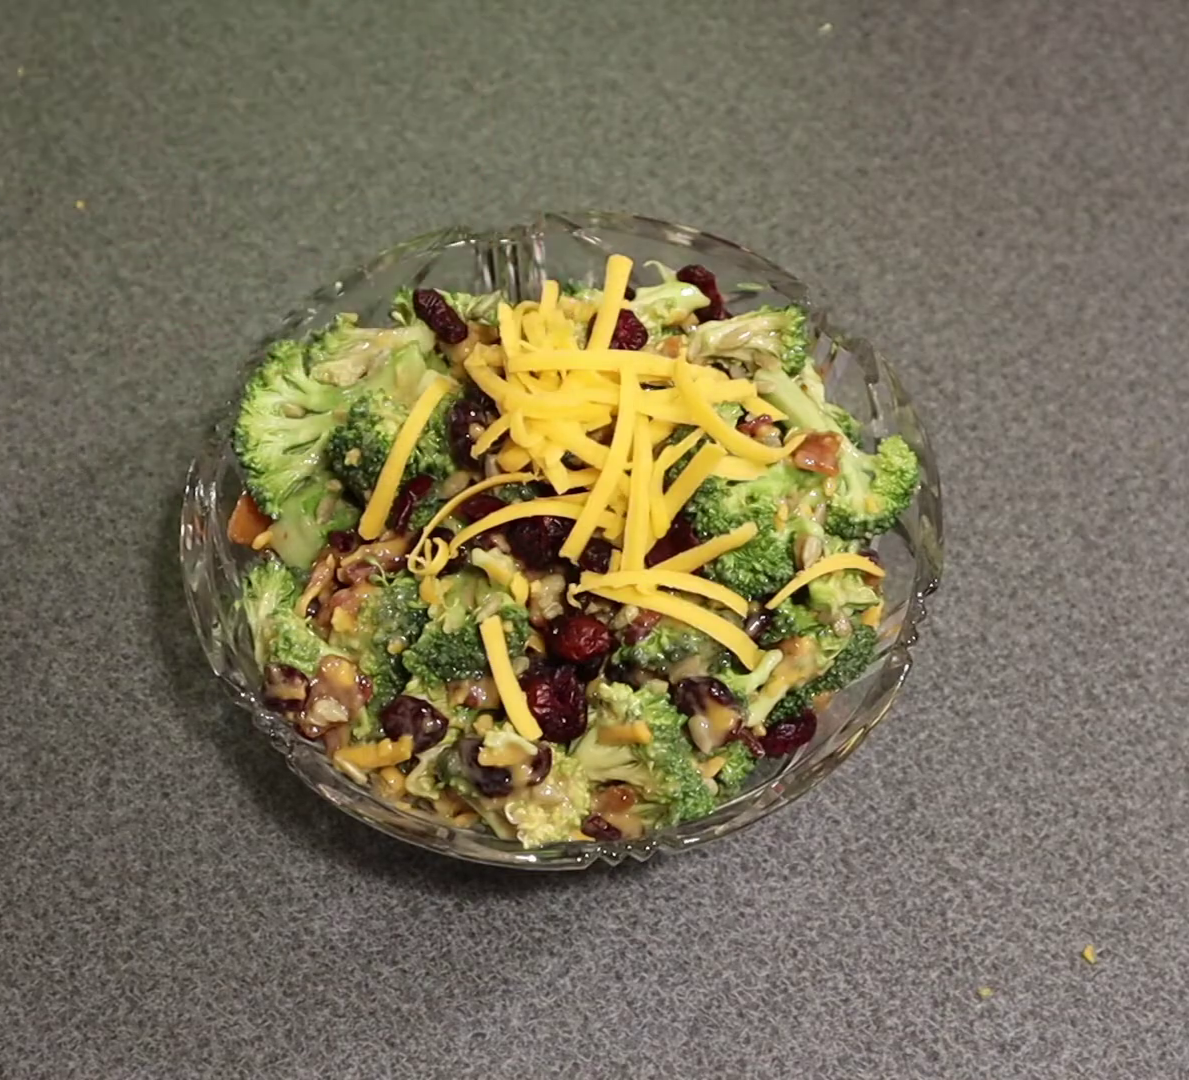
Chicken Salad Chick Broccoli Salad is a dish regarded for its crunchy texture, creamy dressing, and the ideal combo of savoury bacon with the freshness of broccoli. This salad has garnered a fan base for its pleasant flavour and health advantages.

What Makes This Recipe Good?

The Chicken Salad Chick Broccoli Salad sticks out for several reasons, making it a favourite among salad enthusiasts and a staple at gatherings. Here’s what sets this recipe apart:

Flavour Balance: The combination of fresh, crunchy broccoli with the savoury taste of bacon, the sharpness of cheddar, and the creaminess of the dressing creates a harmonious balance of flavours that is both satisfying and refreshing.

Texture Contrast: The crispness of the broccoli and bacon provides a delightful contrast to the softness of the cheese and the smoothness of the dressing, making every bite interesting.

Nutritional Value: Broccoli is a nutrient-dense vegetable, packed with vitamins C and K, fibre, and antioxidants. When combined with the protein from the bacon and the calcium from the cheese, this salad becomes a nutritious option that doesn’t compromise on taste.

Versatility: This salad can be customised to fit various dietary preferences and restrictions. Whether you’re adding more vegetables, substituting the dressing for a lighter option, or adding protein to make it a main dish, it’s incredibly adaptable.

Ease of Preparation: With a preparation time of just 10 minutes, this salad is not only delicious but also quick and easy to make, making it perfect for busy weeknights, potlucks, or as a nutritious lunch option.

FAQs

Can the salad be made ahead of time?

Yes, preparing it a day in advance allows the flavours to meld beautifully, making it even more delicious. It’s a perfect make-ahead dish for busy days or special occasions.

How should leftovers be stored?

Store any leftovers in an airtight container in the refrigerator for up to 3–5 days. The salad keeps well, but it’s best enjoyed within the first couple of days for optimal freshness.

Is this salad suitable for vegetarians?

As is, the recipe includes bacon, which is not suitable for vegetarians. However, you can easily omit the bacon or substitute it with a vegetarian alternative like smoked tofu or tempeh to keep the smoky flavour.

Can I use frozen broccoli instead of fresh?

While fresh broccoli is recommended for the best texture and flavour, you can use frozen broccoli in a pinch. Ensure it’s thawed and well-drained before adding it to the salad to prevent it from becoming soggy.

Health Benefits

This salad is not just about tantalising your taste buds; it’s also packed with nutritional value. Broccoli, the star ingredient, is a powerhouse of vitamins, minerals, and fibre. When combined with the protein-rich bacon and calcium-filled cheese, this dish becomes a nutritious choice for any meal. Discover more about the Health Benefits of Broccoli to understand why this salad is a must-have in your diet.

Overview of Ingredients

The Chicken Salad Chick Broccoli Salad is made with simple yet flavorful ingredients:

Fresh broccoli

Crispy bacon

Sharp cheddar and mozzarella cheese

A homemade dressing of mayonnaise, apple cider vinegar, sugar, salt, and pepper

For those looking to make this dish at home, consider visiting our guide on the Best Seasoning for Chicken Breast for additional flavour pairing ideas.

Chef’s Tips for Perfect Chicken Salad Chick Broccoli Salad

Achieving the perfect Chicken Salad Chick Broccoli Salad at home is all about the details:

Use fresh broccoli for the best crunch.

Cook the bacon to your desired level of crispiness, keeping in mind it will harden slightly when cooled.

For the dressing, balance is key. Whisk until smooth and taste as you go.

Customising Your Chicken Salad Chick Broccoli Salad

This salad is wonderfully versatile. Here are a few ways to make it your own:

Add dried cranberries or sliced almonds for an extra layer of texture and flavour.

For a healthier dressing, substitute mayonnaise with Greek yogurt.

What to Serve with Chicken Salad Chick Broccoli Salad

This salad pairs beautifully with a variety of dishes. For a light, refreshing meal, consider serving it alongside Lemon Butter Garlic Shrimp Pasta, which offers a delightful contrast in flavours.

Print

Chicken Salad Chick Broccoli Salad

Discover the secrets to making the perfect Chicken Salad Chick Broccoli Salad with our step-by-step guide. Fresh, flavorful.

  • Author: Gabriela cardenas
  • Prep Time: 10 minutes
  • Cook Time: 0 minutes (no cooking required)
  • Total Time: 10 minutes
  • Yield: 6
  • Category: Salad/Side Dish
  • Method: Mixing/No Cook
  • Cuisine: American

Ingredients

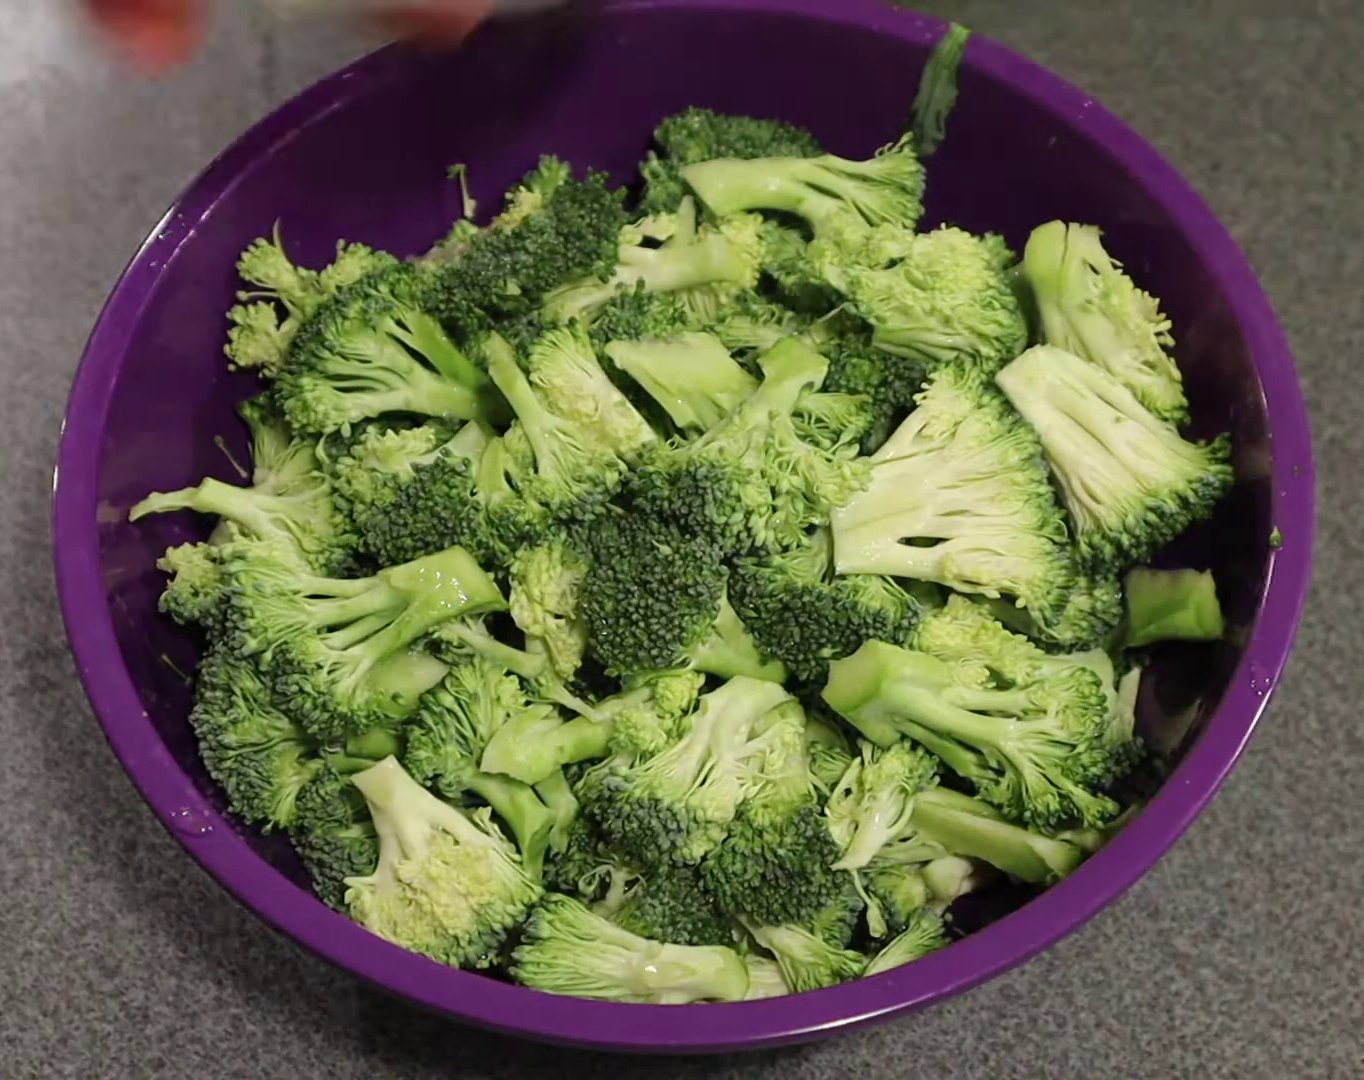
  • 6 cups fresh broccoli florets (about 2 heads of broccoli)
  • 6 slices of bacon, cooked and crumbled
  • 1 cup sharp cheddar cheese, grated
  • 1/2 cup mozzarella cheese, grated
  • 3/4 cup mayonnaise
  • 1/4 cup apple cider vinegar
  • 1/4 cup sugar
  • 1/4 teaspoon salt
  • 1/4 teaspoon black pepper

Instructions

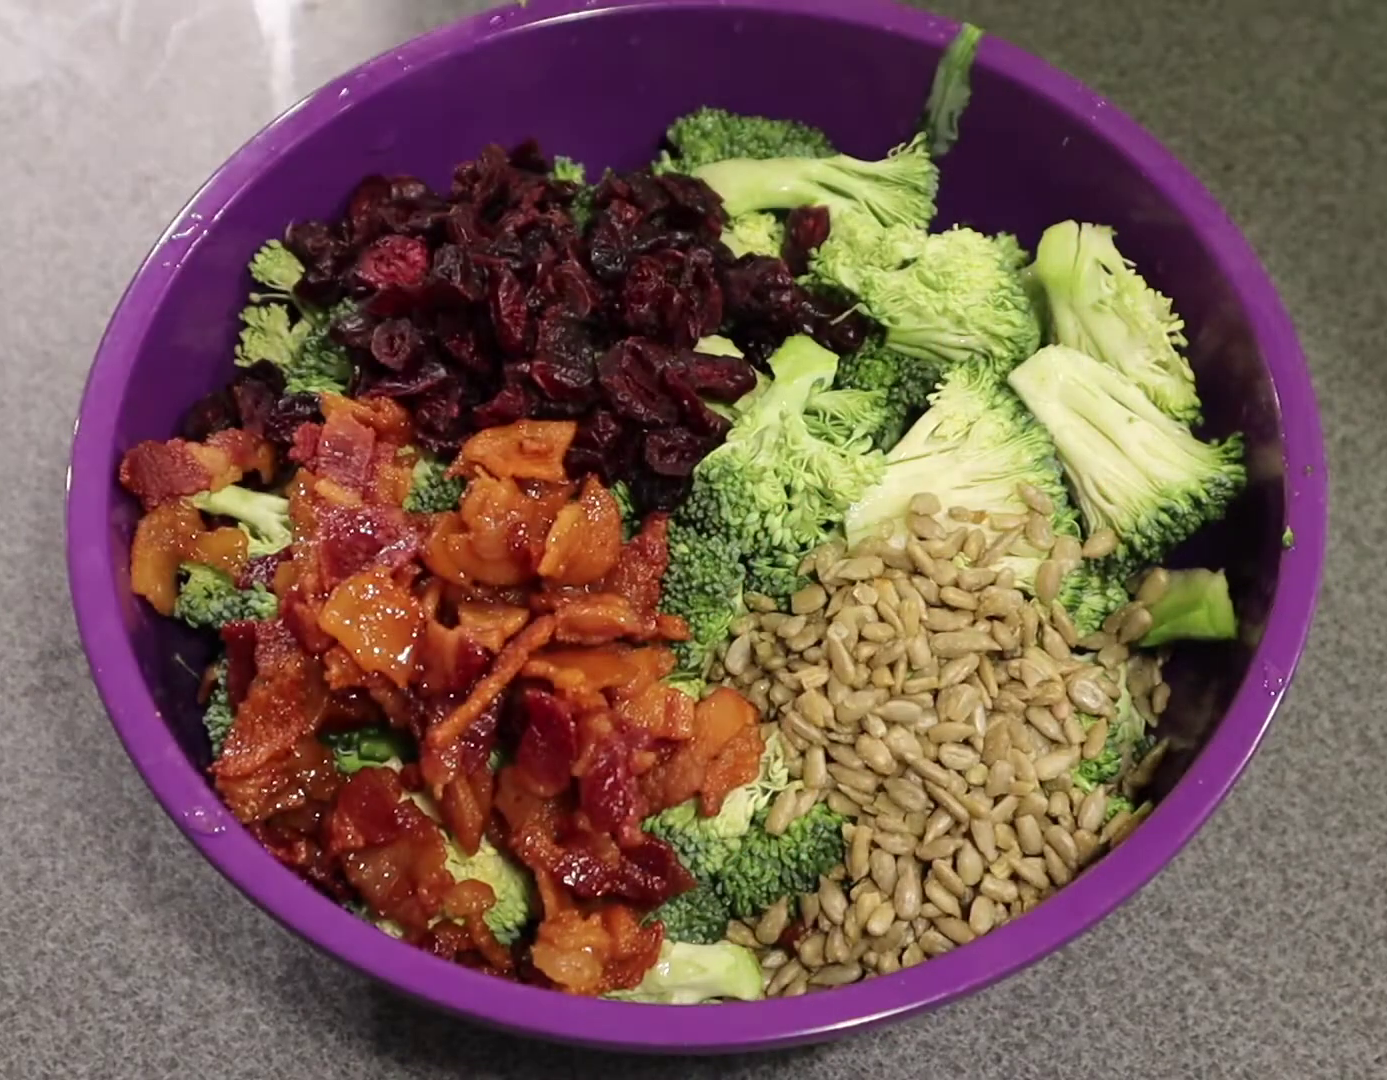
  1. In a large mixing bowl, combine the broccoli florets, crumbled bacon, sharp cheddar cheese, and mozzarella cheese.
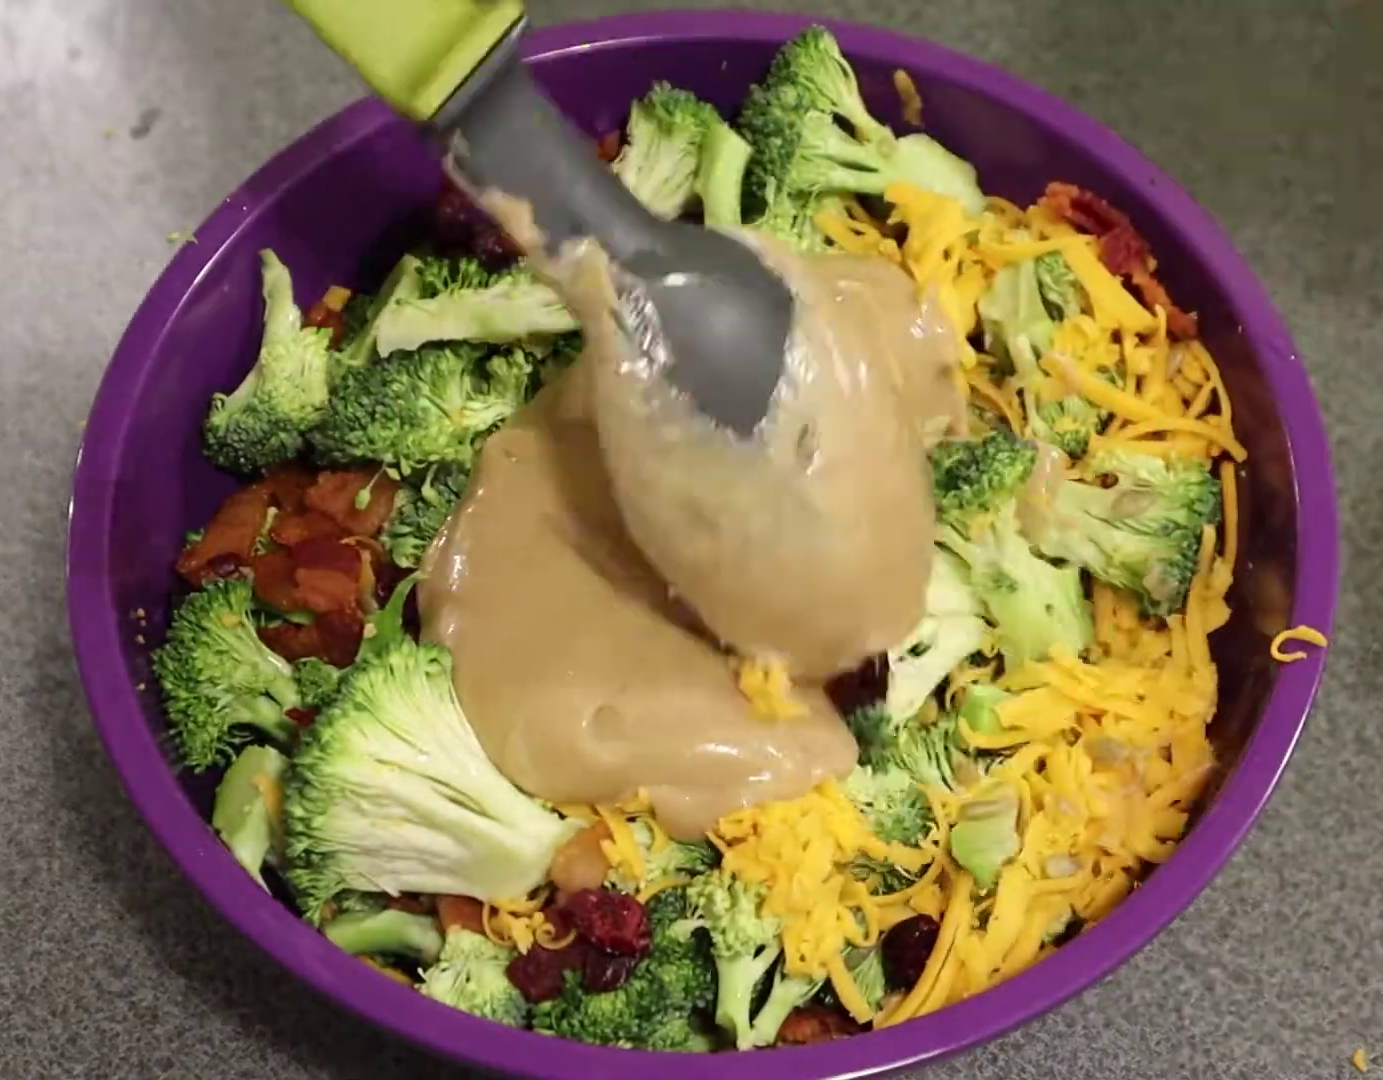
  2. In a separate small bowl, whisk together the mayonnaise, apple cider vinegar, sugar, salt, and pepper until smooth.
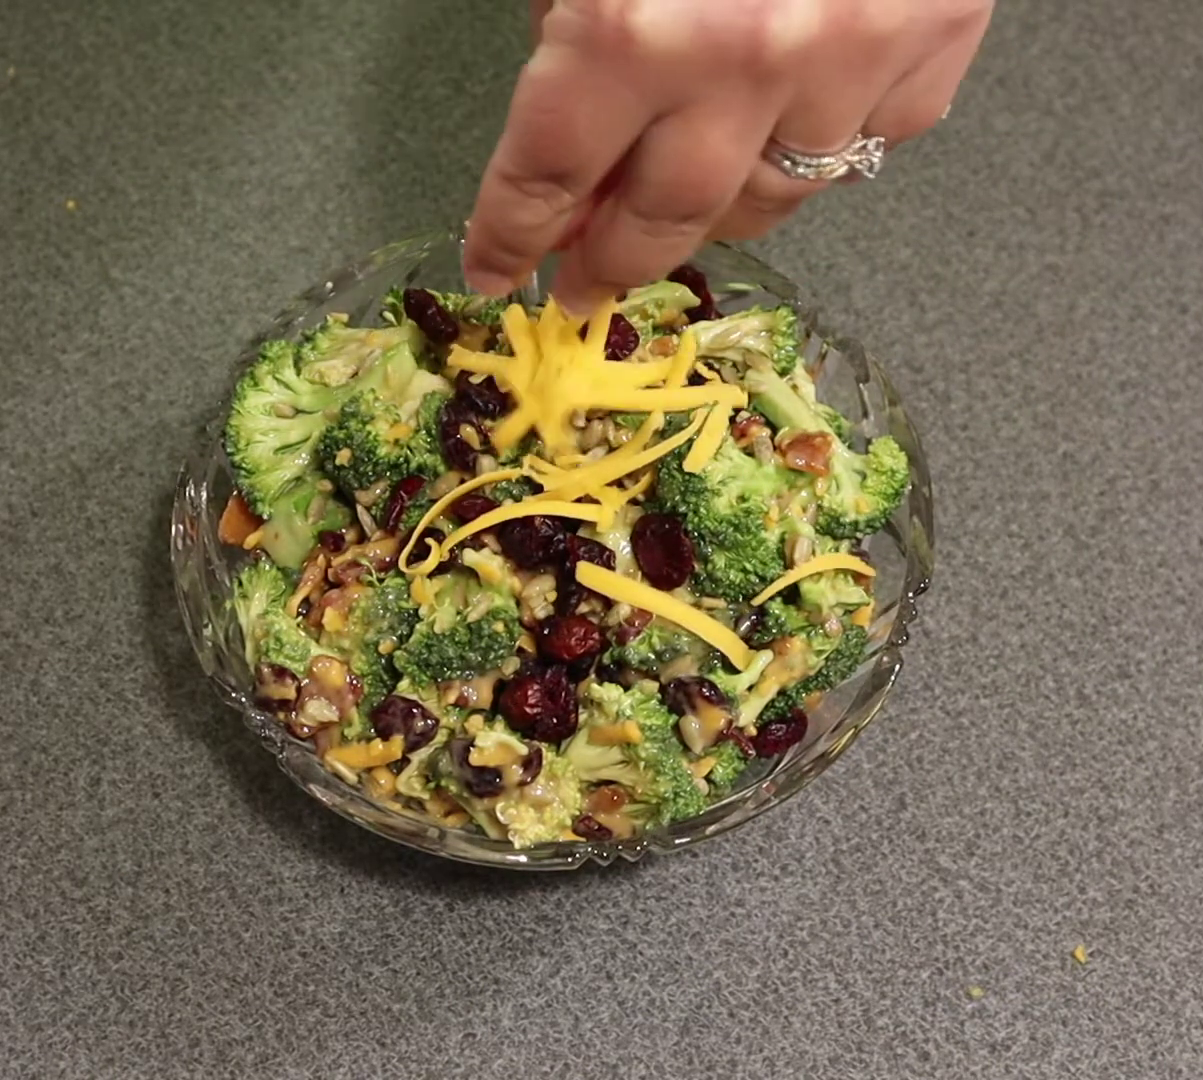
  3. Pour the dressing over the broccoli mixture and toss to coat evenly.
  4. Refrigerate the salad for at least an hour before serving to allow the flavors to meld together.

Notes

  • For a healthier version, substitute Greek yogurt for mayonnaise.
  • Add a crunch by including sunflower seeds or slivered almonds.
  • For a vegetarian version, omit the bacon or use a plant-based alternative.
  • Make sure to cut the broccoli into bite-sized pieces for easier eating.
  • This salad can be made a day ahead, making it perfect for picnics and potlucks.

Keywords: broccoli bacon salad, creamy broccoli salad, chicken salad chick recipe

Did you make this recipe?

Share a photo and tag us — we can't wait to see what you've made!

Chicken and Yellow Rice

Chicken and Yellow Rice


This chicken and yellow rice recipe is flavorful, quick to prepare, flexible, and guaranteed to become a supper staple. From choosing ingredients to serving and preserving your food, this complete guide will help you make the most delectable and satisfying dinner every time.

Why You’ll Love chicken and yellow

There are many reasons to appreciate chicken and yellow rice. Its rich, fragrant taste and simplicity of preparation make it a nightly staple. The recipe’s adaptability allows for unlimited variation, satisfying all preferences and diets. It doesn’t matter your culinary experience; this recipe will wow.

  • Flavorful and Comforting: The combination of juicy chicken, fluffy yellow rice, and the subtle warmth of saffron creates a dish that’s both comforting and irresistibly delicious.
  • Quick and Easy Preparation: With a total cooking time of just 30 minutes, this recipe is perfect for those seeking a quick yet satisfying meal. Learn more about the health benefits of saffron, a key ingredient that not only adds a unique flavour but also offers numerous health benefits.
  • Highly Customisable: From the choice of rice to the type of chicken used, this dish can be easily adapted to suit your preferences or dietary requirements.

FAQs

What goes well with yellow rice?

A variety of sides, from vegetables to biscuits, complement this dish well.

Can I use brown rice instead of white?

Yes, brown rice can be used, but it may require a longer cooking time.

How can I make this dish vegetarian?

Substitute the chicken with a plant-based protein and use vegetable broth instead of chicken stock.

Overview of Ingredients

  • Chicken: boneless pieces, which cook quickly and evenly.
  • Rice: For their fluffy texture, people prefer long-grain varieties like Basmati or Jasmine.
  • Saffron adds a beautiful golden colour and rich flavour. Turmeric can be a substitute for colour, though it changes the flavour.
  • Broth: chicken or vegetable, enhancing the rice’s taste and moisture.
  • Vegetables: onions, garlic, and optional peas, carrots, or bell peppers.
  • Seasonings: bay leaves, salt, and pepper. Fresh herbs like parsley or cilantro for garnish.
Chicken and Yellow Rice

Tips for the Best Chicken and Yellow Rice Recipe

Selecting the Right Rice

  • The choice of rice is crucial to achieving the perfect texture and flavour. Long-grain rice like Basmati or Jasmine is ideal because it remains fluffy and separates when cooked, absorbing the flavours without becoming mushy.
  • For a healthier option, consider using brown rice. Keep in mind that it requires a longer cooking time and slightly more liquid.

Optimising the Use of Saffron

  • Saffron is the star ingredient that gives this dish its characteristic colour and a portion of its distinctive taste. To fully release their colour and flavour, steep the saffron threads in a bit of warm water or broth before adding them to the dish.
  • Turmeric can serve as a colour substitute for saffron, but it will change the flavour profile.

Enhancing the Chicken Flavour

  • Marinate the chicken pieces with spices and a bit of lemon juice for at least 30 minutes before cooking. This not only tenderises the chicken but also infuses it with flavours that complement the yellow rice.
  • Consider browning the chicken pieces before adding them to the rice. This step adds depth to the dish through the Maillard reaction, which enhances the savoury flavour.
Saffron Chicken Rice

Layering Flavours

  • Start by sautéing onions, garlic, and celery in olive oil or butter until they are soft and fragrant. This creates a flavorful base for the rice.
  • Add a bay leaf or two during the cooking process to infuse the rice with its subtle, aromatic flavour. Remember to remove the bay leaves before serving.

Cooking Techniques for Perfect Rice

  • Rinse the rice under cold water until the water runs clear. This removes excess starch and prevents the rice from sticking together.
  • Use a tight-fitting lid to ensure that steam, an essential element for cooking rice, does not escape. Cook on low heat to allow the rice to slowly absorb the liquid, resulting in perfectly cooked grains.

Vegetable and protein variations

  • To make the dish more colourful and nutritious, add vegetables like peas, carrots, or bell peppers. To retain their colour and crunch, add them towards the end of the cooking process.
  • While chicken is traditional, you can also use other proteins like shrimp, pork, or tofu for vegetarian options. Adjust the cooking time accordingly.
Chicken and Yellow Rice

Finishing Touches

  • Before serving, fluff the rice with a fork to separate the grains and incorporate the chicken evenly throughout the dish.
  • Garnish with fresh herbs like parsley or cilantro for a burst of colour and freshness. A squeeze of lemon juice just before serving can brighten the flavours.

Storage and Reheating Tips

  • Storing Leftovers: Cool the dish quickly and store it in an airtight container in the fridge for up to 4 days or in the freezer for up to 4 months.
  • Reheating: To retain moisture and flavour, reheat leftovers in a skillet with a splash of chicken stock or water, stirring until heated through.
Chicken and Yellow Rice

Customising Your Dish

  • Rice Varieties: Substitute brown rice for a healthier option, adjusting liquid and cook time.
  • Protein Variations: Try shrimp, pork, or tofu as alternatives to chicken.
  • Vegetable Additions: At the end of cooking, add colourful vegetables such as peas and bell peppers.

What goes best with chicken and yellow rice?

Chicken and yellow rice go with many sides. Whether you’re eating light or heavy, these accompaniments will enhance your meal:

Green Salads

A crisp green salad with a citrus vinaigrette can provide a refreshing contrast to the dish’s rich flavours. Consider ingredients like mixed greens, cherry tomatoes, cucumber, and a sprinkle of nuts for added texture.

Roasted Vegetables

Enhance your meal with a side of roasted vegetables. Options like asparagus, zucchini, or bell peppers not only add a splash of colour but also provide a healthy boost.

Breads

To complement the meal, serve a variety of breads. Garlic naan, pita bread, or even dinner rolls make excellent choices for soaking up the flavorful rice.

Legume Salads

A bean or lentil salad can be a nutritious addition, providing a protein-rich side that pairs nicely with the spiciness of the rice. A cold black bean salad with corn, avocado, and a lime dressing could be a hit.

Yoghurt or Raita

Cucumber and mint-flavored yoghurt, or raita, balances the warmth of the saffron and spices in the rice and gives the dish a creamy texture.

Pickles and Chutneys

To spice up the meal, offer a variety of pickles or chutneys. These can range from mild to hot, adding an extra layer of flavour that complements the chicken and rice beautifully.

Stuffed Peppers

For an elegant presentation, stuff bell peppers with a mixture of yellow rice and finely chopped vegetables, then bake until the peppers are tender.

Sweet Plantains

Fried or baked sweet plantains add a touch of sweetness that contrasts nicely with the dish’s savoury flavours.

Bisquick Cheddar Bay Biscuits

These biscuits are always a crowd-pleaser, offering a cheesy, buttery addition that pairs wonderfully with the textures and flavours of the rice.

These sides may make chicken with yellow rice more filling and tasty for different tastes and diets. To make a memorable meal, mix and combine these alternatives depending on the occasion and guests’ tastes.

Yellow Rice Dinner
Yellow Rice Dinner

Health Benefits

  • Saffron is known for its antioxidants and potential mood-enhancing properties.
  • Turmeric offers anti-inflammatory benefits and increases the antioxidant capacity of the body.
  • Brown rice is rich in fibre, vitamins, and minerals, supporting better digestion and heart health.

Have you used this recipe or modified it? Tag us in your social media postings and share your tips below! Your contributions improve our community and encourage taste exploration.

Print

Chicken and Yellow Rice

Discover how to make Chicken and Yellow Rice in just 30 minutes. This comforting dish is perfect for any night of the week.

  • Author: Gabriela cardenas
  • Prep Time: 10 minutes
  • Cook Time: 20 minutes
  • Total Time: 30 minutes
  • Yield: 4
  • Category: Main Course
  • Method: Stovetop
  • Cuisine: International

Ingredients

  • 2 cups of Basmati or Jasmine rice
  • 1 lb boneless chicken, cut into bite-sized pieces
  • 4 cups of chicken or vegetable broth (for vegetarian option)
  • 1 large onion, finely chopped
  • 2 cloves of garlic, minced
  • 1/4 teaspoon of saffron threads (or 1/2 teaspoon turmeric for color)
  • 1 bay leaf
  • 1/2 cup of peas (optional)
  • 1/2 cup of carrots, diced (optional)
  • 2 tablespoons of olive oil or butter
  • Salt and pepper to taste
  • Fresh parsley or cilantro, chopped (for garnish)
  • Lemon wedges (for serving)

Instructions

  1. Rinse the rice under cold water until the water runs clear to remove excess starch.
  2. Heat olive oil or butter in a large skillet or saucepan over medium heat. Add onions and garlic, sautéing until soft and fragrant.
  3. Add the chicken to the pan and cook until lightly browned on all sides.
  4. Stir in the rice, saffron (or turmeric), bay leaf, salt, and pepper. Pour in the broth and bring to a boil.
  5. Reduce heat to low, cover, and simmer until the rice is tender and the liquid is absorbed, about 18-20 minutes.
  6. If using, add the peas and carrots in the last 5 minutes of cooking.
  7. Once cooked, remove from heat and let sit, covered, for 5 minutes. Remove the bay leaf, fluff with a fork, and mix in the parsley or cilantro.
  8. Serve hot, garnished with lemon wedges.

Notes

  • Marinating the Chicken: For extra flavor, marinate the chicken in a mixture of lemon juice, salt, pepper, and a pinch of saffron or turmeric before cooking.
  • Saffron Soaking: Soak saffron threads in a tablespoon of warm water for 10 minutes before adding to the dish to enhance the flavor and color.
  • Vegetable Variations: Feel free to add other vegetables like bell peppers or green beans for more color and nutrition.
  • Storing: Store leftovers in an airtight container in the refrigerator for up to 4 days or freeze for up to 4 months. Reheat with a splash of broth to keep it moist.

Keywords: Chicken and Yellow Rice, yellow rice with chicken, saffron rice recipe, easy chicken rice dish

Did you make this recipe?

Share a photo and tag us — we can't wait to see what you've made!

Chicken Quinoa Salad

Chicken Quinoa Salad


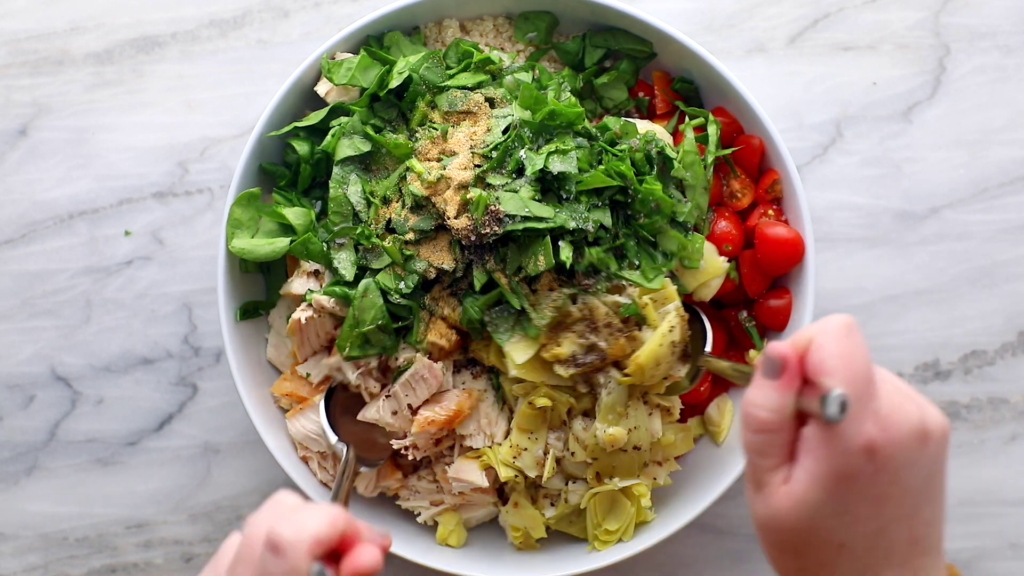
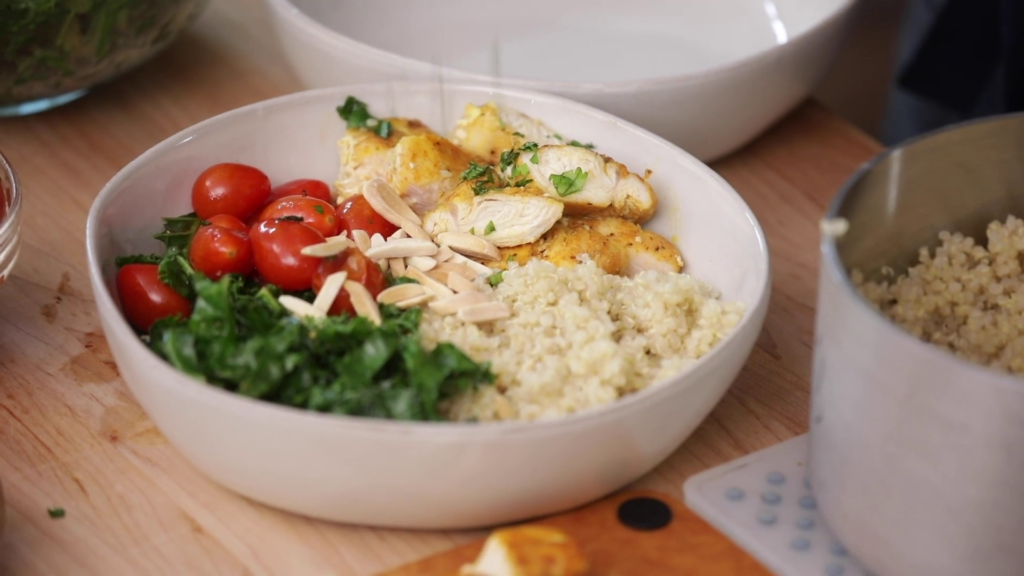
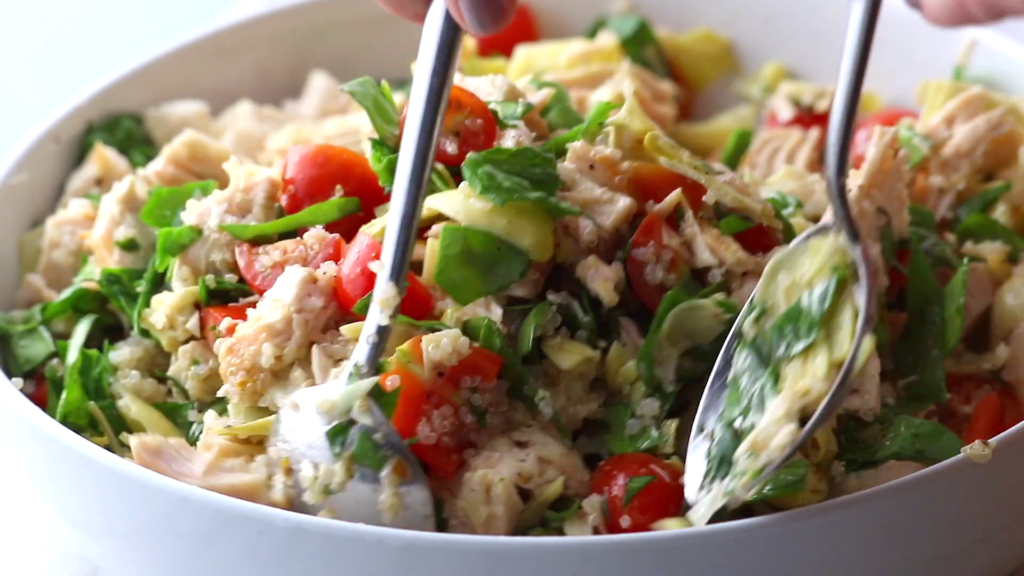
Chicken Quinoa Salad is a perfect blend of nutrition and taste, offering a hearty meal that’s both satisfying and health-conscious. This salad combines the lean protein of chicken with the superfood quinoa, alongside a variety of fresh vegetables, making it an ideal choice for anyone.

Why Choose Chicken Quinoa Salad?

High in protein and fiber

Full of essential vitamins and minerals

Versatile and easy to customize

FAQs

Can I use a different type of quinoa?

Yes, any color quinoa (white, red, or black) works well in this salad.

How long can I store Chicken Quinoa Salad in the fridge?

Properly stored, it can last up to 3 days.

Are there any vegan alternatives for chicken in this salad?

Yes, chickpeas, tofu, or tempeh make great plant-based protein sources.

Overview of Ingredients

The beauty of chicken quinoa salad lies in its versatility. Here are the essential ingredients that form the foundation of this dish:

  • Quinoa: cooked until fluffy and light.
  • Chicken: grilled or baked, and then sliced or shredded.
  • Greens: spinach, arugula, or mixed greens for a fresh base.
  • Vegetables: Cherry tomatoes, cucumbers, and red onions offer crunch and color.
  • Extras: Add in things like feta cheese, olives, or nuts for added texture and flavor.
  • Dressing: A simple vinaigrette or a lemony dressing to brighten the dish.

Check out Recipes Gabriela’s guide on the best seasoning for chicken if you want to learn more about how to use chicken in different recipes.


Chef’s Tips for Perfect Chicken Quinoa Salad

A tasty and healthy chicken quinoa salad demands careful preparation and creativity. Expert advice to make the perfect salad every time:

Select the Right Quinoa

Choose a high-quality quinoa. There are several varieties, including white, red, and black quinoa, each offering a slightly different texture and nutty flavor. White quinoa is the fluffiest and mildest in taste, which makes it a great canvas for your salad.

Cook the Quinoa Properly

For a good salad base, cooking quinoa to perfection is critical. Rinse the quinoa thoroughly under cold water to remove the saponin, which can give it a bitter taste. Add water to the quinoa in a 2:1 ratio, bring it to a boil, and simmer it covered for about 15 minutes or until the water absorbs. Let it sit covered for 5 minutes after cooking, then fluff with a fork.

Marinate the Chicken

Before cooking, marinate the chicken for at least 30 minutes to infuse it with flavor. Use olive oil, lemon juice, garlic, and herbs like rosemary or thyme. This not only enhances the taste but also helps tenderize the chicken.

Grill or Bake the Chicken

For the healthiest and tastiest results, either grill or bake the chicken. Grilling adds a smoky flavor that pairs wonderfully with the nuttiness of quinoa, while baking allows for a tender, consistent cook.

Balance Your Ingredients

A great chicken quinoa salad is all about balance. Combine the cooked quinoa and chicken with a variety of textures and flavors from ingredients like crispy fresh greens, creamy avocado, sweet cherry tomatoes, and crunchy nuts or seeds.

Dress Appropriately

The dressing should complement the dish without overpowering it. A simple lemon vinaigrette works beautifully—whip together lemon juice, olive oil, salt, and pepper. For a creamy texture, a tahini-based dressing or Greek yogurt dressing can add depth without excessive calories.

Season Well

Don’t forget to season your salad at every stage. Season the cooking water for both the chicken and quinoa, as well as the marinade and salad dressing. A well-seasoned salad will have layers of flavor that make every bite satisfying.

Let Flavors Mingle

Once assembled, let your salad sit for about 10 minutes before serving. This resting period allows the flavors to meld together beautifully.

Garnish and Serve

Finish your salad with a sprinkle of fresh herbs like parsley or cilantro, which will add a burst of freshness. A squeeze of lemon or lime just before serving can also enhance the flavors.

Customizing Your Chicken Quinoa Salad

You can easily tailor chicken quinoa salad to suit various dietary needs and flavor preferences. Here are several ways to customize your salad to keep it exciting and delicious every time you prepare it:

Protein Variations

    • Vegetarian Options: Replace chicken with grilled tofu, tempeh, or a hearty legume like chickpeas or black beans to maintain a high protein content while catering to vegetarian or vegan diets.
    • Seafood Twist: For a pescatarian option, consider adding grilled shrimp or flaked salmon instead of chicken. These seafood choices complement the light nature of quinoa and add a rich, savory flavor.

Grain Substitutions

    • Different Grains: Although quinoa is a nutritious choice, you can also experiment with other grains like farro, bulgur, or couscous for different textures and flavors.
    • Low-Carb Options: For a lower-carb version, substitute quinoa with cauliflower rice or chopped mixed greens such as kale and spinach.

Add more vegetables

    • Colorful Veggies: Incorporate a variety of vegetables like red bell peppers, steamed broccoli, or roasted Brussels sprouts to add color, crunch, and additional nutrients.
    • Sweet Elements: To balance the savory flavors, introduce elements of sweetness with diced apples, dried cranberries, or orange segments.

Dressings and Conditions

    • Homemade Dressings: Create your own dressings to control the ingredients and suit your taste. Mix olive oil with balsamic vinegar, or blend avocado with lime juice for a creamy yet healthy dressing.
    • Global Flavors: Spice up your salad with international flair by adding a curry dressing, pesto, or a splash of soy sauce and sesame oil for an Asian-inspired version.

Nutty Crunch

    • Seeds and Nuts: Sprinkle toasted almonds, sunflower seeds, or pumpkin seeds on top of your salad for an added crunch and a boost of healthy fats.
    • Cheese for Richness: Add crumbled feta, shaved Parmesan, or diced mozzarella for a touch of creamy texture and salty flavor.

Herbs and Spices

    • Fresh Herbs: Garnish your salad with fresh herbs like cilantro, dill, or mint to add a burst of freshness and elevate the overall taste.
    • Bold Spices: For seasoning the chicken, consider cumin, coriander, or smoked paprika, or sprinkle over the salad for an extra kick.

Special Diets

    • Gluten-Free: Ensure all ingredients, especially any store-bought items like dressings or marinades, are certified gluten-free.
    • Allergy-Friendly: Be mindful of common allergens like nuts and dairy; substitute or omit these ingredients as necessary to accommodate dietary restrictions.

What goes best with Chicken Quinoa Salad?

Chicken quinoa salad is a flexible dish that pairs well with a variety of accompaniments. Whether you’re planning a light lunch or a fuller dinner, here are some suggestions on what to serve alongside this nutritious salad:

  1. Crusty Bread: A slice of artisanal bread or a piece of garlic toast can complement the textures in the salad and help sop up any remaining dressing.
  2. Soup: Pair the salad with a light vegetable soup or a more robust lentil soup for a satisfying meal.
  3. Grilled Vegetables: Serve alongside grilled asparagus, zucchini, or bell peppers for a warm contrast to the cool, crisp salad.
  4. Fresh Fruit: A side of fresh fruit, such as sliced apples, pears, or a berry mix, can add a sweet note to balance the salad’s savory flavors.
  5. For an upscale addition to the meal: offer a small cheese plate with a variety of cheeses, nuts, and olives.
  6. Roasted sweet potatoes: Their sweet, soft texture complements the nutty quinoa and savory chicken, making for a hearty meal.

These sides not only enhance the eating experience but also help round out the meal, making it more filling and varied in flavor and texture.

Health Benefits of Chicken Quinoa Salad

Chicken quinoa salad is not just tasty—it’s also packed with nutritional benefits, making it an excellent choice for a health-conscious diet.

Healthline has a full guide on quinoa that tells you more about its health benefits and why it makes a great salad base.

  • High Protein Content: Both chicken and quinoa are great sources of high-quality protein, which is vital for muscle repair, growth, and overall bodily functions.
  • Quinoa is high in fibe: which aids digestion and can help manage blood sugar levels, promoting a feeling of fullness and reducing appetite.
  • Low in Calories: You can make this salad with low-calorie ingredients, which makes it perfect for managing your weight.
  • Packed with Vitamins and Minerals: Ingredients like leafy greens and vegetables in the salad are high in vitamins A, C, and K, as well as iron and magnesium, which are crucial for maintaining many body functions.
  • Heart Health: Monounsaturated fats, which are known to be heart-healthy, are abundant in the olive oil often used in salad dressings.
  • Antioxidants: Many of the ingredients, especially the colorful vegetables and herbs, contain antioxidants that help combat oxidative stress in the body, reducing inflammation and promoting overall health.

Chicken quinoa salad is tasty and healthful for a balanced lifestyle due to its health advantages. This salad is tasty and nutritious for lunch or supper.


Why not try making a great chicken quinoa salad now that you know how? Try various ingredients and dressings to discover your favourites and share them with friends and family. Begin your healthier, tastier diet now!

Print

Chicken Quinoa Salad

Discover how to make a nutritious chicken quinoa salad, perfect for a quick lunch or dinner. Fresh, healthy, and delicious!

  • Author: Gabriela cardenas
  • Prep Time: 15 minutes
  • Cook Time: 20 minutes
  • Total Time: 35 minutes
  • Yield: 4
  • Category: Salad
  • Method: Boil, Saute
  • Cuisine: Mediterranean

Ingredients

  • 1 cup quinoa
  • 2 cups water or chicken broth
  • 2 boneless, skinless chicken breasts
  • 1 tablespoon olive oil
  • Salt and pepper to taste
  • 1 cup cherry tomatoes, halved
  • 1 cucumber, diced
  • 1/2 red onion, thinly sliced
  • 1/4 cup chopped fresh parsley
  • 1/4 cup feta cheese, crumbled
  • 1/4 cup kalamata olives, pitted and halved
  • Dressing:
    • 1/4 cup olive oil
    • 2 tablespoons lemon juice
    • 1 teaspoon Dijon mustard
    • 1 clove garlic, minced
    • Salt and pepper to taste

Instructions

  1. Rinse quinoa under cold water until water runs clear. In a medium saucepan, bring 2 cups of water or chicken broth to a boil. Add quinoa, reduce heat to low, cover, and simmer for 15 minutes or until water is absorbed. Remove from heat and let stand for 5 minutes, then fluff with a fork.
  2. While the quinoa cooks, season chicken breasts with salt and pepper. Heat olive oil in a skillet over medium heat and cook chicken until golden and cooked through, about 6-7 minutes per side. Let cool, then dice.
  3. In a large bowl, combine cooked quinoa, diced chicken, tomatoes, cucumber, onion, parsley, feta, and olives.
  4. In a small bowl, whisk together the dressing ingredients. Pour over the salad and toss to combine.
  5. Season with additional salt and pepper to taste. Serve chilled or at room temperature.

Notes

  • For added flavor, cook the quinoa in chicken broth instead of water.
  • Let the quinoa cool to room temperature before adding other ingredients to prevent wilting of the greens.
  • This salad can be made ahead of time, making it perfect for meal prep. Store in an airtight container in the refrigerator for up to 3 days.

Keywords: Chicken Quinoa Salad, quinoa chicken salad, healthy chicken salad, protein-rich salad, easy quinoa salad

Did you make this recipe?

Share a photo and tag us — we can't wait to see what you've made!

Print

Chicken Quinoa Salad

Chicken Quinoa Salad is a perfect blend of nutrition and taste, offering a hearty meal that’s both satisfying and health-conscious. This salad combines the lean protein of chicken with the superfood quinoa, alongside a variety of fresh vegetables, making it an ideal choice for anyone

  • Author: Gabriela cardenas
  • Prep Time: 15 minutes
  • Cook Time: 20 minutes
  • Total Time: 35 minutes
  • Yield: 4
  • Category: recipes

Ingredients

1 cup quinoa

2 cups water or chicken broth (for cooking quinoa)

2 chicken breasts, grilled and sliced

1 avocado, diced

1 cup cherry tomatoes, halved

1 cucumber, diced

1/2 red onion, finely chopped

1/4 cup fresh parsley, chopped

1/4 cup feta cheese, crumbled

Salt and pepper to taste

For the Dressing:

1/4 cup olive oil

Juice of 1 lemon

2 tablespoons honey or agave syrup

1 garlic clove, minced

Salt and pepper to taste

Instructions

Cook the Quinoa: Rinse the quinoa under cold water. In a medium saucepan, bring 2 cups of water or chicken broth to a boil. Add the quinoa, reduce heat to low, cover, and simmer for about 15 minutes, or until all liquid is absorbed. Remove from heat and let it sit covered for 5 minutes. Fluff with a fork and let it cool.

Prepare the Chicken: While the quinoa is cooking, grill the chicken breasts seasoned with salt and pepper until fully cooked and juicy. Let them rest for a few minutes before slicing.

Make the Dressing: In a small bowl, whisk together olive oil, lemon juice, honey, minced garlic, salt, and pepper until well combined.

Assemble the Salad: In a large bowl, combine the cooled quinoa, sliced chicken, avocado, cherry tomatoes, cucumber, red onion, and parsley. Drizzle with the dressing and toss until everything is evenly coated. Top with crumbled feta cheese.

Serve: Adjust the seasoning with salt and pepper if necessary. Serve immediately, or chill in the refrigerator before serving for a refreshing touch

Notes

Flavor Boost: For an extra flavor boost, cook the quinoa in chicken broth instead of water.

Grill Marks: For beautiful grill marks on the chicken, make sure your grill is hot before adding the chicken.

Dressing Variation: Feel free to adjust the dressing ingredients according to your taste. Adding a teaspoon of Dijon mustard can introduce a nice tangy flavor.

Storage: This salad can be stored in an airtight container in the refrigerator for up to 3 days. If storing, consider adding the avocado and dressing just before serving to maintain freshness.

Customization: This recipe is highly customizable. Feel free to add other vegetables like bell peppers or spinach, or swap out feta cheese for goat cheese or queso fresco for different flavors.

Did you make this recipe?

Share a photo and tag us — we can’t wait to see what you’ve made!

Boneless Chicken Wings: Recipes & Tips

Boneless Chicken Wings: Recipes & Tips


Boneless chicken wings have taken the culinary world by storm, offering the delicious flavors of traditional wings without the hassle of bones. This comprehensive guide explores everything from the origins and benefits of boneless wings to recipes and serving suggestions.

Boneless Chicken Wings step 0

The Evolution of Boneless Chicken Wings

The journey of boneless chicken wings from a simple idea to a menu staple in restaurants worldwide is fascinating. Unlike traditional wings, boneless wings are made from breast meat, offering a tender and juicy bite every time.

  • Origins: While traditional wings have a long history, boneless wings gained popularity as a convenient and less messy alternative.
  • Popularity: Their rise to fame can be attributed to the growing demand for easy-to-eat appetizers and the versatility they offer in flavors and cooking methods.

Discover the history of chicken wings and how they became a beloved dish across the globe.

FAQs 

What exactly are boneless chicken wings?

Boneless chicken wings are typically made from breast meat, cut into pieces, breaded, and cooked to mimic the taste and texture of traditional wings. They are often served with various sauces, just like traditional wings.

Are boneless wings actually wings?

Despite the name, boneless wings are not made from wing meat. They are usually crafted from chicken breast meat, making them more akin to chicken tenders or nuggets than actual wings.

Why choose boneless wings over traditional wings?

Many people prefer boneless wings for their convenience and ease of eating, as they don’t contain bones. They’re also versatile in flavor and can be a leaner option, depending on the preparation.

Can boneless wings be made in an air fryer?

Yes, boneless wings are perfect for air-frying, offering a healthier alternative to deep-frying. Air-frying provides a crispy exterior while keeping the inside juicy with minimal oil use.

How do you keep boneless wings crispy?

To keep them crispy, serve them immediately after cooking. If you’re tossing them in sauce, do so right before serving to maintain the crunch. Reheating in an air fryer can also help restore crispiness.

What sauces and dips pair well with boneless wings?

Boneless wings pair well with a wide range of sauces, from classic Buffalo and BBQ to honey mustard and garlic Parmesan. Ranch and blue cheese dips are popular choices for cooling down spicy flavors.

Boneless Chicken Wings step 2

Overview of Ingredients

Boneless chicken wings require a straightforward yet adaptable set of ingredients that allows for various cooking styles and flavor profiles. Here’s what you’ll typically need:


  • Chicken: boneless, skinless chicken breast meat, cut into pieces the size of wings.
  • Breading: all-purpose flour, eggs, and breadcrumbs or panko for a crispy exterior.
  • Seasonings: salt, pepper, and poultry seasoning. Additional spices can vary based on the flavor profile you’re aiming for.
  • Sauces: A variety of sauces, such as Buffalo, BBQ, honey mustard, or garlic Parmesan, should be used to coat the wings after cooking.
  • Oil: for frying or spraying before air-frying, depending on your cooking method preference.

Chef’s Tips for Perfect Boneless Wings step 3

Chef’s Tips for Perfect Boneless Wings

To ensure your boneless chicken wings turn out perfectly crispy and flavorful, follow these chef-approved tips:

  • Ensure Even Cut: Cut the chicken breast into even pieces to promote uniform cooking.
  • Season Generously: Don’t skimp on the seasoning in the flour mixture. This base layer of flavor is crucial.
  • Perfect the Breading: Dredge the chicken in flour, dip in beaten eggs, and then coat in breadcrumbs. Press the crumbs onto the chicken to ensure they stick well.
  • Rest Before Cooking: Let the breaded chicken sit for 10–15 minutes before cooking. This helps the coating adhere better and prevents it from falling off during cooking.
  • Optimal Cooking Temperature: Whether frying or air frying, make sure your oil or air fryer is at the right temperature—typically around 375°F (190°C) for frying and slightly lower for air frying.
  • Don’t Overcrowd: Cook in batches to avoid overcrowding, which can lower the temperature and lead to soggy wings.
  • Toss with Sauce Immediately: Toss the wings in sauce as soon as they’re cooked to maximize flavor absorption and retain crispiness

Air Fryer Adaptation: Crispy, Boneless Wings

For those who prefer a healthier cooking method without sacrificing the crispy texture we all love, this recipe is perfectly adaptable to an air fryer. Utilizing the air fryer not only reduces the amount of oil needed but also ensures each wing is evenly cooked and deliciously golden. It’s a convenient and quick way to enjoy your homemade boneless wings with less guilt and more flavor.

 Chicken Bites

Why Boneless Wings Reign Supreme

Boneless chicken wings offer several advantages that make them a preferred choice for many:

  • Convenience: Easy to eat without dealing with bones, perfect for social gatherings.
  • Versatility: They serve as a blank canvas for a wide array of flavors, from classic Buffalo to sweet and tangy barbecue.
  • Nutritional Value: Often made from chicken breast, boneless wings are a good source of lean protein.

Understanding the nutritional benefits of chicken reveals why incorporating poultry into your diet can be both delicious and beneficial.

What goes best with boneless chicken wings?

Choosing the right accompaniments can turn your boneless wings into a hearty meal. Here are some serving suggestions:

  • Classic Sides: Celery sticks, carrot sticks, and blue cheese or ranch dressing are classic pairings that offer a crunchy, creamy contrast to the spicy wings.
  • Healthy Options: Serve with a side salad or roasted vegetables to add a nutritious element to your meal.
  • Starchy Complements: Consider garlic bread, sweet potato fries, or a simple coleslaw for a more filling option.
  • Dipping Sauces: Offer a variety of dipping sauces to cater to different tastes, including spicy, sweet, and savory options.

To make the perfect boneless wing at home, start with chicken breast cut into pieces. Marinate in your favorite flavors, coat in flour, egg, and breadcrumbs, then bake, fry, or air-fry until crispy. Toss in sauce and enjoy your homemade, delicious boneless wings.

Deboning a chicken wing typically takes about 5 to 10 minutes per wing, depending on your skill level and experience. For beginners, it might be on the longer side as you get used to the technique and anatomy of the wing. With practice, you can become more efficient and reduce the amount of time needed.

For more delicious recipes and culinary inspiration, don’t forget to browse our complete recipe collection.

Health Benefits

Boneless chicken wings, especially when made from chicken breast, offer a variety of health benefits that make them a worthwhile addition to any diet.

  • High Protein Content: Chicken is a great source of lean protein, which is crucial for muscle repair and growth. Protein also helps with feeling fuller longer, which can aid in weight management.
  • Lower Fat Than Traditional Wings: Using breast meat instead of wing meat, which includes skin, often results in a lower fat content, particularly if you choose air frying over deep frying.
  • Rich in Vitamins and Minerals: Chicken is a good source of B vitamins, particularly niacin and B6, which are important for energy production and cardiovascular health. It also contains phosphorus, essential for strong bones and teeth, and selenium, known for its antioxidant properties.
  • Customizable for Healthier Options: By choosing to air fry, use gluten-free coatings, or incorporate whole-grain breading, you can increase the nutritional value of boneless wings and make them suitable for various dietary needs.

Enter the delightful world of boneless chicken wings. These wings are perfect for game-day parties, family dinners, and snacks. Try various coatings, spices, and dips to find your ideal wing combination. To promote these adaptable, tasty snacks, share your recipes with friends and family or on social media. Start cooking now to achieve the ideal flavor-health balance in your own kitchen!

Print

Boneless Chicken Wings: Recipes & Tips

Discover the perfect boneless chicken wings with this guide! Includes recipes, health tips, and serving ideas for delicious, easy-to-make wings.

  • Author: Gabriela cardenas
  • Prep Time: 15 minutes
  • Cook Time: 20 minutes
  • Total Time: 35 minutes
  • Yield: 4
  • Category: Appetizer, Main Course
  • Method: Frying, Air Frying, Baking
  • Cuisine: American
  • Diet: Gluten Free

Ingredients

  • 2 lbs boneless, skinless chicken breast, cut into pieces
  • 1 cup all-purpose flour
  • 2 large eggs, beaten
  • 2 cups breadcrumbs or panko
  • 1 teaspoon salt
  • 1/2 teaspoon pepper
  • 1 tablespoon poultry seasoning
  • Your choice of sauce (e.g., Buffalo, BBQ, honey mustard)
  • Oil for frying or spraying (if air frying)

Instructions

  1. Prepare three bowls for the breading process: one with flour mixed with salt and pepper, one with beaten eggs, and one with breadcrumbs mixed with poultry seasoning.
  2. Dip each piece of chicken first in flour, then egg, and finally breadcrumbs, ensuring each piece is well coated.
  3. If deep frying, heat oil to 375°F and fry the wings until golden and crispy, about 4-5 minutes. If air frying, spray the wings lightly with oil and cook at 375°F for about 10 minutes, turning halfway through.
  4. Toss the cooked wings in your chosen sauce and serve immediately.

Notes

  • Ensure the chicken pieces are dry before starting the breading process for better adhesion.
  • For a healthier option, bake the wings at 400°F for 20 minutes instead of frying.
  • Let the breaded chicken sit for 5-10 minutes before cooking to help the coating stick during the cooking process.

Keywords: boneless wings, chicken breast wings, breaded chicken wings, air fryer chicken wings

Did you make this recipe?

Share a photo and tag us — we can't wait to see what you've made!

Baked Scrambled Eggs

Baked Scrambled Eggs


Baked scrambled eggs are a tasty morning variation. This approach yields light, fluffy eggs every time and simplifies cooking by removing stirring. Simple and versatile, this recipe is perfect for family breakfasts or serving a large.

What makes good baked scrambled eggs?

Egg-to-Milk Ratio: Crucial for fluffiness; typically 1/4 cup of milk for every four eggs.

Seasoning: Essential ingredients include salt and pepper; adjust according to taste.

Oven Temperature: Ideal at around 350°F to ensure even cooking and prevent eggs from becoming rubbery.

FAQs

Can you make baked scrambled eggs with egg whites only?

Absolutely! Egg white-only baked scrambled eggs are lower in cholesterol. Try adding skim milk or a dairy-free milk replacement to egg whites to keep them fluffy and moist. Because egg whites are blander than whole eggs, you may wish to season them extra. Bake them in a buttered dish.

How can you keep baked scrambled eggs moist?

Use 1/4 cup of milk or cream per four eggs to keep baked scrambled eggs moist. Remove eggs from the oven while they’re still slightly soft to avoid overcooking. Covering the dish with aluminium foil while baking helps maintain moisture. A little butter or oil might help prevent eggs from drying.

A Summary of the Ingredients

Baked scrambling eggs are exquisite in their simplicity. The essential components comprise:

The centrepiece of the dish is the egg.
For a creamy texture, milk or cream may be used.
Pepper and salt are used for fundamental seasoning.
Preferably, one may apply butter or oil to coat the baking dish.

Chef’s Tips for Perfect Baked Scrambled Eggs

Choose the right pan

The choice of baking dish has a big impact on scrambled eggs. A ceramic or glass baking dish evenly distributes heat, preventing the sides from cooking faster than the centre. If possible, avoid metal pans, which heat eggs too quickly and unevenly.

Stir Mid-Baking

To ensure that the eggs cook uniformly, give them a gentle stir halfway through the baking process. This action helps redistribute the eggs that may have settled or begun to cook faster at the edges or bottom of the pan.

Incorporate Cream

For an extra luxurious texture, substitute half of your milk quantity with heavy cream. This not only adds richness but also contributes to the creamy, soft consistency of your scrambled eggs, making them more indulgent.

Season Creatively

While salt and pepper are staples, don’t shy away from incorporating other seasonings to enhance the flavour. Consider adding a pinch of paprika for warmth, some dried herbs like tarragon or chives for freshness, or a dash of curry powder for a unique twist.

Use fresh eggs

The quality of your eggs can make a big difference in your dish. Fresh eggs not only have better flavour but also tend to have firmer whites and yolks, which helps maintain a good structure when baked.

Finish with fresh toppings

Finishing your eggs with fresh toppings while they’re still hot from the oven can add layers of texture and flavour. A sprinkle of fresh herbs, a handful of arugula, or some diced avocados can enhance the dish with minimal effort.

Keeping Baked Scrambled Eggs Moist

Keeping baked scrambled eggs wet requires preparation and cooking. These techniques will keep your eggs wet and fluffy:

Use the Right Ratio: Adding the correct amount of liquid is crucial. For every four eggs, use about 1/4 cup of milk or cream. This helps to create a creamy texture that retains moisture during baking.

Don’t overcook: Eggs continue to cook even after they are removed from the oven due to residual heat. Remove the eggs from the oven just before they are fully set to prevent them from becoming dry. They should still be slightly wet in the middle.

Cover While Baking: For at least part of the cooking time, covering the dish with foil can help trap steam and moisture inside, preventing the eggs from drying out.

Add fat: Incorporate a small amount of butter or oil into the eggs before baking. Fat helps to lock in moisture and adds richness to the flavour.

Low and Slow: Consider baking at a lower temperature, such as 325°F, and allow a longer cooking time. This gentler approach helps to cook the eggs evenly without expelling all the moisture.

Customising Your Baked Scrambled Eggs

Baked scrambled eggs are incredibly adaptable. Here are some popular additions to customise your dish:

Vegetables: spinach, tomatoes, and onions add flavour and colour.

Cheeses: cheddar, mozzarella, or feta can enhance the texture and taste.

Meats: Ham, bacon, or sausage for a heartier meal.

Herbs: chives, parsley, or dill for a fresh touch.

For additional meat preparation ideas, check out our guide on Hawaiian Chicken in a Crock Pot.

What to Serve with Baked Scrambled Eggs

Complement your baked scrambled eggs with:

Toast: Whole grain, sourdough, or rye.

Breakfast meats: Sausages or bacon.

Fresh salads: A light arugula or spinach salad. Discover various variations on scrambled eggs recipes to pair with your dish.

Are baked scrambled eggs healthy?

Baked scrambled eggs are a healthy breakfast option, especially when prepared with minimal added fats and served with nutritious sides like vegetables or whole grains. Eggs are a great source of high-quality protein, vitamins such as B12, and minerals like selenium. Using ingredients like skim milk or adding vegetables can enhance the nutritional profile, making it a wholesome and satisfying meal. Learn more about the benefits and nutritional information of eggs.


Are you ready to change your breakfast? Bake your scrambled eggs next time! It’s straightforward and offers great taste variations. Share your baked scrambled egg creations online or subscribe to our newsletter for more creative recipes.

Happy cooking!

Print

Baked Scrambled Eggs

Our easy recipe will show you how to prepare airy baked scrambled eggs. Exceptional for breakfast or sizable gatherings.

  • Author: Gabriela cardenas
  • Prep Time: 10 minutes
  • Cook Time: 20 minutes
  • Total Time: 30 minutes
  • Yield: 4
  • Category: Breakfast
  • Method: Baking
  • Cuisine: American
  • Diet: Vegetarian

Ingredients

  • 8 large eggs
  • 1/2 cup whole milk
  • Salt, to taste
  • Black pepper, to taste
  • 1/4 cup shredded cheddar cheese (optional)
  • 1 tablespoon butter, for greasing
  • Fresh chives, chopped (for garnish)

Instructions

  1. Preheat your oven to 350°F (175°C). Grease a medium baking dish with butter.
  2. In a large bowl, whisk together eggs, milk, salt, and pepper until well combined.
  3. Pour the egg mixture into the prepared baking dish. Sprinkle with shredded cheese if using.
  4. Bake in the preheated oven for 15-20 minutes, or until the eggs are set and lightly golden on top.
  5. Garnish with fresh chives before serving.

Notes

  • For extra fluffy eggs, add an additional 1/4 cup of milk.
  • Stir the eggs halfway through baking for an even cook.
  • Incorporate vegetables like spinach or diced bell peppers for a healthier version.

Keywords: baked scrambled eggs Oven-baked eggs, Easy scrambled eggs

Did you make this recipe?

Share a photo and tag us — we can't wait to see what you've made!

4-Ingredient Chicken Salad

4-Ingredient Chicken Salad


Fast and tasty 4-ingredient chicken salad are perfect for busy folks looking for a nutritious supper. Fast lunches, meal preps, and high-protein snack plates are perfect for this chicken dish.

Why choose a 4-ingredient chicken salad?

The beauty of a 4-ingredient recipe lies in its:

Ease and Convenience: Ideal for busy individuals and families.

Flavor Development: Slow cooking melds flavours beautifully, making dishes like chicken and yellow rice incredibly tasty.

Versatility: The crock pot handles many recipes, from soups and stews to casseroles and desserts.

An overhead shot of 4-ingredient chicken salad in a cream bowl.

FAQs

Can I use mayonnaise instead of Greek yogurt?

Yes, though Greek yogurt offers a healthier twist.

Can I add other ingredients?

Absolutely! Add grapes, nuts, or diced apples for extra texture and flavor.

4-ingredient-chicken-salad

Is this chicken salad keto-friendly?

The recipe isn’t strictly keto due to Greek yogurt’s carbs. For a keto version, use full-fat mayo or keto yogurt, check the ranch seasoning’s carbs, or use homemade to stay within carb limits.

Can I use flavored Greek yogurt?

It’s best to use plain Greek yogurt to avoid altering the intended flavor profile of the chicken salad. Flavored yogurts can introduce unwanted sugars and artificial flavors that might not complement the salad’s savory taste.

How can I add more flavor without adding more ingredients?

Experiment with the types of ranch seasoning for different flavor profiles, or add a pinch of smoked paprika or cayenne pepper for a subtle kick. Fresh herbs, like dill or parsley, can enhance the flavor without complicating the ingredient list if you have them on hand.

An overhead shot of 4-ingredient chicken salad in a cream bowl.

The Core Ingredients

Creating this chicken salad requires only 4 simple ingredients, each contributing to the dish’s overall flavor and texture:

Cooked Chicken: Opt for shredded chicken breast or grab a rotisserie chicken for convenience.

Greek yogurt is a healthier alternative to mayonnaise, adding creaminess and a protein boost.

Ranch Seasoning: Provides a zesty flavor that elevates the salad.

Celery or sweet onions add a crunchy texture and freshness to the dish.

Explore our guide on the best seasoning for chicken breast to elevate your salad further.

Health Benefits of Greek Yogurt in Your Chicken Salad

The 4-ingredient chicken salad is not just quick and delicious; it’s also nutritious, thanks to Greek yogurt. This ingredient boosts bone health, muscle mass, and metabolism while reducing appetite. It’s rich in calcium, protein, and probiotics, offering a healthier alternative to mayonnaise. For a deeper dive into Greek yogurt’s benefits, check out 8 health benefits of Greek yogurt on Medical News Today.

Serving and Storage Suggestions

This chicken salad is incredibly versatile. Serve it as a sandwich, on a green salad, or on a snack plate. Store leftovers in an airtight container in the fridge for up to 3–4 days for best freshness.

Conclusion

This 4-ingredient chicken salad is more than just a meal; it’s a quick, healthy, and versatile option that fits perfectly into any diet. Whether you’re a seasoned home cook or a beginner, this recipe promises to deliver on flavor, comfort, and convenience.

Print

4-Ingredient Chicken Salad

easy 4-Ingredient Chicken Salad in just 10 minutes! Perfect for a healthy, delicious lunch or snack. Gluten-free and adaptable for Keto.

  • Author: Gabriela cardenas
  • Prep Time: 10 minutes
  • Cook Time: 0 minutes (assuming chicken is pre-cooked)
  • Total Time: 10 minutes
  • Yield: 4
  • Category: Salad
  • Method: Mixing
  • Cuisine: American

Ingredients

  • 2 cups cooked chicken, shredded (about 1 large chicken breast)
  • 1/2 cup plain Greek yogurt
  • 2 tablespoons ranch seasoning mix
  • 1/2 cup diced celery or sweet onion (based on preference)

Instructions

  1. Prepare the Chicken: If you haven’t already, cook and shred your chicken breast. For convenience, you can also use rotisserie chicken.
  2. Mix Ingredients: In a large bowl, combine the shredded chicken, Greek yogurt, and ranch seasoning. Mix well until the chicken is evenly coated with the yogurt and seasoning.
  3. Add Crunch: Fold in the diced celery or sweet onion into the chicken mixture, ensuring it’s well distributed for crunch in every bite.
  4. Chill (Optional): For best flavor, let the chicken salad chill in the refrigerator for at least 30 minutes before serving. This step is optional but helps the flavors meld together.
  5. Serve: Enjoy your chicken salad on whole-grain bread as a sandwich, atop a bed of greens for a low-carb option, or with crackers for a light snack.

Notes

  • Flavor Variations: Feel free to experiment with different types of ranch seasoning to find your preferred flavor profile. For a spicier kick, a pinch of smoked paprika or cayenne pepper can be added.
  • Serving Suggestions: This chicken salad is versatile. Serve it as a filling for sandwiches, a topping for salads, or a dip with crackers and veggies.
  • Storage: Store any leftovers in an airtight container in the refrigerator for up to 3-4 days. Stir well before serving again.
  • Dietary Adjustments: For a keto-friendly version, substitute Greek yogurt with full-fat mayonnaise or a keto-compliant yogurt, and ensure the ranch seasoning is low in carbs.

Did you make this recipe?

Share a photo and tag us — we can't wait to see what you've made!

Print

4-Ingredient Chicken Salad

  • Author: Gabriela cardenas
  • Prep Time: 10 minutes
  • Cook Time: 0 minutes (using pre-cooked chicken)
  • Total Time: 10 minutes
  • Yield: 4
  • Category: salad
  • Method: Mixing
  • Cuisine: American
  • Diet: Gluten Free

Ingredients

  • 2 cups cooked chicken, shredded
  • 1 cup plain Greek yogurt
  • 2 tablespoons ranch seasoning
  • 1/2 cup celery, finely chopped

Instructions

  1. In a large mixing bowl, combine the shredded chicken and chopped celery.
  2. Add the plain Greek yogurt and ranch seasoning to the bowl.
  3. Mix all the ingredients until well combined and the chicken is evenly coated with the yogurt and seasoning.
  4. Taste and adjust seasoning if necessary. Serve chilled.

Notes

  • For a lighter version, opt for low-fat Greek yogurt.
  • Enhance the flavor with fresh herbs like dill or parsley if desired.
  • Serve on a bed of greens, in a wrap, or as a sandwich for a complete meal.

Keywords: 4-ingredient chicken salad

Did you make this recipe?

Share a photo and tag us — we can’t wait to see what you’ve made!

Sausage ,Corn ,Potato Chowder

Sausage ,Corn ,Potato Chowder


As the leaves turn and the air chills, the quest for warm, comforting meals brings us to a classic favorite: sausage corn potato chowder. This hearty dish combines the robust flavors of sausage, the sweetness of corn, and the earthiness of potatoes into a creamy, satisfying chowder that’s perfect for any chilly evening.

The Essence of Comfort Food

At its core, sausage corn potato chowder is comfort food at its finest. It’s a dish that warms the soul as much as it fills the stomach, making it a staple in many households as the weather cools. The key to its heartwarming effect lies in the simplicity and quality of its ingredients. For a deeper dive into selecting the perfect ingredients for your chowder, explore our guide on choosing the best potatoes for soups and stews, which can make all the difference in your cooking.

Ingredient for Sausage Corn Potato Chowder

FAQs

Can I use frozen corn instead of fresh corn in the chowder?

Yes, you can use frozen corn in place of fresh corn. There’s no need to thaw it before adding it to the chowder; it can go straight into the pot from the freezer, making it a convenient option for this recipe.

What type of sausage is best for this chowder?

For this chowder, you can use any type of pork sausage that you prefer. Mild Italian sausage is a popular choice for its flavor, but you can also use spicy sausage if you enjoy a bit of heat in your chowder.

How can I make a vegetarian version of this chowder?

To make a vegetarian version of this chowder, omit the sausage and use a vegetable broth instead of chicken broth. You can add extra vegetables, such as carrots and celery, to enhance the flavor and texture of the chowder.

Can sausage corn potato chowder be frozen for later use?

Yes, you can freeze sausage corn potato chowder, although the texture of the potatoes and cream might change slightly upon thawing and reheating. It’s best to consume it within 1-2 months for optimal taste. Thaw in the refrigerator overnight and reheat gently on the stove, adding a little extra broth or milk if necessary.

How can I thicken my chowder if it’s too thin?

If your chowder is too thin, you can thicken it by mixing a tablespoon of cornstarch with a little cold water to make a slurry, then stirring it into the chowder and simmering for a few minutes until thickened. Alternatively, you can mash some of the potatoes directly in the pot to naturally thicken the chowder.

Ingredient for Sausage Corn Potato Chowder

Serving and Enjoyment

Enjoy your sausage corn potato chowder steaming hot, elegantly adorned with a sprinkle of freshly chopped herbs, a generous helping of finely grated cheese, and a scattering of crispy bacon bits for an extra layer of luxurious indulgence. Pair this rich and creamy chowder with a slice of warm, crusty bread to soak up every flavorful spoonful, or opt for a light, crisp side salad to add a refreshing contrast to the meal. This combination promises not only to satiate your hunger but also to envelop you in a comforting embrace, making every bite a satisfyingly complete dining experience.

For more inspiration on creating comforting and delicious meals, explore this collection of 49 Cozy Recipes That Feel Like a Hug on Food & Wine, where you’ll find a variety of dishes to warm your heart and delight your palate.


Ingredient for Sausage Corn Potato Chowder 

Variations and Substitutions

Meat Variations: While pork sausage is a classic choice, feel free to experiment with chicken or turkey sausage for a lighter version of this chowder. For a smoky flavor, consider adding diced bacon or ham.

Dairy-Free Options: For those who are lactose intolerant or following a dairy-free diet, replace the cream with coconut milk for a unique twist that adds a hint of sweetness and creaminess to the chowder.

Gluten-Free Guidance: Ensure that the sausage and any broth used are gluten-free to make this dish suitable for those with gluten sensitivities. Thickening the chowder with cornstarch, as mentioned, is already a gluten-free option.

Spice Level Adjustments: Customize the heat level by adding more or less of the spicy sausage, or incorporate chili flakes, cayenne pepper, or diced jalapeños for those who prefer an extra kick.

Vegetable Add-Ins: Enhance the nutritional value and color of the chowder by adding other vegetables such as diced bell peppers, celery,

Ingredient for Sausage Corn Potato Chowder

Ingredient for Sausage Corn Potato Chowder

Conclusion

In the heart of every home kitchen lies the potential to create dishes that do more than just satisfy hunger—they comfort, they heal, and they bring people together. The sausage corn potato chowder is one such recipe, embodying the essence of home-cooked comfort food with its rich flavors and hearty ingredients. Whether you’re gathering around the table on a cold winter night or looking for a dish that feels like a warm hug, this chowder promises to deliver both taste and comfort in every spoonful.

Sausage ,Corn ,Potato Chowder Presentation

Print

Sausage ,Corn ,Potato Chowder

Enjoy this comforting and hearty Sausage Corn Potato Chowder, a perfect dish to warm up with on a chilly day. Its simplicity, combined with the rich flavors of sausage, corn, and potatoes, makes it a beloved comfort food for many.

  • Author: Gabriela cardenas
  • Prep Time: 15 minutes
  • Cook Time: 30 minutes
  • Total Time: 45 minutes
  • Yield: 5
  • Category: Soup
  • Method: Simmering
  • Cuisine: American

Ingredients

  • 1 lb pork sausage (mild or spicy, based on preference)
  • 4 cups chicken broth (or vegetable broth for a vegetarian version)
  • 2 cups corn (fresh, frozen, or canned)
  • 2 large potatoes, peeled and diced
  • 1 onion, diced
  • 2 cloves garlic, minced
  • 1 cup heavy cream (or coconut milk for a dairy-free option)
  • Salt and pepper to taste
  • Optional garnishes: chopped fresh herbs (such as parsley or chives), grated cheese, bacon bits

Instructions

  1. Cook the Sausage: In a large pot over medium heat, cook the sausage, breaking it apart with a spoon, until browned and cooked through. Remove the sausage with a slotted spoon and set aside. Drain excess fat, leaving about 1 tablespoon in the pot for sautéing the vegetables.
  2. Sauté Vegetables: In the same pot, add the diced onion and minced garlic. Sauté until the onion is translucent and fragrant, about 5 minutes.
  3. Add Potatoes and Broth: Add the diced potatoes to the pot, followed by the chicken broth. Bring to a boil, then reduce the heat to simmer. Cook until the potatoes are tender, about 15 minutes.
  4. Return Sausage and Add Corn: Add the cooked sausage and corn to the pot. Simmer for an additional 5 minutes to allow the flavors to meld.
  5. Stir in Cream: Reduce the heat to low and stir in the heavy cream (or coconut milk). Warm through without bringing to a boil to prevent curdling. Season with salt and pepper to taste.
  6. Serve: Ladle the chowder into bowls and garnish with your choice of fresh herbs, grated cheese, and bacon bits. Serve hot with a side of crusty bread or a light salad.

Notes

  • Thickening the Chowder: If you prefer a thicker chowder, you can mash some of the potatoes directly in the pot or use a cornstarch slurry (mix 1 tablespoon of cornstarch with 2 tablespoons of cold water and stir into the chowder).
  • Meat Variations: Feel free to use chicken or turkey sausage for a lighter option, or add bacon or ham for additional smokiness.
  • Vegetable Add-Ins: For extra nutrition and color, consider adding diced bell peppers or celery along with the onions.
  • Storage: Store leftovers in an airtight container in the refrigerator for up to 3 days. Reheat gently on the stove, adding a little extra broth or milk if necessary.

Did you make this recipe?

Share a photo and tag us — we can't wait to see what you've made!

Print

Sausage Corn Potato Chowder

  • Author: Gabriela cardenas
  • Prep Time: 15 minutes
  • Cook Time: 30 minutes
  • Total Time: 45 minutes
  • Yield: 4
  • Category: Soup
  • Method: Simmering
  • Cuisine: American

Ingredients

  • 1 pound pork sausage
  • 1 small yellow onion, diced
  • 1 teaspoon minced garlic
  • 4 medium Russet potatoes, chopped
  • 2 teaspoons salt
  • 1 teaspoon black pepper
  • 1 teaspoon dried basil
  • 3 cups chicken broth
  • 1 cup frozen or fresh corn
  • 1 can creamed corn (or 1 cup homemade)
  • 1 can evaporated milk

Instructions

  1. In a large soup pan or Dutch oven, brown the sausage with the onion. Drain off excess grease.
  2. Add in the garlic and cook for 30 seconds.
  3. Add the potatoes, salt, pepper, basil, and chicken broth. Bring to a boil, then reduce to a simmer. Simmer for 15 minutes or until potatoes are fork-tender.
  4. Stir in the corn, creamed corn, and evaporated milk. Cover and cook until almost boiling – about 7-10 minutes, stirring occasionally.

Notes

  • For a thicker chowder, mash some of the potatoes before adding the corn and milk.
  • Add a sprinkle of cheddar cheese and some crispy bacon bits on top for extra flavor.
  • If you prefer a spicier chowder, consider using spicy sausage or adding a dash of cayenne pepper.

Did you make this recipe?

Share a photo and tag us — we can’t wait to see what you’ve made!

Beef Burrito Bowl

Beef Burrito Bowl


Experience the joy of bringing the vibrant flavors of Mexico right to your table with this ultimate Beef Burrito Bowl recipe. Perfect for those who love a mix of textures and tastes, this dish is not just food; it’s a celebration in a bowl. Ideal for a nutritious weeknight dinner or as a part of your meal prep lineup, our beef burrito bowl is quick to make, customizable, and incredibly delicious.

From the lean, spiced ground beef to the fresh burst of tomatoes and the creamy, zesty cilantro jalapeño sauce, every element of this bowl works in harmony to deliver a satisfying meal. Whether you’re feeding a family or looking for a filling solo meal, this recipe has got you covered.

Beef Burrito Bowl Recipe:

Why You’ll Love This Beef Burrito Bowl recipe

Quick & Easy: Ready in 30 minutes or less, it’s perfect for a fast, filling meal.

Customizable: With endless topping and substitution options, it’s easy to make this bowl your own.

Healthy: Packed with protein and fresh veggies, it’s a meal you can feel good about.

For a similar approach to wholesome meals, don’t miss our Mediterranean Quinoa Power Bowl, a dish that promises both nutrition and flavor.

Recipe Tips and Tricks

Adding a little water or broth can adjust the consistency of your beef sauce.

Customize your toppings based on what you love – there’s no wrong way to top a burrito bowl!

Taste as you go, especially with the spices, to ensure the perfect flavor balance.

FAQs

Can I make this meal healthier?

Yes, serve over chopped romaine instead of rice for a lighter option.

Can I prepare these beef burrito bowls ahead of time?

Absolutely, they make excellent meal prep options.

What rice is best for beef burrito bowls?

For beef burrito bowls recipe , long-grain white rice or basmati rice is often preferred for its fluffy texture. However, brown rice can be used for a whole grain, fiber-rich option.

Can I meal prep beef burrito bowls in advance?

Yes, beef burrito bowls are perfect for meal prepping. Cook the components separately and store them in the fridge. Assemble and reheat when ready to eat for a quick and nutritious meal.

Conclusion

This Beef Burrito Bowl recipe is more than just a meal; it’s a customizable, flavorful journey that’s sure to become a staple in your cooking repertoire. With its combination of hearty protein, fresh veggies, and that irresistible cilantro jalapeño sauce, it’s a bowl that brings the best of Mexican cuisine right to your kitchen.

Print

Beef Burrito Bowl Recipe

  • Author: Gabriela cardenas
  • Prep Time: 15 minutes
  • Cook Time: 15 minutes
  • Total Time: 30 minutes
  • Yield: 4

Ingredients

  • 1 lb ground beef (lean)
  • 1 tablespoon olive oil
  • 1 large onion, diced
  • 2 cloves garlic, minced
  • 1 packet taco seasoning (or homemade blend)
  • 1 cup rice (white, basmati, or brown for a healthier option)
  • 2 cups water (for rice)
  • 1 can black beans, drained and rinsed
  • 1 cup corn kernels (fresh, canned, or frozen)
  • 1 large tomato, diced
  • 1 avocado, sliced
  • 1/2 cup shredded cheese (cheddar or Mexican blend)
  • 1/2 cup cilantro, chopped
  • 1 lime, cut into wedges
  • Salt and pepper to taste
  • For the Cilantro Jalapeño Sauce:
    • 1 cup Greek yogurt or sour cream
    • 1 jalapeño, seeds removed and chopped
    • 1/2 cup packed cilantro leaves
    • Juice of 1 lime
    • Salt to taste

Instructions

  1. Cook the Rice: In a medium saucepan, bring 2 cups of water to a boil. Add rice and a pinch of salt, lower the heat, cover, and simmer until water is absorbed and rice is tender, about 18 minutes for white rice or longer for brown rice. Remove from heat and let it sit, covered, for 5 minutes.

  2. Brown the Beef: While the rice cooks, heat olive oil in a large skillet over medium heat. Add onion and garlic, sautéing until softened. Increase heat to medium-high, add ground beef, breaking it apart with a spoon. Cook until browned. Drain excess fat, then stir in taco seasoning and a splash of water. Simmer for 5 minutes, then remove from heat.

  3. Prepare the Cilantro Jalapeño Sauce: Blend Greek yogurt (or sour cream), jalapeño, cilantro, lime juice, and salt in a blender until smooth. Adjust seasoning to taste.
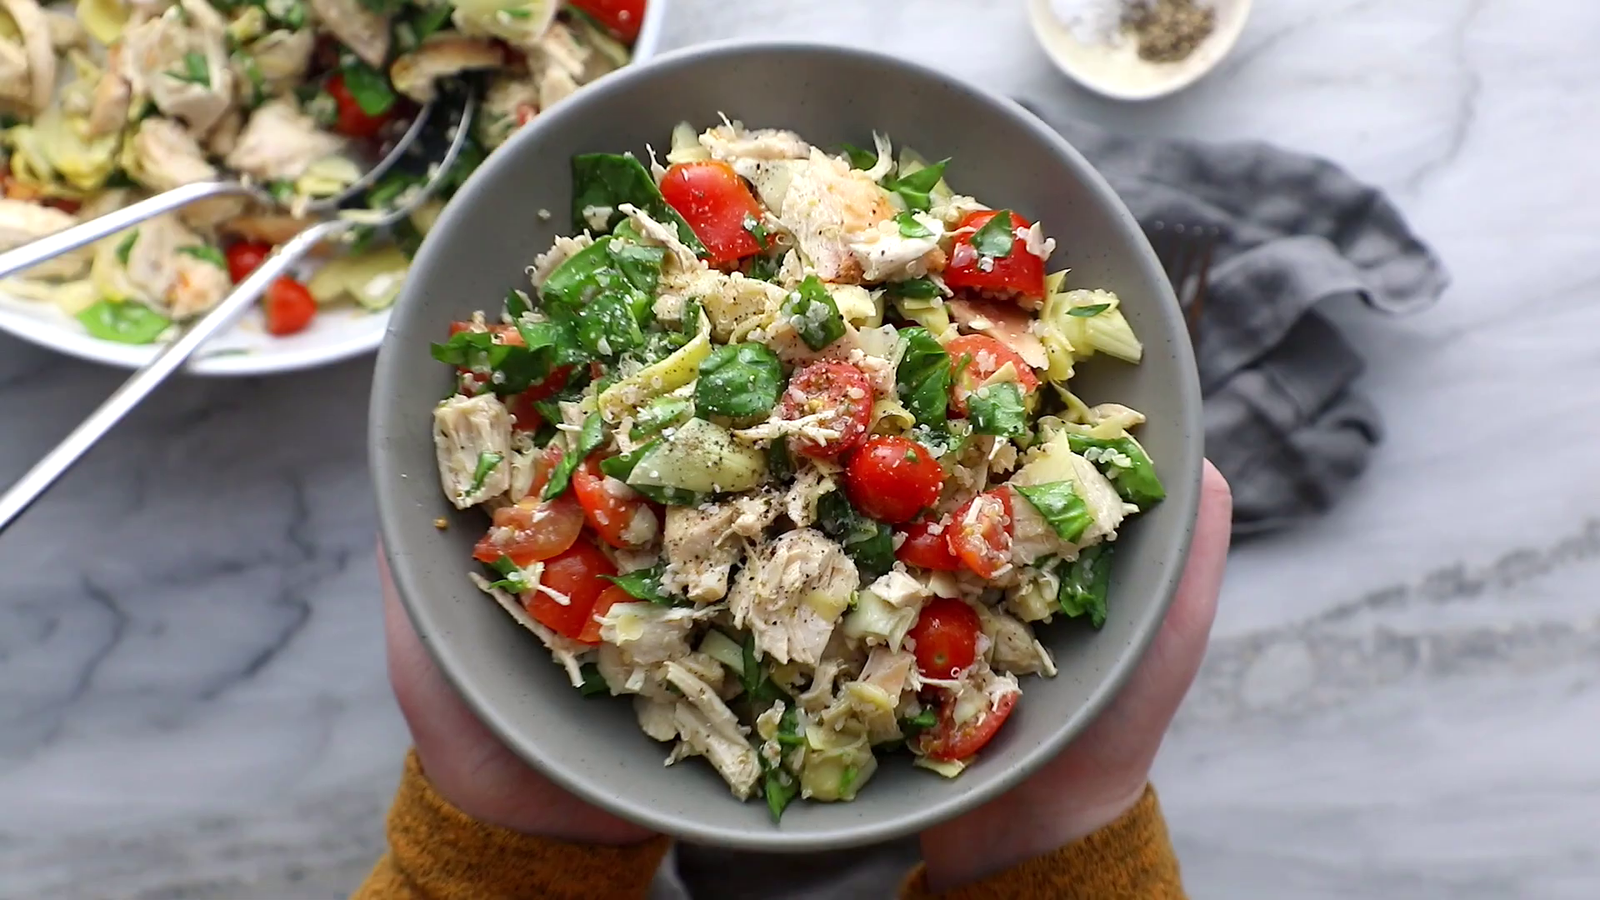
  4. Assemble the Bowls: Divide the cooked rice among four bowls. Top with seasoned beef, black beans, corn, diced tomato, avocado slices, and shredded cheese. Drizzle with cilantro jalapeño sauce and garnish with chopped cilantro and lime wedges.

Notes

  • Customization: Feel free to add or substitute toppings like lettuce, sour cream, salsa, or pickled jalapeños according to your preference.
  • Meal Prep: Store individual components separately in the fridge for up to 4 days. Assemble and reheat for a quick meal.
  • Healthier Option: For a lower-carb version, serve over chopped romaine lettuce instead of rice.

Did you make this recipe?

Share a photo and tag us — we can’t wait to see what you’ve made!

Steak Frites Sauce

Steak Frites Sauce


Steak Frites, a beloved classic that combines the simplicity of grilled steak with the universally adored French fries, is elevated to new heights with the right sauce. The sauce not only complements but enhances the flavors, turning a simple meal into a gourmet experience. In this guide, we delve into the world of Steak Frites Sauce, exploring various types and offering tips for creating the perfect accompaniment to this iconic dish.

Steak Frites Sauce

The secret to an unforgettable Steak Frites lies in its sauce

Here are some popular choices:

Béarnaise Sauce: A classic French sauce, rich and buttery, with a tangy tarragon flavor.

Peppercorn Sauce: A creamy sauce with a spicy kick from crushed peppercorns.

Blue Cheese Sauce: A bold and tangy sauce that pairs perfectly with the umami of steak.

Elevating Steak Frites with Exquisite Sauces

The essence of a classic Steak Frites meal transcends its simple elements when paired with the perfect sauce. The right accompaniment can enrich the dish, making every bite a gourmet indulgence. Our exploration into the world of sauces for Steak Frites reveals an array of flavors designed to complement and enhance this timeless dish.

Creating the perfect sauce for Steak Frites involves more than just following a recipe. It’s about mastering techniques and understanding ingredients. For instance, the Béarnaise Sauce requires gentle heat to emulsify the butter without curdling the eggs. Explore detailed guides and tips on enhancing your culinary skills.

FAQs

Can I prepare the sauce in advance?

Yes, most sauces can be made ahead and gently reheated.

What if my sauce separates?

Slowly whisk in a few tablespoons of warm water to emulsify again.

How can I adjust the sauce’s thickness?

Use a reduction method for thinner sauces or a cornstarch slurry for thicker ones.

Discover the basics of crafting these sauces with Gabriela’s comprehensive recipes collection.

Steak Frites Sauce

The Journey to Sauce Perfection

The right sauce can transform your Steak Frites from a simple dish to a memorable meal. Experiment with different ingredients, respect the cooking process, and don’t be afraid to adjust to your taste. The journey to finding your perfect Steak Frites sauce is one of culinary exploration and personal preference.

Proper Storage and Reheating Methods for Béarnaise Sauce

Béarnaise sauce can be stored, although it is best enjoyed fresh. If you need to store it, here are some tips:

Refrigeration: Place the sauce in an airtight container and keep it in the refrigerator. It should be consumed within one to two days for the best quality.

Reheating: To reheat the sauce, do so gently over a double boiler on low heat, whisking constantly to prevent separation. You can also reheat it in a microwave at a low power setting, in short bursts, stirring frequently.

Freezing: Freezing Béarnaise sauce is not recommended as it can cause the sauce to separate and lose its creamy texture upon thawing.

When storing the sauce, ensure it is cooled down to room temperature before refrigerating to prevent bacterial growth. Always reheat only the amount you plan to use, as repeated reheating can deteriorate the quality of the sauce.

Print

Steak Frites Sauce

  • Author: Gabriela cardenas
  • Prep Time: 10 minutes
  • Cook Time: 20 minutes
  • Total Time: 30 minutes
  • Category: Sauce
  • Method: Stovetop
  • Cuisine: French
  • Diet: Vegetarian

Ingredients

  • 3 tablespoons white wine vinegar
  • 2 tablespoons dry white wine
  • 1 tablespoon minced shallots
  • 1 teaspoon dried tarragon (or 1 tablespoon fresh tarragon)
  • 3 egg yolks
  • 1 stick (1/2 cup) unsalted butter, melted and slightly cooled
  • Salt and pepper to taste
  • A pinch of cayenne pepper (optional)

Instructions

  1. Combine Vinegar Mixture: In a small saucepan, combine the white wine vinegar, white wine, minced shallots, and tarragon. Simmer over medium heat until the liquid is reduced by half. Strain the reduction into a bowl, discarding the solids.

  2. Prepare Egg Yolk Mixture: In a heatproof bowl, whisk the egg yolks until smooth. Gradually whisk in the vinegar reduction.

  3. Double Boiler: Place the bowl over a pot of simmering water (double boiler method), making sure the bottom of the bowl does not touch the water. Whisk the mixture constantly until it thickens and doubles in volume.

  4. Add Butter: Remove the bowl from heat. Slowly drizzle in the melted butter while whisking constantly until the sauce is thickened and smooth. Season with salt, pepper, and a pinch of cayenne pepper if desired.

  5. Serve: Serve immediately with Steak Frites or your preferred dish.

Notes

  • Fresh Tarragon: If available, use fresh tarragon for a more vibrant flavor.
  • Consistency: If the sauce is too thick, whisk in a few teaspoons of warm water to reach the desired consistency.
  • Preventing Curdling: Keep the heat low to prevent the eggs from curdling. If the sauce begins to separate, remove from heat and whisk vigorously.
  • Storage: Béarnaise sauce is best enjoyed fresh. However, if you must store it, keep it in a thermos to maintain warmth or gently reheat over low heat, adding water if necessary.

Did you make this recipe?

Share a photo and tag us — we can’t wait to see what you’ve made!

To enhance your culinary skills and dive deeper into the art of this classic French sauce, explore Serious Eats’ Guide to Béarnaise Sauce.

Lemon Garlic Parmesan Chicken

Lemon Garlic Parmesan Chicken


Lemon Garlic Parmesan Chicken is more than just a dish; it’s a symphony of flavors that brings together the tanginess of lemon, the pungent kick of garlic, and the nutty, salty goodness of Parmesan cheese. This dish has become a beloved staple in many households for its ability to deliver complex flavors while being surprisingly easy to prepare.


Lemon Garlic Parmesan Chicken

Lemon Garlic Parmesan Chicken

The Heart of the Dish

At the core of Lemon Garlic Parmesan Chicken are ingredients that are simple yet powerful in their nutritional and culinary impact. Lemons, known for their health benefits, bring a vibrant zestiness to the dish, cutting through the richness of the Parmesan with their acidity. Garlic, a cornerstone of flavor in countless cuisines, offers not just taste but also numerous health benefits, including improved heart health and immune support.

The Essence of the Ingredients

Lemon: The zesty flavor of lemon not only adds a fresh burst of flavor but also helps in tenderizing the chicken, ensuring it’s juicy and flavorful. Learn more about the health benefits of lemon.

Garlic: Garlic lends a robust flavor that complements the chicken and lemon beautifully, infusing the dish with its unmistakable aroma and taste.

Parmesan Cheese: The Parmesan cheese adds a nutty, salty depth to the dish, creating a perfect balance with the acidity of the lemon.*

Lemon Garlic Parmesan Chicken

FAQs

Can I use boneless chicken thighs instead of chicken breasts for Lemon Garlic Parmesan Chicken?

Absolutely. Boneless chicken thighs can be used as a substitute for chicken breasts in this recipe. They tend to be juicier and more flavorful, but keep in mind that cooking times may vary slightly due to differences in fat content and thickness.

What are the key ingredients for Lemon Garlic Parmesan Chicken?

The key ingredients include:

Chicken breasts or thighs

Fresh lemon juice

Garlic

Parmesan cheese

Butter

Salt and pepper

Additional herbs and spices, such as parsley or Italian seasoning, can be added for extra flavor.

How can I make my Lemon Garlic Parmesan Chicken crispy?

To achieve a crispy exterior, make sure to:

Pat the chicken dry before seasoning.

Use a mixture of butter and oil for frying to get a nice golden crust.

Cook on medium-high heat to start, then reduce to medium to fully cook the chicken without burning it.

Can I make this dish gluten-free?

Yes, this dish can easily be made gluten-free by using gluten-free flour or almond flour for dredging the chicken, or by skipping the flour altogether and focusing on a crispy skin by adjusting the cooking method.

What sides pair well with Lemon Garlic Parmesan Chicken?

This dish pairs beautifully with a variety of sides, including:

Roasted vegetables

Garlic mashed potatoes

Quinoa or rice pilaf

A simple green salad

How can I store and reheat leftovers?

Leftovers can be stored in an airtight container in the refrigerator for up to 3 days. For best results, reheat gently in a skillet over low heat with a splash of water or chicken broth to keep the chicken moist, or in a covered dish in the microwave.

Preparing Your Dish

To embark on this culinary adventure, you’ll need the following key ingredients:

Boneless, skinless chicken breasts or thighs

Freshly squeezed lemon juice

Minced garlic cloves

Grated Parmesan cheese

Olive oil, salt, and pepper for seasoning

Lemon Garlic Parmesan Chicken

Conclusion

Lemon Garlic Parmesan Chicken is more than just a meal; it’s a delightful experience that brings together the best of simple ingredients to create a dish that’s bursting with flavor. Whether you’re looking for a quick weeknight dinner or a special dish to impress guests, this recipe promises satisfaction with every bite.

For more delicious recipes and cooking tips, explore our collection of chicken dishes that are sure to inspire your next culinary creation.

Remember, the key to a great Lemon Garlic Parmesan Chicken lies in the quality of your ingredients and the love you put into preparing it. So, gather your ingredients, and let’s make a dish that’ll be remembered long after the last bite.

Print

Lemon Garlic Parmesan Chicken

  • Author: Gabriela cardenas
  • Prep Time: 15 minutes
  • Cook Time: 25 minutes
  • Total Time: 40 minutes
  • Yield: 4

Ingredients

  • 4 boneless, skinless chicken breasts or thighs
  • Juice of 2 lemons
  • 4 garlic cloves, minced
  • 1/2 cup grated Parmesan cheese
  • 2 tablespoons olive oil
  • Salt and pepper to taste
  • Optional: Fresh parsley or Italian seasoning for garnish

Instructions

  1. Preparation: Begin by preheating your oven to 375°F (190°C) if you choose to bake. Pat the chicken dry with paper towels to ensure proper browning.

  2. Season the Chicken: Season both sides of the chicken with salt and pepper. In a bowl, combine the lemon juice, minced garlic, and a bit of olive oil. Marinate the chicken in this mixture for at least 15 minutes in the refrigerator.

  3. Cook the Chicken: Heat the remaining olive oil in a large skillet over medium-high heat. Add the chicken and cook for 2-3 minutes on each side, until golden brown. If you’re baking, transfer the chicken to a baking dish.

  4. Add Parmesan: Sprinkle the grated Parmesan cheese over the chicken. If cooking on the stove, reduce the heat to medium, cover, and cook until the chicken is cooked through. If baking, place in the oven for about 20 minutes, or until the chicken reaches an internal temperature of 165°F (74°C).

  5. Garnish and Serve: Garnish with fresh parsley or Italian seasoning before serving. Serve hot with your choice of sides.

Notes

  • Crispy Chicken: For a crispy exterior, you can lightly dredge the chicken in flour or almond flour before frying.
  • Gluten-Free Option: Skip the flour dredge for a gluten-free version, or use a gluten-free flour alternative.
  • Sides: Pair with roasted vegetables, garlic mashed potatoes, quinoa, rice pilaf, or a simple green salad for a complete meal.
  • Storing and Reheating: Store leftovers in an airtight container in the fridge for up to 3 days. Reheat gently in a skillet with a splash of water or in the microwave, covered.

Did you make this recipe?

Share a photo and tag us — we can’t wait to see what you’ve made!

This recipe combines the tangy zest of lemon with the rich flavor of garlic and Parmesan, creating a deliciously simple dish perfect for any weeknight dinner.

Crockpot Scalloped Potatoes and Ham

Crockpot Scalloped Potatoes and Ham


Crockpot scalloped potatoes and ham is a dish that epitomizes comfort food. It’s a hearty, creamy, and utterly satisfying meal that combines the simplicity of potatoes and ham with the rich flavors of cheese and a creamy sauce. This dish is not only a favorite among adults but also a hit with kids, making it a perfect family meal for any day of the week.

Convenience and Versatility: The Hallmarks of Crockpot Scalloped Potatoes and Ham

One of the greatest benefits of this classic comfort food is its convenience and adaptability. The use of a crockpot allows for a “set it and forget it” approach, making it ideal for busy schedules. Moreover, this recipe’s versatility caters to various dietary preferences and needs, with options for vegan, gluten-free, and dairy-free adaptations. Not only is it a delightful way to incorporate vegetables and proteins into a meal, but it also offers an excellent opportunity to use up leftovers, making it economically friendly and reducing food waste. Whether you’re looking for a warming dish on a cold evening or a comforting meal to share with loved ones, crockpot scalloped potatoes and ham stands out as a nourishing choice that brings people together.

placing potato In a kitchen with a white marble countertop, a black crockpot is the central focus. A human hand is placing thinly sliced rounds of orange sweet potatoes on top of white potatoes already layered inside the crockpot. The potatoes are arranged in an overlapping pattern, covering the bottom of the crockpot. The hand appears to be in the middle of the layering process, suggesting the preparation of a dish that will be slow-cooked to perfection. The scene gives an impression of home cooking and the preparation of a comforting meal. There is a blue and white checkered cloth partially visible in the background, adding a touch of homely decor to the setting.

FAQs

How to prevent the potatoes from turning brown?

Soak sliced potatoes in cold water for a few minutes before cooking.

Can I prepare this dish ahead of time?

Yes, assemble the ingredients in the crockpot insert and refrigerate overnight. Start cooking when needed.

Tips for making the dish creamier or thicker?

For a creamier texture, add more cheese or a splash of milk. For a thicker sauce, reduce the amount of water or add a tablespoon of flour mixed with the soup.

Why aren’t my scalloped potatoes getting soft?

Potatoes can sometimes remain tough if cooked in something acidic like sour cream. Cooking them with milk or heavy cream should ensure they become nice and soft.

Why do my scalloped potatoes taste bland?

If your scalloped potatoes lack flavor, consider adding more herbs and seasonings. Thyme, garlic powder, diced chives, or extra salt and pepper can enhance the taste significantly.

How do you fix runny scalloped potatoes?

If your sauce is too runny, using milk, consider adding heavy cream or whole milk to create a thicker, more indulgent sauce.


Crockpot Scalloped Potatoes and Ham

Serving and Pairing

When it comes to serving, presentation is key. A sprinkle of fresh parsley or chives can add color and freshness to the dish. As for pairings, scalloped potatoes and ham go well with a simple green salad, steamed vegetables, or crusty bread. For drinks, consider a light white wine, a refreshing beer, or a sparkling water with lemon for a non-alcoholic option

Storage and Reheating

Leftovers, if any, can be stored in the refrigerator for up to three days or frozen for longer storage. Reheat in the microwave or oven, adding a little milk or water to keep the dish moist and creamy.

Step-by-Step Guide to Making Crockpot Scalloped Potatoes and Ham

Preparation is straightforward and begins with layering the sliced potatoes in the crockpot. Then, mix the cheese, ham, and onion in a bowl before adding them to the potatoes. Stir the condensed soup with water, garlic powder, salt, and pepper, and pour it evenly over the potato mixture. For those interested in the different types of potatoes and their uses, All About Potatoes offers a wealth of information. Additionally, for a deeper dive into the culinary uses of ham, Cooking with Ham provides valuable insights.

Crockpot Scalloped Potatoes and Ham

Ingredient Variations:

Experiment with different types of cheese for new flavors.

Use leftover holiday ham or even bacon for a different twist.

Sweet potatoes can be a delicious and nutritious alternative to regular potatoes.

For more creative cooking ideas, consider exploring Easy Reuben Casserole Recipe: Classic Comfort Food, which offers a twist on another beloved comfort dish.

Print

Crockpot Scalloped Potatoes and Ham

  • Author: Gabriela cardenas
  • Category: Main Course
  • Method: Slow Cooking
  • Cuisine: American homes
  • Diet: Gluten Free

Ingredients

  • 3 lbs potatoes, thinly sliced
  • 1 lb cooked ham, diced
  • 1 onion, finely chopped
  • 2 cups shredded cheddar cheese (or a mix of your favorite cheeses)
  • 1 can (10.5 oz) condensed cream of mushroom soup (or cream of chicken for a gluten-free option)
  • 1/2 cup water
  • 1 teaspoon garlic powder
  • Salt and pepper to taste
  • Optional: 1/2 cup milk or heavy cream for a creamier sauce
  • Fresh parsley or chives, for garnish

Instructions

  1. Prepare the Potatoes: Peel and thinly slice the potatoes. To prevent browning, soak them in cold water for a few minutes, then drain.

  2. Layer Ingredients: In the crockpot, create a layer of sliced potatoes. Top with half of the diced ham, half of the chopped onion, and half of the shredded cheese. Repeat the layers with the remaining potatoes, ham, onion, and cheese.

  3. Mix the Sauce: In a bowl, whisk together the condensed soup, water, garlic powder, salt, and pepper. If you prefer a creamier texture, add 1/2 cup of milk or heavy cream to the mixture.

  4. Cook: Pour the sauce evenly over the potato mixture in the crockpot. Cover and cook on low for 7-8 hours or on high for 3-4 hours, until the potatoes are tender.

  5. Serve: Garnish with fresh parsley or chives before serving. Enjoy your crockpot scalloped potatoes and ham with a side of green salad, steamed vegetables, or crusty bread.

Notes

  • Cheese Variations: Experiment with different types of cheese like Gruyère, Parmesan, or a smoked cheese for added flavor.
  • Meat Options: Substitute ham with bacon or use leftover holiday ham for a twist.
  • Vegetable Additions: Sweet potatoes can be used instead of regular potatoes for a nutritious alternative. Feel free to add other vegetables like spinach or mushrooms for extra flavor and nutrition.
  • Thickening the Sauce: If the sauce is too runny after cooking, you can thicken it by stirring in a mixture of cornstarch and water during the last 30 minutes of cooking.

Storage and Reheating

  • Refrigerator: Store leftovers in an airtight container in the refrigerator for up to 3 days.
  • Freezer: Freeze in a freezer-safe container for up to 3 months. Thaw overnight in the refrigerator before reheating.
  • Reheating: Reheat in the microwave or oven. If using the oven, cover with foil and bake at 350°F until heated through. Add a splash of milk or water to maintain moisture.

Did you make this recipe?

Share a photo and tag us — we can’t wait to see what you’ve made!

This dish is a comforting and versatile option for any meal, offering the warmth and satisfaction of a home-cooked dish.

Exit mobile version