Categories
Blog Dinner Recipes

Chicken Quinoa Soup

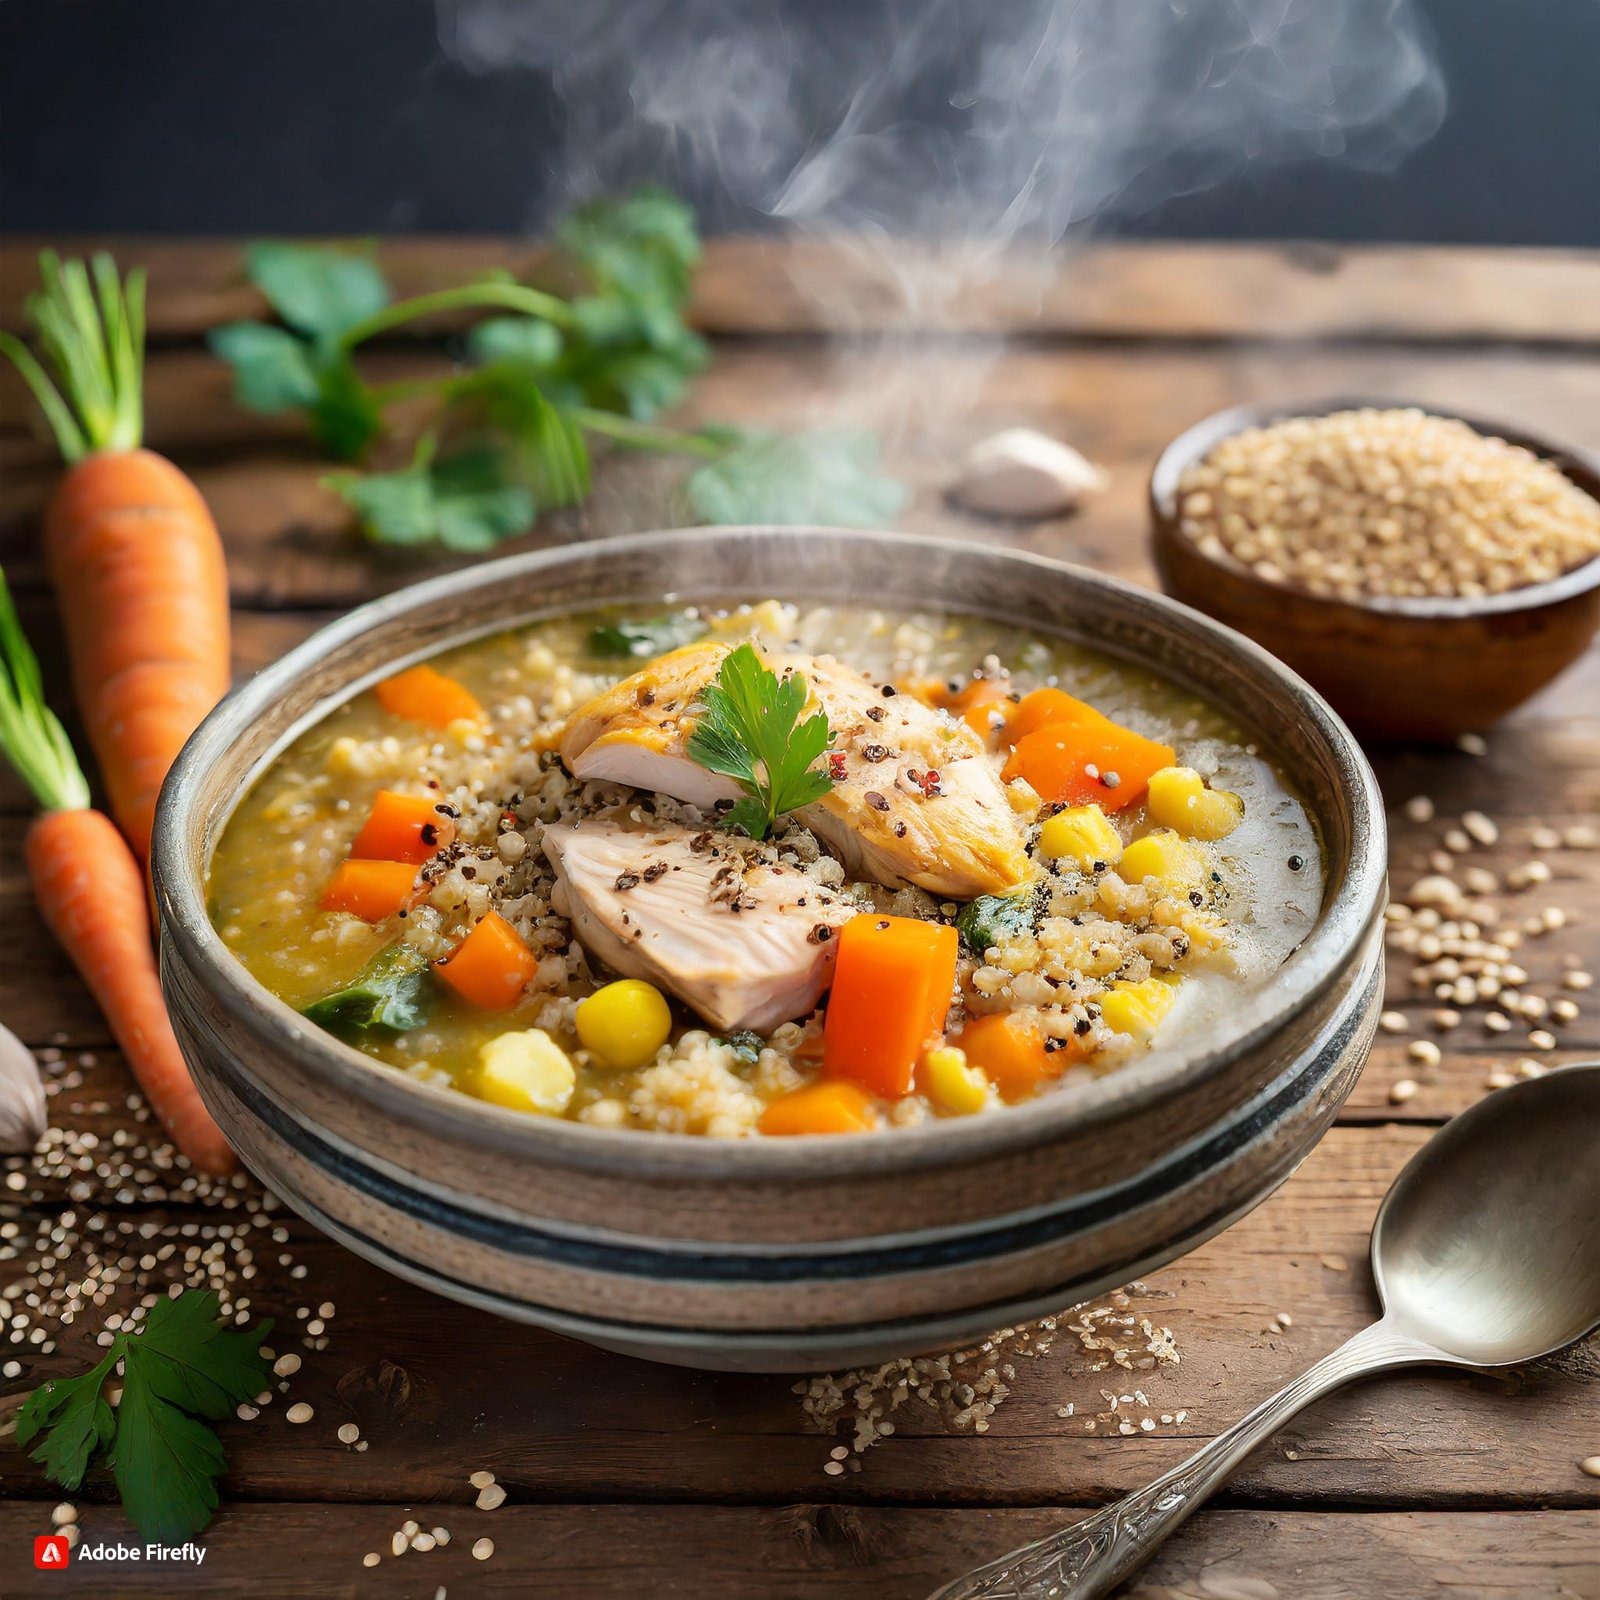
Chicken Quinoa Soup stands as a testament to a meal that perfectly balances delectable flavors with nutritional benefits, promising to delight your palate and nourish your body.

What Makes This Recipe Good?

Its pleasant warmth and harmonious taste mix without compromising health make this soup famous. Why chicken quinoa soup is special:

  • It’s incredibly nutritious, combining lean protein from chicken and high-fiber quinoa.
  • The recipe is versatile, allowing for various vegetables and spices to be added, tailoring it to personal tastes and seasonal ingredients.
  • Chicken Quinoa Soup can be a staple for those looking to maintain a healthy diet without spending hours in the kitchen.

Benefits of Chicken Quinoa Soup

The benefits of chicken quinoa soup extend far beyond its delicious taste. Here are several reasons why this soup is a fantastic addition to your diet:

Nutrient-Rich: Quinoa is known for its high nutrient content, including all nine essential amino acids, making it a complete protein source. This is particularly beneficial for vegetarians and vegans when combined with other protein sources. Chicken, on the other hand, is a great source of lean protein that helps in muscle repair and growth. Discover more about the best seasoning for chicken breast to enhance your soup.

High in Fiber: Quinoa is also high in fiber, which aids in digestion and helps you feel full longer, supporting weight management.

Boosts Immune System: Chicken broth is famous for its immune-boosting properties. The soup can help reduce inflammation and promote a healthy gut.

Versatile and Customizable: This soup can be easily adapted to suit various dietary needs and preferences. It can be made gluten-free, dairy-free, or even vegetarian by substituting chicken with a plant-based protein source.

Overview of Key Ingredients

Chicken Quinoa Soup

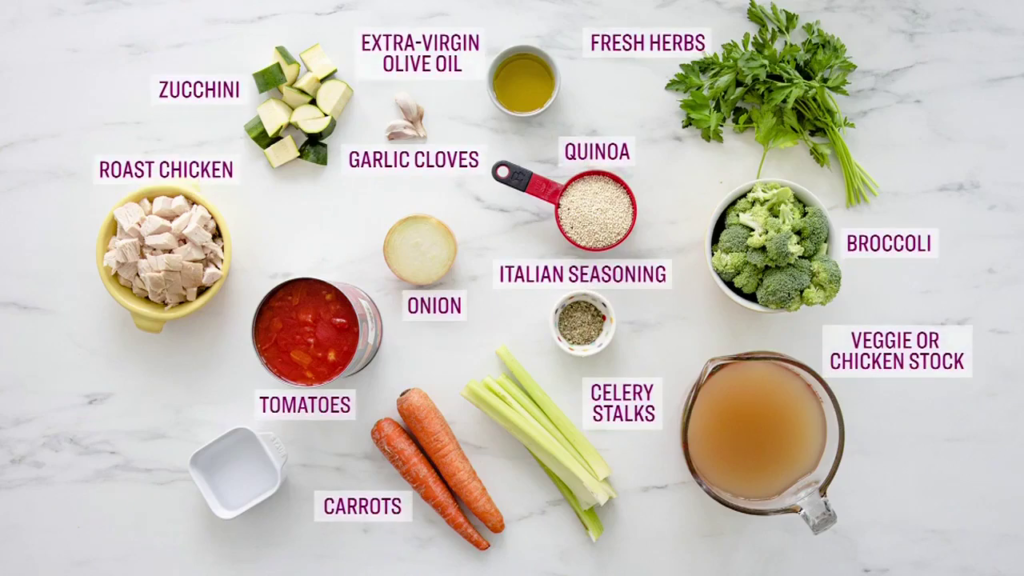
The beauty of chicken quinoa soup lies in its simplicity and the wholesomeness of its ingredients. Here’s a quick overview:

Chicken: Lean and tender pieces of chicken breast or thigh add a rich protein source to the soup.

Quinoa: is a gluten-free grain that is a complete protein, providing all essential amino acids.

Vegetables: A colorful mix of vegetables like carrots, celery, onions, and kale contributes vitamins, minerals, and fiber.

Broth: A base of chicken or vegetable broth brings all the ingredients together, infusing the soup with flavor and nutrients.

Herbs and Spices: Garlic, bay leaves, thyme, and parsley add depth and aroma to the soup, making it not only a treat for the palate but also a feast for the senses.

For a creative twist on traditional recipes, consider exploring our Mediterranean Quinoa Power Bowl, an excellent dish for those who love quinoa.

Chef’s Tips for Perfect Chicken Quinoa Soup

To make the best chicken quinoa soup, follow these easy but useful tips:

  • Start with a Sauté: First, sauté your onions, garlic, and other aromatic vegetables in a bit of oil before adding the broth. This step helps to release their flavors into the soup, creating a richer base.

  • Toast the Quinoa: Before adding it to the soup, toast the quinoa in a dry skillet until it starts to pop. This improves its nutty flavor and can help the soup maintain a better texture.

  • Use Fresh Herbs: At the end of your cooking, incorporate fresh herbs such as thyme, parsley, or cilantro. Fresh herbs add a burst of flavor that dried herbs can’t match.

  • Adjust the cooking time: Cook the quinoa in the soup just until it’s tender. Keep a watch on it after adding it to the pot, as overcooking can make it mushy.

  • Balance the Flavors: Taste as you go and adjust the seasoning with salt, pepper, and acid, such as lemon juice or a splash of white wine vinegar. This helps to balance the flavors and brighten the overall taste of the soup.

  • Add a Touch of Creaminess: For a creamier texture, stir in a little coconut milk or cream during the last few minutes of cooking. This adds a silky richness without overwhelming the other flavors.

  • Garnish Wisely: Garnish with something that will complement the soup’s flavors, such as a sprinkle of grated Parmesan, a swirl of olive oil, or fresh lemon zest.

  • Slow Cook for Depth: If you have time, let the soup simmer on low heat for an hour or so after cooking. This slow cooking method allows all the flavors to meld together beautifully.

FAQs on Chicken Quinoa Soup

 What are the health benefits of chicken quinoa soup?

 Chicken quinoa soup is packed with nutrients beneficial for overall health. Quinoa is a complete protein, containing all nine essential amino acids, making it excellent for muscle growth and repair. It’s also high in fiber, which aids digestion and helps maintain a healthy weight. Chicken is a lean protein source, supporting muscle development and contributing to a feeling of fullness. The vegetables in the soup provide vitamins and minerals, boosting the immune system and promoting overall well-being.

 Can I make chicken quinoa soup in a slow cooker?

Yes, you can easily adapt this recipe for a slow cooker. Add all ingredients except the kale to the slow cooker, and cook on low for 6-7 hours or on high for 3-4 hours. About 30 minutes before serving, add the kale and allow it to wilt. If you’re using chicken breasts, remove them, shred, and return the shredded chicken to the slow cooker before serving.

 How can I make this soup vegan?

 To make vegan chicken quinoa soup, substitute the chicken for a plant-based protein like chickpeas, lentils, or cubed tofu. Use vegetable broth instead of chicken broth. You can also add more vegetables or vegan meat substitutes to enhance the protein content without using animal products.

 What can I serve with chicken quinoa soup?

 Chicken quinoa soup is hearty and can be served as a main dish. For a complete meal, pair it with a side salad, crusty bread for dipping, or a light sandwich. You can also serve it with a sprinkle of grated cheese or a dollop of yogurt or sour cream on top for extra flavor.

Customizing Your Chicken Quinoa Soup

Everyone has their own unique taste preferences, but here are a few ways to make Chicken Quinoa Soup your own:

  • For a vegetarian version, substitute chicken with chickpeas or tofu.
  • Spice It Up: Add chili flakes or cayenne pepper for a spicy kick.
  • Extra Veggies: Include spinach or kale for additional nutrients.

Explore more delicious chicken dishes like this with our Hawaiian Chicken in a Crock Pot.

Cooking a Chicken Quinoa Soup


Ready to try making this wonderful Chicken Quinoa Soup at home? Gather your ingredients and follow these tips for a delightful and healthy meal. Don’t forget to check back for more tasty recipes and healthy eating tips!

Print

Chicken Quinoa Soup

  • Author: Gabriela cardenas
  • Prep Time: 10 minutes
  • Cook Time: 20 minutes
  • Total Time: 30 minutes
  • Yield: 4-6
  • Category: Soup
  • Method: Stovetop
  • Cuisine: International
  • Diet: Gluten Free

Ingredients

  • 1 tablespoon olive oil
  • 1 medium onion, diced
  • 2 garlic cloves, minced
  • 2 medium carrots, peeled and diced
  • 2 celery stalks, diced
  • 1 pound chicken breast, cut into bite-sized pieces (substitute with chickpeas or tofu for a vegan version)
  • 1 cup quinoa, rinsed
  • 6 cups chicken or vegetable broth
  • 1 teaspoon dried thyme
  • 1 bay leaf
  • Salt and pepper to taste
  • 2 cups kale, stems removed and leaves chopped
  • Fresh parsley, chopped for garnish

Instructions

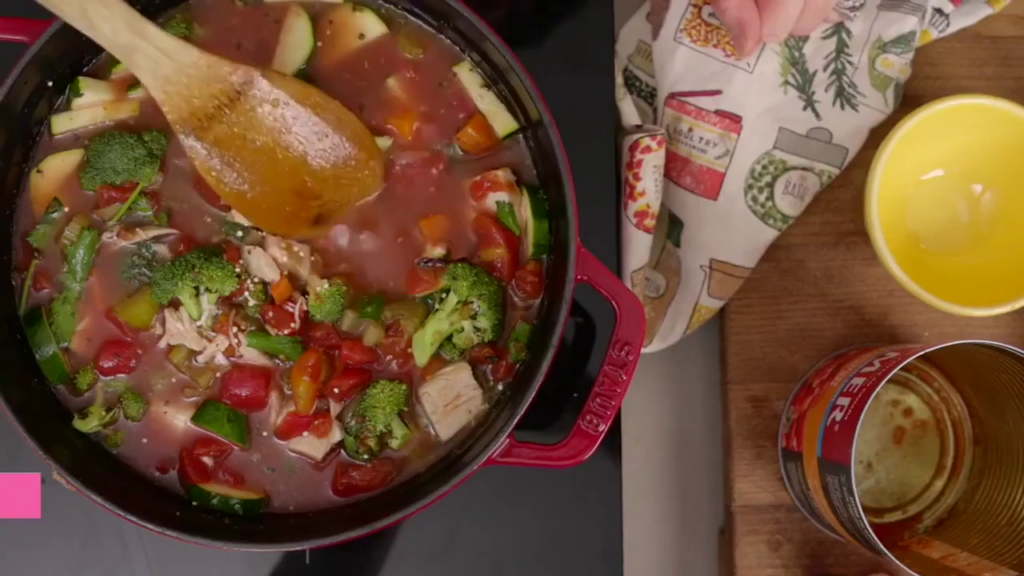
  1. Sauté Vegetables: In a large pot, heat olive oil over medium heat. Add onion, garlic, carrots, and celery. Sauté until the vegetables are softened, about 5 minutes.

  2. Cook Chicken: Add the chicken pieces to the pot and cook until they are no longer pink on the outside, about 5 minutes. (Skip this step for a vegan version and proceed with adding broth and quinoa.)

  3. Add Quinoa and Broth: Stir in the quinoa, chicken or vegetable broth, thyme, and bay leaf. Season with salt and pepper. Bring the mixture to a boil, then reduce heat to low, cover, and simmer for 15 minutes.

  4. Add Kale: Add the chopped kale to the pot and continue to simmer until the kale is wilted and the quinoa is cooked through, about 5 minutes.

  5. Serve: Remove the bay leaf. Taste and adjust seasoning if necessary. Serve hot, garnished with fresh parsley.

Notes

  • Rinse Quinoa: Always rinse quinoa under cold water in a fine-mesh strainer to remove its natural coating, saponin, which can make it taste bitter or soapy.
  • Customization: Feel free to add other vegetables like mushrooms, bell peppers, or spinach to the soup for added nutrition and flavor.
  • Storage: Store leftovers in an airtight container in the refrigerator for up to 3 days or freeze for up to 3 months. Reheat gently on the stove or in the microwave, adding a little broth or water if the soup has thickened.

Serving Suggestions

Serve this hearty soup as a standalone meal or pair it with a crusty piece of bread for dipping. For a complete meal, accompany it with a simple green salad dressed with olive oil and lemon juice.

Did you make this recipe?

Share a photo and tag us — we can’t wait to see what you’ve made!

Categories
Dinner Lunch Recipes

Easy Homemade Reuben Casserole

A tasty take on the Reuben sandwich, the Reuben casserole delivers savory tastes and pleasant textures to your dinner table. This casserole recipe makes corned beef, Swiss cheese, sauerkraut, and rye bread a delicious baked meal for parties or a night in.

What makes a Reuben casserole good?

The appeal of the Reuben casserole lies in its perfect harmony of ingredients. Each layer of the casserole offers a unique taste and texture, creating a complex flavor profile that’s deeply satisfying.

  • Corned beef is rich and savory, providing the foundational flavor.
  • Sauerkraut adds a tangy contrast, enhancing the meat’s robustness.
  • Swiss cheese melts into a creamy layer, binding all the ingredients together.
  • Rye bread crumbs: Offer a crunchy topping, introducing a delightful textural play.

Visit our roaster corned beef guide for selection and cooking tips.

Origins of Reuben Casserole

The reuben sandwich, which inspired this casserole, is a classic American dish. Its origins are debated, although experts think it began in the early 20th century US deli culture. See the Reuben Sandwich history for more.

FAQs

Can I use a different kind of bread besides pumpernickel for a Reuben casserole?

Yes, cubed-up rye bread is also commonly used and provides a classic flavor that complements the other ingredients well.

What are the best layers to use in a Reuben casserole?

Traditional layers for a Reuben casserole include a base of rye bread or pumpernickel cubes, followed by layers of corned beef, sauerkraut, and Swiss cheese, topped off with a drizzle of Russian or Thousand Island dressing.

How long should I bake a Reuben casserole?

Typically, a Reuben casserole should be baked covered at 400 degrees F for about 20 minutes, then uncovered after adding a layer of cheese, and baked for an additional 10 minutes until the cheese is melted and bubbly.

Overview of Ingredients for Reuben Casserole

In order to make a Reuben dish, you need to use basic items that taste like the traditional Reuben burger. Here’s a quick rundown of the most important parts:

  • Rye or Pumpernickel Bread: These breads are cubed and form the base layer of the casserole, providing a sturdy foundation that absorbs the flavors of the toppings.
  • Corned Beef: Thinly sliced or chopped, this is the main protein component, adding a savory, meaty element that is central to the dish.
  • Sauerkraut: This fermented cabbage adds a tangy flavor that contrasts well with the rich meat.
  • Swiss Cheese: Typically shredded, it melts into a creamy layer that binds all the ingredients together.
  • Russian or Thousand Island Dressing: Drizzled over the top or mixed in with other layers, this dressing adds a creamy, tangy finish that enhances the overall flavor of the casserole.
  • Caraway Seeds (optional): These can be sprinkled on top for added flavor, echoing the traditional rye bread seasoning.


Chef’s Tips for Perfect Reuben Casserole

Perfecting a Reuben dish requires more than stacking ingredients. How to improve your casserole using chef-approved tips:

Optimal Ingredient Prep:

Trim the excess fat from the corned beef and slice it against the grain to make it tender and easy to eat once baked into the casserole.

To keep the casserole from getting soggy, thoroughly drain and press the sauerkraut to remove excess liquid.

Cheese Choices:

While Swiss cheese is traditional, feel free to experiment with other types, like Gruyère for a nuttier flavor or a mix of Swiss and mozzarella for extra creaminess.

Dressing Application:

Spread the Russian or Thousand Island dressing evenly over the sauerkraut layer to ensure every bite is flavorful. For a creamier, milder flavor profile, try mixing the dressing with a little sour cream or mayonnaise.

Baking Tips:

Preheat your oven thoroughly before baking to ensure a consistent temperature, which helps the casserole cook evenly.

If the top starts to brown too quickly, cover it with aluminum foil during the last few minutes of baking to prevent burning.

Serving Suggestions:

Let the casserole sit for about 5–10 minutes after baking. This resting period allows it to set up, making it easier to cut and serve neat portions.

Garnish with fresh chopped parsley or chives for a pop of color and a fresh flavor contrast.

Flavor Enhancers:

Add a layer of caramelized onions beneath the corned beef for a touch of sweetness that complements the tangy sauerkraut.

Before baking, sprinkle caraway seeds over the topping to add an authentic rye bread flavor.

These ideas might make your Reuben casserole taste and feel like a gourmet dinner that’s warm and delicious.

Customizing Reuben Casserole

Casseroles are versatile and suit all tastes. How to customize your Reuben casserole:

  • Vegetarian Version: Replace corned beef with smoked mushrooms or seitan for a meat-free alternative.
  • Extra Creaminess: Incorporate a layer of cream cheese or béchamel sauce.
  • Spice it Up: Add jalapeños or pepper flakes for a kick of heat.

What to Serve with Reuben Casserole

Pairing the right sides can enhance the Reuben casserole experience. Consider these options:

  • To balance the casserole’s richness, a light salad is recommended.
  • Pickles or olives: For an extra tang.
  • Dark ale, or stout, complements the deep flavors of the casserole perfectly.
  • Light salad: To balance the richness of the casserole.
  • Pickles or olives: For an extra tang.
  • Dark ale or stout: Complements the deep flavors of the casserole perfectly.

Health Benefits of Reuben Casserole

A Reuben dish is loved for its hearty tastes and warming qualities, but it also has some ingredients that are good for you in different ways. Here’s a more in-depth look at the health benefits:

  • Corned Beef: This main ingredient is a good source of protein, essential for building and repairing tissues. It also provides important vitamins such as vitamin B12, which is crucial for brain health and maintaining proper nerve function, and iron, which is vital for forming red blood cells and transporting oxygen throughout the body.

  • Sauerkraut: Not just a tangy topping, sauerkraut is fermented cabbage that offers a wealth of health benefits. It is rich in dietary fiber, which aids in digestion and helps maintain a healthy gut microbiota. Moreover, sauerkraut contains abundant amounts of vitamins C and K, as well as minerals like iron and manganese. Its fermentation process also produces probiotics, beneficial bacteria that support gut health and enhance immune function.

  • Swiss Cheese: This cheese is not only delicious, but it is also healthy. It’s a great source of calcium, crucial for strong bones and teeth, and contains phosphorus, which helps in bone formation and maintains the body’s energy production. Swiss cheese also provides protein and essential fats that are vital for cellular structure and function.

  • Whole Grain Rye Bread: Choosing whole grain rye as the base for the casserole adds important nutrients such as fiber, which promotes digestive health and can help manage cholesterol levels. Studies also link whole grains to a lower risk of several diseases, such as heart disease, diabetes, and certain types of cancer.

  • When used in moderation, Russian or Thousand Island dressing can enhance the intake of certain micronutrients. For example, some dressings contain vinegar or lemon juice, which can improve iron absorption from other foods.


Ready to experience Reuben casserole comfort? Gather your ingredients, preheat your oven, and get ready for a culinary adventure that will satisfy your taste buds and warm your heart. Show off your Reuben casseroles.

Happy cooking!

Print

Easy Homemade Reuben Casserole

Discover how to make the perfect Reuben Casserole with this easy recipe. Ideal comfort food for family dinners!

  • Author: Gabriela cardenas
  • Prep Time: 20 minutes
  • Cook Time: 30 minutes
  • Total Time: 50 minutes
  • Yield: 4-6
  • Category: Casseroles
  • Method: Baking
  • Cuisine: American
  • Diet: Gluten Free

Ingredients

  • 1012 slices of rye or pumpernickel bread, cubed
  • 1 pound of sauerkraut, drained and squeezed dry
  • pounds of corned beef, thinly sliced
  • 8 ounces of Swiss cheese, shredded
  • 1 cup of Russian or Thousand Island dressing
  • Optional: Caraway seeds for added flavor

Instructions

  1. Preheat your oven to 400 degrees F (200 degrees C).
  2. Layer the bottom of a greased 9×13-inch baking dish with cubed bread.
  3. Spread sauerkraut evenly over the bread, followed by layers of corned beef.
  4. Evenly pour the dressing over the top.
  5. Sprinkle shredded Swiss cheese over everything.
  6. Cover with aluminum foil and bake in the preheated oven for 20 minutes.
  7. Remove the foil and bake for an additional 10 minutes or until the cheese is melted and bubbly.
  8. Allow the casserole to cool slightly before serving.

Notes

  • Toasting the bread cubes lightly before assembling can prevent the base from becoming too soggy.
  • Ensure the sauerkraut is well-drained to avoid excess moisture in the casserole.
  • Experiment with adding caraway seeds to the bread layer for an authentic rye flavor.

Keywords: Easy Homemade Reuben Casserole, corned beef casserole, sauerkraut bake, rye bread casserole

Did you make this recipe?

Share a photo and tag us — we can't wait to see what you've made!

Print

Easy Reuben Casserole Recipe: Classic Comfort Food

  • Author: Gabriela cardenas
  • Prep Time: 15 minutes
  • Cook Time: 25 minutes
  • Total Time: 40 minutes
  • Category: Baking
  • Method: Main Course
  • Cuisine: American

Ingredients

  • 4 cups cubed rye bread (use gluten-free bread for a gluten-free version)
  • 1 pound thinly sliced corned beef, chopped (substitute with a plant-based meat alternative for a vegetarian version)
  • 1 (14 oz) can sauerkraut, drained and squeezed dry
  • 2 cups shredded Swiss cheese (use dairy-free cheese for a dairy-free version)
  • 1 cup Russian or Thousand Island dressing

Instructions

  1. Preheat the Oven: Preheat your oven to 350°F (175°C). Lightly grease a 9×13 inch baking dish.
  2. Layer the Casserole: Begin by spreading the cubed rye bread evenly at the bottom of the baking dish. Add a layer of chopped corned beef over the bread. Spread the drained sauerkraut evenly on top of the corned beef. Drizzle the dressing over the sauerkraut, and finally, sprinkle the shredded Swiss cheese evenly over the top.
  3. Bake: Place the casserole in the preheated oven and bake for 20-25 minutes, or until the cheese is melted and bubbly.
  4. Serve: Allow the casserole to cool for a few minutes before serving. This dish pairs well with a light salad or steamed vegetables for a balanced meal.

Notes

  • Draining Sauerkraut: To ensure your casserole isn’t soggy, thoroughly drain and squeeze the sauerkraut to remove as much liquid as possible.
  • Even Layers: For the best flavor distribution, make sure to layer the ingredients evenly.
  • Vegetarian Adaptation: For a vegetarian version, substitute the corned beef with a plant-based meat alternative. Be sure to check the dressing is vegetarian as well.
  • Gluten-Free Adaptation: Use gluten-free rye bread or another suitable gluten-free bread to make this dish gluten-free. Also, verify that the dressing and meat substitute (if using) are gluten-free.
  • Storage: Leftover casserole can be stored in an airtight container in the refrigerator for up to 3 days. Reheat in the oven or microwave until warmed through.

Did you make this recipe?

Share a photo and tag us — we can’t wait to see what you’ve made!

Categories
Dinner Lunch Recipes

Corned Beef in a Roaster

Corned Beef in a Roaster, seasoned with peppercorns, bay leaf, and cured with large salt grains, transforms from a traditional preservation method into a celebrated culinary tradition. This savory dish, known for its distinctive flavor profile, has become a beloved staple across various cultures, offering a taste experience filled with character and depth.

Cooking Corned Beef: The Roaster Oven Method

Though corned beef can be cooked in several ways, using a roaster oven is ideal. This method is straightforward and guarantees tender, flavorful corned beef by providing consistent, gentle heat.

Corned Beef in a Roaster: Exploring the Rich Tapestry of American Cuisine

Irish-American Roots: Despite its strong association with Ireland, corned beef as celebrated in the U.S., especially on St. Patrick’s Day, is largely an Irish-American innovation.

Symbol of Cultural Melting Pot: Corned beef represents the rich cultural tapestry of America, showcasing the contributions of immigrants to the country’s culinary heritage.

Versatile Comfort Food: Once a feast-day specialty, corned beef has become a year-round favorite in the U.S., enjoyed in sandwiches, hashes, and more, reflecting its status as a beloved comfort food.

Adaptability and Appeal: The enduring popularity of corned beef

FAQs About Corned Beef in a Roaster

Should I Rinse My Corned Beef Prior To Cooking?

Yes, it’s recommended to rinse corned beef before cooking to remove excess salt from the curing process. Skipping this step could result in a very salty dish.

What Goes Into Corned Beef Brine?

A traditional corned beef brine includes heavily salted water and spices like peppercorns, coriander seed, allspice, mustard seed, and cloves. This process is crucial for flavoring the meat.

What Is the Best Way To Cook Corned Beef?

Corned beef can be cooked in various ways, including in a Crock Pot, smoker, oven, or on the stovetop. Regardless of the method, cooking it low and slow is essential for tender results.

How To Use Corned Beef Leftovers?

Leftover corned beef can be transformed into various delicious dishes, such as hearty Reuben soup, avocado Reuben bites, classic Reuben sandwiches, mini Reuben toasts, or Reuben bread stuffed with corned beef.

Mistakes To Avoid When Cooking Corned Beef:

Not rinsing the corned beef, which can make it overly salty.

Not adding enough water to the pot, which can result in uneven cooking.

Cooking at too high a temperature or not long enough, both of which can lead to tough meat.

Not slicing the beef against the grain, which can make it chewy.

Selecting the Right Corned Beef Cut

When it comes to corned beef, the cut of meat is crucial. There are primarily two types:

Flat Cut: Leaner and more uniform in shape, ideal for even cooking.

Point Cut: More marbled with fat, offering richer flavor.

When purchasing corned beef, consider factors like the size of your roaster and the number of people you’re serving. For more on selecting the right cut, visit Livestrong’s Roaster Oven Tips.

Key Ingredients for Corned Beef in a Roaster

Creating a delicious corned beef dish starts with selecting the right ingredients. Here’s a detailed overview of what you’ll need to bring this savory meal to life:

Corned Beef: Choose a high-quality corned beef brisket. Look for a cut that’s well-marbled with fat for flavor and tenderness. The brisket typically comes pre-packaged with a spice packet for seasoning.

Salt: Large grains of salt, or “corns,” are essential for the curing process that gives corned beef its name and distinctive taste.

Spices: The spice packet included with the corned beef often contains peppercorns, bay leaves, mustard seeds, and coriander. These spices are key to achieving the traditional corned beef flavor.

Vegetables for Cooking: Adding aromatic vegetables like onions, carrots, and celery to the cooking liquid infuses the meat with additional flavors.

Potatoes: Small to medium-sized potatoes, such as baby potatoes or fingerlings, are ideal for serving alongside corned beef. They can be boiled or roasted.

Cabbage: A classic accompaniment to corned beef, cabbage can be steamed, boiled, or sautéed. Choose a fresh, firm head of cabbage for the best texture and flavor.

Carrots: Carrots add sweetness and color to the dish. Use whole baby carrots or slice larger carrots into thick pieces for even cooking.

Glaze Ingredients (Optional): For a glazed corned beef, you might need brown sugar, mustard, and ketchup or a combination of honey, Dijon mustard, and spices. These ingredients create a sweet and tangy crust on the meat.

Serving and Presentation

Slicing Technique: To ensure tender, easy-to-eat slices, always cut the corned beef against the grain. This means slicing perpendicular to the muscle fibers in the meat.

Accompaniments: Traditional sides include boiled or roasted potatoes, steamed cabbage, and glazed carrots. These sides not only complement the flavors of the corned beef but also add a variety of textures and colors to the plate.

Presentation Tips: Arrange the sliced corned beef in the center of a large platter. Surround it with the cooked vegetables, creating an appealing and colorful display. Consider garnishing with fresh parsley for a pop of color and a sprinkle of coarse salt for added texture.

Additional Sides: For a more robust meal, consider adding freshly baked Irish soda bread, a green salad with a light vinaigrette, or a creamy horseradish sauce for dipping.

By carefully selecting your ingredients and paying attention to the presentation, you can turn a simple corned beef meal into a festive and inviting dining experience. Whether for St. Patrick’s Day or a cozy family dinner, this dish is sure to impress.

Flavor Enhancements and Glazing Corned Beef in a Roaster

Flavor Enhancements:

Beer Braising: Slow cook the corned beef in a dark beer instead of water. The beer adds a rich, malty flavor that complements the saltiness of the meat.

Aromatic Vegetables: Add onions, carrots, and celery to the cooking liquid. These vegetables will impart additional flavors into the corned beef as it cooks.

Pickling Spices: Enhance the brine with a homemade pickling spice mix including mustard seeds, cinnamon sticks, allspice berries, and dried ginger for a deeper spice profile.

Garlic and Herbs: Introduce whole cloves of garlic and fresh herbs like thyme and parsley to the cooking liquid for a fragrant aroma and taste.

Apple Cider Vinegar: A splash of apple cider vinegar in the cooking liquid can add a subtle tanginess that balances the richness of the meat.

Glazing Techniques:

Honey Mustard Glaze: Combine honey, Dijon mustard, and a touch of brown sugar for a sweet and tangy glaze. Brush over the corned beef during the last 30 minutes of roasting.

Maple and Bourbon Glaze: Mix maple syrup with bourbon and a little soy sauce for a glaze with a kick. The bourbon adds a smoky depth that pairs well with the sweetness of the maple.

Brown Sugar and Spice Glaze: Create a glaze using brown sugar, ground cloves, and a bit of orange juice for a spicy-sweet flavor. This glaze caramelizes beautifully on the surface of the corned beef.

Balsamic Reduction Glaze: Simmer balsamic vinegar until it reduces to a thick syrup. Brushing this glaze on the corned beef adds a rich, tangy flavor with a glossy finish.

Guinness Glaze: Reduce Guinness beer with some brown sugar and a splash of Worcestershire sauce for a uniquely Irish glaze that’s rich and flavorful.

Applying the Glaze:

Last Cooking Phase: Apply your chosen glaze during the last 20-30 minutes of cooking to prevent it from burning while ensuring it caramelizes nicely.

Brush Evenly: Use a pastry brush to evenly coat the corned beef with the glaze. You may want to apply several layers for a thicker glaze.

Broil for Finish: For a crispy, caramelized exterior, consider placing the glazed corned beef under the broiler for a few minutes, watching closely to prevent burning.

By incorporating these flavor enhancements and glazing techniques, you can elevate your corned beef dish, adding complexity and depth to its taste and presentation.

Serving and Presentation Tips for Corned Beef Roaster

Slicing for Tenderness:

Against the Grain: To ensure each slice of corned beef is as tender as possible, always slice against the grain. This means cutting perpendicular to the muscle fibers, which shortens them and makes the meat easier to chew.

Thickness: Consider the thickness of your slices based on use; thinner slices are great for sandwiches, while thicker slices may be more satisfying as a main course.

Thoughtful Accompaniments:

Classic Sides: Elevate the traditional serving of boiled potatoes, cabbage, and carrots by infusing them with flavor. Consider roasting the vegetables instead of boiling, or tossing them in a herb butter after cooking for added richness.

Creative Vegetables: Branch out with other vegetables like roasted Brussels sprouts, parsnips, or a colorful beet salad. These can add a modern twist and a pop of color to your plate.

Sauces and Condiments: Offer a range of condiments to complement the corned beef. Mustard, particularly whole grain or Dijon, is a classic choice. Horseradish sauce, apple cider vinegar reduction, or a creamy dill sauce can also enhance the flavors.

Presentation for Impact:

Platter Arrangement: Arrange your corned beef slices neatly on a large platter. Strategically place your accompaniments around the meat, considering color and texture for a visually appealing presentation.

Garnishes: A sprinkle of chopped parsley or chives on the meat and sides can add a fresh look and taste. Edible flowers or a drizzle of balsamic glaze can also elevate the presentation.

Serving Style: Consider serving the corned beef and sides family-style, allowing guests to help themselves. This encourages interaction and creates a communal dining experience.

Additional Serving Ideas:

Bread Basket: Offer a basket of warm, crusty bread or Irish soda bread to complement the meal. Bread is perfect for sopping up any flavorful juices left on the plate.

Pairing with Beverages: Pair your corned beef meal with beverages that complement its rich flavors. A stout or porter beer, a full-bodied red wine, or even a crisp apple cider can be excellent choices.

By focusing on slicing techniques, thoughtful accompaniments, and presentation details, you can turn the serving of corned beef into a memorable dining experience that delights the senses and honors the tradition of the dish.

Conclusion

As Gabriela Cardenas, I’ve always believed that the best meals are those shared with loved ones, whether it’s a cozy dinner at home or a hearty lunch that breaks up the day. This Corned Beef in a Roaster recipe is one of those dishes that holds a special place in my heart. It’s not just about the delicious, savory flavors or the tender texture of the beef; it’s about the memories and traditions it evokes. From preparing it for St. Patrick’s Day gatherings to serving it as a comforting weekend meal, this recipe has been a staple in my kitchen. It’s my hope that it brings as much warmth and joy to your table as it has to mine.

Cooking corned beef in a roaster is an excellent way to ensure a delicious, tender meal. By following these steps and tips, you’ll be able to serve up a dish that’s sure to impress. Remember, a high-quality roaster oven can make all the difference, so consider investing in one from Hamilton Beach Roaster Oven for the best results.

Happy cooking!

Print

Corned Beef in a Roaster

  • Author: Gabriela cardenas
  • Prep Time: 15 minutes
  • Cook Time: 3 hours (depending on the size of the brisket)
  • Total Time: Approximately 3 hours 15 minutes
  • Category: Main Course
  • Method: Roasting
  • Cuisine: American
  • Diet: Gluten Free

Ingredients

  • 34 lb corned beef brisket
  • 1 onion, quartered
  • 4 cloves garlic, minced
  • 2 bay leaves
  • 1 tablespoon whole peppercorns
  • 34 carrots, peeled and cut into 2-inch pieces
  • 34 potatoes, peeled and quartered
  • 1 small cabbage, cut into wedges
  • Water, enough to cover the brisket

Instructions

  1. Preheat your oven to 325°F (165°C).
  2. Place the corned beef brisket fat-side up in a large roasting pan. Scatter the onion quarters, minced garlic, bay leaves, and peppercorns around the brisket.
  3. Add enough water to the pan to just cover the brisket. Cover the roasting pan tightly with aluminum foil or a lid.
  4. Roast in the preheated oven for about 3 hours, or until the meat is tender and reaches an internal temperature of 145°F (63°C).
  5. During the last hour of cooking, add the carrots, potatoes, and cabbage wedges to the roasting pan. Return the cover to continue cooking.
  6. Once cooked, remove the corned beef from the oven and let it rest for 20 minutes before slicing. This allows the juices to redistribute throughout the meat, ensuring it’s moist and flavorful.
  7. Serve the corned beef sliced against the grain, alongside the roasted vegetables.

Notes

  • Choosing the Cut: Opt for a brisket with a good fat cap; the fat will keep the meat moist during the long cooking process.
  • Slicing: Always slice corned beef against the grain for the most tender texture.
  • Leftovers: Corned beef makes excellent sandwiches the next day. Consider making extra for this purpose.
  • Spices: Feel free to adjust the spices used to suit your taste preferences. Some like to add a touch of sweetness with a bit of brown sugar or honey to the water.
  • Suggested Serving:

    • Serve the corned beef sliced against the grain, accompanied by the roasted vegetables. Mustard and horseradish sauce on the side make excellent condiments.

Did you make this recipe?

Share a photo and tag us — we can’t wait to see what you’ve made!

Print

Corned Beef in a Roaster

Enjoy this Corned Beef in a Roaster recipe, a simple yet delicious way to celebrate any gathering with a tender, flavorful feast that’s sure to impress.

  • Author: Gabriela cardenas
  • Prep Time: 15 minutes
  • Cook Time: 4 houres
  • Total Time: 4 hours 15 minutes
  • Yield: 6
  • Category: Main Course
  • Method: Roasting
  • Cuisine: Irish-American
  • Diet: Gluten Free

Ingredients

  • 1 (3 to 4 lb) corned beef brisket, including spice packet
  • 4 cups water (or enough to cover the brisket)
  • 2 bay leaves
  • 6 whole peppercorns
  • 2 cloves garlic, minced
  • 1 large onion, quartered
  • 3 large carrots, cut into 2-inch pieces
  • 6 medium potatoes, quartered
  • 1 small cabbage, cut into wedges

Instructions

  1. Preheat your roaster oven to 325°F (163°C).
  2. Rinse the corned beef under cold water, and place it in the roaster.
  3. Add water to cover the brisket. Stir in the spices from the packet, bay leaves, peppercorns, and garlic.
  4. Place the onion around the brisket. Cover and cook on low for about 4 hours, or until tender.
  5. Add carrots, potatoes, and cabbage to the roaster in the last hour of cooking.
  6. Once cooked, remove the beef and let it rest for 10 minutes before slicing against the grain. Serve with the vegetables.

Notes

  • Rinsing: Always rinse your corned beef before cooking to remove excess surface salt.
  • Vegetable Timing: Adding vegetables in the last hour prevents them from becoming too soft.
  • Slicing: Cutting the beef against the grain ensures tender slices.
  • Leftovers: Corned beef leftovers make great sandwiches or can be added to soups and hashes

Did you make this recipe?

Share a photo and tag us — we can't wait to see what you've made!

Categories
Dinner Recipes Seafood

Luxurious Lobster Pasta: Home Cooking

Lobster pasta, a dish synonymous with luxury and flavor, is a culinary delight that combines the richness of lobster with the comfort of pasta. In this article, we will guide you through the process of creating a sumptuous lobster pasta dish, ensuring a gourmet experience right in your kitchen.

Overview of Ingredients for Lobster Pasta

Overview of Ingredients for Lobster Pasta

Lobsters: The star of the dish. Fresh lobsters are preferred for their superior flavor and texture, but high-quality frozen lobsters can also provide an excellent taste. The lobster not only adds a rich, seafood flavor but also elevates the dish’s elegance.

Pasta: Long pasta such as spaghetti or linguine is ideal for this recipe. These shapes work well to hold onto the sauce and complement the lobster pieces. Opt for high-quality pasta for the best texture and flavor.

Butter: A high-quality butter is crucial for creating a rich, flavorful sauce that coats the pasta and lobster. It adds depth and a silky texture to the dish. Westgold or another premium brand can enhance the overall taste.

White Wine: A splash of good white wine contributes complexity and acidity to the sauce, balancing the richness of the butter and lobster. It’s important to use a wine that you enjoy drinking, as its flavor will infuse the dish.

Shallots and Garlic: These aromatics are sautéed in butter to form the base of the sauce. Shallots add a subtle sweetness, while garlic introduces a pungent depth, both essential for a well-rounded flavor profile.

Cherry Tomatoes: Cherry tomatoes add a burst of freshness and a slight tanginess to the dish. As they cook, they release their juices, creating a jammy texture that blends beautifully with the other sauce components.

Seasonings: Salt and pepper are used to enhance and balance the flavors. Fresh herbs like basil or parsley add a final touch of freshness and color, while optional ingredients like lemon zest or chili flakes can add brightness or heat to finish the dish.

Each ingredient in lobster pasta plays a pivotal role in creating a harmonious and indulgent dish. By selecting the best quality ingredients available, you ensure a dining experience that’s both luxurious and deeply satisfying.

For ideas on how to season your dishes, take a cue from the Best Seasoning for Chicken Breast The principles of seasoning chicken can be adapted to seafood, providing a balanced and flavorful dish.

Selecting the Best Ingredients For Lobster Pasta Dish

Firstly, the foundation of a great lobster pasta lies in its ingredients. Here’s what you need to consider:

Lobster: Fresh lobster is ideal, but frozen can work well too. Importantly, the key is in the quality and freshness.

Pasta: Opt for long pasta like spaghetti or linguine to complement the lobster.

Butter: A high-quality butter, such as Westgold, can significantly enhance the flavor.

Wine: A splash of good white wine adds depth. Remember, if you wouldn’t drink it, don’t cook with it. Additionally, for more insights on cooking with wine, check out Will Cook For Smiles..

Mastering Lobster Preparation

Furthermore, cooking lobster might seem daunting, but it’s simpler than you think:

Boil or steam the lobster until it’s just cooked.

Extract the meat from the shell, being careful not to overcook.

Moreover, for more detailed techniques on seafood preparation, visit Orchids + Sweet Tea.

Crafting the Perfect Sauce for Lobster Pasta

Subsequently, the sauce is where the magic happens. Here’s how to make it:

Sauté shallots and garlic in butter.

Add white wine and let it reduce.

Toss in cherry tomatoes until they burst, creating a jammy texture.

cooking pasta with lobser

Side Dishes and Wine Pairings

To elevate your lobster pasta, consider these additions:

A simple green salad or garlic bread.

For wine, a Chardonnay or Pinot Grigio pairs beautifully. For non-alcoholic options, try sparkling water with a twist of lemon.

Advanced Tips and Tricks for Perfecting

For that extra touch:

Finish the dish with a sprinkle of lemon zest or chili flakes.

Use fresh herbs like basil or parsley for garnish.

Conclusion: Savoring Your Homemade

Lastly, lobster pasta is more than just a dish; it’s an experience. With these tips and tricks, you’re well on your way to creating a restaurant-quality meal that will impress anyone who tastes it. Remember, the key to a great lobster pasta is in the quality of the ingredients and the love you put into making it. So, don your chef’s hat and start cooking!

Print

Lobster Pasta

Discover how to make luxurious lobster pasta at home. Follow our guide for selecting ingredients, mastering lobster preparation, and crafting the perfect sauce.

  • Author: Gabriela cardenas
  • Prep Time: 20 minutes
  • Cook Time: 30 minutes
  • Total Time: 50 minutes
  • Yield: 4
  • Category: Main Course
  • Method: Boiling, Sautéing
  • Cuisine: Italian-Inspired

Ingredients

  • 2 whole lobsters (fresh or frozen)
  • 400g (14 oz) long pasta (spaghetti or linguine)
  • 4 tablespoons high-quality butter (e.g., Westgold)
  • 1/2 cup good white wine
  • 2 shallots, finely chopped
  • 2 garlic cloves, minced
  • 1 cup cherry tomatoes
  • Salt and pepper, to taste
  • Fresh herbs (basil or parsley) for garnish
  • Optional: lemon zest or chili flakes for finishing

Instructions

  1. Prepare the Lobster: Boil or steam the lobsters until fully cooked, then extract the meat from the shells. Chop the meat into bite-sized pieces.
  2. Cook the Pasta: In a large pot of salted boiling water, cook the pasta until al dente. Drain and set aside.
  3. Make the Sauce: In a large skillet, melt the butter over medium heat. Add the shallots and garlic, sautéing until fragrant. Pour in the white wine and let it reduce by half. Add the cherry tomatoes and cook until they start to burst.
  4. Combine: Add the cooked pasta to the skillet with the sauce, tossing to coat evenly. Gently fold in the lobster meat, heating through. Season with salt and pepper to taste.
  5. Serve: Divide the pasta among plates. Garnish with fresh herbs, lemon zest, or chili flakes if desired.

Notes

  • Seafood Alternatives: Shrimp or scallops can be used in place of lobster.
  • Gluten-Free Option: Use gluten-free pasta to accommodate dietary restrictions.
  • Dairy-Free Modification: Substitute butter with a dairy-free alternative.
  • Storing and Reheating: Store leftovers in an airtight container in the fridge. Reheat gently on the stove, adding a splash of water to loosen the sauce if necessary.

Keywords: Lobster Pasta Dish, Cooking Lobster Pasta, Gourmet Lobster Pasta

Did you make this recipe?

Share a photo and tag us — we can't wait to see what you've made!

Exit mobile version