Categories
Blog

Turkey Pesto Sandwich


A Turkey Pesto Sandwich is more than just a lunch option; it’s a delightful fusion of flavors that can transform your midday meal into a gourmet experience. This guide will walk you through creating the perfect sandwich, from selecting the right ingredients to pairing suggestions.

Essential Ingredients and Variations

Every Turkey Pesto Sandwich starts with a few key components: carved turkey breast, provolone cheese, pesto, sundried tomatoes, and your choice of bread. For those looking to explore beyond the classic, consider incorporating ingredients from the Sun-Dried Tomato and Feta Stuffed French Toast for a Mediterranean twist.

Main Ingredients

The choice of bread plays a pivotal role in the sandwich’s texture and flavor. While thick-sliced sourdough is a popular choice for its robustness and ability to complement the rich flavors of pesto and turkey, feel free to experiment with other types based on your preferences.

Variations

For a healthier alternative, swap out the traditional provolone cheese with a low-fat option or use a vegan cheese to cater to dietary restrictions. Additionally, consider adding a spread from the Lemon Butter Garlic Shrimp Pasta recipe for an extra kick of flavor

Turkey Pesto Sandwich

Read more

Categories
Dinner Recipes

Easy Crock-Pot Hawaiian Chicken | Tropical Flavors at Home


Imagine coming home to the delicious smell of Hawaiian chicken cooking in your crock pot. Slow cooking makes this food simple, and the tastes of Hawaii make it an excellent choice for a busy weeknight or a relaxing weekend dinner. Mixing juicy chicken, sweet pineapple, and spicy sauces transforms a simple meal into a fun tropical feast.

Hawaiian cuisine blends native traditions with Asian and European influences, featuring ingredients like seafood, taro, and tropical fruits to create unique and flavorful dishes

Overview of Ingredients 

The beauty of Hawaiian Chicken Crock-Pot lies in its simplicity and boldness of ingredients. Here’s what you’ll need:

Boneless, skinless chicken breasts or thighs

Pineapple chunks, preferably fresh or canned in juice.

Soy sauce for umami depth

Brown sugar adds a touch of sweetness.

Fresh garlic and ginger, finely minced

A splash of lemon juice or apple cider vinegar for acidity

Optional: bell peppers and red onions for added crunch and flavor.

Overview of Ingredients 

FAQs

Is it OK to put raw chicken in a slow cooker?

Yes, it’s perfectly safe to put raw chicken in a slow cooker. The slow cooking process allows the chicken to cook thoroughly at a consistent temperature. However, for the best results and to ensure food safety, the chicken should reach an internal temperature of 165°F (74°C) by the end of the cooking time. Place the chicken at the bottom of the slow cooker to ensure it is closer to the heat source.

How many hours does it take to cook chicken in a crockpot?

The cooking time for chicken in a crockpot depends on the setting you use.

On the low setting, it typically takes about 6–8 hours for the chicken to cook thoroughly.

On the high setting, it generally takes about 3–4 hours.

Slow Cooker Setting Guidelines.

Chef’s Tips for Perfect slow cooker Hawaiian chicken

Creating the perfect Hawaiian chicken in a slow cooker involves more than just tossing ingredients together. Here are some additional chef’s tips and cooking methods to ensure that your Hawaiian chicken comes out flavorful, tender, and delicious every time:

Choose the right chicken cut.

Use boneless, skinless chicken thighs for the best results, as they tend to be more flavorful and moist than chicken breasts. If you prefer chicken breasts, keep them whole to prevent them from drying out during the long cooking process.

Layer ingredients strategically:

Start by placing aromatic ingredients like sliced onions and bell peppers at the bottom of your slow cooker. Then add the chicken and pour the sauce over top. This arrangement allows the flavors to meld beautifully as the heat circulates.

Balance Flavors in the Sauce:

Taste the sauce before adding it to the cooker. Ensure it has a good balance of sweet, sour, and savory components. Adjust the seasoning with extra soy sauce for saltiness, pineapple juice for sweetness, or a splash of cider vinegar for acidity if needed.

Avoid Overcrowding:

Give your ingredients space to cook by not overcrowding the slow cooker. This ensures even cooking and better heat distribution, which is crucial for developing flavors and textures.

Set the right temperature and time.

Cooking on ‘low’ is preferable for Hawaiian chicken as it allows the flavors to develop slowly and the chicken to become tender without overcooking. Generally, 6–8 hours on low should suffice. If short on time, 3–4 hours on high is an alternative, but the meat might not be as tender.

Thicken the sauce.

If the sauce is too thin after cooking, make a slurry by mixing cornstarch with water and stirring it into the pot. Cook on high for an additional 20–30 minutes until the sauce thickens. This gives the sauce a silky texture that clings beautifully to the chicken.

Before serving, add freshness.

To brighten up the dish, stir in some freshly chopped cilantro or parsley just before serving. A squeeze of fresh lime juice can also add a nice zing that complements the sweet and savory flavors of the dish.

Use a meat thermometer.

To ensure food safety and avoid overcooking, use a meat thermometer to check that the chicken has reached an internal temperature of 165°F (74°C).

Rest Before Serving:

Let the chicken rest in the slow cooker with the heat turned off for about 10 minutes before serving. This allows the juices to redistribute throughout the meat, making it juicier and more flavorful.

Final Note:

Incorporate these tips into your cooking process to elevate the flavors and textures of your Hawaiian chicken. With careful attention to detail and a little patience, you’ll be able to serve a dish that’s sure to impress.

Customizing Your Dish

Hawaiian chicken is incredibly versatile. Here are a few ways you can make this dish your own:

Spice it up: Add red pepper flakes or sriracha for a spicy kick.

Make it Sweet: Increase the brown sugar or add honey for a sweeter sauce.

Go Healthy: Swap the brown sugar for a healthier sweetener like coconut sugar and use low-sodium soy sauce.

Health Benefit

This Hawaiian chicken recipe isn’t just delicious; it’s also packed with nutrients:

Chicken is a great source of lean protein, essential for muscle repair and growth.

Pineapple is rich in vitamin C and manganese, which are important for antioxidant defenses and bone health.


Don’t wait any longer to try making Hawaiian chicken in the crockpot now that you know how easy and tasty it is. Get your goods together, read these tips, and get ready for a tasty trip to the islands.
This recipe offers a perfect blend of taste and health, making it an ideal choice for your next family meal. Enjoy your culinary trip to Hawaii from the comfort of your home!
Print

Easy Crock-Pot Hawaiian Chicken | Tropical Flavors at Home

Discover how to make Hawaiian Chicken in a Crock-Pot with our easy recipe, bringing tropical flavors right to your kitchen.

  • Author: Gabriela cardenas
  • Prep Time: 15 minutes
  • Cook Time: 6 hours on Low
  • Total Time: 6 hours 15 minutes on Low / 3 hours 15 minutes on High
  • Yield: 4
  • Category: Main Course
  • Method: Slow Cooking
  • Cuisine: Hawaiian, Tropical
  • Diet: Gluten Free

Ingredients

  • 4 boneless, skinless chicken thighs or breasts
  • 1 cup pineapple chunks, with juice
  • 1/4 cup soy sauce
  • 2 tablespoons brown sugar
  • 2 cloves garlic, minced
  • 1 teaspoon fresh ginger, grated
  • 1/2 cup red bell pepper, sliced
  • 1/2 cup onion, sliced
  • 1 tablespoon cornstarch (optional for thickening)
  • 2 tablespoons water (for cornstarch slurry, if using)

Instructions

  1. Place the pineapple chunks, red bell pepper, and onion at the bottom of the Crock-Pot.
  2. In a bowl, mix together soy sauce, brown sugar, garlic, and ginger. Pour this mixture over the chicken and place the chicken on top of the pineapple and vegetables.
  3. Cover and cook on Low for 6 hours or on High for 3 hours.
  4. If a thicker sauce is desired, mix cornstarch with water and stir into the Crock-Pot 30 minutes before the end of the cooking time.

Notes

  • If you prefer a spicier dish, add a pinch of red pepper flakes to the sauce.
  • Serving suggestion: Serve over steamed rice to soak up the delicious sauce.
  • Garnish with sliced green onions and sesame seeds for an extra touch of flavor and presentation.

Keywords: Hawaiian Chicken Crock-Pot, slow cooker Hawaiian chicken, pineapple chicken recipe, crock-pot tropical chicken

Did you make this recipe?

Share a photo and tag us — we can't wait to see what you've made!

 
Categories
Dinner Lunch Recipes

Healthy Air Fryer Sesame Chicken Recipe: Crispy & Flavorful


Air-fried Sesame Chicken brings a delightful crunch and a burst of flavors, making it a perfect dish for those seeking a healthier alternative without compromising taste. This dish combines the tenderness of chicken coated in a rich, savory-sweet sesame sauce, all achieved with less oil thanks to the air-frying technique.

Overview of Ingredients

The Air Fryer Sesame Chicken recipe employs a carefully chosen ingredient combination to optimize taste while being light and nutritious. Each item and its recipe function are listed below:  

Chicken Thighs (1 lb, boneless, skinless, cut into bite-sized pieces): The main protein of the dish, chicken thighs, are chosen for their juiciness and flavor, which hold up well during air frying.

Cornstarch (1/2 cup): Used to coat the chicken, cornstarch is preferred over flour because it creates a lighter, crisper texture when air-fried.

Soy Sauce (1/4 cup): Soy sauce adds depth and saltiness to the dish and is a staple in creating the savory base of the sesame sauce.

Rice Vinegar (2 tablespoons): Introduces a mild acidity that balances the sauce’s sweetness, adding a subtle tang.

Brown Sugar (2 tablespoons): Provides sweetness, which contrasts beautifully with the soy sauce and vinegar, contributing to the sauce’s sticky texture.

Sesame Oil (1 tablespoon): Enhances the sesame flavor central to this dish, adding richness and a distinct aroma.

Vegetable Oil (1 tablespoon): Used in the sauce to help combine the flavors and add smoothness.

Garlic (2 cloves, minced) is a key aromatic that infuses the chicken and sauce with a pungent, earthy flavor, which is essential in many Asian dishes.

Chili Paste (1 teaspoon, optional) adds a spicy kick to the sauce, which can be adjusted according to your heat preference.

Water (2 tablespoons): Thins the sauce slightly, allowing it to coat the chicken more evenly without becoming overly thick.

Sesame Seeds (1 tablespoon, toasted): Adds a nutty crunch and visual appeal to the finished dish.

Olive Oil Spray is used to lightly coat the chicken before air frying, helping to achieve that golden, crispy exterior.

Overview of Ingredients

Why Choose Air Fryer Sesame Chicken?

Air frying offers a healthier cooking method by significantly reducing the oil content compared to traditional frying. This method does not sacrifice the crispy texture beloved in sesame chicken. Moreover, it retains the chicken’s juiciness, ensuring a satisfying bite every time. Explore our comprehensive recipe collection for inspiration for those looking to dive deeper into healthy cooking methods.

Making Air Fryer Sesame Chicken at home is a tasty and healthy dish. This meal shows that taste and nutrition coexist, making it a great addition to your repertoire.

To improve your chicken seasoning skills, check out our post on the finest seasoning for chicken breast, which is readily adaptable to this recipe.

Expert Tips for Best Air Fryer Sesame Chicken

Preheat Your Air Fryer: Just like an oven, preheating your air fryer can lead to more even cooking and a perfect crispy texture.

Don’t Overcrowd: Cooking in smaller batches might seem time-consuming, but it ensures that each piece of chicken is evenly cooked and crisp.

Sauce at the Last Minute: To keep the crunch of your air-fried chicken, toss it in the sesame sauce just before serving. To prevent the coating from becoming soggy.

tips to Make Air-fried chicken  crispy

Several factors can affect the crispiness of air-fried chicken:

Moisture Content: Too much moisture on the surface of the chicken can prevent it from becoming crispy. Make sure to pat the chicken dry before coating.

Overcrowding: If the air fryer is overcrowded, the chicken can steam rather than fry. Ensure enough space for air to circulate each piece of chicken.

Coating: The right type of coating can make a big difference. Cornstarch or potato starch often yields a crispier texture than flour. Also, ensure the chicken is well-coated and that any excess is shaken off.

Temperature and Time: Cooking at too low a temperature or not cooking long enough can prevent the chicken from becoming crispy. Ensure the air fryer is preheated and the chicken is cooked at the recommended temperature for enough time.

Not Enough Oil: While air frying uses less oil, a light oil spray helps to crisp up the coating. Ensure the chicken is lightly sprayed with an oil suitable for high-heat.

Prepare the Sesame Sauce

How long to air fry sesame seeds?

Air frying sesame seeds is a quick process:

Preparation: Spread the sesame seeds in a single layer in the air fryer basket. There’s no need to add oil unless you want them slightly toasted.

Temperature and Time: Set the air fryer to 350°F (175°C). Air fry the sesame seeds for about 3-5 minutes. Shake the basket halfway through to ensure even toasting.

Monitoring: Keep a close eye on the seeds, which can go from perfectly toasted to burnt very quickly. They’re done once they turn golden and emit a nutty aroma.

tips for cooking raw chicken in the air fryer

Yes, you can cook raw chicken in an air fryer. It’s one of the appliance’s conveniences. Here’s how to ensure it’s done properly:

Preparation: If using chicken breasts or thighs, you might want to pound them to an even thickness to promote even cooking. Season or marinate as desired.

Temperature and Cooking Time: Preheat the air fryer to around 360°F (182°C). Cook chicken breasts or thighs for about 20-25 minutes, depending on their size and thickness. For chicken pieces, the cooking time might vary.

Safety: To be safe for consumption, ensure the chicken reaches an internal temperature of 165°F (74°C). Use a meat thermometer to check.

Resting: Let the chicken rest for a few minutes after cooking. It will help retain the juices, making the chicken moist and tender.

Serving and Presentation Tips

Presentation is key to making your Air Fryer Sesame Chicken not just a meal but an experience:

Try Different Grains: While white and brown rice is classic, you could also serve this chicken over quinoa or cauliflower rice for a low-carb option.

Add Color and Crunch: Include vibrant vegetables like bell peppers, snap peas, or carrots in your side dishes. These not only add a pop of color but also enhance the meal’s nutritional value.

Health Benefits of Air Fryer Sesame Chicken

Opting for an air fryer over traditional frying methods has several health advantages:

Reduced Oil Content: Air frying requires significantly less oil, reducing overall calorie intake without compromising the food’s taste or texture.

Preserved Nutrients: Cooking at high temperatures can diminish food’s nutritional value. Air-frying cooks quickly and efficiently, helping to preserve the integrity of the chicken’s proteins and the sesame seeds’ antioxidants.

Air fryers offer a healthier way to achieve crispy, delicious meals with minimal oil, making them a must-have kitchen appliance. They’re quick, efficient, easy to clean, and perfectly suited for various cooking methods. For a deeper dive into how air fryers can transform your cooking, check out Good Housekeeping’s comprehensive guide.

FAQs 

How to select the best airfryer?

Air fryers are becoming more popular as a healthy alternative to deep-frying. They’re faster and more energy-efficient than ovens. Dinner is ready quickly, and roasting a chicken shouldn’t blow up your electrical cost. Most of us worry about rising costs and lengthy work days, yet the basic air fryer may save time, money, and health.

I found a great article providing detailed information on choosing the best air fryer. It covers various factors, such as capacity, cooking presets, features, price range, and more. The article also includes a review of the top air fryers in the market and their pros and cons to help you make an informed decision. It’s worth checking out if you’re looking for an air fryer.

Is Air Fryer Sesame Chicken easy to make?

Yes, making Sesame Chicken in an air fryer is easy. Once familiar with the basic technique for achieving crispy chicken pieces using your air fryer, you’ll find the process straightforward, quick, and mess-free.

What makes the sesame sauce for the chicken?

The sesame sauce is a savory-sweet, sticky concoction made from soy sauce, rice vinegar, brown sugar, water, cornstarch, sesame oil, vegetable oil, minced garlic cloves, optionally chile paste, and toasted sesame seeds.

Can I deep fry the chicken instead of air frying?

Yes, if you prefer or don’t have an air fryer, you can deep fry the chicken. Use a pot of neutral, high smoke point cooking oil and cook the chicken until golden brown, then proceed with the recipe as written.

Print

Healthy Air Fryer Sesame Chicken Recipe: Crispy & Flavorful

Experience the taste of crispy sesame chicken with our air fryer recipe. Our easy-to-follow instructions will help you create a flavorful and healthier meal in just a few minutes. Take advantage of this delicious opportunity!

  • Author: Gabriela cardenas
  • Prep Time: 15 minutes
  • Cook Time: 25 minutes
  • Total Time: 40 minutes
  • Yield: 4
  • Category: Main Dish
  • Method: Air Frying
  • Cuisine: Asian
  • Diet: Gluten Free

Ingredients

  • 1 lb boneless, skinless chicken thighs, cut into bite-sized pieces
  • 1/2 cup cornstarch
  • 1/4 cup soy sauce
  • 2 tablespoons rice vinegar
  • 2 tablespoons brown sugar
  • 1 tablespoon sesame oil
  • 1 tablespoon vegetable oil
  • 2 garlic cloves, minced
  • 1 teaspoon chili paste (optional)
  • 2 tablespoons water
  • 1 tablespoon sesame seeds, toasted
  • Olive oil spra

Instructions

Prepare the Chicken:

  • Cut the Chicken: Start by cutting the boneless, skinless chicken thighs into bite-sized pieces, ensuring they are of even size for uniform cooking.
  • Dry the Chicken: Pat the chicken pieces dry with paper towels to remove any excess moisture. This step is crucial for achieving a crispy texture.
  • Marinate (Optional): If time allows, marinate the chicken in a mixture of soy sauce, a bit of sesame oil, and minced garlic for at least 30 minutes in the refrigerator to enhance the flavor.

2. Coat the Chicken:

  • Mix Coating: In a large bowl, combine the cornstarch with a pinch of salt and pepper. Add the chicken pieces to the bowl, tossing them until they are evenly coated with the cornstarch. Shake off any excess.
  • Spray Oil: Lightly spray the coated chicken pieces with olive oil spray. This helps to get them crispy without needing to deep-fry.

3. Air Fry the Chicken:

  • Preheat the Air Fryer: Preheat your air fryer to 380°F (190°C). This ensures the cooking environment is hot enough to start crisping right away.
  • Cook in Batches: Place the chicken pieces in a single layer in the air fryer basket, making sure they do not overlap to ensure even cooking. You may need to work in batches depending on the size of your air fryer.
  • Cooking Time: Air fry the chicken for about 10-12 minutes, then flip or shake the basket and continue cooking for another 10-13 minutes until the chicken is golden brown and crispy. The internal temperature should reach at least 165°F (74°C).

4. Prepare the Sesame Sauce:

  • Combine Ingredients: While the chicken cooks, prepare the sauce. In a small saucepan, combine soy sauce, rice vinegar, brown sugar, water, and chili paste (if using).
  • Simmer: Bring the mixture to a low simmer over medium heat, stirring occasionally.
  • Thicken the Sauce: Mix a tablespoon of cornstarch with a little cold water to create a slurry. Pour this into the simmering sauce, stirring continuously until the sauce thickens—about 1-2 minutes. Then stir in the sesame oil.
  • Add Sesame Seeds: Once the sauce is thickened, remove it from heat and stir in the toasted sesame seeds.

5. Combine Chicken and Sauce:

  • Toss Chicken in Sauce: Once the chicken is cooked and crispy, transfer it to a bowl. Pour the hot sesame sauce over the chicken and gently toss to coat all the pieces evenly.
  • Garnish: Sprinkle with sliced green onions and additional sesame seeds if desired.

6. Serve:

  • Serving Suggestions: Serve the sesame chicken over a bed of rice with steamed broccoli or blanched green beans on the side.
  • Serve Hot: For the best experience, serve the chicken immediately while it’s warm and crispy for the perfect texture contrast with the savory-sweet sauce.

Notes

  • Marinating: For deeper flavor, marinate the chicken pieces in a mixture of soy sauce, sesame oil, and garlic for at least 30 minutes before air frying.
  • Air Fryer Setup: Ensure your air fryer is preheated to 380°F (190°C) for optimal cooking.
  • Batch Cooking: Avoid overcrowding by cooking in batches if necessary to ensure all pieces are evenly crispy.
  • Final Toss: Toss the cooked chicken in the sauce just before serving to keep the coating crispy.

Keywords: Air Fryer Sesame Chicken, Air Fried Sesame Chicken, Healthy Sesame Chicken Recipe, Crispy Sesame Chicken Air Fryer

Did you make this recipe?

Share a photo and tag us — we can't wait to see what you've made!

Categories
Dinner Lunch Recipes

Cheddar Bay Biscuit Chicken Pot Pie


Chicken pot pie with Cheddar Bay biscuits is comforting! Cheesey, garlicky Red Lobster biscuits and creamy chicken pot pie make this meal delicious. A proper taste combination makes a familiar dish interesting.

Cheddar Bay Biscuit Chicken Pot Pie

A Brief History of Cheddar Bay Biscuit Chicken Pot Pie

Red Lobster’s Cheddar Bay Biscuits are known for their buttery, cheesy richness. Their unusual taste and texture have inspired many home chefs to reproduce and modify this dish. The history of Red Lobster’s Cheddar Bay Biscuits reveals how a simple side dish became a national sensation.

FAQs

Can I make the Cheddar Bay Biscuit Chicken Pot Pie gluten-free?

Yes, you can make this dish gluten-free by using a gluten-free all-purpose flour blend for both the filling thickener and the biscuit dough. Ensure all other ingredients are certified gluten-free as well.

Is it possible to make a dairy-free version of this recipe?Absolutely! Substitute the butter with a dairy-free alternative, use a dairy-free cheese for the biscuits, and opt for a plant-based milk or cream for the filling. Be sure to check the labels for any hidden dairy content.

Can I freeze the Cheddar Bay Biscuit Chicken Pot Pie for later?

Yes, this dish can be frozen either before or after baking. If freezing before baking, add a few extra minutes to the oven time when you’re ready to bake. If freezing after baking, ensure it’s cooled down before freezing, and reheat thoroughly before serving.

Overview of Ingredients

To accommodate varied diets, Cheddar Bay Biscuit Chicken Pot Pie’s components are simple yet adaptable:

  • Chicken: cooked rotisserie chicken, shredded (about 4 cups)
  • Vegetables: A classic mirepoix of chopped onions, carrots, and celery
  • Butter and Flour: For making the roux, which thickens the filling
  • Liquid: chicken broth and heavy cream for the creamy sauce.
  • Seasoning: poultry seasoning, salt, and pepper
  • Biscuit Mix: Cheddar Bay biscuit mix, or a similar type
  • Cheese: Shredded sharp cheddar for the biscuits.

Each component plays a crucial role in building the depth and richness of the dish, with the rotisserie chicken offering a time-saving shortcut without compromising on taste.

Chef’s Tips for Perfect Cheddar Bay Biscuit Chicken Pot Pie

Achieving the perfect Cheddar Bay Biscuit Chicken Pot Pie is all about balancing the rich, creamy filling with the fluffy, cheesy topping. Here are some expert tips to help you master this dish:

Start with Quality Ingredients

The basis of any great dish is the quality of its ingredients. Use fresh vegetables and a good-quality rotisserie chicken for the best flavor and texture. If you’re buying pre-made biscuit mix, opt for a reputable brand to ensure delicious results.

Buttery Roux: A well-cooked roux is the secret to a thick and creamy filling

Melt the butter over medium heat, add the flour, and cook, stirring constantly, until the mixture turns a light golden color. This will not only effectively thicken your pot pie but also add a nutty flavor to the base.

Season Correctly

Don’t shy away from seasoning. Poultry seasoning works wonderfully, but you can enhance the dish further with a pinch of garlic powder, paprika, and even a little cayenne for heat. Taste the seasonings as you go to adjust them to your preference.

Avoid overworking the biscuit dough.

When mixing the biscuit dough, do so until it is just combined. Overworking the dough can lead to tough biscuits. Just incorporate the ingredients for light and fluffy biscuits.

Spoon Size Matters

When you’re placing the biscuit dough on top of the filling, use a consistent size for your spoonfuls. This ensures even cooking. You want all the biscuits to be golden and cooked through at the same time.

Use an Oven-Safe Skillet

If possible, prepare the filling in an oven-safe skillet. This allows you to add the biscuit dough directly on top and transfer the entire dish into the oven, reducing cleanup and enhancing the flavors as they meld together in the oven.

Brush with butter:

Just before serving, brush the baked biscuits with melted butter, mixed with a little garlic powder and parsley. This adds a beautiful sheen and a burst of flavor that makes the dish even more irresistible.

Customizing Your Dish

This recipe is wonderfully versatile. Here are a few ways to make it your own:

  • Swap the chicken: Use leftover turkey from Thanksgiving as a tasty substitute.
  • Veggie Variations: Boost the nutritional content by adding spinach, peas, or mixed vegetables to the filling.
  • Dairy Adjustments: For a lighter version, replace heavy cream with whole milk or a plant-based alternative.

What goes best with Cheddar Bay Biscuit Chicken Pot Pie?

Complement your Cheddar Bay Biscuit Chicken Pot Pie with side dishes that will enhance the meal without overpowering it:

  • Garlic Parmesan Roasted Broccoli
  • Sautéed green beans
  • Simple Kale Salad

These sides offer a refreshing contrast to the richness of the pot pie, rounding out your meal with a balance of flavors and textures.

Health Benefits

While indulgent, this pot pie also offers several health benefits:

  • Protein: Chicken is a great source of lean protein, which is essential for muscle repair and growth.
  • Vitamins & Minerals: The vegetables provide vitamins A and C, along with fiber.
  • Calcium: The cheese in the biscuits contributes to your daily calcium intake, which is vital for bone health.
 

Cheddar Bay Biscuit Chicken Pot Pie


Ready to up your comfort food game? Try this Cheddar Bay Biscuit Chicken Pot Pie tonight! Share your work and personal information.


Print

Cheddar Bay Biscuit Chicken Pot Pie

  • Author: Gabriela cardenas
  • Prep Time: 20 minutes
  • Cook Time: 35 minutes
  • Total Time: 55 minutes
  • Yield: 6
  • Category: recipes

Ingredients

For the Filling:

  • 1 tablespoon olive oil
  • 1 medium onion, chopped
  • 2 carrots, diced
  • 2 celery stalks, diced
  • 3 garlic cloves, minced
  • 1/2 cup all-purpose flour (or gluten-free alternative)
  • 2 cups chicken broth
  • 1 cup milk (or dairy-free alternative)
  • 2 cups cooked chicken, shredded (substitute with mushrooms or chickpeas for a vegetarian version)
  • 1 cup frozen peas
  • 1 teaspoon dried thyme
  • Salt and pepper to taste

For the Cheddar Bay Biscuits:

  • 2 cups all-purpose flour (or gluten-free alternative)
  • 1 tablespoon baking powder
  • 1/2 teaspoon garlic powder
  • 1/2 cup cold butter, cubed (or dairy-free alternative)
  • 1 cup grated cheddar cheese (or dairy-free alternative)
  • 3/4 cup milk (or dairy-free alternative)
  • 1/4 cup chopped fresh parsley
  • Salt to taste

Instructions

  1. Preheat the oven to 400°F (200°C).
  2. Prepare the Filling:
    • Heat olive oil in a large skillet over medium heat. Add onion, carrots, celery, and garlic. Cook until softened, about 5 minutes.
    • Stir in flour to coat the vegetables. Gradually whisk in chicken broth and milk. Bring to a simmer, stirring constantly until the mixture thickens.
    • Add the cooked chicken, peas, thyme, salt, and pepper. Stir to combine. Transfer the filling to a large baking dish.
  3. Make the Cheddar Bay Biscuits:
    • In a bowl, combine flour, baking powder, garlic powder, and salt. Cut in the butter until the mixture resembles coarse crumbs. Stir in the cheddar cheese and parsley.
    • Add milk and stir until just combined. Do not overmix.
    • Drop spoonfuls of the biscuit dough over the filling in the baking dish.
  4. Bake for 25-30 minutes, or until the biscuits are golden brown and the filling is bubbly.
  5. Let cool for a few minutes before serving.

Notes

  • Customization: Feel free to add more vegetables to the filling for added nutrition.
  • Make-Ahead: The filling can be prepared in advance and stored in the refrigerator. Assemble with biscuit dough right before baking.
  • Freezing: This dish can be frozen before baking. Add extra baking time if cooking from frozen.
  • Serving: Pair with a simple green salad for a complete meal.

Did you make this recipe?

Share a photo and tag us — we can’t wait to see what you’ve made!

Categories
Blog Dinner Recipes

Chicken Quinoa Soup


Chicken Quinoa Soup stands as a testament to a meal that perfectly balances delectable flavors with nutritional benefits, promising to delight your palate and nourish your body.

What Makes This Recipe Good?

Its pleasant warmth and harmonious taste mix without compromising health make this soup famous. Why chicken quinoa soup is special:

  • It’s incredibly nutritious, combining lean protein from chicken and high-fiber quinoa.
  • The recipe is versatile, allowing for various vegetables and spices to be added, tailoring it to personal tastes and seasonal ingredients.
  • Chicken Quinoa Soup can be a staple for those looking to maintain a healthy diet without spending hours in the kitchen.

Benefits of Chicken Quinoa Soup

The benefits of chicken quinoa soup extend far beyond its delicious taste. Here are several reasons why this soup is a fantastic addition to your diet:

Nutrient-Rich: Quinoa is known for its high nutrient content, including all nine essential amino acids, making it a complete protein source. This is particularly beneficial for vegetarians and vegans when combined with other protein sources. Chicken, on the other hand, is a great source of lean protein that helps in muscle repair and growth. Discover more about the best seasoning for chicken breast to enhance your soup.

High in Fiber: Quinoa is also high in fiber, which aids in digestion and helps you feel full longer, supporting weight management.

Boosts Immune System: Chicken broth is famous for its immune-boosting properties. The soup can help reduce inflammation and promote a healthy gut.

Versatile and Customizable: This soup can be easily adapted to suit various dietary needs and preferences. It can be made gluten-free, dairy-free, or even vegetarian by substituting chicken with a plant-based protein source.

Overview of Key Ingredients

Chicken Quinoa Soup

The beauty of chicken quinoa soup lies in its simplicity and the wholesomeness of its ingredients. Here’s a quick overview:

Chicken: Lean and tender pieces of chicken breast or thigh add a rich protein source to the soup.

Quinoa: is a gluten-free grain that is a complete protein, providing all essential amino acids.

Vegetables: A colorful mix of vegetables like carrots, celery, onions, and kale contributes vitamins, minerals, and fiber.

Broth: A base of chicken or vegetable broth brings all the ingredients together, infusing the soup with flavor and nutrients.

Herbs and Spices: Garlic, bay leaves, thyme, and parsley add depth and aroma to the soup, making it not only a treat for the palate but also a feast for the senses.

For a creative twist on traditional recipes, consider exploring our Mediterranean Quinoa Power Bowl, an excellent dish for those who love quinoa.

Chef’s Tips for Perfect Chicken Quinoa Soup

To make the best chicken quinoa soup, follow these easy but useful tips:

  • Start with a Sauté: First, sauté your onions, garlic, and other aromatic vegetables in a bit of oil before adding the broth. This step helps to release their flavors into the soup, creating a richer base.

  • Toast the Quinoa: Before adding it to the soup, toast the quinoa in a dry skillet until it starts to pop. This improves its nutty flavor and can help the soup maintain a better texture.

  • Use Fresh Herbs: At the end of your cooking, incorporate fresh herbs such as thyme, parsley, or cilantro. Fresh herbs add a burst of flavor that dried herbs can’t match.

  • Adjust the cooking time: Cook the quinoa in the soup just until it’s tender. Keep a watch on it after adding it to the pot, as overcooking can make it mushy.

  • Balance the Flavors: Taste as you go and adjust the seasoning with salt, pepper, and acid, such as lemon juice or a splash of white wine vinegar. This helps to balance the flavors and brighten the overall taste of the soup.

  • Add a Touch of Creaminess: For a creamier texture, stir in a little coconut milk or cream during the last few minutes of cooking. This adds a silky richness without overwhelming the other flavors.

  • Garnish Wisely: Garnish with something that will complement the soup’s flavors, such as a sprinkle of grated Parmesan, a swirl of olive oil, or fresh lemon zest.

  • Slow Cook for Depth: If you have time, let the soup simmer on low heat for an hour or so after cooking. This slow cooking method allows all the flavors to meld together beautifully.

FAQs on Chicken Quinoa Soup

 What are the health benefits of chicken quinoa soup?

 Chicken quinoa soup is packed with nutrients beneficial for overall health. Quinoa is a complete protein, containing all nine essential amino acids, making it excellent for muscle growth and repair. It’s also high in fiber, which aids digestion and helps maintain a healthy weight. Chicken is a lean protein source, supporting muscle development and contributing to a feeling of fullness. The vegetables in the soup provide vitamins and minerals, boosting the immune system and promoting overall well-being.

 Can I make chicken quinoa soup in a slow cooker?

Yes, you can easily adapt this recipe for a slow cooker. Add all ingredients except the kale to the slow cooker, and cook on low for 6-7 hours or on high for 3-4 hours. About 30 minutes before serving, add the kale and allow it to wilt. If you’re using chicken breasts, remove them, shred, and return the shredded chicken to the slow cooker before serving.

 How can I make this soup vegan?

 To make vegan chicken quinoa soup, substitute the chicken for a plant-based protein like chickpeas, lentils, or cubed tofu. Use vegetable broth instead of chicken broth. You can also add more vegetables or vegan meat substitutes to enhance the protein content without using animal products.

 What can I serve with chicken quinoa soup?

 Chicken quinoa soup is hearty and can be served as a main dish. For a complete meal, pair it with a side salad, crusty bread for dipping, or a light sandwich. You can also serve it with a sprinkle of grated cheese or a dollop of yogurt or sour cream on top for extra flavor.

Customizing Your Chicken Quinoa Soup

Everyone has their own unique taste preferences, but here are a few ways to make Chicken Quinoa Soup your own:

  • For a vegetarian version, substitute chicken with chickpeas or tofu.
  • Spice It Up: Add chili flakes or cayenne pepper for a spicy kick.
  • Extra Veggies: Include spinach or kale for additional nutrients.

Explore more delicious chicken dishes like this with our Hawaiian Chicken in a Crock Pot.

Cooking a Chicken Quinoa Soup


Ready to try making this wonderful Chicken Quinoa Soup at home? Gather your ingredients and follow these tips for a delightful and healthy meal. Don’t forget to check back for more tasty recipes and healthy eating tips!

Print

Chicken Quinoa Soup

  • Author: Gabriela cardenas
  • Prep Time: 10 minutes
  • Cook Time: 20 minutes
  • Total Time: 30 minutes
  • Yield: 4-6
  • Category: Soup
  • Method: Stovetop
  • Cuisine: International
  • Diet: Gluten Free

Ingredients

  • 1 tablespoon olive oil
  • 1 medium onion, diced
  • 2 garlic cloves, minced
  • 2 medium carrots, peeled and diced
  • 2 celery stalks, diced
  • 1 pound chicken breast, cut into bite-sized pieces (substitute with chickpeas or tofu for a vegan version)
  • 1 cup quinoa, rinsed
  • 6 cups chicken or vegetable broth
  • 1 teaspoon dried thyme
  • 1 bay leaf
  • Salt and pepper to taste
  • 2 cups kale, stems removed and leaves chopped
  • Fresh parsley, chopped for garnish

Instructions

  1. Sauté Vegetables: In a large pot, heat olive oil over medium heat. Add onion, garlic, carrots, and celery. Sauté until the vegetables are softened, about 5 minutes.

  2. Cook Chicken: Add the chicken pieces to the pot and cook until they are no longer pink on the outside, about 5 minutes. (Skip this step for a vegan version and proceed with adding broth and quinoa.)

  3. Add Quinoa and Broth: Stir in the quinoa, chicken or vegetable broth, thyme, and bay leaf. Season with salt and pepper. Bring the mixture to a boil, then reduce heat to low, cover, and simmer for 15 minutes.

  4. Add Kale: Add the chopped kale to the pot and continue to simmer until the kale is wilted and the quinoa is cooked through, about 5 minutes.

  5. Serve: Remove the bay leaf. Taste and adjust seasoning if necessary. Serve hot, garnished with fresh parsley.

Notes

  • Rinse Quinoa: Always rinse quinoa under cold water in a fine-mesh strainer to remove its natural coating, saponin, which can make it taste bitter or soapy.
  • Customization: Feel free to add other vegetables like mushrooms, bell peppers, or spinach to the soup for added nutrition and flavor.
  • Storage: Store leftovers in an airtight container in the refrigerator for up to 3 days or freeze for up to 3 months. Reheat gently on the stove or in the microwave, adding a little broth or water if the soup has thickened.

Serving Suggestions

Serve this hearty soup as a standalone meal or pair it with a crusty piece of bread for dipping. For a complete meal, accompany it with a simple green salad dressed with olive oil and lemon juice.

Did you make this recipe?

Share a photo and tag us — we can’t wait to see what you’ve made!

Categories
Blog

Flatbread Margherita Pizza


Flatbread Margherita Pizza is a delightful homemade meal that combines crispy flatbread, creamy mozzarella, ripe tomatoes, and fresh basil. This simple and delicious recipe is perfect for any occasion, offering a quick and gourmet pizza experience.

Ingredients Overview Flatbread Margherita Pizza

The magic of a great Margherita Pizza lies in its simplicity. The essential ingredients include:

Flatbread: The base of your pizza, which can be homemade or store-bought. The choice of flatbread significantly affects the texture and flavor of the final dish.

Fresh mozzarella cheese: This cheese’s moisture and melting qualities are crucial for achieving the creamy, stretchy layer that characterizes a good Margherita.

Ripe tomatoes or high-quality tomato sauce: Whether you choose fresh slices or a rich sauce, tomatoes add the necessary acidity and sweetness.

Fresh basil leaves: Basil introduces a fresh, peppery element that brightens the pizza’s flavor.

Extra virgin olive oil: A drizzle of good-quality olive oil adds depth and richness, enhancing the overall taste.

FAQs

Can I use pita bread as a base for Margherita pizza?

Absolutely! Pita bread is a convenient and tasty alternative.

What’s the best cheese for Margherita pizza?

Fresh mozzarella is unparalleled for its melting qualities and mild flavor.

How can I make my flatbread pizza crust crispy?

Pre-baking the flatbread and using a hot oven are your best bets for a crispy crust.

Is flatbread Margherita pizza healthy?

Yes, with its focus on fresh, quality ingredients, it’s a healthier take on traditional pizza options.

detailed cooking techniques and tips

Preparing the flatbread

  • Pre-Baking the Flatbread: To ensure your flatbread becomes crispy and doesn’t get soggy from the toppings, pre-bake it for about 5 minutes at 400°F (204°C) before adding any ingredients. This creates a firmer base that can support the weight of the toppings.
  • Choosing the Right Flatbread: Opt for flatbreads that are fresh and have a firm texture. Avoid those that are too fluffy or thick, as they might not crisp up as desired in the oven.

Cheese and toppings

  • Slice the mozzarella thinly to ensure it melts evenly and covers the flatbread without overwhelming the other flavors. Drain any excess liquid from the cheese before placing it on the pizza to prevent sogginess.

  • Layering Ingredients: Start with a light spread of sauce or a few slices of fresh tomato, then add the cheese, and top with additional toppings if desired. This layering method helps maintain the texture and integrity of each component.

Baking Techniques

  • Pizza Stone or Baking Steel: For an extra crispy crust, use a pizza stone or baking steel. While it is preheating, place it in the oven, and then bake your pizza on it. The intense heat from the stone or steel helps to crisp the flatbread’s bottom quickly.

  • Oven Temperature: Bake your pizza at a high temperature—around 450°F (232°C) to 500°F (260°C). High heat ensures quick cooking, which is key to achieving a crispy crust and perfectly melted cheese.

Garnishing and serving

  • Adding Fresh Basil: Add fresh basil leaves after baking, not before. Basil cooked in the oven can lose its vibrant flavor and become bitter. Fresh basil added after baking retains its aromatic qualities and adds a burst of freshness.

  • Olive Oil Drizzle: For a gourmet touch, finish your pizza with a drizzle of high-quality extra virgin olive oil. This not only adds flavor but also helps to tie all the ingredients together visually and taste-wise.

Post-Baking

  • Letting the Pizza Rest: After removing the pizza from the oven, allow it to cool for a few minutes. This resting period helps the cheese set slightly, making the pizza easier to slice and eat.

  • Slicing Techniques: Use a pizza cutter or a large chef’s knife to slice your pizza. A clean, sharp cut through the crust ensures that the toppings stay intact and the presentation is neat.

Choosing the Right Flatbread

Selecting the right flatbread is pivotal. Here are some considerations:

  • Thickness: A thinner flatbread will yield a crispier base, while a thicker one provides a softer, bread-like texture.
  • Ingredients: Look for flatbreads with minimal ingredients for a more authentic taste. Homemade options allow for customization, ensuring a perfect match for your toppings.

Sauce Selection

The sauce plays a critical role in marrying the flavors of the pizza. Here’s how to choose:

  • Tomato sauce: A homemade sauce simmered with garlic, basil, and olive oil can elevate your pizza to new heights.
  • Fresh tomatoes: For a lighter, fresher option, thinly sliced ripe tomatoes are excellent.

Garnishing and Serving

The final touches are crucial.

  • Sprinkle freshly torn basil leaves over the hot pizza to release their aroma.
  • A final drizzle of olive oil adds a glossy finish and a flavor boost.
  • Cut into slices and serve immediately to enjoy the blend of crispy, creamy, and aromatic flavors at their best.

Variations and Dietary Adjustments

Adapting this recipe for dietary restrictions doesn’t mean compromising on taste.

Gluten-Free: Choose a gluten-free flatbread base. Many stores offer delicious alternatives that mimic the texture and taste of traditional flatbread.

Vegan: Vegan mozzarella has come a long way in texture and flavor, melting beautifully under the broiler.

Creative Toppings and Twists

While a classic Margherita is always a winner, feel free to get creative.

Vegetables: Grilled eggplant, zucchini, or bell peppers add sweetness and a smoky flavor.

Cheeses: Experiment with different cheeses, such as smoked mozzarella or burrata, for a creamy texture.

Meats: For a non-vegetarian twist, prosciutto or cooked Italian sausage can add a savory depth.

Nutritional Information Per Serving (approximate)

  • Calories: 300–350 kcal
  • Protein: 15-20 grams
  • Total fat: 15-20 grams
    • Saturated Fat: 5-7 grams
    • Trans fat: 0 grams
  • Cholesterol: 25–30 mg
  • Carbohydrates: 30–35 grams
    • Dietary Fiber: 2-4 grams
    • Sugars: 3-5 grams
  • Sodium: 600–800 mg

Key nutritional highlights:

  • Protein: The mozzarella cheese provides a good source of protein, which is essential for muscle repair and growth.
  • Calcium: Cheese is also a great source of calcium, which is important for bone health.
  • Fiber: Using whole-grain flatbread can increase the fiber content, which helps in digestion and provides a feeling of fullness.
  • Lycopene: Tomatoes are a rich source of lycopene, an antioxidant that has been linked to many health benefits, including a reduced risk of heart disease and cancer.
  • Vitamins and Minerals: Fresh basil adds a small amount of vitamins A and C, and if you’re using extra virgin olive oil, you’re also getting vitamin E and healthy monounsaturated fats.

Considerations:

  • Calories and Fat: This pizza can be considered moderate in calories and fat, making it a suitable option for a balanced meal when paired with a salad.
  • Sodium: The sodium level might be a concern, especially for those watching their salt intake. To reduce sodium, use less cheese, opt for low-sodium flatbread, or make your own without added salt.
  • Carbohydrates: The carbohydrates are primarily from the flatbread. Opting for a whole-grain version can improve the meal’s overall nutritional profile.

If you enjoyed exploring the delightful flavors of our Flatbread Margherita Pizza, you might also love trying out some other tantalizing chicken recipes from Gabriela’s collection. For a delicious twist, check out the Air Fryer Sesame Chicken, perfect for a quick and crispy meal, or dive into the rich flavors of the Hawaiian Chicken in a Crock Pot for a tropical dinner experienc

  • Print

    Flatbread Margherita Pizza

    Discover how to make a delicious Flatbread Margherita Pizza with our easy recipe. Fresh ingredients & simple steps for a perfect meal. Ready in 30 mins!

    • Author: Gabriela cardenas
    • Prep Time: 10 minutes
    • Cook Time: 20 minutes
    • Total Time: 30 minutes
    • Yield: 2-4
    • Category: Main Course
    • Method: Baking
    • Cuisine: Italian

    Ingredients

    • 2 large flatbreads (homemade or store-bought)
    • 1 cup fresh mozzarella cheese, sliced
    • 2 ripe tomatoes, thinly sliced or 1/2 cup high-quality tomato sauce
    • Fresh basil leaves, for garnish
    • Extra virgin olive oil, for drizzling
    • Salt and pepper, to taste

    Instructions

    1. Preheat Oven: Preheat your oven to its highest setting, typically between 450°F (230°C) and 500°F (260°C).
    2. Prepare the Base: Place the flatbreads on a baking sheet. If using tomato sauce, spread it thinly over the flatbreads. Alternatively, arrange the tomato slices evenly.
    3. Add Cheese: Distribute slices of fresh mozzarella cheese across the flatbreads.
    4. Bake: Bake in the preheated oven for about 10-15 minutes, or until the cheese is bubbly and the edges of the flatbread are golden and crispy.
    5. Garnish and Serve: Remove from the oven, and immediately garnish with fresh basil leaves. Drizzle with extra virgin olive oil, add salt and pepper to taste, and serve hot.

    Notes

    • Flatbread Selection: Choosing the right flatbread is crucial. A thinner flatbread will give you a crispier base, while a thicker one will be softer.
    • Quality Ingredients: The simplicity of this recipe means the quality of each ingredient shines through. Opt for the freshest mozzarella and basil you can find.
    • Pre-baking Flatbread: For an extra crispy base, you can pre-bake the flatbread for 5 minutes before adding the toppings.
    • Oven Temperature: Ensure your oven is fully preheated to achieve the perfect crispiness. Using a pizza stone or baking steel can enhance the crust’s texture

    Keywords: Margherita flatbread, easy Margherita pizza, homemade pizza

    Did you make this recipe?

    Share a photo and tag us — we can't wait to see what you've made!

Categories
Dinner Lunch Recipes

Easy Homemade Reuben Casserole


A tasty take on the Reuben sandwich, the Reuben casserole delivers savory tastes and pleasant textures to your dinner table. This casserole recipe makes corned beef, Swiss cheese, sauerkraut, and rye bread a delicious baked meal for parties or a night in.

What makes a Reuben casserole good?

The appeal of the Reuben casserole lies in its perfect harmony of ingredients. Each layer of the casserole offers a unique taste and texture, creating a complex flavor profile that’s deeply satisfying.

  • Corned beef is rich and savory, providing the foundational flavor.
  • Sauerkraut adds a tangy contrast, enhancing the meat’s robustness.
  • Swiss cheese melts into a creamy layer, binding all the ingredients together.
  • Rye bread crumbs: Offer a crunchy topping, introducing a delightful textural play.

Visit our roaster corned beef guide for selection and cooking tips.

Origins of Reuben Casserole

The reuben sandwich, which inspired this casserole, is a classic American dish. Its origins are debated, although experts think it began in the early 20th century US deli culture. See the Reuben Sandwich history for more.

FAQs

Can I use a different kind of bread besides pumpernickel for a Reuben casserole?

Yes, cubed-up rye bread is also commonly used and provides a classic flavor that complements the other ingredients well.

What are the best layers to use in a Reuben casserole?

Traditional layers for a Reuben casserole include a base of rye bread or pumpernickel cubes, followed by layers of corned beef, sauerkraut, and Swiss cheese, topped off with a drizzle of Russian or Thousand Island dressing.

How long should I bake a Reuben casserole?

Typically, a Reuben casserole should be baked covered at 400 degrees F for about 20 minutes, then uncovered after adding a layer of cheese, and baked for an additional 10 minutes until the cheese is melted and bubbly.

Overview of Ingredients for Reuben Casserole

In order to make a Reuben dish, you need to use basic items that taste like the traditional Reuben burger. Here’s a quick rundown of the most important parts:

  • Rye or Pumpernickel Bread: These breads are cubed and form the base layer of the casserole, providing a sturdy foundation that absorbs the flavors of the toppings.
  • Corned Beef: Thinly sliced or chopped, this is the main protein component, adding a savory, meaty element that is central to the dish.
  • Sauerkraut: This fermented cabbage adds a tangy flavor that contrasts well with the rich meat.
  • Swiss Cheese: Typically shredded, it melts into a creamy layer that binds all the ingredients together.
  • Russian or Thousand Island Dressing: Drizzled over the top or mixed in with other layers, this dressing adds a creamy, tangy finish that enhances the overall flavor of the casserole.
  • Caraway Seeds (optional): These can be sprinkled on top for added flavor, echoing the traditional rye bread seasoning.


Chef’s Tips for Perfect Reuben Casserole

Perfecting a Reuben dish requires more than stacking ingredients. How to improve your casserole using chef-approved tips:

Optimal Ingredient Prep:

Trim the excess fat from the corned beef and slice it against the grain to make it tender and easy to eat once baked into the casserole.

To keep the casserole from getting soggy, thoroughly drain and press the sauerkraut to remove excess liquid.

Cheese Choices:

While Swiss cheese is traditional, feel free to experiment with other types, like Gruyère for a nuttier flavor or a mix of Swiss and mozzarella for extra creaminess.

Dressing Application:

Spread the Russian or Thousand Island dressing evenly over the sauerkraut layer to ensure every bite is flavorful. For a creamier, milder flavor profile, try mixing the dressing with a little sour cream or mayonnaise.

Baking Tips:

Preheat your oven thoroughly before baking to ensure a consistent temperature, which helps the casserole cook evenly.

If the top starts to brown too quickly, cover it with aluminum foil during the last few minutes of baking to prevent burning.

Serving Suggestions:

Let the casserole sit for about 5–10 minutes after baking. This resting period allows it to set up, making it easier to cut and serve neat portions.

Garnish with fresh chopped parsley or chives for a pop of color and a fresh flavor contrast.

Flavor Enhancers:

Add a layer of caramelized onions beneath the corned beef for a touch of sweetness that complements the tangy sauerkraut.

Before baking, sprinkle caraway seeds over the topping to add an authentic rye bread flavor.

These ideas might make your Reuben casserole taste and feel like a gourmet dinner that’s warm and delicious.

Customizing Reuben Casserole

Casseroles are versatile and suit all tastes. How to customize your Reuben casserole:

  • Vegetarian Version: Replace corned beef with smoked mushrooms or seitan for a meat-free alternative.
  • Extra Creaminess: Incorporate a layer of cream cheese or béchamel sauce.
  • Spice it Up: Add jalapeños or pepper flakes for a kick of heat.

What to Serve with Reuben Casserole

Pairing the right sides can enhance the Reuben casserole experience. Consider these options:

  • To balance the casserole’s richness, a light salad is recommended.
  • Pickles or olives: For an extra tang.
  • Dark ale, or stout, complements the deep flavors of the casserole perfectly.
  • Light salad: To balance the richness of the casserole.
  • Pickles or olives: For an extra tang.
  • Dark ale or stout: Complements the deep flavors of the casserole perfectly.

Health Benefits of Reuben Casserole

A Reuben dish is loved for its hearty tastes and warming qualities, but it also has some ingredients that are good for you in different ways. Here’s a more in-depth look at the health benefits:

  • Corned Beef: This main ingredient is a good source of protein, essential for building and repairing tissues. It also provides important vitamins such as vitamin B12, which is crucial for brain health and maintaining proper nerve function, and iron, which is vital for forming red blood cells and transporting oxygen throughout the body.

  • Sauerkraut: Not just a tangy topping, sauerkraut is fermented cabbage that offers a wealth of health benefits. It is rich in dietary fiber, which aids in digestion and helps maintain a healthy gut microbiota. Moreover, sauerkraut contains abundant amounts of vitamins C and K, as well as minerals like iron and manganese. Its fermentation process also produces probiotics, beneficial bacteria that support gut health and enhance immune function.

  • Swiss Cheese: This cheese is not only delicious, but it is also healthy. It’s a great source of calcium, crucial for strong bones and teeth, and contains phosphorus, which helps in bone formation and maintains the body’s energy production. Swiss cheese also provides protein and essential fats that are vital for cellular structure and function.

  • Whole Grain Rye Bread: Choosing whole grain rye as the base for the casserole adds important nutrients such as fiber, which promotes digestive health and can help manage cholesterol levels. Studies also link whole grains to a lower risk of several diseases, such as heart disease, diabetes, and certain types of cancer.

  • When used in moderation, Russian or Thousand Island dressing can enhance the intake of certain micronutrients. For example, some dressings contain vinegar or lemon juice, which can improve iron absorption from other foods.


Ready to experience Reuben casserole comfort? Gather your ingredients, preheat your oven, and get ready for a culinary adventure that will satisfy your taste buds and warm your heart. Show off your Reuben casseroles.

Happy cooking!

Print

Easy Homemade Reuben Casserole

Discover how to make the perfect Reuben Casserole with this easy recipe. Ideal comfort food for family dinners!

  • Author: Gabriela cardenas
  • Prep Time: 20 minutes
  • Cook Time: 30 minutes
  • Total Time: 50 minutes
  • Yield: 4-6
  • Category: Casseroles
  • Method: Baking
  • Cuisine: American
  • Diet: Gluten Free

Ingredients

  • 1012 slices of rye or pumpernickel bread, cubed
  • 1 pound of sauerkraut, drained and squeezed dry
  • pounds of corned beef, thinly sliced
  • 8 ounces of Swiss cheese, shredded
  • 1 cup of Russian or Thousand Island dressing
  • Optional: Caraway seeds for added flavor

Instructions

  1. Preheat your oven to 400 degrees F (200 degrees C).
  2. Layer the bottom of a greased 9×13-inch baking dish with cubed bread.
  3. Spread sauerkraut evenly over the bread, followed by layers of corned beef.
  4. Evenly pour the dressing over the top.
  5. Sprinkle shredded Swiss cheese over everything.
  6. Cover with aluminum foil and bake in the preheated oven for 20 minutes.
  7. Remove the foil and bake for an additional 10 minutes or until the cheese is melted and bubbly.
  8. Allow the casserole to cool slightly before serving.

Notes

  • Toasting the bread cubes lightly before assembling can prevent the base from becoming too soggy.
  • Ensure the sauerkraut is well-drained to avoid excess moisture in the casserole.
  • Experiment with adding caraway seeds to the bread layer for an authentic rye flavor.

Keywords: Easy Homemade Reuben Casserole, corned beef casserole, sauerkraut bake, rye bread casserole

Did you make this recipe?

Share a photo and tag us — we can't wait to see what you've made!

Print

Easy Reuben Casserole Recipe: Classic Comfort Food

  • Author: Gabriela cardenas
  • Prep Time: 15 minutes
  • Cook Time: 25 minutes
  • Total Time: 40 minutes
  • Category: Baking
  • Method: Main Course
  • Cuisine: American

Ingredients

  • 4 cups cubed rye bread (use gluten-free bread for a gluten-free version)
  • 1 pound thinly sliced corned beef, chopped (substitute with a plant-based meat alternative for a vegetarian version)
  • 1 (14 oz) can sauerkraut, drained and squeezed dry
  • 2 cups shredded Swiss cheese (use dairy-free cheese for a dairy-free version)
  • 1 cup Russian or Thousand Island dressing

Instructions

  1. Preheat the Oven: Preheat your oven to 350°F (175°C). Lightly grease a 9×13 inch baking dish.
  2. Layer the Casserole: Begin by spreading the cubed rye bread evenly at the bottom of the baking dish. Add a layer of chopped corned beef over the bread. Spread the drained sauerkraut evenly on top of the corned beef. Drizzle the dressing over the sauerkraut, and finally, sprinkle the shredded Swiss cheese evenly over the top.
  3. Bake: Place the casserole in the preheated oven and bake for 20-25 minutes, or until the cheese is melted and bubbly.
  4. Serve: Allow the casserole to cool for a few minutes before serving. This dish pairs well with a light salad or steamed vegetables for a balanced meal.

Notes

  • Draining Sauerkraut: To ensure your casserole isn’t soggy, thoroughly drain and squeeze the sauerkraut to remove as much liquid as possible.
  • Even Layers: For the best flavor distribution, make sure to layer the ingredients evenly.
  • Vegetarian Adaptation: For a vegetarian version, substitute the corned beef with a plant-based meat alternative. Be sure to check the dressing is vegetarian as well.
  • Gluten-Free Adaptation: Use gluten-free rye bread or another suitable gluten-free bread to make this dish gluten-free. Also, verify that the dressing and meat substitute (if using) are gluten-free.
  • Storage: Leftover casserole can be stored in an airtight container in the refrigerator for up to 3 days. Reheat in the oven or microwave until warmed through.

Did you make this recipe?

Share a photo and tag us — we can’t wait to see what you’ve made!

Categories
Blog

Sloppy Joe Recipes: Top Mixes and Homemade Delights


Welcome to the ultimate guide for Sloppy Joe Recipes, where we explore the best mixes and homemade delights for this classic dish. Whether you’re a fan of traditional Sloppy Joe Sauce or seeking creative Homemade Sloppy Joe ideas, our guide is designed to provide you with easy and delicious options for every taste.

In the homemade recipe section: “For those who love to cook, our Sloppy Joe Recipes section offers easy-to-follow instructions for making your own Sloppy Joes, ensuring a delicious and satisfying meal.

Choosing the Best Sloppy Joe Mix

When it comes to Sloppy Joes, the sauce is the star. Whether you’re a fan of the classic Manwich or prefer a more gourmet option, the market is flooded with choices. Here are some factors to consider when selecting a mix:

Personal Preference: Your taste buds should guide your choice. Whether you like it sweet, tangy, or spicy, there’s a mix out there for you.

Ingredients: Look for high-quality ingredients and avoid unnecessary additives. Common ingredients include tomato sauce, brown sugar, Worcestershire sauce, garlic, and onion.

Servings: Consider the number of servings you need. Some mixes are better suited for larger families or gatherings.

Discover more about enhancing flavors in your cooking with our guide on the Best Seasoning for Chicken Breast: A Comprehensive Guide.

FAQs 

What’s the best ground beef for Sloppy Joes?

Lean ground beef (85-90% lean) is ideal.

Can Sloppy Joes be made in a slow cooker?

Absolutely! They’re great for crockpot cooking.

How can I spice up my Sloppy Joe?

Add jalapenos or hot sauce for extra heat.

Top 5 Store-Bought Sloppy Joe Mixes

After extensive research, here are the top 5 store-bought mixes that stand out in flavor and quality:

Hunt’s Manwich Original Sloppy Joe Sauce: A classic with a perfect balance of bold and tangy flavors.

McCormick Sloppy Joes Seasoning Mix: Offers a classic taste with a bold kick.

Lawry’s Sloppy Joe Seasoning Mix: Ideal for bulk cooking, this mix adds a tangy and sweet flavor to your meat.

Del Monte Sloppy Joe Sauce Original: Zesty and flavorful, made with real tomatoes.

Simply Organic Sloppy Joe Mix: An organic option that’s both light and robust in flavor.

For a unique twist on classic recipes, explore our Maine Lobster Roll: A Culinary Journey.


Indulge in more culinary delights with our Lobster Pasta: The Ultimate Guide.


Conclusion

Sloppy Joes, whether made from a store-bought mix or from scratch, are a quick, easy, and satisfying meal. They’re perfect for busy weeknights, game days, or just when you need some good old comfort food. Remember, the best Sloppy Joe is the one that suits your taste and needs!

Print

Sloppy Joe Recipes: Top Mixes and Homemade Delights

  • Author: Gabriela cardenas
  • Prep Time: 10 minutes
  • Cook Time: 20 minutes
  • Total Time: 30 minutes
  • Yield: 4-6
  • Category: Main Course
  • Method: Stovetop
  • Cuisine: American

Ingredients

  • 1 lb lean ground beef (85-90% lean)
  • 1 medium green bell pepper, finely chopped
  • 1 medium onion, finely chopped
  • 2 cloves garlic, minced
  • 1 cup tomato sauce
  • 2 tablespoons brown sugar
  • 2 tablespoons yellow mustard
  • 1 tablespoon Worcestershire sauce
  • Salt and pepper to taste
  • 46 hamburger buns, toasted

Instructions

  1. Cook the Beef: In a large skillet over medium heat, cook the ground beef, breaking it apart with a spoon, until no longer pink. Drain any excess fat.
  2. Add Vegetables: Add the chopped green bell pepper, onion, and garlic to the skillet with the beef. Cook until the vegetables are softened, about 5 minutes.
  3. Mix in the Sauce Ingredients: Stir in the tomato sauce, brown sugar, yellow mustard, and Worcestershire sauce. Season with salt and pepper to taste. Reduce the heat to low and simmer the mixture for 10-15 minutes, or until thickened.
  4. Serve: Spoon the Sloppy Joe mixture onto the toasted hamburger buns and serve immediately.

Notes

  • Lean Ground Beef: Using lean ground beef helps to reduce the fat content without sacrificing flavor.
  • Slow Cooker Option: For convenience, you can also prepare Sloppy Joes in a slow cooker. Combine all ingredients in the slow cooker and cook on low for 4-6 hours.
  • Spicing It Up: For those who enjoy a bit of heat, consider adding diced jalapeños or a splash of hot sauce to the mixture.
  • Serving Suggestions: Pair your Sloppy Joes with a side of coleslaw, potato chips, or a simple salad for a complete meal.

Did you make this recipe?

Share a photo and tag us — we can’t wait to see what you’ve made!

For more culinary inspiration, don’t miss Ina Garten’s Italian Wedding Soup: A Culinary Delight and Corned Beef in a Roaster: A Guide to Perfectly Cooked Meat.

Categories
Dinner Lunch Recipes

Corned Beef in a Roaster


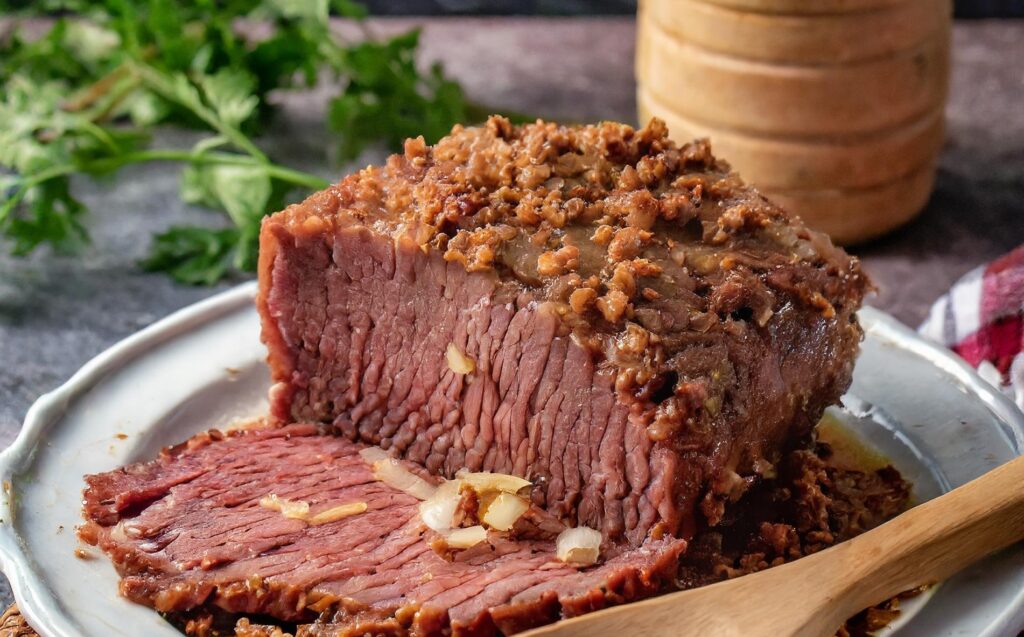
Corned Beef in a Roaster, seasoned with peppercorns, bay leaf, and cured with large salt grains, transforms from a traditional preservation method into a celebrated culinary tradition. This savory dish, known for its distinctive flavor profile, has become a beloved staple across various cultures, offering a taste experience filled with character and depth.

Cooking Corned Beef: The Roaster Oven Method

Though corned beef can be cooked in several ways, using a roaster oven is ideal. This method is straightforward and guarantees tender, flavorful corned beef by providing consistent, gentle heat.

Corned Beef in a Roaster: Exploring the Rich Tapestry of American Cuisine

Irish-American Roots: Despite its strong association with Ireland, corned beef as celebrated in the U.S., especially on St. Patrick’s Day, is largely an Irish-American innovation.

Symbol of Cultural Melting Pot: Corned beef represents the rich cultural tapestry of America, showcasing the contributions of immigrants to the country’s culinary heritage.

Versatile Comfort Food: Once a feast-day specialty, corned beef has become a year-round favorite in the U.S., enjoyed in sandwiches, hashes, and more, reflecting its status as a beloved comfort food.

Adaptability and Appeal: The enduring popularity of corned beef

FAQs About Corned Beef in a Roaster

Should I Rinse My Corned Beef Prior To Cooking?

Yes, it’s recommended to rinse corned beef before cooking to remove excess salt from the curing process. Skipping this step could result in a very salty dish.

What Goes Into Corned Beef Brine?

A traditional corned beef brine includes heavily salted water and spices like peppercorns, coriander seed, allspice, mustard seed, and cloves. This process is crucial for flavoring the meat.

What Is the Best Way To Cook Corned Beef?

Corned beef can be cooked in various ways, including in a Crock Pot, smoker, oven, or on the stovetop. Regardless of the method, cooking it low and slow is essential for tender results.

How To Use Corned Beef Leftovers?

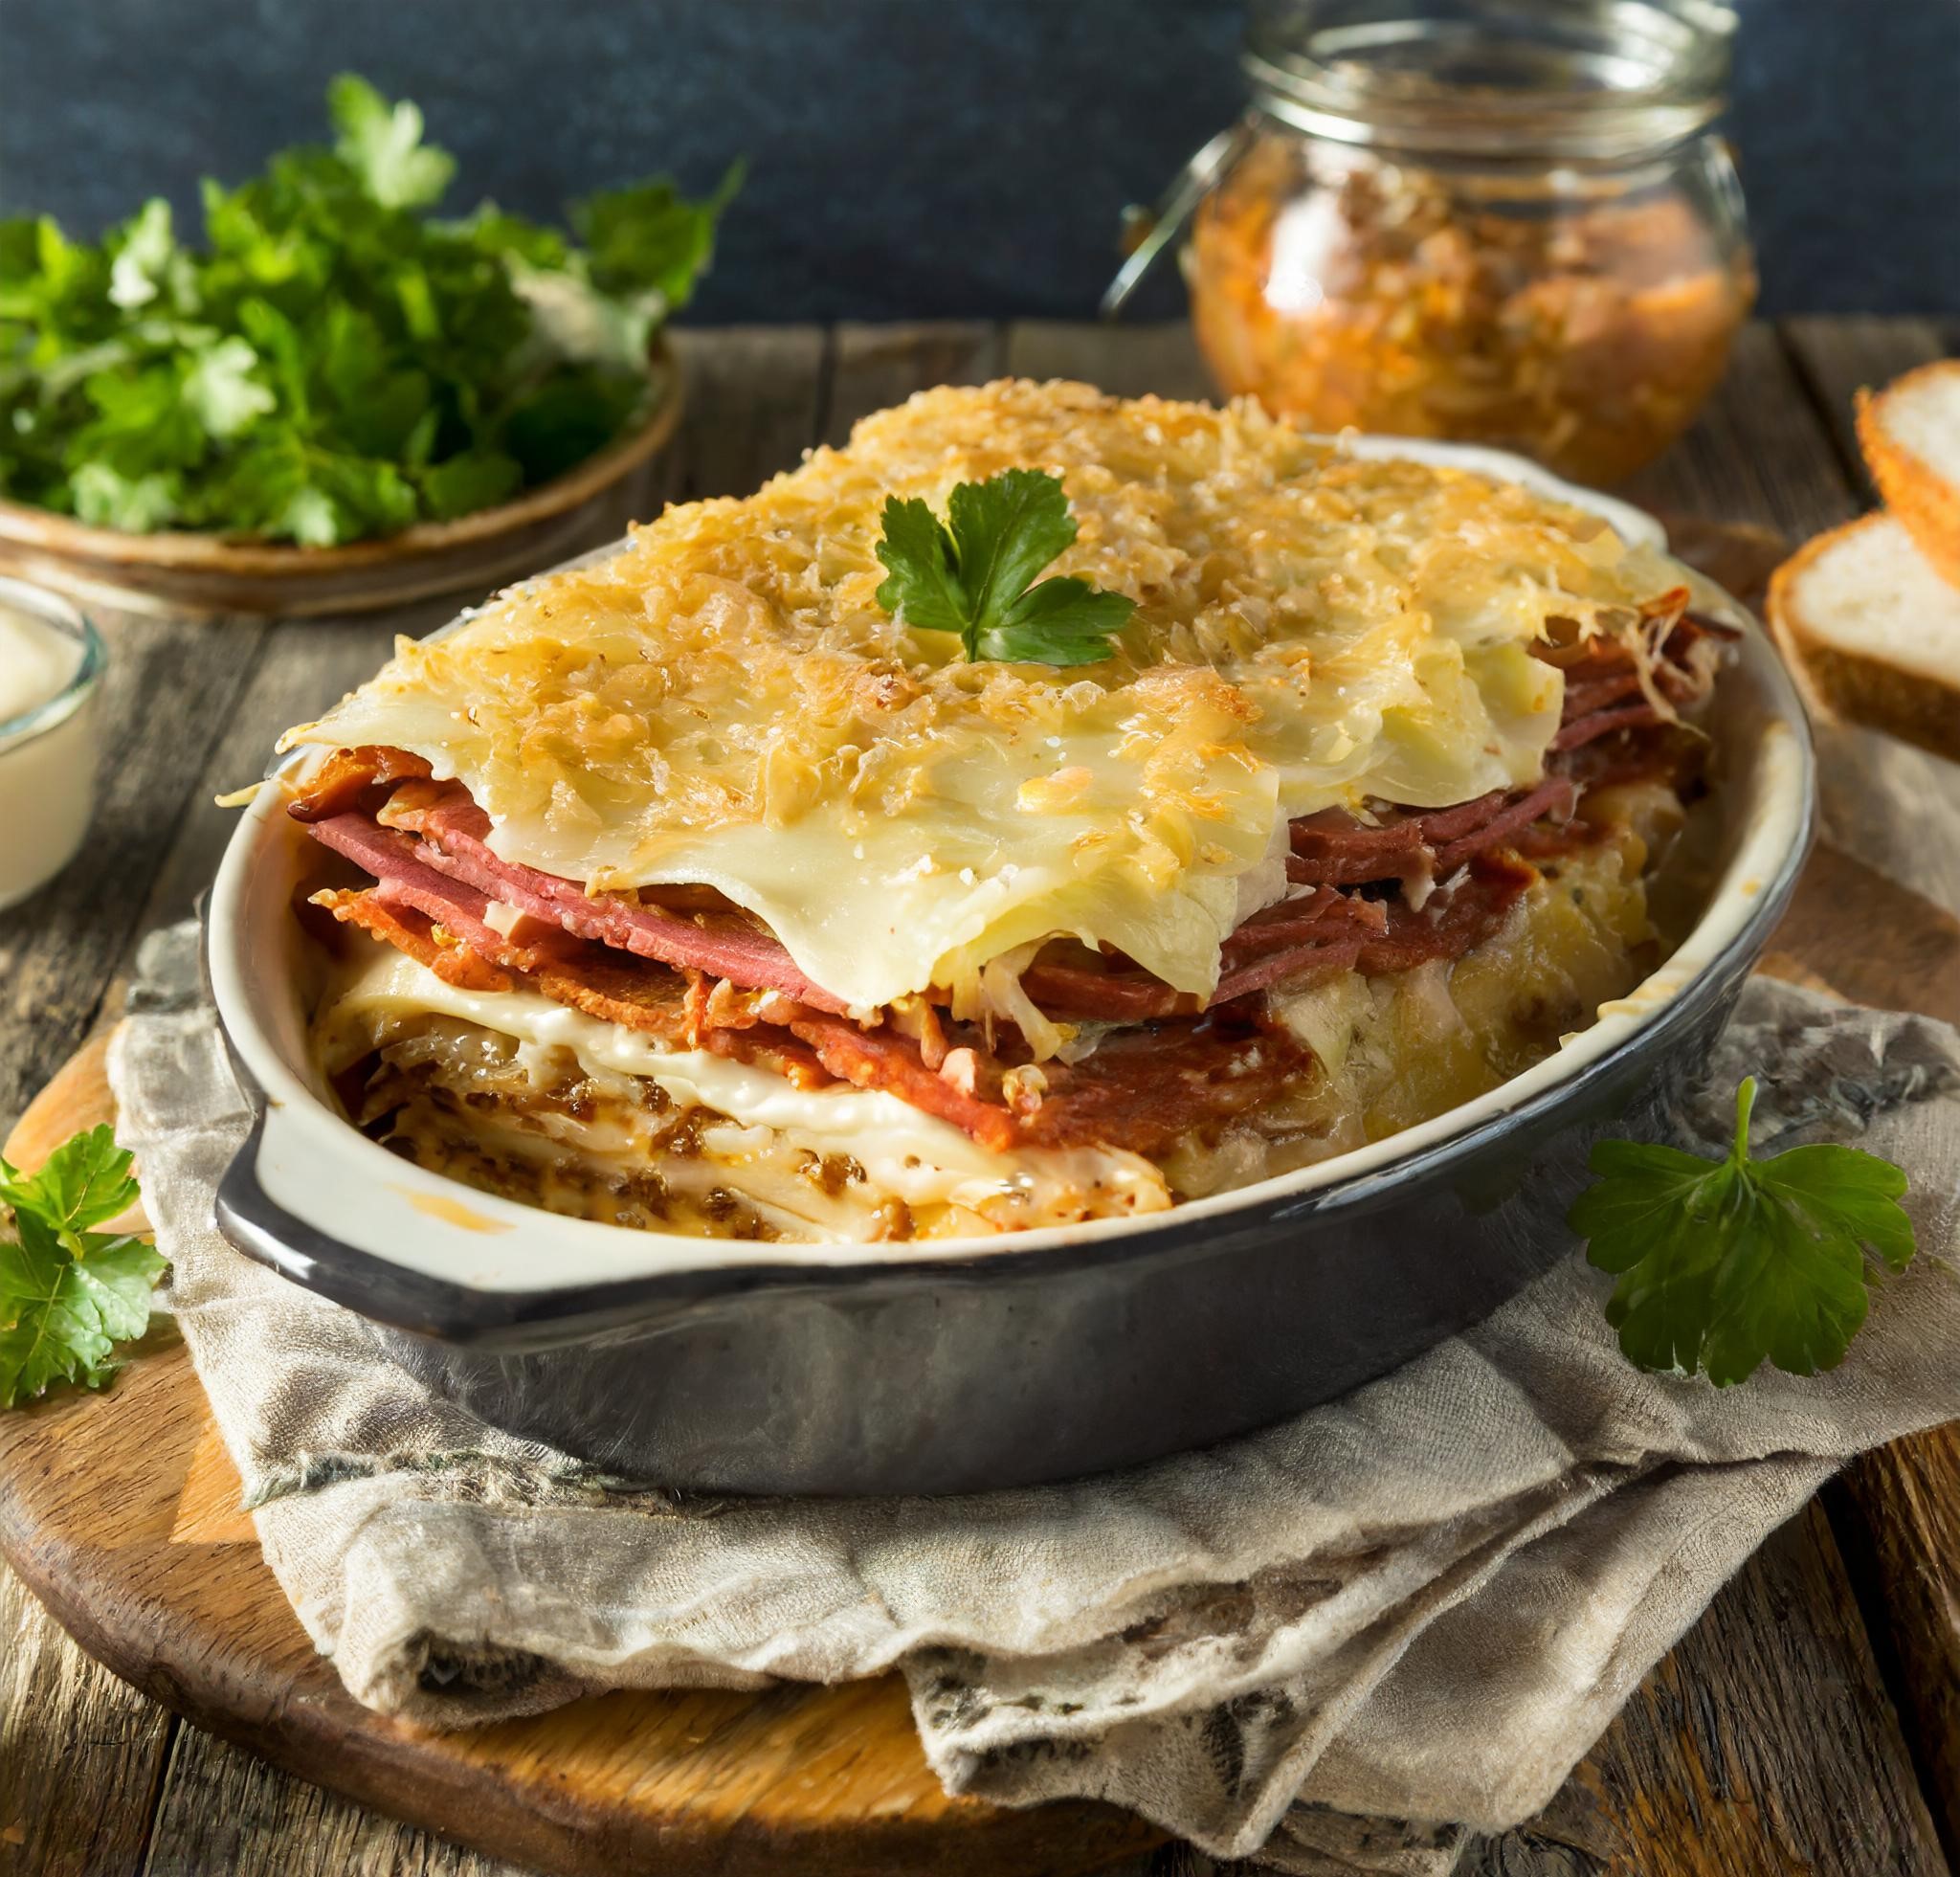
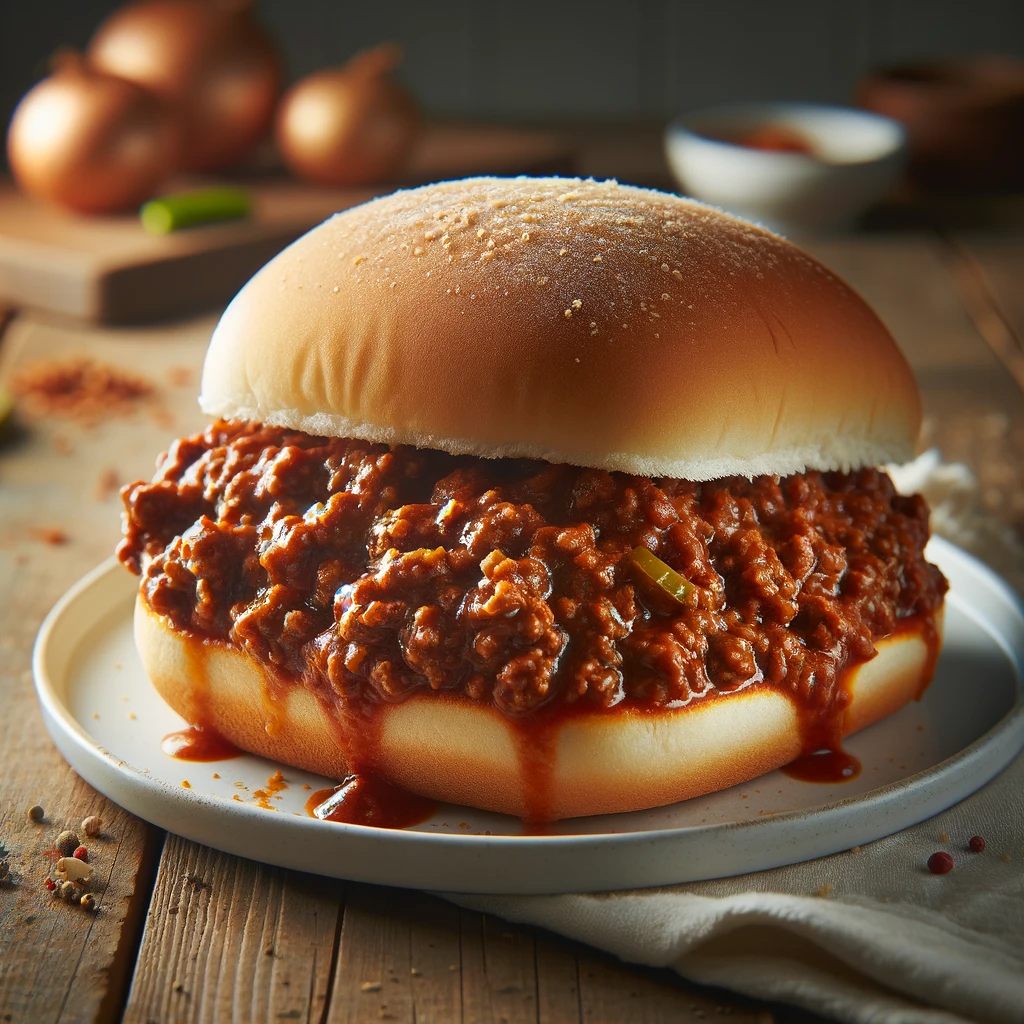
Leftover corned beef can be transformed into various delicious dishes, such as hearty Reuben soup, avocado Reuben bites, classic Reuben sandwiches, mini Reuben toasts, or Reuben bread stuffed with corned beef.

Mistakes To Avoid When Cooking Corned Beef:

Not rinsing the corned beef, which can make it overly salty.

Not adding enough water to the pot, which can result in uneven cooking.

Cooking at too high a temperature or not long enough, both of which can lead to tough meat.

Not slicing the beef against the grain, which can make it chewy.

Selecting the Right Corned Beef Cut

When it comes to corned beef, the cut of meat is crucial. There are primarily two types:

Flat Cut: Leaner and more uniform in shape, ideal for even cooking.

Point Cut: More marbled with fat, offering richer flavor.

When purchasing corned beef, consider factors like the size of your roaster and the number of people you’re serving. For more on selecting the right cut, visit Livestrong’s Roaster Oven Tips.

Key Ingredients for Corned Beef in a Roaster

Creating a delicious corned beef dish starts with selecting the right ingredients. Here’s a detailed overview of what you’ll need to bring this savory meal to life:

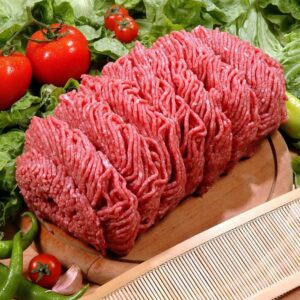
Corned Beef: Choose a high-quality corned beef brisket. Look for a cut that’s well-marbled with fat for flavor and tenderness. The brisket typically comes pre-packaged with a spice packet for seasoning.

Salt: Large grains of salt, or “corns,” are essential for the curing process that gives corned beef its name and distinctive taste.

Spices: The spice packet included with the corned beef often contains peppercorns, bay leaves, mustard seeds, and coriander. These spices are key to achieving the traditional corned beef flavor.

Vegetables for Cooking: Adding aromatic vegetables like onions, carrots, and celery to the cooking liquid infuses the meat with additional flavors.

Potatoes: Small to medium-sized potatoes, such as baby potatoes or fingerlings, are ideal for serving alongside corned beef. They can be boiled or roasted.

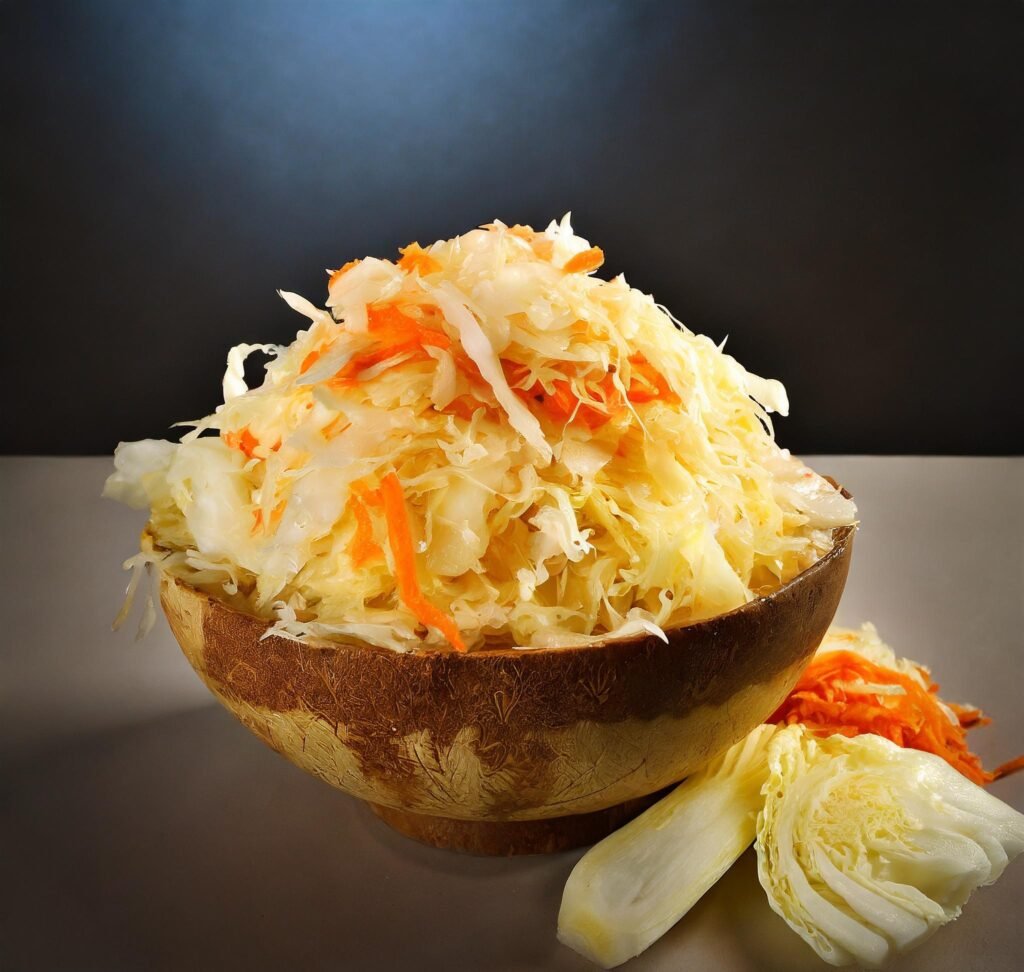
Cabbage: A classic accompaniment to corned beef, cabbage can be steamed, boiled, or sautéed. Choose a fresh, firm head of cabbage for the best texture and flavor.

Carrots: Carrots add sweetness and color to the dish. Use whole baby carrots or slice larger carrots into thick pieces for even cooking.

Glaze Ingredients (Optional): For a glazed corned beef, you might need brown sugar, mustard, and ketchup or a combination of honey, Dijon mustard, and spices. These ingredients create a sweet and tangy crust on the meat.

Serving and Presentation

Slicing Technique: To ensure tender, easy-to-eat slices, always cut the corned beef against the grain. This means slicing perpendicular to the muscle fibers in the meat.

Accompaniments: Traditional sides include boiled or roasted potatoes, steamed cabbage, and glazed carrots. These sides not only complement the flavors of the corned beef but also add a variety of textures and colors to the plate.

Presentation Tips: Arrange the sliced corned beef in the center of a large platter. Surround it with the cooked vegetables, creating an appealing and colorful display. Consider garnishing with fresh parsley for a pop of color and a sprinkle of coarse salt for added texture.

Additional Sides: For a more robust meal, consider adding freshly baked Irish soda bread, a green salad with a light vinaigrette, or a creamy horseradish sauce for dipping.

By carefully selecting your ingredients and paying attention to the presentation, you can turn a simple corned beef meal into a festive and inviting dining experience. Whether for St. Patrick’s Day or a cozy family dinner, this dish is sure to impress.

Flavor Enhancements and Glazing Corned Beef in a Roaster

Flavor Enhancements:

Beer Braising: Slow cook the corned beef in a dark beer instead of water. The beer adds a rich, malty flavor that complements the saltiness of the meat.

Aromatic Vegetables: Add onions, carrots, and celery to the cooking liquid. These vegetables will impart additional flavors into the corned beef as it cooks.

Pickling Spices: Enhance the brine with a homemade pickling spice mix including mustard seeds, cinnamon sticks, allspice berries, and dried ginger for a deeper spice profile.

Garlic and Herbs: Introduce whole cloves of garlic and fresh herbs like thyme and parsley to the cooking liquid for a fragrant aroma and taste.

Apple Cider Vinegar: A splash of apple cider vinegar in the cooking liquid can add a subtle tanginess that balances the richness of the meat.

Glazing Techniques:

Honey Mustard Glaze: Combine honey, Dijon mustard, and a touch of brown sugar for a sweet and tangy glaze. Brush over the corned beef during the last 30 minutes of roasting.

Maple and Bourbon Glaze: Mix maple syrup with bourbon and a little soy sauce for a glaze with a kick. The bourbon adds a smoky depth that pairs well with the sweetness of the maple.

Brown Sugar and Spice Glaze: Create a glaze using brown sugar, ground cloves, and a bit of orange juice for a spicy-sweet flavor. This glaze caramelizes beautifully on the surface of the corned beef.

Balsamic Reduction Glaze: Simmer balsamic vinegar until it reduces to a thick syrup. Brushing this glaze on the corned beef adds a rich, tangy flavor with a glossy finish.

Guinness Glaze: Reduce Guinness beer with some brown sugar and a splash of Worcestershire sauce for a uniquely Irish glaze that’s rich and flavorful.

Applying the Glaze:

Last Cooking Phase: Apply your chosen glaze during the last 20-30 minutes of cooking to prevent it from burning while ensuring it caramelizes nicely.

Brush Evenly: Use a pastry brush to evenly coat the corned beef with the glaze. You may want to apply several layers for a thicker glaze.

Broil for Finish: For a crispy, caramelized exterior, consider placing the glazed corned beef under the broiler for a few minutes, watching closely to prevent burning.

By incorporating these flavor enhancements and glazing techniques, you can elevate your corned beef dish, adding complexity and depth to its taste and presentation.

Serving and Presentation Tips for Corned Beef Roaster

Slicing for Tenderness:

Against the Grain: To ensure each slice of corned beef is as tender as possible, always slice against the grain. This means cutting perpendicular to the muscle fibers, which shortens them and makes the meat easier to chew.

Thickness: Consider the thickness of your slices based on use; thinner slices are great for sandwiches, while thicker slices may be more satisfying as a main course.

Thoughtful Accompaniments:

Classic Sides: Elevate the traditional serving of boiled potatoes, cabbage, and carrots by infusing them with flavor. Consider roasting the vegetables instead of boiling, or tossing them in a herb butter after cooking for added richness.

Creative Vegetables: Branch out with other vegetables like roasted Brussels sprouts, parsnips, or a colorful beet salad. These can add a modern twist and a pop of color to your plate.

Sauces and Condiments: Offer a range of condiments to complement the corned beef. Mustard, particularly whole grain or Dijon, is a classic choice. Horseradish sauce, apple cider vinegar reduction, or a creamy dill sauce can also enhance the flavors.

Presentation for Impact:

Platter Arrangement: Arrange your corned beef slices neatly on a large platter. Strategically place your accompaniments around the meat, considering color and texture for a visually appealing presentation.

Garnishes: A sprinkle of chopped parsley or chives on the meat and sides can add a fresh look and taste. Edible flowers or a drizzle of balsamic glaze can also elevate the presentation.

Serving Style: Consider serving the corned beef and sides family-style, allowing guests to help themselves. This encourages interaction and creates a communal dining experience.

Additional Serving Ideas:

Bread Basket: Offer a basket of warm, crusty bread or Irish soda bread to complement the meal. Bread is perfect for sopping up any flavorful juices left on the plate.

Pairing with Beverages: Pair your corned beef meal with beverages that complement its rich flavors. A stout or porter beer, a full-bodied red wine, or even a crisp apple cider can be excellent choices.

By focusing on slicing techniques, thoughtful accompaniments, and presentation details, you can turn the serving of corned beef into a memorable dining experience that delights the senses and honors the tradition of the dish.

Conclusion

As Gabriela Cardenas, I’ve always believed that the best meals are those shared with loved ones, whether it’s a cozy dinner at home or a hearty lunch that breaks up the day. This Corned Beef in a Roaster recipe is one of those dishes that holds a special place in my heart. It’s not just about the delicious, savory flavors or the tender texture of the beef; it’s about the memories and traditions it evokes. From preparing it for St. Patrick’s Day gatherings to serving it as a comforting weekend meal, this recipe has been a staple in my kitchen. It’s my hope that it brings as much warmth and joy to your table as it has to mine.

Cooking corned beef in a roaster is an excellent way to ensure a delicious, tender meal. By following these steps and tips, you’ll be able to serve up a dish that’s sure to impress. Remember, a high-quality roaster oven can make all the difference, so consider investing in one from Hamilton Beach Roaster Oven for the best results.

Happy cooking!

Print

Corned Beef in a Roaster

  • Author: Gabriela cardenas
  • Prep Time: 15 minutes
  • Cook Time: 3 hours (depending on the size of the brisket)
  • Total Time: Approximately 3 hours 15 minutes
  • Category: Main Course
  • Method: Roasting
  • Cuisine: American
  • Diet: Gluten Free

Ingredients

  • 34 lb corned beef brisket
  • 1 onion, quartered
  • 4 cloves garlic, minced
  • 2 bay leaves
  • 1 tablespoon whole peppercorns
  • 34 carrots, peeled and cut into 2-inch pieces
  • 34 potatoes, peeled and quartered
  • 1 small cabbage, cut into wedges
  • Water, enough to cover the brisket

Instructions

  1. Preheat your oven to 325°F (165°C).
  2. Place the corned beef brisket fat-side up in a large roasting pan. Scatter the onion quarters, minced garlic, bay leaves, and peppercorns around the brisket.
  3. Add enough water to the pan to just cover the brisket. Cover the roasting pan tightly with aluminum foil or a lid.
  4. Roast in the preheated oven for about 3 hours, or until the meat is tender and reaches an internal temperature of 145°F (63°C).
  5. During the last hour of cooking, add the carrots, potatoes, and cabbage wedges to the roasting pan. Return the cover to continue cooking.
  6. Once cooked, remove the corned beef from the oven and let it rest for 20 minutes before slicing. This allows the juices to redistribute throughout the meat, ensuring it’s moist and flavorful.
  7. Serve the corned beef sliced against the grain, alongside the roasted vegetables.

Notes

  • Choosing the Cut: Opt for a brisket with a good fat cap; the fat will keep the meat moist during the long cooking process.
  • Slicing: Always slice corned beef against the grain for the most tender texture.
  • Leftovers: Corned beef makes excellent sandwiches the next day. Consider making extra for this purpose.
  • Spices: Feel free to adjust the spices used to suit your taste preferences. Some like to add a touch of sweetness with a bit of brown sugar or honey to the water.
  • Suggested Serving:

    • Serve the corned beef sliced against the grain, accompanied by the roasted vegetables. Mustard and horseradish sauce on the side make excellent condiments.

Did you make this recipe?

Share a photo and tag us — we can’t wait to see what you’ve made!

Print

Corned Beef in a Roaster

Enjoy this Corned Beef in a Roaster recipe, a simple yet delicious way to celebrate any gathering with a tender, flavorful feast that’s sure to impress.

  • Author: Gabriela cardenas
  • Prep Time: 15 minutes
  • Cook Time: 4 houres
  • Total Time: 4 hours 15 minutes
  • Yield: 6
  • Category: Main Course
  • Method: Roasting
  • Cuisine: Irish-American
  • Diet: Gluten Free

Ingredients

  • 1 (3 to 4 lb) corned beef brisket, including spice packet
  • 4 cups water (or enough to cover the brisket)
  • 2 bay leaves
  • 6 whole peppercorns
  • 2 cloves garlic, minced
  • 1 large onion, quartered
  • 3 large carrots, cut into 2-inch pieces
  • 6 medium potatoes, quartered
  • 1 small cabbage, cut into wedges

Instructions

  1. Preheat your roaster oven to 325°F (163°C).
  2. Rinse the corned beef under cold water, and place it in the roaster.
  3. Add water to cover the brisket. Stir in the spices from the packet, bay leaves, peppercorns, and garlic.
  4. Place the onion around the brisket. Cover and cook on low for about 4 hours, or until tender.
  5. Add carrots, potatoes, and cabbage to the roaster in the last hour of cooking.
  6. Once cooked, remove the beef and let it rest for 10 minutes before slicing against the grain. Serve with the vegetables.

Notes

  • Rinsing: Always rinse your corned beef before cooking to remove excess surface salt.
  • Vegetable Timing: Adding vegetables in the last hour prevents them from becoming too soft.
  • Slicing: Cutting the beef against the grain ensures tender slices.
  • Leftovers: Corned beef leftovers make great sandwiches or can be added to soups and hashes

Did you make this recipe?

Share a photo and tag us — we can't wait to see what you've made!

Categories
Dinner Recipes Seafood

Luxurious Lobster Pasta: Home Cooking


Lobster pasta, a dish synonymous with luxury and flavor, is a culinary delight that combines the richness of lobster with the comfort of pasta. In this article, we will guide you through the process of creating a sumptuous lobster pasta dish, ensuring a gourmet experience right in your kitchen.

Overview of Ingredients for Lobster Pasta

Overview of Ingredients for Lobster Pasta

Lobsters: The star of the dish. Fresh lobsters are preferred for their superior flavor and texture, but high-quality frozen lobsters can also provide an excellent taste. The lobster not only adds a rich, seafood flavor but also elevates the dish’s elegance.

Pasta: Long pasta such as spaghetti or linguine is ideal for this recipe. These shapes work well to hold onto the sauce and complement the lobster pieces. Opt for high-quality pasta for the best texture and flavor.

Butter: A high-quality butter is crucial for creating a rich, flavorful sauce that coats the pasta and lobster. It adds depth and a silky texture to the dish. Westgold or another premium brand can enhance the overall taste.

White Wine: A splash of good white wine contributes complexity and acidity to the sauce, balancing the richness of the butter and lobster. It’s important to use a wine that you enjoy drinking, as its flavor will infuse the dish.

Shallots and Garlic: These aromatics are sautéed in butter to form the base of the sauce. Shallots add a subtle sweetness, while garlic introduces a pungent depth, both essential for a well-rounded flavor profile.

Cherry Tomatoes: Cherry tomatoes add a burst of freshness and a slight tanginess to the dish. As they cook, they release their juices, creating a jammy texture that blends beautifully with the other sauce components.

Seasonings: Salt and pepper are used to enhance and balance the flavors. Fresh herbs like basil or parsley add a final touch of freshness and color, while optional ingredients like lemon zest or chili flakes can add brightness or heat to finish the dish.

Each ingredient in lobster pasta plays a pivotal role in creating a harmonious and indulgent dish. By selecting the best quality ingredients available, you ensure a dining experience that’s both luxurious and deeply satisfying.

For ideas on how to season your dishes, take a cue from the Best Seasoning for Chicken Breast The principles of seasoning chicken can be adapted to seafood, providing a balanced and flavorful dish.

Selecting the Best Ingredients For Lobster Pasta Dish

Firstly, the foundation of a great lobster pasta lies in its ingredients. Here’s what you need to consider:

Lobster: Fresh lobster is ideal, but frozen can work well too. Importantly, the key is in the quality and freshness.

Pasta: Opt for long pasta like spaghetti or linguine to complement the lobster.

Butter: A high-quality butter, such as Westgold, can significantly enhance the flavor.

Wine: A splash of good white wine adds depth. Remember, if you wouldn’t drink it, don’t cook with it. Additionally, for more insights on cooking with wine, check out Will Cook For Smiles..

Mastering Lobster Preparation

Furthermore, cooking lobster might seem daunting, but it’s simpler than you think:

Boil or steam the lobster until it’s just cooked.

Extract the meat from the shell, being careful not to overcook.

Moreover, for more detailed techniques on seafood preparation, visit Orchids + Sweet Tea.

Crafting the Perfect Sauce for Lobster Pasta

Subsequently, the sauce is where the magic happens. Here’s how to make it:

Sauté shallots and garlic in butter.

Add white wine and let it reduce.

Toss in cherry tomatoes until they burst, creating a jammy texture.

cooking pasta with lobser

Side Dishes and Wine Pairings

To elevate your lobster pasta, consider these additions:

A simple green salad or garlic bread.

For wine, a Chardonnay or Pinot Grigio pairs beautifully. For non-alcoholic options, try sparkling water with a twist of lemon.

Advanced Tips and Tricks for Perfecting

For that extra touch:

Finish the dish with a sprinkle of lemon zest or chili flakes.

Use fresh herbs like basil or parsley for garnish.

Conclusion: Savoring Your Homemade

Lastly, lobster pasta is more than just a dish; it’s an experience. With these tips and tricks, you’re well on your way to creating a restaurant-quality meal that will impress anyone who tastes it. Remember, the key to a great lobster pasta is in the quality of the ingredients and the love you put into making it. So, don your chef’s hat and start cooking!

Print

Lobster Pasta

Discover how to make luxurious lobster pasta at home. Follow our guide for selecting ingredients, mastering lobster preparation, and crafting the perfect sauce.

  • Author: Gabriela cardenas
  • Prep Time: 20 minutes
  • Cook Time: 30 minutes
  • Total Time: 50 minutes
  • Yield: 4
  • Category: Main Course
  • Method: Boiling, Sautéing
  • Cuisine: Italian-Inspired

Ingredients

  • 2 whole lobsters (fresh or frozen)
  • 400g (14 oz) long pasta (spaghetti or linguine)
  • 4 tablespoons high-quality butter (e.g., Westgold)
  • 1/2 cup good white wine
  • 2 shallots, finely chopped
  • 2 garlic cloves, minced
  • 1 cup cherry tomatoes
  • Salt and pepper, to taste
  • Fresh herbs (basil or parsley) for garnish
  • Optional: lemon zest or chili flakes for finishing

Instructions

  1. Prepare the Lobster: Boil or steam the lobsters until fully cooked, then extract the meat from the shells. Chop the meat into bite-sized pieces.
  2. Cook the Pasta: In a large pot of salted boiling water, cook the pasta until al dente. Drain and set aside.
  3. Make the Sauce: In a large skillet, melt the butter over medium heat. Add the shallots and garlic, sautéing until fragrant. Pour in the white wine and let it reduce by half. Add the cherry tomatoes and cook until they start to burst.
  4. Combine: Add the cooked pasta to the skillet with the sauce, tossing to coat evenly. Gently fold in the lobster meat, heating through. Season with salt and pepper to taste.
  5. Serve: Divide the pasta among plates. Garnish with fresh herbs, lemon zest, or chili flakes if desired.

Notes

  • Seafood Alternatives: Shrimp or scallops can be used in place of lobster.
  • Gluten-Free Option: Use gluten-free pasta to accommodate dietary restrictions.
  • Dairy-Free Modification: Substitute butter with a dairy-free alternative.
  • Storing and Reheating: Store leftovers in an airtight container in the fridge. Reheat gently on the stove, adding a splash of water to loosen the sauce if necessary.

Keywords: Lobster Pasta Dish, Cooking Lobster Pasta, Gourmet Lobster Pasta

Did you make this recipe?

Share a photo and tag us — we can't wait to see what you've made!

Categories
Blog

Seasoning for Chicken


Seasoning for Chicken
Chicken seasoning enhances its mild taste to make delicious meals in any cuisine. The right combination of herbs, spices, and other flavor enhancers demonstrates chicken’s adaptability as a protein in many culinary cultures.

Basic Seasonings:

  • Salt and pepper are the foundation of all seasoning and are essential for enhancing the natural flavor of chicken.
  • Garlic Powder: Adds a mild, aromatic flavor suitable for both grilled and roasted chicken.
  • Onion Powder: Provides a sweet yet sharp taste that complements garlic well.

Herbs:

  • Thyme: Its minty and slightly floral notes are perfect for slow-cooked chicken.
  • Rosemary: With its woody aroma, it’s ideal for roasting and grilling.
  • Parsley offers a fresh, clean taste to lighter chicken dishes.

Spices:

  • Paprika adds warmth and color, with a sweet or smoky flavor.
  • Cumin: earthy, with a hint of citrus, works well in spice mixes.
  • Turmeric offers a vibrant color and a bold, warm taste, plus health benefits.

Special Blends:

  • BBQ Seasoning: A mix of sweet, savory, and smoky elements.
  • Jerk Seasoning: A spicy, fragrant blend perfect for a Caribbean twist.
  • Tandoori Masala: Rich in spices, it’s essential for creating Indian-style chicken.

Seasoning Techniques:

  • Dry Rubs: Ideal for creating a crust on grilled or roasted chicken.
  • Marinades: Use acidic bases, such as lemon juice or yogurt, to tenderize and infuse flavor.
  • Glazes: For a sweet or savory finish, brush on towards the end of cooking.

Pairing Seasonings with Foods:

  • With Vegetables: Suggest herbs and spices that complement common vegetables.
  • With Grains: Offer ideas for seasoning blends that enhance dishes like rice or quinoa.

Storage and Shelf Life:

  • Tips on Storage: Best Practices for Keeping Seasonings Fresh.
  • Shelf Life of Common Seasonings: How Long They Last and Signs They’ve Gone Bad.

Chicken Breast Seasoning Recipe

Ingredients:

  • 1 tablespoon paprika (sweet or smoked, depending on your preference)
  • 1 tablespoon garlic powder
  • 1 tablespoon onion powder
  • 1 teaspoon dried oregano
  • 1 teaspoon dried basil
  • 1 teaspoon salt (or to taste)
  • 1/2 teaspoon black pepper
  • 1/2 teaspoon crushed red pepper flakes (optional for a spicy kick)
  • 1/2 teaspoon dried thyme

Instructions:

  1. Mix Ingredients: In a small bowl, combine all the ingredients to create a uniform seasoning blend.
  2. Store: Place the seasoning mix in an airtight container to keep it fresh, storing it in a cool, dry place.

How to season chicken breast

Ingredients:

  • 1 to 2 tablespoons of the chicken breast seasoning
  • 2 large chicken breasts
  • Olive oil or melted butter

Instructions:

  1. Prepare the chicken: If the chicken breasts are very thick, you might consider pounding them to an even thickness to ensure uniform cooking. To help the seasoning stick better, pat the chicken dry with paper towels.
  2. Apply Oil or Butter: Lightly coat each chicken breast with olive oil or melted butter. This not only helps the seasoning adhere to the meat but also aids in achieving a golden crust.
  3. Season the chicken. Generously rub the seasoning mix all over the chicken breasts. Make sure to cover both sides evenly and massage the seasoning into the meat.
  4. Let it Rest: For enhanced flavor, allow the seasoned chicken to sit for at least 15 minutes at room temperature (or up to an hour in the fridge if you have more time).
  5. Cook the chicken. Depending on your preference:
    • Grill: Preheat the grill to medium-high heat. Grill the chicken breasts for 6-7 minutes on each side or until the internal temperature reaches 165°F (74°C).
    • Bake: Preheat the oven to 375°F (190°C). Place the chicken on a baking sheet and bake for 22–26 minutes, or until the chicken is thoroughly cooked.
    • Sauté: Heat a skillet over medium heat, add a splash of oil, and cook the chicken breasts for 7-8 minutes on each side, or until golden brown and cooked through.

This spice combination and procedure will keep chicken breasts moist and flavorful, making them a delicious complement to any dinner. Seasoned chicken breasts are delicious with veggies, salads, and sandwiches.

Homemade Taco Seasoning for chicken

Using Taco Seasoning on Chicken

Ingredients:

  • 1 to 2 tablespoons homemade taco seasoning
  • 1 pound chicken breasts or thighs, either whole or cut into strips
  • 1 tablespoon olive oil or any other cooking oil
  • Lime wedges, for serving (optional)

Instructions:

  1. Prepare Chicken: Pat the chicken dry with paper towels to ensure the seasoning sticks well.
  2. Season the Chicken: Sprinkle the taco seasoning evenly over the chicken. Use your hands to rub the seasoning all over the chicken, ensuring it is fully coated.
  3. Marinate (Optional): For deeper flavor, let the chicken marinate for at least 30 minutes in the refrigerator, though this step can be skipped if you’re short on time.
  4. Cook the Chicken:
    • For Grilling: Preheat the grill to medium-high heat. Grill the chicken for 5-7 minutes on each side, or until the internal temperature reaches 165°F (74°C).
    • For Pan-frying: Heat oil in a skillet over medium heat. Add the chicken and cook for about 6–8 minutes on each side, or until cooked through and golden.
    • For Baking: Preheat the oven to 375°F (190°C). Place the seasoned chicken on a baking sheet and bake for 20–25 minutes, or until the chicken is thoroughly cooked.
  5. Serve: Serve the cooked chicken with lime wedges and use it in your favorite taco, salad, or wrap recipe.

Low-Sodium Chicken Seasoning Recipe

For those watching their salt consumption, making a low-sodium chicken seasoning lets you enjoy delectable foods without sacrificing health. Homemade low-sodium chicken seasoning recipe and use instructions:

Ingredients:

  • 1 tablespoon onion powder
  • 1 tablespoon garlic powder
  • 1 tablespoon dried parsley
  • 1 tablespoon dried basil
  • 1 teaspoon dried thyme
  • 1 teaspoon ground black pepper
  • 1 teaspoon paprika (sweet or smoked)
  • 1/2 teaspoon cayenne pepper (optional, for a spicy kick)
  • 1/2 teaspoon mustard powder

Instructions:

  1. Mix Ingredients: In a small bowl, combine all the ingredients thoroughly to ensure even distribution.
  2. Store: Place the seasoning mix in an airtight container and store it in a cool, dry place away from direct sunlight.

Using Low-Sodium Seasoning on Chicken

Ingredients:

  • 1 to 2 tablespoons of the low-sodium seasoning
  • 1 pound of chicken breasts or thighs
  • 1 tablespoon of olive oil (if cooking in a pan or baking)

Instructions:

  1. Prepare the chicken. Clean and pat dry the chicken pieces with paper towels.
  2. Season the chicken. Generously apply the low-sodium seasoning all over the chicken. If time allows, let the chicken marinate for 30 minutes in the refrigerator to enhance the flavors.
  3. Cook the Chicken:
    • For Baking: Preheat the oven to 375°F (190°C). Place the seasoned chicken in a baking dish and drizzle with olive oil. Bake for 25–30 minutes or until the internal temperature reaches 165°F (74°C).
    • For grilling: Preheat the grill to medium-high heat. Grill the chicken for 5-7 minutes on each side, depending on thickness, until fully cooked.
    • For pan-frying, heat the olive oil in a skillet over medium heat. Add the chicken and cook for about 7 minutes on each side, or until golden brown and cooked through.
  4. Serve: Offer the cooked chicken with a side of steamed vegetables, over a bed of whole grains, or sliced atop a fresh salad.

Healthy and full of herbs and spices, this homemade low-sodium chicken seasoning brings out the chicken’s natural tastes without salt. Eat heart-healthy chicken and enjoy its deliciousness.

Smoked Chicken Seasoning Recipe

Seasoning can significantly enhance the smokiness of smoked chicken. Good smoking rubs combine sweet, savory, and spicy tastes to enhance the chicken’s inherent flavors and the wood’s smokiness. A strong smoked chicken seasoning recipe:

Ingredients:

  • 2 tablespoons of brown sugar
  • 1 tablespoon paprika (smoked paprika, if available, for extra smokiness)
  • 1 tablespoon of coarse salt
  • 1 tablespoon ground black pepper
  • 1 teaspoon garlic powder
  • 1 teaspoon of onion powder
  • 1 teaspoon dried thyme
  • 1/2 teaspoon cayenne pepper (adjust based on heat preference)
  • 1/2 teaspoon dried mustard

Instructions:

  1. Combine Ingredients: In a bowl, mix all the ingredients together until well blended.
  2. Store: To maintain freshness, keep the blend in an airtight container and use as needed.

Applying Seasoning to Smoked Chicken

Ingredients:

  • One whole chicken, weighing approximately 3 to 5 pounds, or its equivalent in chicken pieces, is required.
  • Olive oil or mustard (to bind the seasoning)

Instructions:

  1. Prepare the chicken. With paper towels, pat the chicken dry. This helps the seasoning stick better.
  2. Apply Binder: Lightly coat the chicken with olive oil or brush it with mustard. The oil, or mustard, acts as a binder for the seasoning and helps create a beautiful crust.
  3. Season the Chicken: Liberally apply the seasoning mix all over the chicken, both on and under the skin, to ensure full coverage.
  4. Let it Marinate: For deeper flavor penetration, let the seasoned chicken rest in the refrigerator for at least 1 hour or overnight.
  5. Prepare to Smoke: Preheat your smoker as per the manufacturer’s instructions. Ideal smoking temperatures are between 225°F and 250°F.
  6. Smoke the Chicken: Place the chicken in the smoker. The cooking time will depend on the size of the chicken and the type of smoker, but generally ranges from 3 to 5 hours. Once the internal temperature reaches 165°F, the chicken is ready.
  7. Rest the Chicken: After removing the chicken from the smoker, let it rest for about 10 minutes. This allows the juices to redistribute throughout the meat, making it juicier and more flavorful.

Tips for Smoking Chicken

  • Wood Choice: Use woods like hickory, apple, or cherry for a sweet and smoky flavor that complements chicken well.
  • Temperature Control: Maintain a consistent temperature in your smoker to ensure even cooking.
  • Moisture: Keep a water pan in the smoker to help maintain moisture during the long cooking process.

This combination gives smoked chicken a delicious crust and a juicy, smokey inside. This chicken may be eaten alone, shredded into BBQ chicken sandwiches, or sliced into salads or tacos. Taste the deep, smokey flavors that make your dinner special.

Mastering Chicken Seasonings: Tips and FAQs for Flavorful Meals

What is the best way to apply a dry rub to chicken?

Applying a dry rub to chicken is simple yet crucial for flavor. Start by patting your chicken dry with paper towels to remove excess moisture. This helps the seasonings stick better. Sprinkle the dry rub evenly over the chicken, and use your hands to massage it into the skin and under it if possible. For deeper flavor, let the chicken sit with the rub for at least 15 minutes or refrigerate it for a few hours before cooking.

Can I mix my own spice blends at home?

Absolutely! Mixing your own spice blends at home allows for customization to your taste preferences and control over ingredients. Start with basic spices like paprika, cumin, and coriander, and adjust the ratios as you experiment. Don’t forget to add herbs like dried oregano or thyme for complexity. Store your blends in airtight containers away from direct light and heat to maintain their potency.

How long should I marinate the chicken?

The length of time spent marinating chicken can vary depending on the marinade ingredients. For acidic marinades (containing vinegar, lemon juice, or yogurt), 30 minutes to 2 hours is sufficient. For milder marinades, you can marinate for up to 12 hours. Avoid over-marinating, especially with acidic ingredients, as they can break down the proteins too much, resulting in a mushy texture.

What are some quick seasoning tips for a busy weeknight?

For a quick and flavorful seasoning, rely on pre-mixed spice blends like Italian seasoning, taco seasoning, or curry powder. These can be quickly sprinkled over the chicken before cooking. Using pastes like pesto or harissa to spread instant flavor over chicken is another quick method. Lastly, don’t underestimate the power of salt, pepper, and a squeeze of fresh lemon juice for a simple yet effective taste boost.

Are there any health considerations associated with using certain spices?

While spices add flavor and offer health benefits, it’s important to use them in moderation. Some spices, like red pepper or garlic powder, might cause digestive discomfort for those with sensitive stomachs. Additionally, store-bought spice mixes often contain added salt or preservatives, so reading labels and choosing lower-sodium and preservative-free options can be a healthier choice. If you have specific health conditions or dietary restrictions, consulting with a healthcare provider about your spice intake is advisable.

Exit mobile version