Categories
Breakfast Recipes

Lemon Bars with Graham Cracker Crust

Lemon bars with a unique Graham cracker crust offer a delightful blend of sweet and tart. Perfect for any season, these bars combine the zing of fresh lemons with the sweet crunch of Graham crackers, creating a mouthwatering contrast that’s hard to resist. Plus, they’re a healthier option because they use natural sweeteners like maple syrup.

Key Ingredients for Lemon Bars with Graham Cracker Crust

Key Ingredients for Lemon Bars with Graham Cracker Crust

Each ingredient in lemon bars plays a vital role in creating the final, delicious dessert. Here’s a breakdown:

Graham Cracker Crumbs: Create the crust’s base.

Butter binds the crumbs together and adds richness.

Eggs: Help set the lemon filling.

Lemon juice adds the necessary acidity and tartness.

Maple syrup offers natural sweetness without the need for refined sugar.

Coconut flour helps to thicken the filling.

Substituting ingredients can be necessary for those with dietary restrictions. For instance, understanding alternatives can make baking more accessible for everyone. Check out Gluten-Free Baking Techniques for more on how to adjust recipes.

What Makes Easy Lemon Bars

A great lemon bar recipe strikes a balance between flavor and texture. Here’s why simplicity in your approach to baking these bars makes a big difference:

Fewer Ingredients: A simple ingredient list ensures that the lemon’s fresh flavors and the crust’s sweetness shine through.

Flavor Balance: The ideal lemon bar teases the palate with its bright tartness and just enough sweetness.

Texture: The crust should be firm and crumbly, satisfyingly contrasting the smooth, creamy filling.

Understanding the qualities of the key ingredients is crucial for those looking to perfect their baking technique. For example, selecting the right type of lemon can significantly enhance the flavor of your bars. Learn more about selecting the best lemons for baking.

Chef’s Tips for Perfect Lemon Bars

To ensure your lemon bars are just as delicious as they are appealing, consider these tips:

Perfect Crust Consistency: Before adding the filling, bake the crust until golden.

Smooth Filling: To prevent lumps, thoroughly whisk the filling in.

Avoid overcooking: To prevent cracking, remove the bars from the oven when the filling sets.

Customizing your lemon dessert

Feel free to add your twist to the traditional lemon bar.

Add other citrus flavors, like lime or orange, for a different twist.

Mix in extracts: Vanilla or almond extract can deepen the flavor.

What to Serve with Lemon Bars

These bars go well with:

Coffee or tea complements the tartness well.

Enjoy a scoop of vanilla ice cream for an extra indulgent treat.

Health Benefits

Lemon bars with natural ingredients like maple syrup can be a healthier option. They provide:

Vitamin C is obtained from lemon juice.

Natural sweeteners have contributed to a reduction in refined sugar consumption.

Maple syrup isn’t just sweet; it’s also beneficial. Explore the nutritional benefits of maple syrup to learn why it’s a fantastic choice for baking.

FAQs

Here are some common questions and answers about making lemon bars:

What is the best type of lemon to use?

Typically, any fresh, ripe lemon works, but some prefer the tartness of Meyer lemons.

How do you prevent the crust from getting soggy? 

First, bake the crust independently to create a barrier that keeps it crisp.

Can you make lemon bars vegan or gluten-free?

Yes, you can use substitutes like plant-based ingredients or gluten-free graham crackers.


We hope you enjoyed making and eating these tasty lemon bars with Graham cracker crust. If you want to try more tasty recipes, why not try some other treats we have here? Our Blueberry Lemon Lasagna is one easy, no-bake treat that might become your new favorite. If you’d rather eat something spicy, our Lemon Garlic Parmesan Chicken is a great choice that goes well with any meal.

Print

Lemon Bars with Graham Cracker Crust

Make these easy lemon bars with a crunchy graham cracker crust for a perfect summer treat. Simple ingredients, full of flavor!

  • Author: Gabriela cardenas
  • Prep Time: 15 minutes
  • Cook Time: 25 minutes
  • Total Time: 40 minutes
  • Yield: 16 bars
  • Category: Dessert
  • Method: Baking
  • Cuisine: American
  • Diet: Vegetarian

Ingredients

  • 1.5 cups graham cracker crumbs
  • ¼ cup melted butter
  • 4 large eggs
  • ¾ cup fresh lemon juice (about 4 lemons)
  • ½ cup maple syrup
  • 1.5 tablespoons coconut flour
  • 1 tablespoon grated lemon zest

Instructions

  1. Preheat your oven to 350°F (175°C) and line an 8×8-inch baking pan with parchment paper.
  2. In a bowl, mix graham cracker crumbs with melted butter until well combined. Press this mixture into the bottom of the prepared pan to form a crust.
  3. Bake the crust for 10 minutes until set and golden.
  4. While the crust bakes, whisk together eggs, lemon juice, maple syrup, coconut flour, and lemon zest until smooth.
  5. Pour the lemon mixture over the hot crust and return to the oven.
  6. Lower the oven temperature to 325°F (163°C) and bake for 15 minutes until the filling is set.
  7. Let cool completely in the pan on a wire rack before slicing into bars.

Notes

  • Ensure the lemon juice is freshly squeezed for the best flavor.
  • Allow the bars to chill in the refrigerator for at least 2 hours for easier slicing.
  • Dust with powdered sugar before serving for a sweet touch.

Keywords: lemon bars with graham cracker crus, citrus bars, lemon dessert, easy lemon bars

Did you make this recipe?

Share a photo and tag us — we can't wait to see what you've made!

Categories
Breakfast Dinner Recipes

Guide to Brisket Brine: Recipes, Tips, and Pairings

Brining is the secret to taking your barbecue from good to great. This technique involves soaking the brisket in a salt-based solution. Not only does this step boost the flavor and texture of the meat, but it also guarantees that every brisket you cook will be moist, tasty, and tender.

Overview of Ingredients

The basic brisket brine consists of water, salt, and sugar, but the variations are limitless depending on your taste preferences and dietary needs. Key ingredients include:

Water: The base of any brine.

Salt: Kosher salt is preferred for its purity and taste.

Sugar: Brown sugar is common, but honey or maple syrup can be substituted.

Additional flavorings: Garlic, bay leaves, peppercorns, and mustard seeds.

Substitutes and alternatives are available for those with dietary restrictions, ensuring everyone can enjoy a delicious brined brisket.

Overview of Ingredients

Chef’s Tips for Perfect brisket brine

Achieving the perfect brisket involves not only selecting the right cut but also applying the brining and cooking methods effectively. Here are some invaluable insights and best practices to help you master your brisket preparation:

Brining Essentials

Brisket should ideally be brined in a solution made primarily of water, salt, and sugar, with possible additions of spices and herbs to enhance the flavor. The purpose of brining is to increase the moisture retention of the meat during cooking, making it juicier and more flavorful.

Duration of Brining

You can brine a brisket for 12 to 24 hours. Beyond this time frame, the brisket can become overly salty and the texture may start to degrade, which can affect the quality of your final dish.

Brine vs. Injection

While injecting a brisket can directly introduce flavor and moisture deep into the meat, brining tends to enhance the overall texture and moisture retention through osmosis. For those looking for a uniformly seasoned and tender brisket, brining is generally the preferred method.

Effective Brining Techniques

The best brine method involves fully submerging the brisket in your brine solution in a large enough container to ensure even coverage. It’s crucial to keep the brisket refrigerated during this process to prevent bacterial growth.

The Role of Salt

Salt is a critical component of the brine, helping to tenderize the brisket by breaking down some of the protein structures. This not only helps in moisture retention but also makes the meat tender.

Ensuring Tender Brisket

The secret to a tender brisket lies in the slow cooking process. Cooking brisket at low temperatures, typically around 225°F (107°C), allows the connective tissues to break down without drying out the meat, which is essential for achieving that fall-apart texture.

Keeping Brisket Moist

To ensure the brisket remains moist during cooking, consider using a pan of water inside the smoker or oven to maintain humidity. This helps in keeping the brisket moist and tender. The best liquids for maintaining moisture in the brisket include broth, apple juice, or a simple mix of water and vinegar.

beef brine technique

Optimal Cooking Temperature for brisket brine 

Brisket becomes tender and starts to “fall apart” at an internal temperature around 195°F to 205°F (90°C to 96°C). It’s important to monitor the temperature closely with a meat thermometer to prevent overcooking.

By following these tips, you can ensure your brisket is not only flavorful but also tender and juicy, providing a delightful eating experience for all your guests.

Customize Your Brisket Brine 

Customizing your brisket brine allows you to infuse unique flavors that can significantly enhance the overall taste of your brisket. Here are some creative ideas and additions to help you tailor your brine to your specific taste preferences:

Citrus and Zest

Adding slices of orange, lemon, or lime to your brine can impart a subtle citrus note, which pairs wonderfully with the rich flavor of brisket. The zest of these fruits can also be included for a more pronounced aroma.

Aromatics

Onion and garlic are fundamental aromatics that can be added in whole cloves or chopped form. They provide a robust base flavor that is essential in many meat preparations. For a different twist, try shallots or leeks, which provide a milder onion-like flavor.

Smokey Flavors

For a smokey touch, consider adding liquid smoke directly into the brine. This can mimic the flavors of traditional smoking without the need for a smoker.

Acidic Components

Incorporating a splash of apple cider vinegar or red wine can help tenderize the brisket and add a layer of complexity to the taste. The acidity also balances the richness of the meat.

Beer or Wine

Substituting part of the water with beer or wine can introduce complex flavors, depending on the type used. Dark beers or robust wines like cabernet sauvignon can enhance the depth of the brine.

International Flavors

For a global twist, add ingredients like soy sauce for an Asian flair or a mix of cumin and coriander for a Middle Eastern touch. These elements introduce new flavor profiles that can make your brisket stand out.

By customizing your brine, you can create a signature dish that stands out at any barbecue. For a detailed guide on cooking techniques, see this comprehensive guide to perfectly cooked meat.

smoked brisket recipe

What goes best with Brisket marinade

The right side dishes can enhance your brisket meal dramatically. Consider serving your brisket with the following:

Classic coleslaw

Grilled vegetables

Creamy mashed potatoes

Cornbread

Each side dish complements the rich flavors of the smoked brisket, making for a well-rounded meal.

Wines

Pairing the right drink or wine with brisket, particularly when it’s been brined and possibly smoked, can enhance the dining experience by complementing the rich and savory flavors of the meat. Here are some excellent options:

Zinfandel: This red wine is a classic pairing with barbecued meats due to its bold fruit flavors and spice notes that complement the smokiness of brisket.

Cabernet Sauvignon: Known for its deep flavor and firm tannins, Cabernet Sauvignon can stand up to the richness of brisket, balancing the fatty content beautifully.

Syrah/Shiraz: Offering spicy and dark fruit flavors, Syrah matches well with the robust flavors of a seasoned brisket.

Merlot: For those preferring something smoother, Merlot provides a softer option with plenty of depth to handle the brisket without overpowering it.

Beers

Porter or Stout: These dark beers, with their roasted malt flavors, are natural complements to the deep, smoky flavors of brisket.

American Pale Ale: The hoppy character of a pale ale can cut through the fat of brisket, refreshing the palate with each sip.

Brown Ale: Offering a balance of malt sweetness and mild bitterness, brown ales can enhance the inherent flavors of brisket without overwhelming them.

Non-Alcoholic Options

Iced Tea: Sweet or unsweetened, iced tea is a refreshing choice that cleanses the palate, especially when enjoying a heavily seasoned brisket.

Lemonade: The sweetness and tartness of lemonade provide a refreshing counterbalance to the richness of brisket.

Sparkling Water: A bubbly, unsweetened sparkling water with a slice of lemon or lime can help refresh the palate between bites of fatty brisket.

Spirits

Bourbon: The sweet, woody notes of bourbon pair wonderfully with smoked or barbecued brisket.

Rye Whiskey: The spicy characteristics of rye whiskey make it an excellent match for the robust flavors of brisket.

Choosing the right beverage to serve with brisket can turn a simple meal into a memorable dining experience, whether you opt for wine, beer, a non-alcoholic drink, or spirits. Each option offers a unique way to complement the flavors of the brisket.

brisket brine

Health Benefits of smoked brisket

Brisket is not only delicious but also offers various health benefits when prepared properly:

Protein-Rich: Brisket is a great source of lean protein, essential for muscle repair and growth.

Minerals and Vitamins: It contains iron, zinc, and B vitamins.

Understanding these benefits can help you appreciate the brisket even more. For more detailed nutritional information, explore nutritional information for beef brisket.

Print

Guide to Brisket Brine: Recipes, Tips, and Pairings

 Elevate your BBQ game with expert tips, pairings, and a detailed recipe to make the perfect brisket brine. 

  • Author: Gabriela cardenas
  • Prep Time: 20 minutes
  • Cook Time: 7 hours
  • Total Time: 7 hours 20 minutes
  • Yield: 4-6
  • Category: Main Course
  • Method: Brining, Smoking
  • Cuisine: American

Ingredients

  • 6 quarts water
  • 1 cup light brown sugar
  • 1/2 cup kosher salt
  • 2 oranges, sliced (for added citrus flavor)
  • 4 bay leaves
  • 1 tablespoon peppercorns
  • 1 large brisket (about 57 pounds)
  • Additional aromatics (optional): garlic cloves, rosemary sprigs

Instructions

  1. In a large pot, combine water, brown sugar, and kosher salt. Bring to a boil to dissolve the solids.
  2. Remove from heat. Add the orange slices, bay leaves, and peppercorns. Allow the mixture to cool completely.
  3. Place the brisket in a large container. Pour the cooled brine over the brisket, ensuring it is completely submerged. Add additional cold water if needed.
  4. Cover and refrigerate the brisket for 12 to 24 hours.
  5. Remove the brisket from the brine and pat dry with paper towels. Optionally, season with additional spices before cooking.
  6. Cook the brisket in a preheated smoker or oven at 225°F until the internal temperature reaches 195°F.
  7. Allow the brisket to rest for at least 30 minutes before slicing against the grain.

Notes

  • Ensure the brine is cooled completely before adding the brisket to prevent premature cooking.
  • If desired, add a splash of apple cider vinegar to the brine to enhance tenderness.
  • For a more pronounced flavor, consider adding other spices such as cumin or smoked paprika to the brine mixture.

Keywords: Brisket Brine Recipe. Brisket marinade, smoked brisket recipe, beef brine technique

Did you make this recipe?

Share a photo and tag us — we can't wait to see what you've made!

Categories
Breakfast Recipes

Tater Tot Breakfast Casserole

Breakfast casseroles have long been a standard way to start the day. But when tater tots are added, the ordinary breakfast casserole becomes something amazing. The Tater to breakfast casserole has all of the yummy breakfast foods people love: eggs, cheese, and meat. The crispy, delicious texture of the tater tots makes the dish more appealing to everyone.

Overview of Ingredients 

This casserole is beautiful because of its simplicity and the synergy of its components:

Frozen tater tots are the show’s star, providing a crispy texture and comforting potato flavor.

Lean ground turkey or sausage offers a healthier protein option without compromising taste.

Eggs are the binding element that combines all ingredients, making the casserole fluffy and rich.

Cheese adds creaminess and a delightful gooey texture.

Overview of Ingredients 

Chef’s Tips Chef’se Perfect potato casserole

Layering is key

Achieve a harmonious balance by thoughtfully layering ingredients. Start with a base layer of tater tots to ensure a crispy bottom. Follow with evenly spread cooked meats and vegetables, sprinkle cheese for a melty middle layer, and finally, pour over the egg mixture to bind it together.

Season at Every Step

Be sure to season your casserole before the end. Season your meat as it cooks; sprinkle a little salt and pepper over the tater tots, and even add a pinch of salt to your egg mixture. This ensures that every bite is flavorful.

Use Fresh Herbs

Although dried herbs are useful, fresh herbs offer a unique brightness and depth of flavor. Consider adding chopped chives, parsley, or dill for a fresh touch.

Cheese Varieties

Don’t limit yourself to one type of cheese. Combining sharp cheddar for depth, mozzarella for stretchiness, and parmesan for a salty, nutty flavor can make your casserole more complex and delicious.

Pre-cook Your Add-ins

Whether it’s Vegetabit’s bacon or sausage, pre-cooking these ingredients guarantees their full cooking and helps eliminate excess fat that could cause the casserole to become greasy.

Let It Rest

After baking, let your casserole rest for 5–10 minutes before cutting into it. This allows it to set, making it easier to serve neat portions without the casserole falling apart.

Tater tot casserole: Health Benefits 

This casserole isn’t just indulgence. With the right ingredients, it can offer a range of health benefits, including:

Calories: A serving is surprisingly light on calories, making it a guilt-free option for breakfast.

Protein: Packed with high-quality protein from eggs and turkey sausage, fueling your day is great.

Nutritional Benefits: This casserole can be a nutritious meal to start the day by using lean meats, low-fat cheese, and vegetables.

Incorporating healthier alternatives doesn’t mean sacrificing flavor. If you’re exploring healthy and flavorful protein options, Hawaiian chicken in a crock pot can be a great addition to your culinary repertoire, offering a sweet and savory complement to breakfast dishes.

Customize Your Breakfast Casserole to Your Taste

This casserole can easily be tailored to fit any dietary need or taste preference.

For a vegetarian version, omit the meat and add more vegetables like spinachbell peppers, or mushrooms.

Those who avoid dairy can use dairy-free cheese.

Add-ins like diced tomatoes, green chilies, or olives can introduce new flavors and textures.

What Goes With Breakfast Casserole with Tater Tots

The right side dishes can turn this casserole into a feast. Consider pairing it with:

Fresh fruit salad for a sweet and refreshing contrast.

A light green salad for those seeking balance.

Crusty bread or biscuits are perfect for dipping into the casserole.

Check out this easy Ika Sansai Salad.

You should eat this tasty tater to casserole for breakfast in the morning. That’s not just a meal; it’s a story. Enjoying this activity will make your morning happier and more peaceful. You can try it, change the ingredients, and make it your own. In the comments below, show off your work and give us advice.  

Print

Tater Tot Breakfast Casserole

Discover how to make a scrumptious Tater Tot Breakfast Casserole with our simple recipe. Perfect for a family breakfast!

  • Author: Gabriela cardenas
  • Prep Time: 15 minutes
  • Cook Time: 45 minutes
  • Total Time: 60 minutes
  • Yield: 4
  • Category: Breakfast
  • Method: Baking
  • Cuisine: American
  • Diet: Vegetarian

Ingredients

  • 2 cups of frozen tater tots
  • 1 pound lean ground turkey or sausage
  • 8 large eggs
  • 1 cup shredded cheddar cheese
  • 1 cup shredded mozzarella cheese
  • 1/2 cup grated Parmesan cheese
  • 1/2 cup milk (or dairy-free alternative)
  • 1/2 onion, finely chopped
  • 1 bell pepper, diced
  • Salt and pepper to taste
  • Optional herbs: chives, parsley, or dill
  • Optional vegetables: spinach, mushrooms

Instructions

  1. Preheat the oven to 375°F (190°C).
  2. Arrange tater tots in a single layer in a greased 9×13 inch baking dish.
  3. Cook the ground turkey or sausage with onions and bell peppers until browned. Season with salt and pepper.
  4. Evenly spread the cooked meat and vegetables over the tater tots.
  5. In a bowl, whisk together eggs, milk, and optional herbs. Season with salt and pepper.
  6. Pour the egg mixture over the meat and tater tots.
  7. Sprinkle cheddar, mozzarella, and Parmesan cheese over the top.
  8. Bake for 45 minutes, or until the eggs are set and the top is golden brown.
  9. Let the casserole rest for 5–10 minutes before serving.

Notes

  • Cheese Variations: Feel free to experiment with different types of cheese for varying flavors and textures.
  • Make Ahead: Assemble the casserole the night before, cover and refrigerate, then bake in the morning.
  • Storage: Leftovers can be stored in the refrigerator for up to 3 days or frozen for up to a month.
  • Reheating: Reheat in the oven or microwave until warmed through

Keywords: Tater Tot Breakfast Casserole, Tater Tot Casserole,.Breakfast Casserole with Tater Tots. Tater Tot Egg Bake

Did you make this recipe?

Share a photo and tag us — we can't wait to see what you've made!


Categories
Breakfast Dinner Recipes

Creamy Beef Taco Soup Recipe | Hearty & Comforting

Recall that warm, comfortable evening spent at home, tucked up on the couch with a hot bowl of something? Consider that coziness combined with the strong tastes of Tex-Mex food. That desire has an answer in creamy beef taco soup. This marvelous one-pot dinner is a taste explosion just waiting to happen. Before we get to the goodness, though, have you ever pondered where this filling soup came from? Come along as we investigate the mysteries of creamy beef taco soup and make a version that will tantalize your taste buds!

What’s So Great About This Creamy Beef Taco Soup? 

Not only tasty, but a flavor explosion in a bowl is this creamy beef taco soup! Imagine, if you will, Tex-Mex spices symphonizing with flavorful ground meat. Every bite has a taste explosion as the tart snap of tomatoes and the richness of the creamy cheese sauce combine. Still, there’s more! Bell peppers and maize provide a pleasant balance, while black beans substantiality keeps you full for hours.

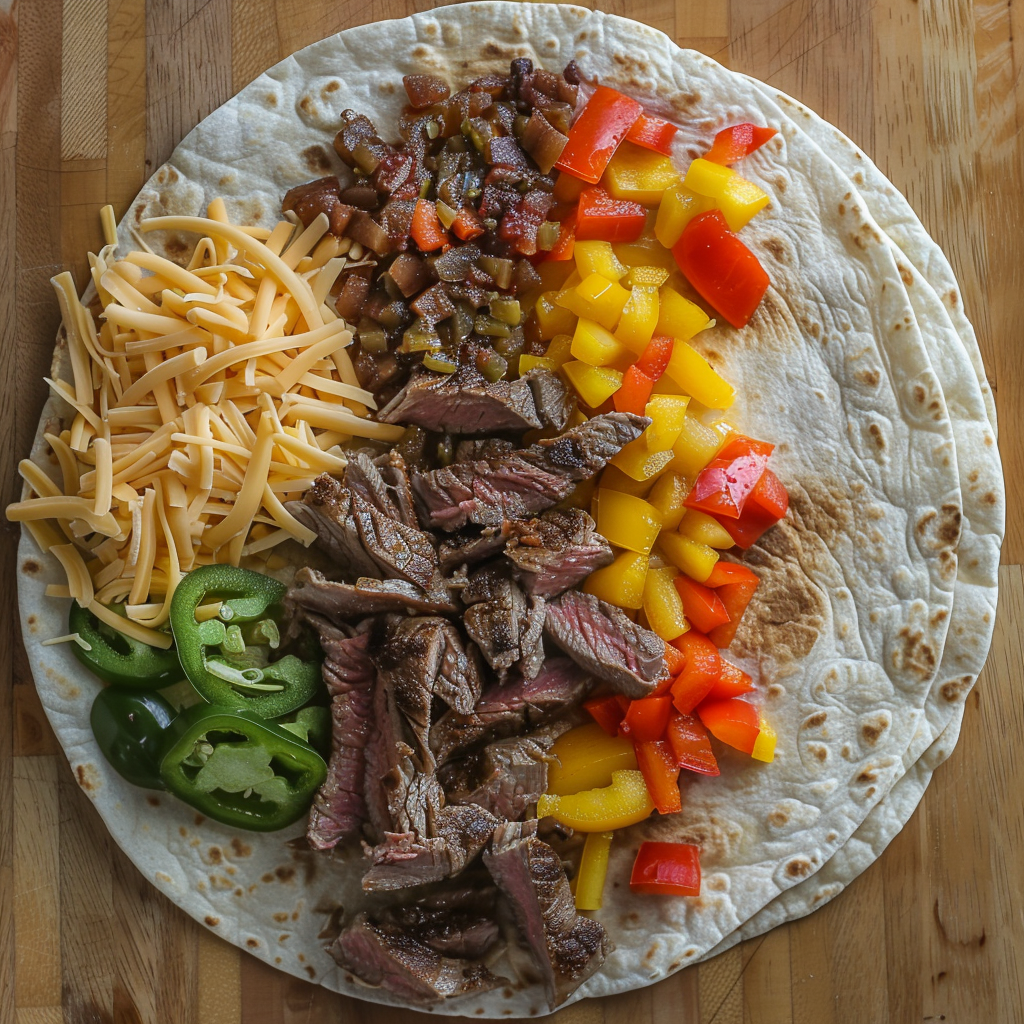
This creamy beef taco soup, then, is your MVP, whether you’re in the mood for a filling midweek dinner, a substantial game-day appetizer, or the foundation for some amazing burritos. It’s a great, flexible, and incredibly simple recipe. Come on over to the kitchen!

Discover another hearty soup that will warm you up, like this Crack Chicken Noodle Soup.

What You’ll Need: A straightforward approach to listing needed ingredients

What You'll Need: A straightforward approach to listing needed ingredients for Creamy Beef Taco Soup Recipe

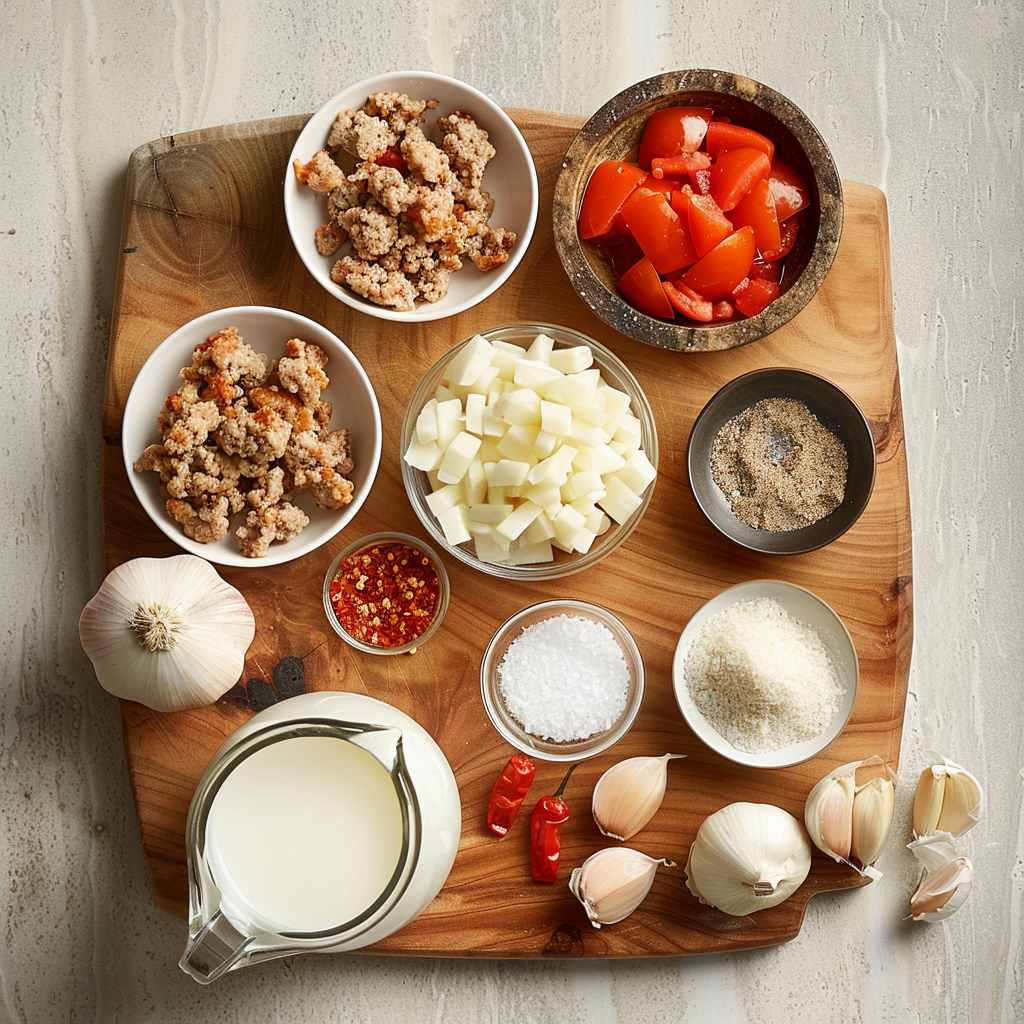
The key to this creamy beef taco soup is to use straightforward yet powerful ingredients. It sings because of:

Our flavor fiesta’s foundation is our hearty ground beef! For richness, go for 80/20; for lightness, go for 90/10. For best flavor, well brown it.

How To Choose The Right Ground Beef For Every Recipe.

Garden Friends: Classic chopped onions and bell peppers (of any color!) add sugar and texture. For diversity, don’t be afraid to include poblano peppers, mushrooms or zucchini.

Taco Seasoning Shortcut: Mix up a batch of your favorite store-bought blend or get inventive with paprika, cumin, and chili powder.

Tomatoes smashed: give tang and texture, and beef broth adds depth. Vegetable soup is very good for vegetarians.

Creamy Dream: To get that silky, opulent feel we all adore, soften cream cheese (or substitute with sour cream, Greek yogurt, or cashew cream).

For a taste change, try pepper jack, Monterey Jack, or queso fresco instead of the traditional shredded cheddar cheese! Cheesy Bliss

Enjoy the comforting flavors of this white bean and escarole soup.

Perfecting Creamy Beef Taco Soup Recipe: Pro Tips and Variations

Perfecting Creamy Beef Taco Soup Recipe: Pro Tips and Variations

Though this soup is all about simplicity, a few simple methods can take it from good to fantastic! For a really excellent creamy beef taco soup, use these chef’s secrets:

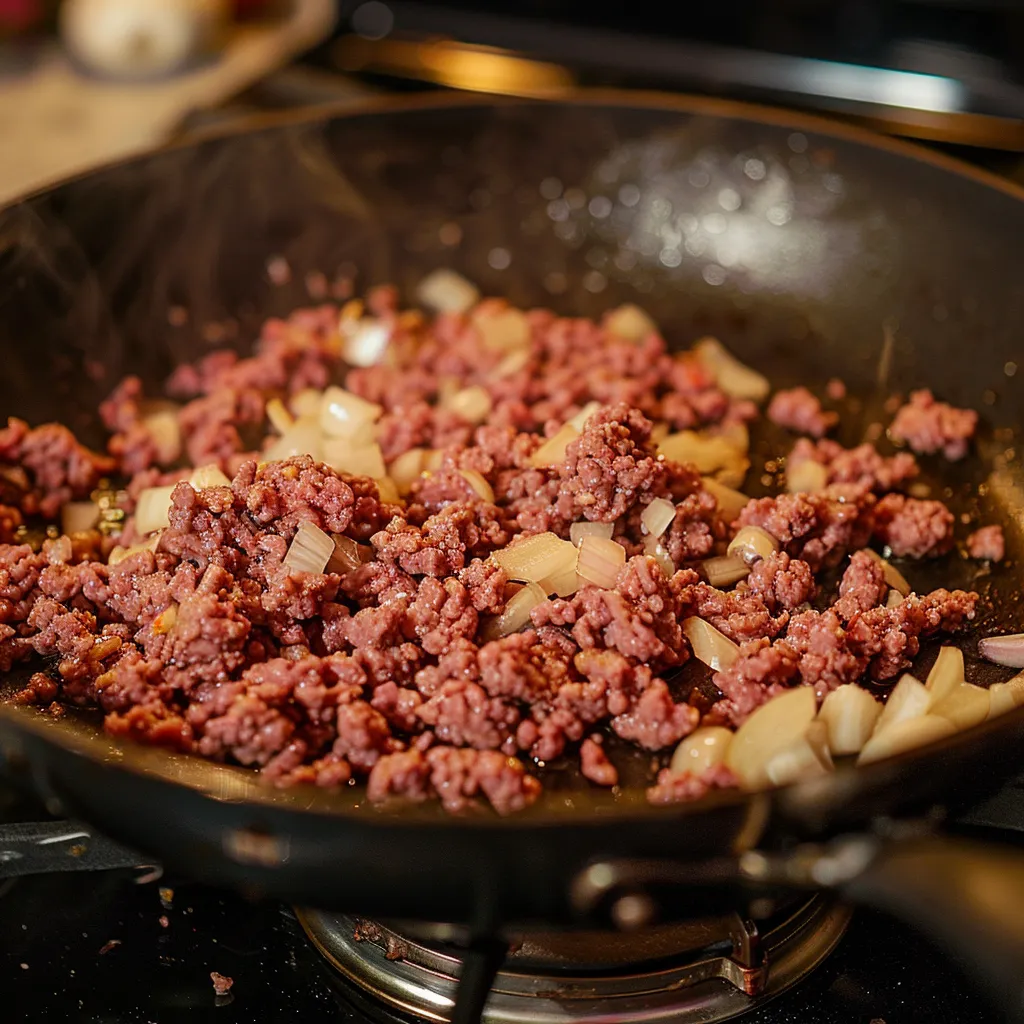
Browning: The Art of Not Cramming! Brown your ground beef in batches in a big saucepan. By avoiding crowding, even cooking and the best possible flavor development are ensured.

Unlocking Vegetable Potential: You really must sauté those peppers and onions. Cook them over medium heat, making sure they soften rather than brown. This unlocks their inherent sweetness and gives the other ingredients a lovely textural contrast.

Simmering Secrets: A virtue is patience! Once you’ve added the liquids, let your soup boil for at least fifteen minutes. Rich and complex soups are produced as a result of tastes blending and developing.

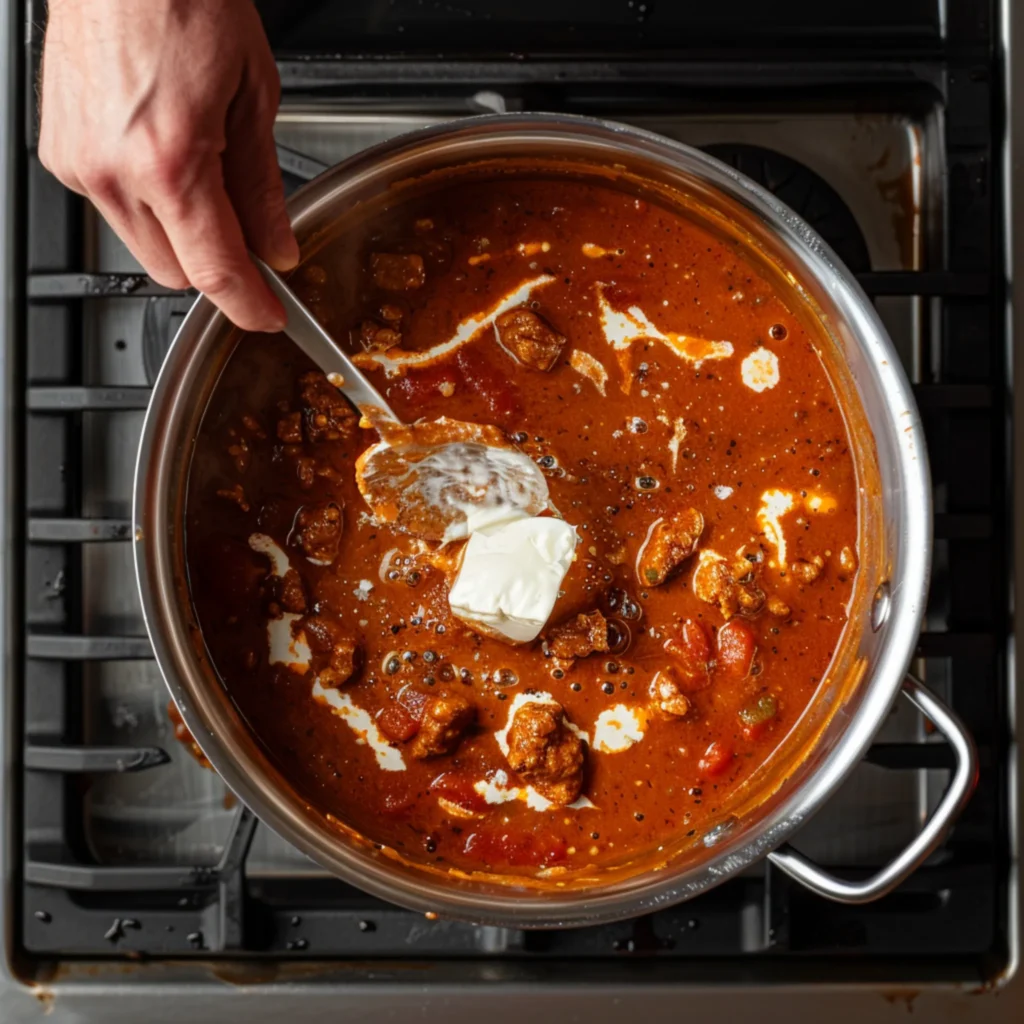
Creamy Perfection: Use the cream cheese sparingly! Stir frequently, add it to the softened cubes, and mix completely. This keeps everything lump-free and guarantees a silky, velvety feel.

Seasoning Wise: Never undervalue the combination of salt and pepper! Throughout cooking, season the soup; add more to taste after starting with a little amount. This enhances every flavor and produces a harmonious finished result.

Tailoring Your Creamy Beef Taco Soup

The versatility of creamy beef taco soup is its beauty! Customize it in the following ways:

The Powerhouse of Proteins

Ground Turkey: Use this lighter, similar-tasting substitute for ground beef. Cook until it crumbles and gets brown.

Diced chicken sausage gives a smoky, fiery dimension. Toss it into the soup after browning and removing the casings.

Shredded Chicken: A great protein substitute is leftover or rotisserie chicken. Add it at the very end of the simmering process, having shred it.

Veggie Delight: Give up meat completely! Using crumbled tempeh or lentils gives you a substantial plant-based protein. Cook lentils as directed on the box, then mix them in with the veggies. For more texture, crumble tempeh and sauté it with onions and peppers.

The Veggie Extravaganza

Sliced zucchini: gives it a little sweetness and freshness. Cook it, along with the bell peppers, until just softened.

Mushrooms: Sliced, earthy, and tasty mushrooms provide a fantastic textural contrast. For optimum effects, sauté them along with the onions and peppers.

Poblano Peppers: Stir in diced poblano peppers along with the bell peppers for some heat. For less intense heat, remove the seeds and membranes.

Black Bean Bonanza: Don’t you love black beans? Swap them with pinto beans, kidney beans, or a combination for a different flavor profile.

Flavor Twists

Spicy Symphony: Use a hot taco spice blend or add sliced jalapenos for more heat.

Creamy Variations: While cream cheese is traditional, for a little different texture, try sour cream (which adds tang), Greek yogurt (which is lighter), or cashew cream (vegan).

Cheesy Delights: Love cheese? Check out these Cheesy Delights. For a novel take on the traditional cheddar finish, try crumbled pepper jack, Monterey Jack, or queso fresco.

Remember the garnishes! Great ways to customize your bowl of creamy beef taco soup include chopped red onion, spicy sauce, avocado cubes, sour cream, shredded cheese, and chopped fresh cilantro.

What Goes Best with Creamy Taco Soup

Though this filling and delicious soup is a meal in and of itself, occasionally you may want to add something else. Among the delectable choices are:

Easy Sides: The richness of the soup is tempered with a cool side salad dressed with a light vinaigrette. Any leftover soup works well dipped and soaked up with warm cornbread or crusty bread.

Tex-Mex Fiesta: Elevate it with traditional Tex-Mex sides like refried beans, fluffy cilantro lime rice or a scoop of guacamole.

Hearty Selections: Serve the soup with quesadillas, grilled cheese sandwiches, or even a large batch of homemade cornbread muffins for a more substantial dinner.

Example Menu

What Goes Best with Creamy Taco Soup Example Menu

  • Salad on the Side: Keep it light with a simple salad and a light vinaigrette to balance the richness of the soup. Think fresh greens, maybe some chopped tomatoes, and a squeeze of lime.
  • Bread Buddies: Warm cornbread or crusty bread are perfect for dunking and soaking up that leftover broth. Carb heaven!
  • Tex-Mex Fiesta: Wanna go all out? Pair your soup with fluffy cilantro lime rice, refried beans for extra protein, and a dollop of guac for some cool creaminess

Whatever you decide, everyone will love this creamy beef taco soup!

Ground Beef Soup has health benefits 

Unquestionably tasty, creamy beef taco soup also has a surprising amount of nutrients! The main health advantages are outlined here:

Powerhouse of Protein: Good sources of protein, which is necessary for developing and preserving muscular tissue, include ground beef, lentils, and chicken.

Fiber Fiesta: Dietary fiber, which is present in vegetables, corn, and black beans (or other bean substitutes), supports intestinal health and digestion.

Vitamin and Mineral Power: The vitamins and minerals found in beef broth, veggies, and spices help maintain general health and wellbeing.

Tailored Comfort: This recipe’s versatility is its beauty. Leaner-ground beef or substitutes like lentils allow you to manage the fat content. More vegetables also increases the nutritional content overall.
Recall, moderation is essential! Though creamy beef taco soup can be a part of a healthy diet, eat it as a balanced dinner and alternate it with other healthy options during the week.

Remember, moderation is key! While creamy beef taco soup can be part of a healthy diet, enjoy it as a balanced meal and pair it with other healthy choices throughout the week.

FAQs About Creamy beef taco soup

Can I freeze this soup?

Absolutely! Leftovers freeze beautifully. Let the soup cool completely, then portion it into airtight containers. Freeze for up to 3 months. Thaw overnight in the refrigerator and reheat gently on the stovetop over medium heat.

How can I make this soup ahead of time?

This soup is perfect for meal prep! Simply cook the soup according to the recipe, then let it cool completely. Store it in the refrigerator in an airtight container for up to 3 days. Reheat on the stovetop over medium heat until warmed through.

What if I don’t have any taco seasoning?

No problem! You can easily make your own. Here’s a basic recipe:

taco seasoning

  • 2 tablespoons chili powder
  • 1 tablespoon ground cumin
  • 1 teaspoon paprika
  • 1/2 teaspoon garlic powder
  • 1/2 teaspoon onion powder
  • 1/4 teaspoon oregano
  • 1/4 teaspoon cayenne pepper (optional)

Combine all the spices in a small bowl and mix well. Use 2-3 tablespoons in the soup recipe, adjusting to your desired level of spice.

Is this soup gluten-free?

The recipe itself is naturally gluten-free, as long as you use gluten-free taco seasoning and ensure your broth is gluten-free. Double-check labels to be sure.

Can I make this soup in an instant pot?

You can make this soup in an instant pot ! Here’s a quick guide:

  1. Brown the ground beef in the Instant Pot using the “sauté” function. Drain any excess grease.
  2. Add the onions, peppers, and spices. Sauté for a few minutes until softened.
  3. Add the remaining ingredients (liquids, beans, corn, etc.) and stir well.
  4. Secure the lid and cook on high pressure for 10 minutes. Let the pressure release naturally for 5 minutes, then do a quick release for any remaining pressure.
  5. Stir in the cream cheese and shredded cheese until melted and incorporated. Season to taste and serve!
We hope this creamy beef taco soup recipe has brought a taste of Tex-Mex comfort to your kitchen. It’s easy to make, endlessly customizable, and guaranteed to satisfy your soul.

let’s get this soup party started! HAPPY COOKING

Print

Creamy Beef Taco Soup Recipe | Hearty & Comforting

Creamy Beef Taco Soup: Weeknight Comfort in a Bowl! This one-pot wonder packs Tex-Mex flavors – savory beef, creamy cheese, and pops of sweetness. Easy, customizable, and guaranteed to satisfy your soul!

  • Author: Gabriela cardenas
  • Prep Time: 10 minutes
  • Cook Time: 30 minutes (or 6-8 hours on Low in a slow cooker)
  • Total Time: 30 minutes (or 6-8 hours on Low in a slow cooker) Total Time: 40 minutes (or 6-8 hours and 10 minutes prep in a slow cooker)
  • Yield: 4-6
  • Category: Soup
  • Method: One-Pot / Slow Cooker (Optional)
  • Cuisine: Tex-Mex
  • Diet: Gluten Free

Ingredients

  • 1 tablespoon olive oil
  • 1 pound ground beef
  • 1 medium onion, diced
  • 1 green bell pepper, diced (optional)
  • 2 cloves garlic, minced
  • 1 tablespoon taco seasoning
  • 1 teaspoon ground cumin
  • 1/2 teaspoon chili powder
  • 1 (28-ounce) can crushed tomatoes (undrained)
  • 4 cups beef broth
  • 1 (15-ounce) can black beans, rinsed and drained
  • 1 (15-ounce) can corn, drained
  • 8 ounces cream cheese, softened and cubed
  • 1 cup shredded cheddar cheese (plus extra for serving)
  • Salt and pepper to taste
  • Chopped fresh cilantro, for garnish (optional)

Suggested Toppings:

    • Chopped fresh cilantro
    • Sour cream
    • Shredded cheese (additional)
    • Diced avocado
    • Hot sauce
    • Tortilla strips
    • Chopped red onion

Instructions

  • Heat olive oil in a large Dutch oven or pot over medium heat. Add ground beef and cook until browned, breaking it up with a spoon as it cooks. Drain any excess grease.
  • Add onion, bell pepper (if using), and garlic to the pot. Cook for 5 minutes, or until softened.
  • Stir in taco seasoning, cumin, and chili powder. Cook for an additional minute, allowing the spices to bloom.
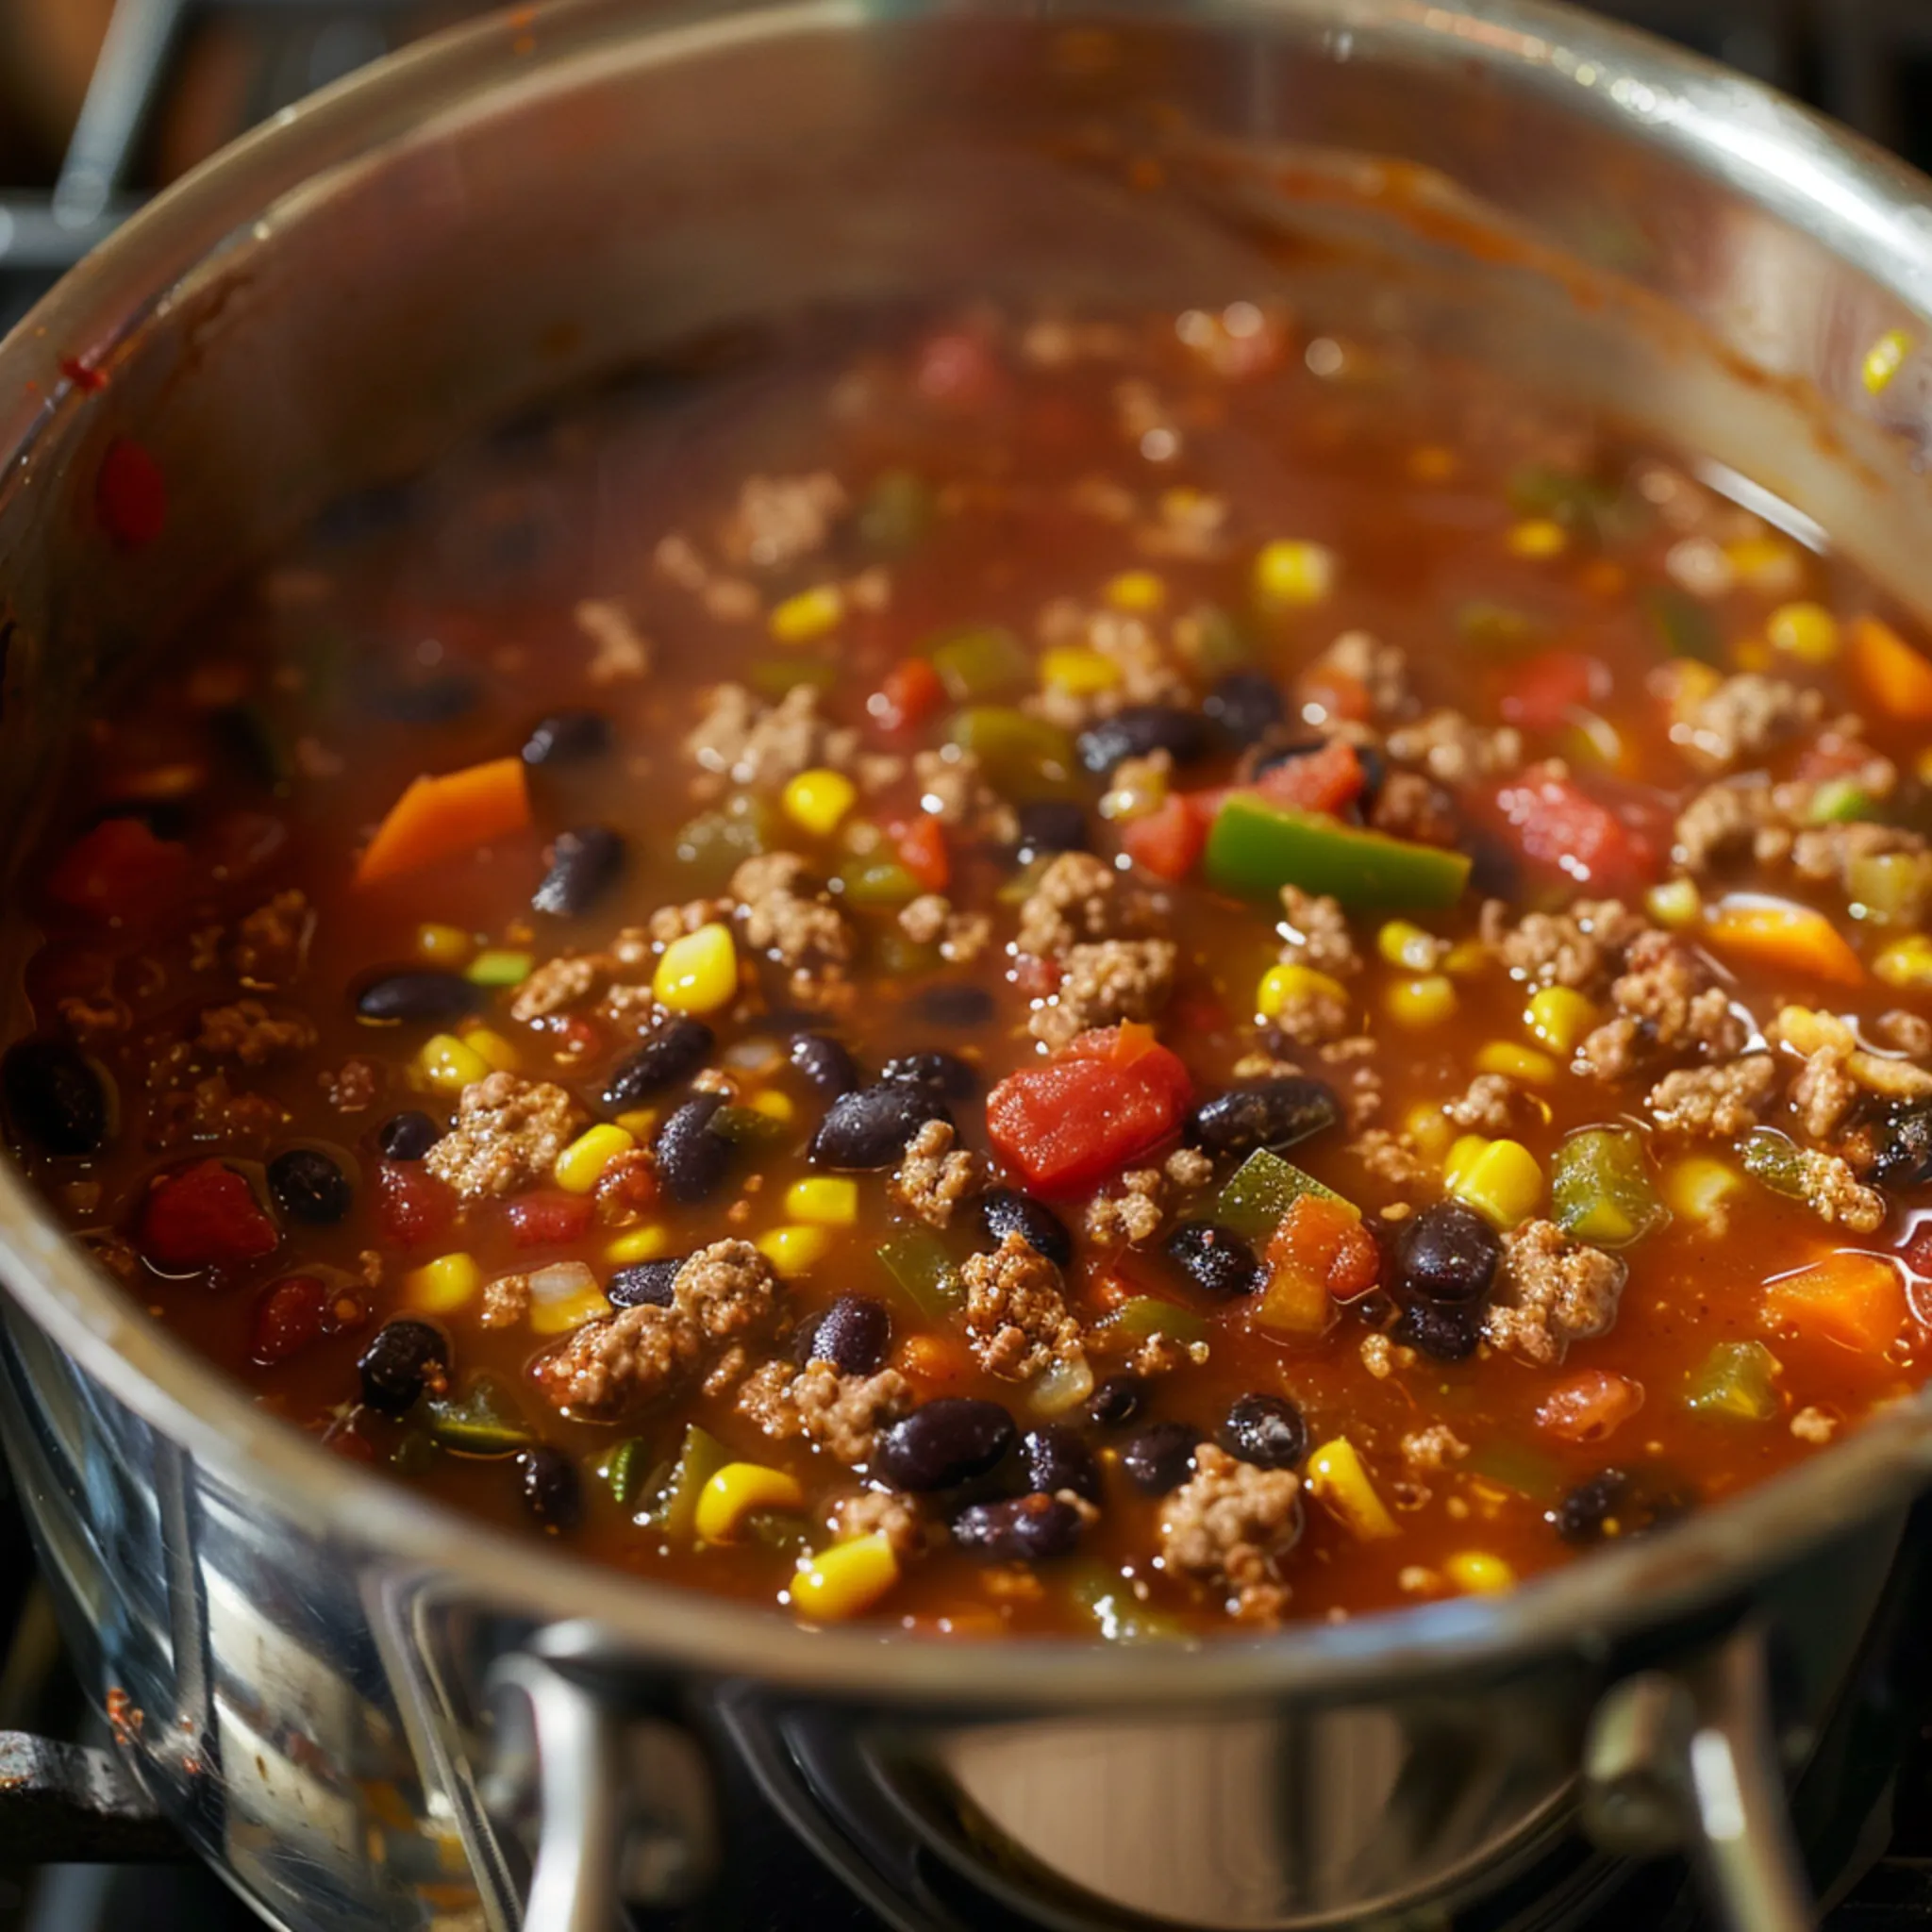
  • Pour in crushed tomatoes, beef broth, black beans, and corn. Bring to a boil, then reduce the heat and simmer for 15 minutes.
  • Stir in the cubed cream cheese and cook until melted and incorporated. Season with salt and pepper, to taste.
  • Remove from heat and stir in shredded cheddar cheese.
  • Serve hot, garnished with additional shredded cheese, chopped fresh cilantro (optional), and your favorite taco toppings like sour cream, avocado, or hot sauce.

Notes

  • For a spicier soup, add diced jalapenos, a pinch of cayenne pepper, or use a hotter taco seasoning blend.
  • Substitute ground beef with ground turkey, chicken sausage, lentils, or crumbled tempeh for a vegetarian option.
  • Make it freezer-friendly by letting leftovers cool completely and storing them in airtight containers for up to 3 months.
  • This soup can be easily made in a slow cooker. Follow the recipe instructions for browning the ground beef and sauteing the vegetables. Then, transfer everything to the slow cooker, add remaining ingredients, and cook on low for 6-8 hours or on high for 3-4 hours.
  • Diet: Can be adapted for Vegetarian, Gluten-Free (use gluten-free taco seasoning and broth)

Keywords: Creamy Beef Taco Soup, Taco Soup Recipe Easy Weeknight Meal One-Pot Meal Ground Beef Soup Tex-Mex Soup Vegetarian Taco Soup (for the vegetarian variation section) Spicy Taco Soup (for the spicy variation section) Slow Cooker Taco Soup (for the slow cooker instructions section)

Did you make this recipe?

Share a photo and tag us — we can't wait to see what you've made!

Categories
Breakfast Dinner Recipes

Creamy Parmesan Italian Sausage Soup

As the weather turns chilly and the leaves begin to change color, there’s nothing better than warming up with a pot of creamy Parmesan Italian sausage soup. Although it is most often enjoyed in the winter, this delicious meal is a go-to for many people all year. It is a crowd-pleaser and a soul-soother because of its velvety texture and strong tastes.

What Makes Parmesan cream soup Good?

Creamy Parmesan Italian Sausage Soup combines hearty Italian sausage with creamy milk and Parmesan. Parmesan cheese adds saltiness and umami to the sausage’s spice. Fresh ingredients and excellent preparation guarantee that every mouthful is flavorful. Its cozy, home-cooked feel and complex flavors make the soup popular.

Texture and Flavor: The combination of creamy broth and savory sausage offers a satisfying complexity.

Fresh Ingredients: Quality ingredients such as fresh herbs, real Parmesan, and premium sausage make a significant difference.

For a deeper understanding of the benefits of Parmesan, you might want to explore the nutritional profile of Parmesan cheese.

Overview of Ingredients

To achieve the best results with your Creamy Parmesan Italian Sausage Soup, here’s what you’ll need:

Italian sausage: Spicy or mild based on preference.

Onions and garlic: are foundational flavors.

Chicken or vegetable broth: As the soup base.

Heavy cream and Parmesan cheese: For creaminess and depth of flavor.

Vegetables like carrots and spinach: provide added nutrition and color.

Optional: Red pepper flakes or fennel for an extra layer of spice.

Choosing high-quality sausage is crucial, and you can learn more about different types of Italian sausage here.

Overview of Ingredients

Chef’s Tips for Perfect Parmesan Italian Sausage Soup

Making this soup is as much about technique as it is about the ingredients. Here are some tips to ensure your soup turns out perfectly:

Brown the Sausage Well: This enhances the soup’s flavor through caramelization.

Simmer Slowly: Letting the soup simmer gently allows flavors to meld beautifully.

Stir in cream and cheese at the end. Prevent separation and ensure a smooth texture.

For more tips on creating delicious meals with sausage, check out our guide on Sausage, Corn, & Potato Chowder.

Customizing Your Parmesan cream soup

This soup is versatile, and you can easily adapt it to meet different dietary needs or taste preferences.

For a lighter version, substitute heavy cream with half-and-half or a plant-based creamer.

Vegetarian adaptations can include using plant-based sausages and vegetable broth.

Overview of Ingredients

What to Serve with Parmesan sausage soup

Pairing this rich soup with the right side dishes can turn a simple meal into a feast. Here are some ideas:

Crusty bread or garlic rolls are perfect for dipping.

A crisp salad: Adds freshness and balances the richness.

A glass of full-bodied white wine: Complements the creamy soup wonderfully.

Health Benefits

Though indulgent, this soup can be part of a balanced diet. Here’s how:

Italian sausage is a good source of protein and provides vital nutrients.

Parmesan is rich in calcium and protein.

Adding vegetables increases the soup’s vitamin content.

Overview of Ingredients

Creative Leftover Ideas

Beyond reheating, leftovers may become new recipes! Creative ways to utilize leftover Creamy Parmesan Italian Sausage Soup:

Italian Sausage Soup Pasta Bake: Mix the soup with cooked pasta, top with breadcrumbs and extra Parmesan, and bake until golden and bubbly.

Stuffed Bell Peppers: Combine the soup with cooked rice, stuff it into bell peppers, top with cheese, and bake.

Creamy Sausage Dip: Reduce the soup on the stove to thicken it, blend until smooth, and serve as a dip with crusty bread or over baked potatoes.

Final Thoughts

Soups like Creamy Parmesan Italian Sausage Soup warm the heart and satisfy the palette. It’s popular at family dinners and holiday meals. Make this soup your own by experimenting with ingredients and methods. Enjoy the process and tasty outcomes!

Please enjoy cooking and eating this delicious soup. Please comment below if you attempt any of the variants or add your own touch. Your knowledge and experiences boost our community and encourage chefs.

Happy cooking!

Print

Creamy Parmesan Italian Sausage Soup

Dive into our Creamy Parmesan Italian Sausage Soup recipe, a perfect blend of rich flavors and hearty comfort. Easy to make and utterly delicious!

  • Author: Gabriela cardenas
  • Prep Time: 15 minutes
  • Cook Time: 30 minutes
  • Total Time: 45 minutes
  • Yield: 4
  • Category: Soup
  • Method: Simmering
  • Cuisine: Italian

Ingredients

  • 1 lb Italian sausage, casing removed and crumbled
  • 1 large onion, diced
  • 2 cloves garlic, minced
  • 1/2 teaspoon red pepper flakes (optional, for heat)
  • 4 cups chicken broth
  • 1 can (14.5 oz) diced tomatoes, undrained
  • 1 cup heavy cream
  • 1/2 cup grated Parmesan cheese, plus more for garnish
  • Salt and pepper, to taste
  • Fresh parsley, chopped (for garnish)

Instructions

  1. In a large pot, heat a bit of oil over medium heat. Add the crumbled sausage and cook until browned, about 5-7 minutes.
  2. Add the diced onion and minced garlic to the pot, cooking until the onions are translucent and the garlic is fragrant, about 3 minutes.
  3. Stir in the red pepper flakes (if using) and cook for another minute.
  4. Pour in the chicken broth and add the diced tomatoes with their juice. Bring the mixture to a boil, then reduce the heat and let simmer for 20 minutes.
  5. Lower the heat to low and stir in the heavy cream and grated Parmesan cheese. Cook until the cheese is melted and the soup is heated through, about 5 minutes. Season with salt and pepper to taste.
  6. Serve hot, garnished with additional Parmesan cheese and chopped parsley.

Notes

  • For a thicker soup, you can add a tablespoon of flour after cooking the sausage, stir to combine, and cook for 2 minutes before adding the broth.
  • Consider adding chopped spinach or kale in the last 5 minutes of simmering for added color and nutrition.
  • This soup can be made ahead and reheated, making it perfect for meal prep.

Keywords: Creamy Parmesan Italian Sausage Soup. Parmesan sausage soup, creamy Italian sausage soup, Parmesan cream soup

Did you make this recipe?

Share a photo and tag us — we can't wait to see what you've made!

Categories
Breakfast Dinner Lunch Recipes

Easy Crockpot Creamy Potato and Hamburger Soup

Hot soup on a cold day calms the spirit. The slow cooker, or crockpot, has revolutionized cooking by making meals easy to prepare. This approach works well with many dishes, but the Crockpot Creamy Potato and Hamburger Soup is especially soothing.

Check out this recipe for Crockpot Scalloped Potatoes and Ham for another dish that uses potatoes in a slow cooker.

What makes this recipe good?

This soup blends ground beef, potatoes, cheese, and cream for a filling dinner. This soup’s simplicity and taste make it a family favorite. Perfect for comfort cuisine that satisfies the stomach and warms the heart. See our Slow Cooker Soup Tips for additional slow cooker soup tips.

Overview of Ingredients

The ingredients in this soup are simple but impactful in delivering flavor and texture:

Ground beef provides a rich and meaty base.

Potatoes add heartiness and are a source of dietary fiber.

Cheddar cheese has a creamy texture and tangy flavor.

Heavy cream enhances the soup’s luxurious mouthfeel.

Each item contributes to the soup’s comfort. Discover the finest components for your cuisine, including ground beef selection and preparation.

Overview of Ingredients

Chef’s Tips for Perfect Creamy Potato Ground Beef Soup

Take these tips into account to guarantee your Crockpot Creamy Potato and Hamburger Soup is always delicious and cosy:

Choose high-starch potatoes like Russets for a thicker, creamier texture.

Opt for lean ground beef to keep the soup from becoming too greasy.

Season well with salt and pepper; adjust according to taste after cooking.

tips to make potato soup creamy

There could be several reasons why your potato soup isn’t creamy:

Cream or Milk Density: If you don’t use enough cream, milk, or other dairy products, the taste may not be as smooth.

Type of Potatoes: Red or fresh potatoes are low in starch and might alter creaminess. High-starch potatoes like Russets are creamier and break down faster.

cooking time: If the potatoes aren’t cooked long enough to break down, the soup won’t be creamy.

Blending Method: Blended or mashed potatoes thicken cream soup; therefore, not blending or mashing some might affect texture.

good way to make potato soup thicker

Several thickeners can be effective for potato soup:

Cornstarch: A slurry made from cornstarch and water can be added to the soup to thicken it without altering the flavor.

Flour: Cooking flour with butter to make a roux before adding it to the soup can also thicken it effectively.

Potato Flakes: Instant potato flakes are a quick and effective thickener that also boosts the potato flavor of the soup.

Pureed Vegetables: Blending part of the soup or adding pureed vegetables can naturally thicken the soup and increase its nutritional content.

Customizing Your Dish

This soup is adaptable. Here are some ways to customize it:

Lighter ground beef may be substituted with turkey or chicken.

Adding spinach or corn boosts its nutrients.

Add a teaspoon of flour or cornstarch dissolved in water at the end to thicken the soup.

What to Serve with This Recipe

This hearty soup pairs beautifully with several side dishes. Consider these options:

Crusty bread is perfect for dipping and soaking up the creamy broth.

A light, crisp salad to balance the richness of the soup.

Health Benefits

The main ingredients of this soup are not only delicious but also offer various health benefits.

Potatoes provide potassium, vitamin C, and dietary fiber.

Ground beef is a great source of protein and iron.

Incorporating vegetables can enhance the soup’s vitamin content.

FAQs About Crockpot Potato Hamburger Soup

Here are some answers to common questions about preparing this soup:

How long do potatoes take to get soft in a crockpot?

In a crockpot, potatoes soften in 3–4 hours on high or 7-8 hours on low. The time depends on the potato and cut size.

Does cream cheese thicken up potato soup?

As it happens, cream cheese thickens potato soup well. Melting makes the soup creamy and a little sour. Add it at the end of cooking and swirl well to fully mix and level it out.

Can I freeze this soup?

Yes, it freezes well for up to 3 months.

What are the best toppings for this soup?

Crispy bacon bits, extra cheese, or green onions make great toppings.

Print

Easy Crockpot Creamy Potato and Hamburger Soup

Get the easy recipe for making delicious Crockpot Creamy Potato and Hamburger Soup. Excellent for a filling family dinner.

  • Author: Gabriela cardenas
  • Prep Time: 20 minutes
  • Cook Time: 4 hours on high or 7 hours on low
  • Total Time: 4 hours 15 minutes (for high setting)
  • Yield: 4
  • Category: Soup
  • Method: Slow Cooking
  • Cuisine: American
  • Diet: Gluten Free

Ingredients

  • 1 pound ground beef
  • 4 large Russet potatoes, peeled and diced
  • 1 cup cheddar cheese, shredded
  • 2 cups heavy cream
  • 4 cups low sodium beef broth
  • 1 onion, chopped
  • 2 cloves garlic, minced
  • 1 teaspoon salt
  • 1/2 teaspoon black pepper
  • Optional: 1/2 cup sour cream for garnish
  • Optional: 3 tablespoons green onions, chopped for garnish

Instructions

  1. In a skillet over medium heat, brown the ground beef with the onion and garlic until the beef is no longer pink. Drain any excess fat.
  2. Transfer the cooked beef mixture to the crockpot.
  3. Add the diced potatoes, beef broth, salt, and pepper to the crockpot.
  4. Cover and cook on low for 7 hours or on high for 4 hours, until the potatoes are tender.
  5. Stir in the cheddar cheese and heavy cream during the last 30 minutes of cooking.
  6. Serve hot, garnished with sour cream and green onions if desired.

Notes

  • For a thicker soup, mash some of the potatoes directly in the crockpot before adding the cheese and cream.
  • Experiment with adding other vegetables such as carrots or peas for added nutrition and color.
  • Leftovers can be stored in the refrigerator for up to three days and make a great base for adding other ingredients when reheated.

Keywords: Crockpot Potato Hamburger Soup , Slow Cooker Potato Beef Soup, Creamy Potato Ground Beef Soup, Crockpot Hamburger Soup

Did you make this recipe?

Share a photo and tag us — we can't wait to see what you've made!

Categories
Breakfast Recipes

Ghirardelli Chocolate Chip Cookie

Ghirardelli chocolate enhances every baking recipe with its unique flavor. The exquisite taste and fascinating background of this product are widely renowned. Ghirardelli chocolate chip cookies are a delightful treat that offers a one-of-a-kind experience with every bite. Discover the secrets to crafting the ultimate chocolate chip cookie and uncover the importance of Ghirardelli chocolate in the art of baking.

Overview of Ingredients

Each part of the Ghirardelli chocolate chip cookie recipe does something different to make the cookies taste and feel better.

Butter: Gives richness and tender crumb.

Sugars (White and Brown): Brown sugar adds moisture and a chewy texture, while white sugar helps the cookies spread correctly.

Eggs: Hold the food together and give it shape.

Vanilla extract makes the chocolate taste better.

Flour: This gives the cookies their shape.

When you add baking soda to cookies, it helps them rise.

Salt: It balances out sweetness and makes the whole taste profile better.

Ghirardelli Chocolate Chips: These sweet pockets that melt in your mouth are the hit of the show.

Overview of Ingredients

Why the Ghirardelli Chocolate Chip Cookie Recipe Is Excellent

Ghirardelli chocolate chips stand out from other brands due to their renowned quality and indulgent flavor. Here are the factors that set them apart:

Ghirardelli maintains complete control over the whole chocolate production process, starting with the cocoa bean and ending with the final product. This ensures that the chocolate chips are of superior quality and have robust flavors.

Melting Point Just Right: These chips are made in a special way that lets them melt just right in cookies, leaving gooey chocolate pockets in every bite.

Variety of Flavors: Ghirardelli makes different kinds of chocolate chips, from milk chocolate to dark chocolate with 72% cacao, so you can use them in a lot of different ways when you bake.

For a deeper dive into different types of chocolate and their uses in baking, visit.

Frequently Asked Questions 

What type of Ghirardelli chocolate chips work best for cookies?

The bittersweet 60% cacao baking chips from Ghirardelli are strongly suggested for a decadent and robust chocolate taste; however, any variation of Ghirardelli chocolate chips may be used. Nevertheless, one may also go for Ghirardelli Milk Chocolate or Semi-Sweet Chocolate Chips, all of which are exceptional alternatives, depending on individual taste.

How do I ensure my cookies are chewy and not too hard?

To keep cookies chewy, avoid overbaking. Take cookies out of the oven while their middles are still soft. Let them cool on the baking sheet for a few minutes before transferring them to a cooling rack, since the remaining heat will keep them cooking.

Can I freeze Ghirardelli chocolate chip cookies?

Both the dough and the finished cookies may be frozen. Before transferring the dough to a freezer bag, be sure to spoon it out onto a baking sheet. Freeze it until it becomes firm. Freeze baked cookies for up to three months if kept in an airtight container.

Is there gluten in Ghirardelli chocolate chips?

Ghirardelli makes several products that do not contain gluten ingredients, but they are not certified gluten-free as there is a potential for cross-contamination. For those with severe gluten allergies, it’s important to consider this information.

Why did my cookies spread too much?

Too much butter or sugar, dough that is too warm before baking, or old baking soda are all potential causes of cookies that spread too much. If you want your cookies to keep their form when baked, chill the dough beforehand.

Chef’s Tips for Perfect Cookies

It takes more than following a recipe to make the ideal Ghirardelli chocolate chip cookie; it requires knowing how the components combine during baking. Guidance from experts:

To make airy cookies, cream together the sugar and butter until the butter is completely integrated and the mixture is pale in color.

Use room-temperature eggs to integrate without affecting the dough’s texture.

Baking soda that has just been baked will help your cookies rise just right. Before you use it, make sure it’s at room temperature.

Making Changes to Your Chocolate Chip Cookies

Customizing your Ghirardelli chocolate chip cookies is a tasty way to change the recipe to fit your taste or health needs.

Gluten-Free: Instead of all-purpose flour, use your favorite gluten-free mix.

Nuts: Chop up some walnuts or pecans to add extra crunch and flavor.

Double Chocolate: To make it double chocolate, add cocoa powder to the flour mix.

Making Changes to Your Chocolate Chip Cookies

How to Serve Ghirardelli Chocolate Chip Cookies

Having these fancy cookies with other things that go well with them can make your eating experience better.

Milk: it goes well with chocolate chip cookies every time.

Coffee: A strong cup of coffee can cut down on the sweetness of the cookies.

Ice Cream: For a sweet treat, make an ice cream cake.


🍪 With all these tips in mind, why not whip up a batch of Ghirardelli chocolate chip cookies? 🍫 ✨ Be sure to share your delicious creations and experiences! ✨


Air Fryer Sesame Chicken offers a savory contrast to sweet delicacies for creative dinner and dessert options.

Print

Ghirardelli Chocolate Chip Cookie

With this simple Ghirardelli Chocolate Chip Cookies recipe, you may become an expert in the crafting of baked goods. Find out how to make cookies that are every time flawless!

  • Author: Gabriela cardenas
  • Prep Time: 15 minutes
  • Cook Time: 10 minutes
  • Total Time: 30 minutes
  • Yield: Makes about 3 dozen cookies
  • Category: Dessert
  • Method: Baking
  • Cuisine: American

Ingredients

  • 1 cup unsalted butter, softened
  • 3/4 cup granulated sugar
  • 3/4 cup packed brown sugar
  • 2 large eggs
  • 1 teaspoon vanilla extract
  • 2 1/4 cups all-purpose flour
  • 1 teaspoon baking soda
  • 1/2 teaspoon salt
  • 2 cups Ghirardelli bittersweet chocolate chips
  • Optional: 1 cup walnuts or pecans, chopped

Instructions

  1. Preheat the Oven: Preheat your oven to 375°F (190°C) and line baking sheets with parchment paper.
  2. Mix Dry Ingredients: In a medium bowl, whisk together the flour, baking soda, and salt.
  3. Cream Butter and Sugars: In a large bowl, beat the butter, granulated sugar, and brown sugar until creamy and light.
  4. Add Eggs and Vanilla: Beat in eggs one at a time, then stir in the vanilla extract.
  5. Combine with Dry Ingredients: Gradually add the dry ingredients to the wet, mixing until just combined.
  6. Add Chocolate Chips and Nuts: Stir in the Ghirardelli chocolate chips and nuts, if using.
  7. Bake: Drop by tablespoonfuls onto prepared baking sheets. Bake for 9 to 11 minutes or until golden brown.
  8. Cool: Allow cookies to cool on baking sheets for 2 minutes before transferring to wire racks to cool completely.

Notes

  • Chocolate Variety: Experiment with different types of Ghirardelli chocolate, such as milk chocolate or semi-sweet, to find your preferred flavor.
  • Chilling Dough: For thicker cookies, chill the dough for at least 30 minutes before baking.
  • Storage: Store cookies in an airtight container to keep them soft and chewy for up to a week.

Did you make this recipe?

Share a photo and tag us — we can't wait to see what you've made!

Categories
Breakfast Recipes

Real Southern Cornbread Recipe | Simple and Delicious

Cornbread is a Southern favorite. Its golden crust and soft crumb bring home a generational flavor. The Southern cornbread recipe is simple and tasty, but each area has its own variants.

What Makes a Good Southern Cornbread Recipe?

An exceptional variety of Southern cornbread harmonizes a delicate, airy consistency with a luscious, buttery taste. Key components consist of:
Cornmeal is the essential ingredient in any cornbread recipe; for a uniform texture, finely powdered cornmeal is preferred.
Buttermilk: This component contributes to the bread’s moisture and imparts a subtle flavor.
These cornbreads should have a golden, crusty skin that holds up when soaked in side dishes. To make cornbread that is neither too thick nor too dry, measure each ingredient carefully.

FAQs

What distinguishes cornbread made in the South from cornbread made elsewhere?

Generally speaking, Southern cornbread is less sweet and butterier than the sweeter, cake-like Northern kind. For a crispy crust, bake it in a cast-iron skillet and it frequently contains buttermilk.

Can I make buttermilk-free Southern cornbread?

You may, in fact, use one cup of milk and one tablespoon of vinegar or lemon juice in place of buttermilk. Give it five minutes or so to sit before using.

How are Southern cornbreads often made?

Mashed sweet potatoes give a luscious texture to sweet potato cornbread.

For a fiery kick, mix shredded cheddar and jalapeños into your cornbread.

For extra flavor, stir in crumbled, cooked bacon.

How can I be sure my cornbread stays moist and not dry?

Steer clear of overmixing the mixture, as this might cause the flour to produce gluten and become tough. It also dries out the bread, so watch out not to overbake.

A Look at the Ingredients for Southern Cornbread

The magic of Southern cornbread lies in its simplicity. The main ingredients include:

Cornmeal is the base of the recipe, providing the classic texture and flavor.

Buttermilk adds moisture and a slight tang.

Eggs: Bind the mixture while contributing to the rise and firmness of the bread.

Butter: for richness and flavor.

Chef’s Insider Advice for the Best Cornbread

Perfecting that batch of Southern cornbread requires skill and accuracy. Proven advice includes the following:

Preheat Your pan: For a crisp bottom crust, use a cast-iron pan that has been preheated in the oven.

To preserve the light texture, only stir the batter until all the ingredients are mixed.

A Look at the Ingredients for Southern Cornbread

Enhancing Your Cornbread

Wonderfully adaptable is southern cornbread. To personalize it, try these:

Add-Ins: For a sweet or spicy variation, use sweet corn or jalapeños.

Cheese: As in Cheddar Bay Biscuit Chicken Pot Pie, a small amount of grated cheddar may provide a wonderful depth of flavor.

Southern Cornbread: What to Accompany It

Many different kinds of food go wonderfully with cornbread.

With a piece of buttery cornbread, collard greens are the ideal side dish.

Perfect for the cooler months, chili is a timeless accompaniment.

If you’re looking for a robust side dish to go with our Sausage Corn Potato Chowder, try this chowder.

Southern Cornbread

Cornbread from the South and Its Health Benefits

When made with care, Southern cornbread is not only a tasty side dish, but it also has several positive effects on health:

The primary component, cornmeal, is a complete grain that increases fullness, improves digestion, and supplies fiber.

Protein: The eggs in the recipe help make it a good source of protein, which the body needs for a variety of purposes, including tissue repair.

Fortified milk and buttermilk are great ways to get more calcium and vitamin D, which is good for your bones.

Nutritional Adjustments

Lower Fat: To cut back on fat without sacrificing flavor, use less butter or substitute some applesauce.

Less Sugar: To cut calories, choose less sugar or natural sweeteners like honey.

Gluten-Free: Cornbread is a safe option for anyone who are sensitive to gluten when made with gluten-free flour.

Considering that you now have the skills, why not try some Southern cornmeal? After cooking a batch of baked goodies, share your observations. Your comments would be much valued, whether you follow the traditional recipe or add your own special touch.

Print

Southern Cornbread

Using this straightforward recipe, you will learn the techniques that are necessary to create the ideal Southern cornbread. It is perfect for any dinner!

  • Author: Gabriela cardenas
  • Prep Time: 10 minutes
  • Cook Time: 25 minutes
  • Total Time: 35 minutes
  • Yield: 4-6
  • Category: Side Dish
  • Method: Baking
  • Cuisine: American (Southern)
  • Diet: Gluten Free

Ingredients

  • 1 ½ cups finely ground cornmeal
  • 1 cup buttermilk
  • 2 large eggs
  • ¼ cup melted butter
  • 1 teaspoon baking powder
  • ½ teaspoon baking soda
  • ½ teaspoon salt
  • Optional: ½ cup diced bell peppers
  • Optional: ¼ cup chopped onions
  • Optional: ½ cup grated cheddar cheese

Instructions

  1. Preheat Oven: Get that oven nice and toasty at 425°F (218°C) and pop in a trusty cast-iron skillet to warm up.
  2. Combine the dry ingredients: In a large bowl, mix together cornmeal, baking powder, baking soda, and salt.
  3. Mix cornmeal, baking powder, baking soda, and salt in a large basin.
  4. Combine Mixtures: Carefully combine the wet and dry ingredients, stirring until they are well blended. Add any additional ingredients of your choice, such as bell peppers, onions, or cheese.
  5. Allow the cornbread to cool for a brief period before cutting and serving it while still warm.

Notes

  • For a crispier crust, preheat your baking dish with the oven.
  • If you prefer a sweeter cornbread, increase the sugar to 1/2 cup.
  • Substitute buttermilk with a mixture of milk and 1 tablespoon of vinegar or lemon juice to make it at home.

Keywords: southern cornbread recipe, traditional cornbread, Southern-style cornbread, cornbread recipe

Did you make this recipe?

Share a photo and tag us — we can't wait to see what you've made!

Categories
Breakfast Dinner Lunch Recipes

steak quesadillas

Many families rely on quesadillas for a quick and tasty lunch. Juicy, delicious beef, melty cheese, and a crunchy tortilla elevate steak quesadillas. How to make the ultimate steak quesadilla, with chef recommendations, nutritional information, and adjustable alternatives for any palette.

Overview of Ingredients

Delicious steak quesadillas depend on their components. The essentials:

For the finest flavor and texture, use flank or skirt steak.

Cheese: Queso asadero or a Mexican mix melts well.

Large, burrito-sized flour tortillas are used, although gluten-free corn tortillas are great.

Spices: Mix garlic powder, cumin, paprika, and a pinch of cayenne for the seasoning.

Overview of Ingredients

FAQs

What kind of meat is best for quesadillas?

It is often recommended to cook skirt steak because it can be heated quickly and easily cut into thin slices. Flanc steak is another great choice. It has a strong flavor and a firm texture. Ribeye and sirloin steaks are also good choices because they are known for being flavorful and versatile.

What kind of cheese melts well in a quesadilla?

When making quesadillas, the best cheeses are those that melt easily and go well with the other ingredients. The best cheese is oaxaca, which has a smooth texture and melts easily. Monterey Jack, Cheddar, and Pepper Jack cheese are also great options if you like your food with a little more kick.

How do I keep steak quesadillas fresh and ready to eat?

Before putting each sirloin quesadilla on its own piece of plastic wrap or foil, let it cool to room temperature. Keep it in the fridge in a safe container for three to four days. Put it in the oven at 350°F (175°C) for 10 to 15 minutes, or heat it up in a skillet until the cheese melts and the tortilla turns brown.

Gabriela’s Secrets to Perfect Steak Quesadillas


Perfect steak quesadillas require mastering a few techniques. What I’ve learned over time:

Steak Perfection: Use a good flank or skirt steak. Juicy, medium-rare to medium doneness is the goal. Let it rest before slicing to seal in the juices.

Precision: Cut steak thinly against the grain. This easy method tenderizes. Every mouthful is melt-in-your-mouth wonderful.

Taste Harmony: I adore enhancing flavors with spices. Infused with garlic powder, cumin, paprika, and a dash of cayenne, the steak is rich and flavorful.

Making layers for a quesadilla is a skill: carefully and uniformly layer the meat, cheese, and toppings. The result is just the proper amount of taste and texture in every bite.

Flip with finesse. Cook slowly. Sizzle the quesadillas, flipping halfway for golden-brown crispiness. Small details matter most.

Attention to Detail: Focus on the details. From selecting the proper meat to organizing the components, these simple details make quesadillas great.

Cook Quesadillas

Customizing Your Steak Quesadilla

Just by making a few small adjustments, you can make this steak quesadilla exactly how you want it:

For Gluten-Free Needs: Opt for corn tortillas instead of flour.

Vegan Options: Use plant-based cheese and meat substitutes.

Add-Ins: Consider incorporating sautéed onions, bell peppers, or mushrooms for extra flavor and texture.

A Healthier Way to Enjoy Steak Quesadillas

Here are some tips to make sure your steak quesadillas are as nutritious as possible:

Select lean cuts of meat, such as flank or sirloin steak, and trim off excess fat before cooking to reduce saturated fat.

Opt for whole-grain tortillas instead of refined-flour tortillas to enhance the fiber content of your quesadillas.

Add Vegetables: Add bell peppers, onions, spinach, or mushrooms to boost fiber and nutrients without adding calories.

Choose a melting cheese, but use it sparingly to save fat and calories. Cheese substitutes with less fat may be healthier

Assemble Quesadillas

What to Serve with Steak Quesadillas

A quesadilla supper can be a feast with the appropriate sides. Some excellent options:

Salads: A light, crisp salad balances the richness of the quesadillas.

Beans: A side of black or refried beans complements the flavors well.

Rice: A bowl of cilantro-lime rice or Mexican rice makes a hearty addition.

For a different take on sauces that could elevate your quesadilla, check out the Steak Frites Sauce.

Print

steak quesadillas

Discover how to make the perfect steak quesadillas with melty cheese and flavorful steak. Quick prep and cook time for a delicious meal!

  • Author: Gabriela cardenas
  • Prep Time: 15 minutes
  • Cook Time: 10 minutes
  • Total Time: 25 minutes
  • Yield: 4
  • Category: Main Course
  • Method: Pan-frying
  • Cuisine: Mexican
  • Diet: Gluten Free

Ingredients

  • 1 lb. flank or skirt steak, thinly sliced
  • 1 tbsp. olive oil
  • 1 tsp. garlic powder
  • 1 tsp. ground cumin
  • Salt and pepper to taste
  • 8 large flour tortillas
  • 2 cups shredded Oaxaca or Monterey Jack cheese
  • Optional: 1/2 cup diced bell peppers
  • Optional: 1/4 cup chopped onions

Instructions

  1. Preparation: Season the steak slices with garlic powder, cumin, salt, and pepper.
  2. Cook the Steak: Heat olive oil in a skillet over medium-high heat. Add steak and cook until browned, about 3-4 minutes per side. Remove from heat and set aside.
  3. Assemble Quesadillas: Lay out the tortillas on a flat surface. Sprinkle cheese on half of each tortilla, add cooked steak, bell peppers, and onions (if using).
  4. Cook Quesadillas: Fold the tortillas over and press gently. Heat a clean skillet over medium heat. Cook each quesadilla until golden brown on both sides and the cheese is melted, about 2-3 minutes per side.
  5. Serve: Cut into wedges and serve hot.

Notes

  • Cheese Choices: For the best melt, choose Oaxaca or Monterey Jack cheese, but feel free to experiment with different types of cheese like cheddar or mozzarella.
  • Adding Vegetables: Incorporating vegetables like bell peppers and onions not only adds flavor but also increases the nutritional value of the quesadillas.
  • Serving Suggestions: Serve with salsa, sour cream, or guacamole on the side for added flavor.

Keywords: steak quesadilla recipe, beef quesadilla, cheese quesadilla, Mexican quesadilla

Did you make this recipe?

Share a photo and tag us — we can't wait to see what you've made!

Categories
Breakfast Recipes

loaf pan basque cheesecake

Usually baked in a circular pan, basque cheesecake boasts a burnt surface and a creamy interior. However, using a loaf pan makes a cheesecake that is easy to slice and looks great on any dessert table. This instruction will help you make a beautiful loaf pan Basque cheesecake that’s tasty and attractive.

Overview of Ingredients

To embark on your cheesecake journey, you’ll need a few key ingredients that combine to create the signature flavor and texture of a Basque cheesecake:

Cream cheese is the star of the show; make sure it’s at room temperature to ensure smooth mixing.

Sugar balances the tanginess of the cream cheese.

Eggs: They add structure and richness to the cheesecake.

Heavy cream—for that irresistible creaminess.

To help set the cheesecake, add a small amount of flour.

Overview of Ingredients

FAQs

How do I prevent my cheesecake from cracking?

Ensure that your cheesecake is cooked at a consistent, moderate temperature to prevent overbaking.

Can I make this cheesecake without flour?

If you want to make a gluten-free version of the recipe, you can replace the flour with cornstarch and still have the same texture.

What’s the best way to store Basque cheesecake?

The flavor of this cheesecake is enhanced when it is preserved in the refrigerator for up to five days, and it tastes best when refrigerated overnight.

Chef’s Tips for a Perfect Basque Cheesecake

Creating the perfect loaf pan Basque cheesecake is an art, but with these expert tips, you’re sure to impress:

Always start with room-temperature ingredients. This ensures that the mix blends together smoothly without lumps.

When mixing your batter, be gentle. Overmixing can introduce air bubbles, which may affect the density of your cheesecake.

Grease your loaf pan well, and consider lining it with parchment paper for easier removal.

Learning the right baking techniques can be crucial, and beginners might benefit from checking out essential baking techniques.

Customizing Your Dish

Basque cheesecake is wonderfully versatile, and customizing it can be as simple as adding a few tweaks.

Vanilla or almond extract can add a lovely aroma and depth of flavor.

Mix in a swirl of fruit compote or jam before baking for a fruity twist.

A sprinkle of cinnamon or nutmeg can enhance the cheesecake’s warm flavors.

What works best with Basque cheesecake?

When it comes to serving, Basque cheesecake pairs beautifully with:

There is a drizzle of salted caramel for a sweet and salty contrast.

Fresh berries or a berry compote offer a refreshing balance to the rich cheesecake.

A scoop of vanilla ice cream makes for a classic pairing.

For inspiration on how to present and serve cheesecake, check out serving cheesecake.

Health Benefits

While indulgent, the ingredients in Basque cheesecake offer a variety of benefits:

Cream cheese provides a good amount of vitamin A.

Eggs are a great source of high-quality protein.

Heavy cream, though high in fat, contributes to the cheesecake’s luxurious texture.


Feeling up for the challenge of making your very own loaf pan Basque cheesecake? Get ready to whip up a dessert that will have your guests begging for more. Just gather your ingredients and follow these simple steps. Show off your culinary skills by sharing your creations online and tagging us! Have a blast in the kitchen!

Print

loaf pan basque cheesecake

Discover how to make creamy Loaf Pan Basque Cheesecake with our easy-to-follow recipe. Perfect texture and rich taste in every slice!

  • Author: Gabriela cardenas
  • Prep Time: 20 minutes
  • Cook Time: 45 minutes
  • Total Time: 65 minutes
  • Yield: 8
  • Category: Dessert
  • Method: Baking
  • Cuisine: European
  • Diet: Vegetarian

Ingredients

  • 400g of cream cheese, room temperature
  • 1 cup of granulated sugar
  • 3 large eggs, room temperature
  • 200 ml of heavy cream
  • 1 teaspoon of vanilla extract
  • 2 tablespoons of all-purpose flour
  • A pinch of salt

Instructions

  1. Preheat the oven and prepare a loaf pan with parchment paper.
  2. Beat the cream cheese until smooth, then gradually add sugar and eggs.
  3. Mix in the heavy cream and vanilla, then sift in the flour and salt to combine.
  4. Pour the batter into the pan and bake until the top is caramelized and the center is slightly jiggly.
  5. Let it cool before serving.

Notes

  • Ensure all ingredients are at room temperature to achieve a smoother texture.
  • Do not overmix the batter to avoid incorporating too much air which can cause cracks.
  • Allow the cheesecake to cool in the oven with the door slightly open to prevent sudden temperature changes that can lead to sinking.

Keywords: Loaf Pan Basque Cheesecake, Basque Burnt Cheesecake Loaf, Rectangular Basque Cheesecake, Loaf Style Basque Cheesecake

Did you make this recipe?

Share a photo and tag us — we can't wait to see what you've made!

Categories
Breakfast Recipes

Blueberry Lemon Lasagna – Easy No-Bake Dessert

Lemon and blueberries together are the perfect summer food. The Blueberry Lemon Lasagna recipe combines these two tastes into a delicious, no-bake treat that looks great too. When you want to impress people at a picnic or just try something new, this recipe is great.

What makes this recipe good?

The allure of Blueberry Lemon Lasagna lies in its simplicity and the exquisite combination of flavors. This dessert is characterized by its layers of creamy sweetness balanced with the zesty punch of lemon, making it an irresistible treat. Furthermore, it’s a no-bake recipe, which means you can prepare it without the heat of an oven, a blissful advantage during the hot summer months.

FAQs About blueberry lemon lasagna

How long should the lasagna chill before serving?

Ideally, let it chill for at least 4 hours to ensure the layers set properly.

Is there a low-sugar version available?

Yes, substitute the regular sugar with a granulated sugar substitute suitable for baking.

What is the best way to store blueberry lemon lasagna?

The best way to store blueberry lemon lasagna is to keep it refrigerated. Here’s how to do it effectively:

  • Cool Completely: Before storing, allow your Blueberry Lemon Lasagna to cool to room temperature after assemblyto prevent condensation from forming inside the container, which can make the layers soggy.
  • Use an Airtight Container: Place the lasagna in an airtight container to protect it from absorbing other flavors from the refrigerator and to keep it fresh.
  • Refrigerate: Store the lasagna in the refrigerator. It will typically keep well for up to 5 days.
  • Cover with Plastic Wrap: If your container isn’t airtight, you can cover the lasagna directly with plastic wrap. Make sure the wrap touches the surface of the lasagna to create a seal that prevents air exposure.
  • Serving: When ready to serve, you can remove it from the refrigerator and cut it into pieces while it is still cold. It’s best served chilled, especially because of its creamy layers.

Overview of Ingredients

  • Cream cheese, 2 packages (8 ounces each), softened
  • Sugar: 1 cup
  • Fresh or frozen blueberries: 3 cups
  • Lemon juice and zest, from 2 large lemons
  • Whipped cream or cool whip: 4 cups
  • Golden Oreos—crushed; for the crust, about 36 cookies
  • Butter, melted, for the crust

Chef’s Tips for Perfect Blueberry Lemon Lasagna

  • Choosing blueberries: For the best flavor, opt for fresh blueberries during their peak season. However, frozen blueberries can also be used, especially if you desire a more cost-effective or off-season alternative.
  • Layering: To ensure each bite is as good as the last, evenly distribute your layers and allow the lasagna to set properly in the refrigerator before serving. This setting phase helps the flavors meld beautifully.

Customizing Your blueberry lemon lasagna

Blueberry Lemon Lasagna is wonderfully versatile. Here are a few ways you can tailor it to your taste:

  • Berry Variations: Substitute blueberries with raspberries or mixed berries for a different twist.
  • Citrus Options: Replace lemon with lime for a subtler citrus note, if desired.

What to Serve with This Recipe

This treat goes well with either a simple cup of tea or a light sparkling wine. It’s great for both everyday afternoons and special events. People who want more cool summer treats might like sorbets or citrus-flavored cakes, which go well with lasagna. Check out more cool summer desserts here. For additional lemon-infused recipes, check out our Lemon Butter Pasta

Health Benefits

Blueberries and lemons are not only delicious but also packed with nutrients. Blueberries offer a significant source of antioxidants and vitamins, while lemons provide vitamin C and can aid in digestion. Learn more about the health benefits of blueberries here.


Ready to dive into making your own Blueberry Lemon Lasagna? Gather your ingredients and prepare for a delightful culinary adventure. Don’t forget to share your creation on social media or with friends and family. Who knew dessert could taste so refreshing and satisfying at the same time? Enjoy every spoonful!

Print

Blueberry Lemon Lasagna – Easy No-Bake Dessert

Try this easy no-bake Blueberry Lemon Lasagna recipe! Perfect for summer with a refreshing mix of lemon and blueberries.

  • Author: Gabriela cardenas
  • Prep Time: 20 minutes
  • Cook Time: 4 hours 20 minutes (includes chilling)
  • Total Time: 4 hours 40 minutes
  • Yield: 8 servings
  • Category: Dessert
  • Method: No-Bake
  • Cuisine: American
  • Diet: Vegetarian

Ingredients

  • 2 packages (8 ounces each) of cream cheese, softened
  • 1 cup granulated sugar
  • 3 cups fresh or frozen blueberries
  • 2 large lemons (juice and zest)
  • 4 cups whipped cream or Cool Whip
  • 36 Golden Oreo cookies, crushed
  • 1/2 cup butter, melted

Instructions

  1. In a mixing bowl, combine softened cream cheese with sugar, lemon juice, and half of the lemon zest until smooth.
  2. In a separate bowl, mix the crushed Golden Oreos with melted butter to form the crust. Press this mixture into the bottom of a 9×13 inch dish.
  3. Spread half of the cream cheese mixture over the crust evenly.
  4. Layer the blueberries over the cream cheese layer.
  5. Top with the remaining cream cheese mixture and smooth out the top.
  6. Finish with a layer of whipped cream and garnish with the remaining lemon zest.
  7. Refrigerate for at least 4 hours to set before serving.

Notes

  • If using frozen blueberries, ensure they are thawed and well-drained to prevent excess moisture.
  • For a firmer lasagna, you can freeze it for 1-2 hours before serving.
  • Garnish with additional blueberries and lemon slices for a more decorative presentation.

Keywords: Blueberry Lemon Lasagna. Lemon Blueberry Dessert, No-Bake Blueberry Lasagna, Blueberry

Did you make this recipe?

Share a photo and tag us — we can't wait to see what you've made!

Categories
Breakfast Recipes

Chocolate Chip Brownies

People appreciate classic chocolate chip brownies for their rich chocolate flavor and delicious texture. This article covers the secrets of preparing the ideal brownie recipe, their nutritional value, and how to modify them to your liking.

What Makes a Good Recipe

By achieving a balance between texture and flavor, brownies are at their best. Suggestions for attaining that irresistible amalgamation are as follows:

  • Consistency: Achieving the right fudginess or cake-like texture.
  • Flavor balance: Using the right amount of chocolate and sugar to create a rich but not overwhelming taste.
  • Proper mixing: Combining ingredients just enough to blend them without overmixing, which can affect the texture.

FAQs about Chocolate Chip Brownies

How do I make sure my brownies are fudgy and not cakey?

To ensure your brownies are fudgy, use a higher fat-to-flour ratio, add more butter and chocolate, and slightly reduce the baking time.

Can I use cocoa powder instead of melted chocolate for brownies?

Yes, you can use cocoa powder in brownies, but the texture and taste will differ. Melted chocolate gives a richer, fudgier texture, while cocoa powder leads to a softer, more cake-like brownie.

What are the best mix-ins for chocolate chip brownies?

Popular mix-ins include nuts (like walnuts or pecans), extra chocolate chips, and marshmallows for added texture and flavor layers.

How long do brownies last, and how should I store them?

Brownies typically last up to 3–4 days at room temperature. Store them in an airtight container to keep them moist and fresh. You can freeze brownies for up to 3 months for longer storage.

How can I determine the perfect baking temperature for my brownies?

Brownies are done when the edges are set and a toothpick inserted in the center comes out with a few moist crumbs. They should still be soft in the center; overbaking will lead to dry brownies.

Do chocolate-chip brownies contain caffeine?

Yes, chocolate naturally contains caffeine. The amount in brownies varies based on the chocolate used, but it is typically much less than in a cup of coffee.

Overview of Ingredients

Every ingredient in a brownie recipe serves a purpose. Here’s what you’ll typically need:

  • Butter: for richness and flavor.
  • Sugar: Adds sweetness and affects the texture.
  • Eggs: Bind the mixture and create a smooth, cohesive batter.
  • Flour: Provides the structure.

Chocolate chips: The star of the show, adding gooey chocolate pockets.

Chef’s Tips for Perfect Chocolate Chip Brownies

Perfecting chocolate chip brownies requires art and science. Master cooks reveal their secrets for delicious, popular brownies:

  • Verify the Temperature of Your Oven: Incorrect calibration of many ovens can result in either underbaking or overbaking. Use an oven thermometer to ensure that your oven’s temperature setting is accurate.
  • Use High-Quality Cocoa Powder: The type of cocoa you use can dramatically affect the taste and texture of your brownies. Opt for high-quality, unsweetened cocoa powder for a rich, intense chocolate flavor.
  • Melt Chocolate and Butter Together: Melting the butter and chocolate together helps to create a smooth, homogenous mixture, which contributes to the creamy texture of the brownie.
  • Avoid Overmixing the Batter: Only mix the batter until all the ingredients are well combined. Overmixing can incorporate too much air into the batter, leading to brownies that are too cake-like instead of dense and fudgy.
  • Line Your Baking Pan: To line your baking pan, use parchment paper or aluminum foil. This not only makes it easier to remove the brownies but also ensures they bake evenly.
  • Cool in the pan: Allow the brownies to cool completely in the pan on a wire rack. This helps them set up and makes cutting easier and cleaner.
  • Cut with a Plastic Knife: A plastic knife cleanly cuts through brownies without sticking, making perfect squares without tearing.

Tailoring Your Chocolate Chip Brownies

Brownies are extraordinarily multipurpose. Several strategies for distinguishing your recipe are as follows:

Nuts, marshmallows, or toffee pieces may be incorporated for added flavor and texture.
As an extra culinary addition, sprinkle sea salt or apply caramel on top prior to baking.
Provisions to Complement Chocolate Chip Brownies

Supplementary Items for Chocolate Chip Brownies

A brownie can be enjoyed to a greater extent with the proper accompaniment. Reflect upon the subsequent:

Complementing the robust chocolate flavor are glasses of cold milk or potent coffee.
A traditional dessert duo consists of vanilla ice cream served as a garnish.

Health Benefits 

While brownies aren’t known for their health benefits, incorporating healthier ingredients can increase their nutritional value without compromising taste. Consider the following substitutions:

  • Whole wheat flour: instead of all-purpose for added fiber.
  • Applesauce: or mashed bananas to reduce butter or oil.
  • Dark chocolate: chips for a boost of antioxidants.

Try making these chocolate chip brownies today and share your results! For more delicious recipes and baking tips, visit Recipes Gabriela.

Print

Chocolate Chip Brownies

Learn the method for baking flawless chocolate chip brownies. Irresistible, fudgy, and opulent; ideal for any dessert enthusiast!

  • Author: Gabriela cardenas
  • Prep Time: 15 minutes
  • Cook Time: 25 minutes
  • Total Time: 40 minutes
  • Yield: 12 brownies
  • Category: Dessert
  • Method: Baking
  • Cuisine: American
  • Diet: Vegetarian

Ingredients

  • 1/2 cup unsalted butter, melted
  • 1 cup granulated sugar
  • 2 large eggs
  • 1 teaspoon vanilla extract
  • 1/3 cup unsweetened cocoa powder
  • 1/2 cup all-purpose flour
  • 1/4 teaspoon salt
  • 1/4 teaspoon baking powder
  • 3/4 cup chocolate chips
  • Optional: 1/2 cup chopped nuts (walnuts or pecans)

Instructions

  1. Preheat your oven to 350°F (175°C). Grease a 9×9 inch baking pan or line with parchment paper.
  2. In a medium bowl, combine melted butter, sugar, and vanilla. Beat in eggs one at a time.
  3. Gradually add cocoa, flour, salt, and baking powder. Mix well.
  4. Stir in chocolate chips and nuts (if using). Spread the batter into the prepared pan.
  5. Bake in preheated oven for 20 to 25 minutes. Do not overcook; the brownies should be soft in the center.
  6. Allow to cool in pan on wire rack before slicing into squares

Notes

  • For fudgier brownies, reduce the amount of flour to 1/3 cup.
  • Ensure all ingredients are at room temperature to help them blend smoothly.
  • For a richer flavor, substitute some sugar with brown sugar.

Keywords: chocolate chip brownies, fudgy brownies chocolate brownies brownie recipe

Did you make this recipe?

Share a photo and tag us — we can't wait to see what you've made!

Categories
Breakfast Dinner Recipes

Boneless Chicken Wings: Recipes & Tips

Boneless chicken wings have taken the culinary world by storm, offering the delicious flavors of traditional wings without the hassle of bones. This comprehensive guide explores everything from the origins and benefits of boneless wings to recipes and serving suggestions.

Boneless Chicken Wings step 0

The Evolution of Boneless Chicken Wings

The journey of boneless chicken wings from a simple idea to a menu staple in restaurants worldwide is fascinating. Unlike traditional wings, boneless wings are made from breast meat, offering a tender and juicy bite every time.

  • Origins: While traditional wings have a long history, boneless wings gained popularity as a convenient and less messy alternative.
  • Popularity: Their rise to fame can be attributed to the growing demand for easy-to-eat appetizers and the versatility they offer in flavors and cooking methods.

Discover the history of chicken wings and how they became a beloved dish across the globe.

FAQs 

What exactly are boneless chicken wings?

Boneless chicken wings are typically made from breast meat, cut into pieces, breaded, and cooked to mimic the taste and texture of traditional wings. They are often served with various sauces, just like traditional wings.

Are boneless wings actually wings?

Despite the name, boneless wings are not made from wing meat. They are usually crafted from chicken breast meat, making them more akin to chicken tenders or nuggets than actual wings.

Why choose boneless wings over traditional wings?

Many people prefer boneless wings for their convenience and ease of eating, as they don’t contain bones. They’re also versatile in flavor and can be a leaner option, depending on the preparation.

Can boneless wings be made in an air fryer?

Yes, boneless wings are perfect for air-frying, offering a healthier alternative to deep-frying. Air-frying provides a crispy exterior while keeping the inside juicy with minimal oil use.

How do you keep boneless wings crispy?

To keep them crispy, serve them immediately after cooking. If you’re tossing them in sauce, do so right before serving to maintain the crunch. Reheating in an air fryer can also help restore crispiness.

What sauces and dips pair well with boneless wings?

Boneless wings pair well with a wide range of sauces, from classic Buffalo and BBQ to honey mustard and garlic Parmesan. Ranch and blue cheese dips are popular choices for cooling down spicy flavors.

Boneless Chicken Wings step 2

Overview of Ingredients

Boneless chicken wings require a straightforward yet adaptable set of ingredients that allows for various cooking styles and flavor profiles. Here’s what you’ll typically need:


  • Chicken: boneless, skinless chicken breast meat, cut into pieces the size of wings.
  • Breading: all-purpose flour, eggs, and breadcrumbs or panko for a crispy exterior.
  • Seasonings: salt, pepper, and poultry seasoning. Additional spices can vary based on the flavor profile you’re aiming for.
  • Sauces: A variety of sauces, such as Buffalo, BBQ, honey mustard, or garlic Parmesan, should be used to coat the wings after cooking.
  • Oil: for frying or spraying before air-frying, depending on your cooking method preference.

Chef’s Tips for Perfect Boneless Wings step 3

Chef’s Tips for Perfect Boneless Wings

To ensure your boneless chicken wings turn out perfectly crispy and flavorful, follow these chef-approved tips:

  • Ensure Even Cut: Cut the chicken breast into even pieces to promote uniform cooking.
  • Season Generously: Don’t skimp on the seasoning in the flour mixture. This base layer of flavor is crucial.
  • Perfect the Breading: Dredge the chicken in flour, dip in beaten eggs, and then coat in breadcrumbs. Press the crumbs onto the chicken to ensure they stick well.
  • Rest Before Cooking: Let the breaded chicken sit for 10–15 minutes before cooking. This helps the coating adhere better and prevents it from falling off during cooking.
  • Optimal Cooking Temperature: Whether frying or air frying, make sure your oil or air fryer is at the right temperature—typically around 375°F (190°C) for frying and slightly lower for air frying.
  • Don’t Overcrowd: Cook in batches to avoid overcrowding, which can lower the temperature and lead to soggy wings.
  • Toss with Sauce Immediately: Toss the wings in sauce as soon as they’re cooked to maximize flavor absorption and retain crispiness

Air Fryer Adaptation: Crispy, Boneless Wings

For those who prefer a healthier cooking method without sacrificing the crispy texture we all love, this recipe is perfectly adaptable to an air fryer. Utilizing the air fryer not only reduces the amount of oil needed but also ensures each wing is evenly cooked and deliciously golden. It’s a convenient and quick way to enjoy your homemade boneless wings with less guilt and more flavor.

 Chicken Bites

Why Boneless Wings Reign Supreme

Boneless chicken wings offer several advantages that make them a preferred choice for many:

  • Convenience: Easy to eat without dealing with bones, perfect for social gatherings.
  • Versatility: They serve as a blank canvas for a wide array of flavors, from classic Buffalo to sweet and tangy barbecue.
  • Nutritional Value: Often made from chicken breast, boneless wings are a good source of lean protein.

Understanding the nutritional benefits of chicken reveals why incorporating poultry into your diet can be both delicious and beneficial.

What goes best with boneless chicken wings?

Choosing the right accompaniments can turn your boneless wings into a hearty meal. Here are some serving suggestions:

  • Classic Sides: Celery sticks, carrot sticks, and blue cheese or ranch dressing are classic pairings that offer a crunchy, creamy contrast to the spicy wings.
  • Healthy Options: Serve with a side salad or roasted vegetables to add a nutritious element to your meal.
  • Starchy Complements: Consider garlic bread, sweet potato fries, or a simple coleslaw for a more filling option.
  • Dipping Sauces: Offer a variety of dipping sauces to cater to different tastes, including spicy, sweet, and savory options.

To make the perfect boneless wing at home, start with chicken breast cut into pieces. Marinate in your favorite flavors, coat in flour, egg, and breadcrumbs, then bake, fry, or air-fry until crispy. Toss in sauce and enjoy your homemade, delicious boneless wings.

Deboning a chicken wing typically takes about 5 to 10 minutes per wing, depending on your skill level and experience. For beginners, it might be on the longer side as you get used to the technique and anatomy of the wing. With practice, you can become more efficient and reduce the amount of time needed.

For more delicious recipes and culinary inspiration, don’t forget to browse our complete recipe collection.

Health Benefits

Boneless chicken wings, especially when made from chicken breast, offer a variety of health benefits that make them a worthwhile addition to any diet.

  • High Protein Content: Chicken is a great source of lean protein, which is crucial for muscle repair and growth. Protein also helps with feeling fuller longer, which can aid in weight management.
  • Lower Fat Than Traditional Wings: Using breast meat instead of wing meat, which includes skin, often results in a lower fat content, particularly if you choose air frying over deep frying.
  • Rich in Vitamins and Minerals: Chicken is a good source of B vitamins, particularly niacin and B6, which are important for energy production and cardiovascular health. It also contains phosphorus, essential for strong bones and teeth, and selenium, known for its antioxidant properties.
  • Customizable for Healthier Options: By choosing to air fry, use gluten-free coatings, or incorporate whole-grain breading, you can increase the nutritional value of boneless wings and make them suitable for various dietary needs.

Enter the delightful world of boneless chicken wings. These wings are perfect for game-day parties, family dinners, and snacks. Try various coatings, spices, and dips to find your ideal wing combination. To promote these adaptable, tasty snacks, share your recipes with friends and family or on social media. Start cooking now to achieve the ideal flavor-health balance in your own kitchen!

Print

Boneless Chicken Wings: Recipes & Tips

Discover the perfect boneless chicken wings with this guide! Includes recipes, health tips, and serving ideas for delicious, easy-to-make wings.

  • Author: Gabriela cardenas
  • Prep Time: 15 minutes
  • Cook Time: 20 minutes
  • Total Time: 35 minutes
  • Yield: 4
  • Category: Appetizer, Main Course
  • Method: Frying, Air Frying, Baking
  • Cuisine: American
  • Diet: Gluten Free

Ingredients

  • 2 lbs boneless, skinless chicken breast, cut into pieces
  • 1 cup all-purpose flour
  • 2 large eggs, beaten
  • 2 cups breadcrumbs or panko
  • 1 teaspoon salt
  • 1/2 teaspoon pepper
  • 1 tablespoon poultry seasoning
  • Your choice of sauce (e.g., Buffalo, BBQ, honey mustard)
  • Oil for frying or spraying (if air frying)

Instructions

  1. Prepare three bowls for the breading process: one with flour mixed with salt and pepper, one with beaten eggs, and one with breadcrumbs mixed with poultry seasoning.
  2. Dip each piece of chicken first in flour, then egg, and finally breadcrumbs, ensuring each piece is well coated.
  3. If deep frying, heat oil to 375°F and fry the wings until golden and crispy, about 4-5 minutes. If air frying, spray the wings lightly with oil and cook at 375°F for about 10 minutes, turning halfway through.
  4. Toss the cooked wings in your chosen sauce and serve immediately.

Notes

  • Ensure the chicken pieces are dry before starting the breading process for better adhesion.
  • For a healthier option, bake the wings at 400°F for 20 minutes instead of frying.
  • Let the breaded chicken sit for 5-10 minutes before cooking to help the coating stick during the cooking process.

Keywords: boneless wings, chicken breast wings, breaded chicken wings, air fryer chicken wings

Did you make this recipe?

Share a photo and tag us — we can't wait to see what you've made!

Categories
Breakfast Recipes

Baked Scrambled Eggs

Baked scrambled eggs are a tasty morning variation. This approach yields light, fluffy eggs every time and simplifies cooking by removing stirring. Simple and versatile, this recipe is perfect for family breakfasts or serving a large.

What makes good baked scrambled eggs?

Egg-to-Milk Ratio: Crucial for fluffiness; typically 1/4 cup of milk for every four eggs.

Seasoning: Essential ingredients include salt and pepper; adjust according to taste.

Oven Temperature: Ideal at around 350°F to ensure even cooking and prevent eggs from becoming rubbery.

FAQs

Can you make baked scrambled eggs with egg whites only?

Absolutely! Egg white-only baked scrambled eggs are lower in cholesterol. Try adding skim milk or a dairy-free milk replacement to egg whites to keep them fluffy and moist. Because egg whites are blander than whole eggs, you may wish to season them extra. Bake them in a buttered dish.

How can you keep baked scrambled eggs moist?

Use 1/4 cup of milk or cream per four eggs to keep baked scrambled eggs moist. Remove eggs from the oven while they’re still slightly soft to avoid overcooking. Covering the dish with aluminium foil while baking helps maintain moisture. A little butter or oil might help prevent eggs from drying.

A Summary of the Ingredients

Baked scrambling eggs are exquisite in their simplicity. The essential components comprise:

The centrepiece of the dish is the egg.
For a creamy texture, milk or cream may be used.
Pepper and salt are used for fundamental seasoning.
Preferably, one may apply butter or oil to coat the baking dish.

Chef’s Tips for Perfect Baked Scrambled Eggs

Choose the right pan

The choice of baking dish has a big impact on scrambled eggs. A ceramic or glass baking dish evenly distributes heat, preventing the sides from cooking faster than the centre. If possible, avoid metal pans, which heat eggs too quickly and unevenly.

Stir Mid-Baking

To ensure that the eggs cook uniformly, give them a gentle stir halfway through the baking process. This action helps redistribute the eggs that may have settled or begun to cook faster at the edges or bottom of the pan.

Incorporate Cream

For an extra luxurious texture, substitute half of your milk quantity with heavy cream. This not only adds richness but also contributes to the creamy, soft consistency of your scrambled eggs, making them more indulgent.

Season Creatively

While salt and pepper are staples, don’t shy away from incorporating other seasonings to enhance the flavour. Consider adding a pinch of paprika for warmth, some dried herbs like tarragon or chives for freshness, or a dash of curry powder for a unique twist.

Use fresh eggs

The quality of your eggs can make a big difference in your dish. Fresh eggs not only have better flavour but also tend to have firmer whites and yolks, which helps maintain a good structure when baked.

Finish with fresh toppings

Finishing your eggs with fresh toppings while they’re still hot from the oven can add layers of texture and flavour. A sprinkle of fresh herbs, a handful of arugula, or some diced avocados can enhance the dish with minimal effort.

Keeping Baked Scrambled Eggs Moist

Keeping baked scrambled eggs wet requires preparation and cooking. These techniques will keep your eggs wet and fluffy:

Use the Right Ratio: Adding the correct amount of liquid is crucial. For every four eggs, use about 1/4 cup of milk or cream. This helps to create a creamy texture that retains moisture during baking.

Don’t overcook: Eggs continue to cook even after they are removed from the oven due to residual heat. Remove the eggs from the oven just before they are fully set to prevent them from becoming dry. They should still be slightly wet in the middle.

Cover While Baking: For at least part of the cooking time, covering the dish with foil can help trap steam and moisture inside, preventing the eggs from drying out.

Add fat: Incorporate a small amount of butter or oil into the eggs before baking. Fat helps to lock in moisture and adds richness to the flavour.

Low and Slow: Consider baking at a lower temperature, such as 325°F, and allow a longer cooking time. This gentler approach helps to cook the eggs evenly without expelling all the moisture.

Customising Your Baked Scrambled Eggs

Baked scrambled eggs are incredibly adaptable. Here are some popular additions to customise your dish:

Vegetables: spinach, tomatoes, and onions add flavour and colour.

Cheeses: cheddar, mozzarella, or feta can enhance the texture and taste.

Meats: Ham, bacon, or sausage for a heartier meal.

Herbs: chives, parsley, or dill for a fresh touch.

For additional meat preparation ideas, check out our guide on Hawaiian Chicken in a Crock Pot.

What to Serve with Baked Scrambled Eggs

Complement your baked scrambled eggs with:

Toast: Whole grain, sourdough, or rye.

Breakfast meats: Sausages or bacon.

Fresh salads: A light arugula or spinach salad. Discover various variations on scrambled eggs recipes to pair with your dish.

Are baked scrambled eggs healthy?

Baked scrambled eggs are a healthy breakfast option, especially when prepared with minimal added fats and served with nutritious sides like vegetables or whole grains. Eggs are a great source of high-quality protein, vitamins such as B12, and minerals like selenium. Using ingredients like skim milk or adding vegetables can enhance the nutritional profile, making it a wholesome and satisfying meal. Learn more about the benefits and nutritional information of eggs.


Are you ready to change your breakfast? Bake your scrambled eggs next time! It’s straightforward and offers great taste variations. Share your baked scrambled egg creations online or subscribe to our newsletter for more creative recipes.

Happy cooking!

Print

Baked Scrambled Eggs

Our easy recipe will show you how to prepare airy baked scrambled eggs. Exceptional for breakfast or sizable gatherings.

  • Author: Gabriela cardenas
  • Prep Time: 10 minutes
  • Cook Time: 20 minutes
  • Total Time: 30 minutes
  • Yield: 4
  • Category: Breakfast
  • Method: Baking
  • Cuisine: American
  • Diet: Vegetarian

Ingredients

  • 8 large eggs
  • 1/2 cup whole milk
  • Salt, to taste
  • Black pepper, to taste
  • 1/4 cup shredded cheddar cheese (optional)
  • 1 tablespoon butter, for greasing
  • Fresh chives, chopped (for garnish)

Instructions

  1. Preheat your oven to 350°F (175°C). Grease a medium baking dish with butter.
  2. In a large bowl, whisk together eggs, milk, salt, and pepper until well combined.
  3. Pour the egg mixture into the prepared baking dish. Sprinkle with shredded cheese if using.
  4. Bake in the preheated oven for 15-20 minutes, or until the eggs are set and lightly golden on top.
  5. Garnish with fresh chives before serving.

Notes

  • For extra fluffy eggs, add an additional 1/4 cup of milk.
  • Stir the eggs halfway through baking for an even cook.
  • Incorporate vegetables like spinach or diced bell peppers for a healthier version.

Keywords: baked scrambled eggs Oven-baked eggs, Easy scrambled eggs

Did you make this recipe?

Share a photo and tag us — we can't wait to see what you've made!

Exit mobile version