Categories
Dinner Lunch Recipes

slow cooker tuscan chicken meatballs with gnocchi

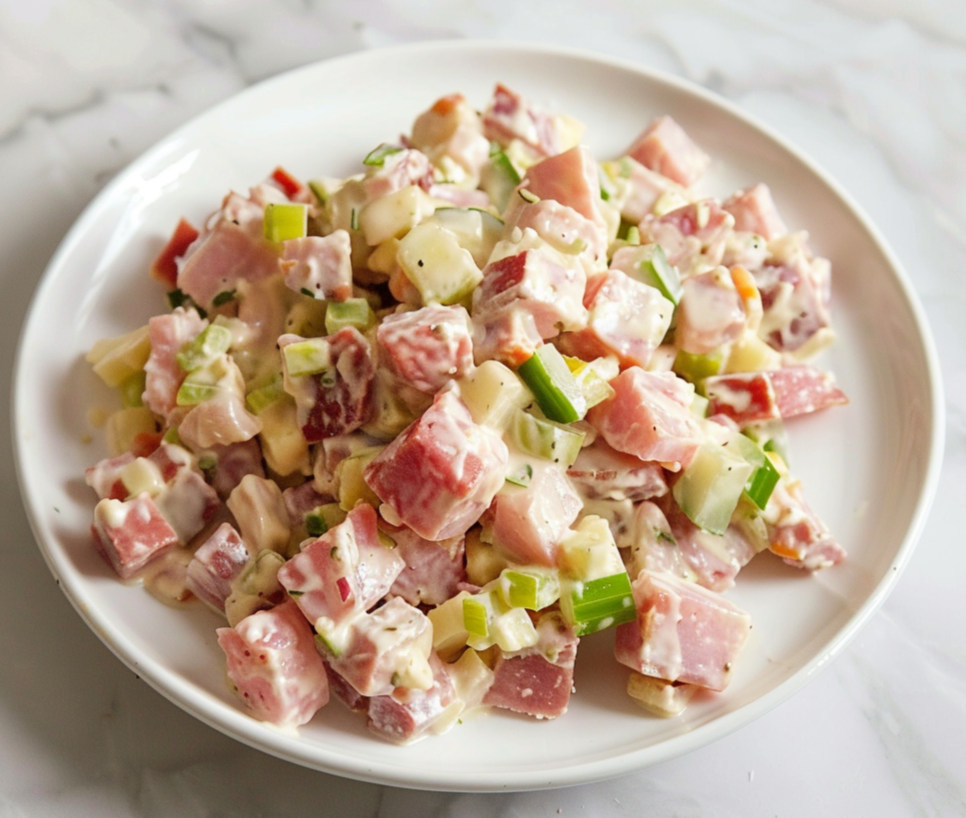
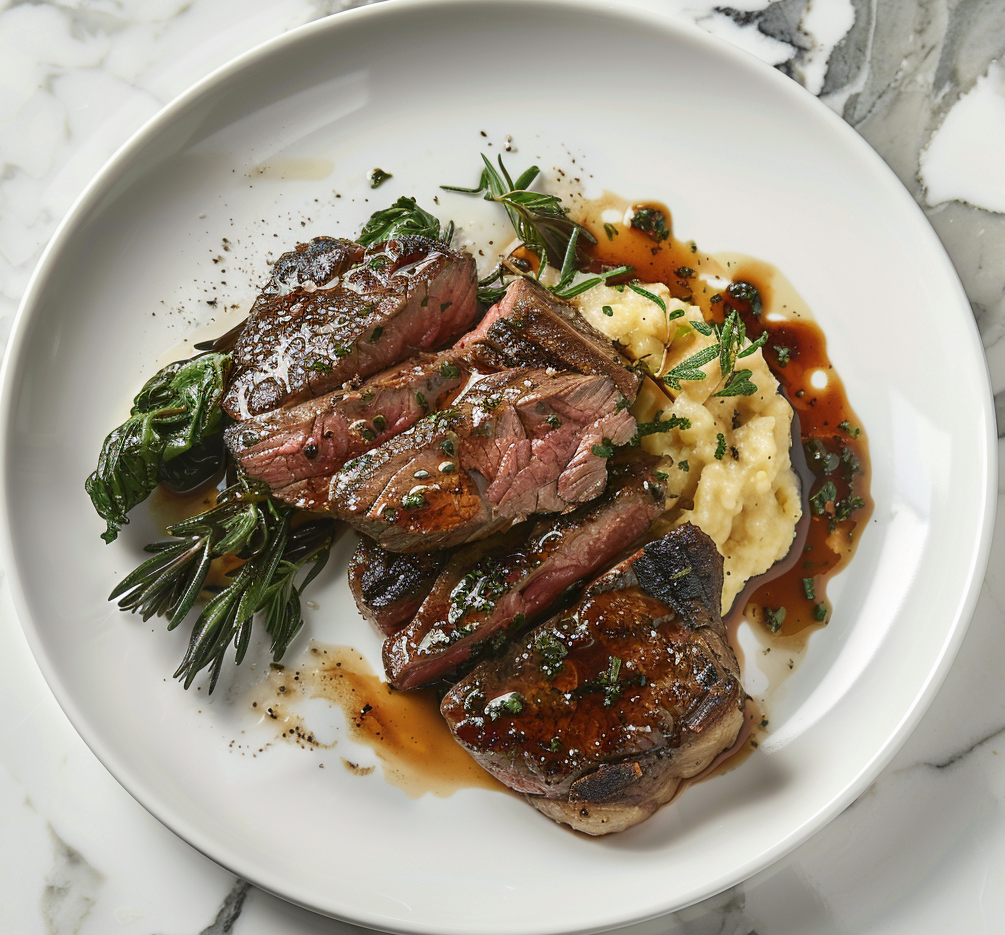
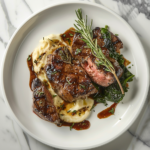
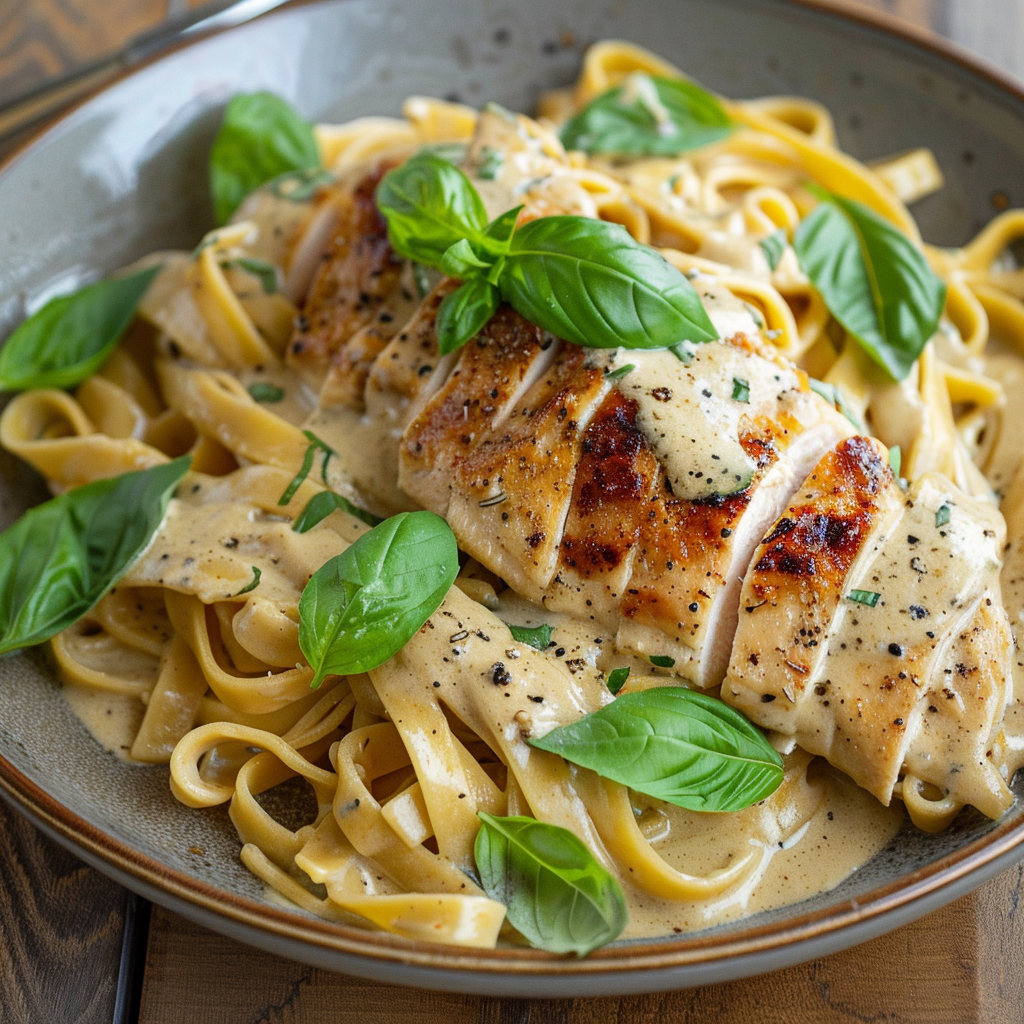
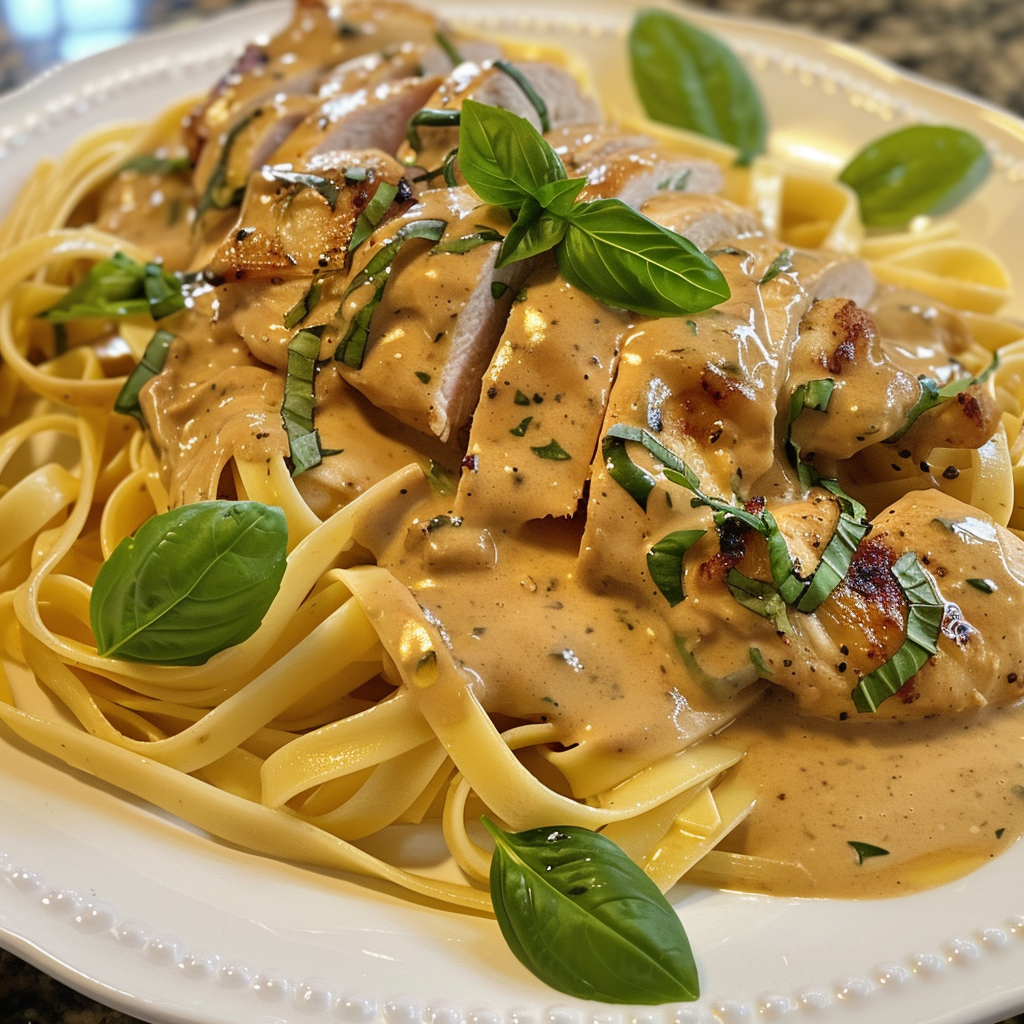
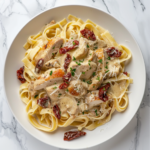
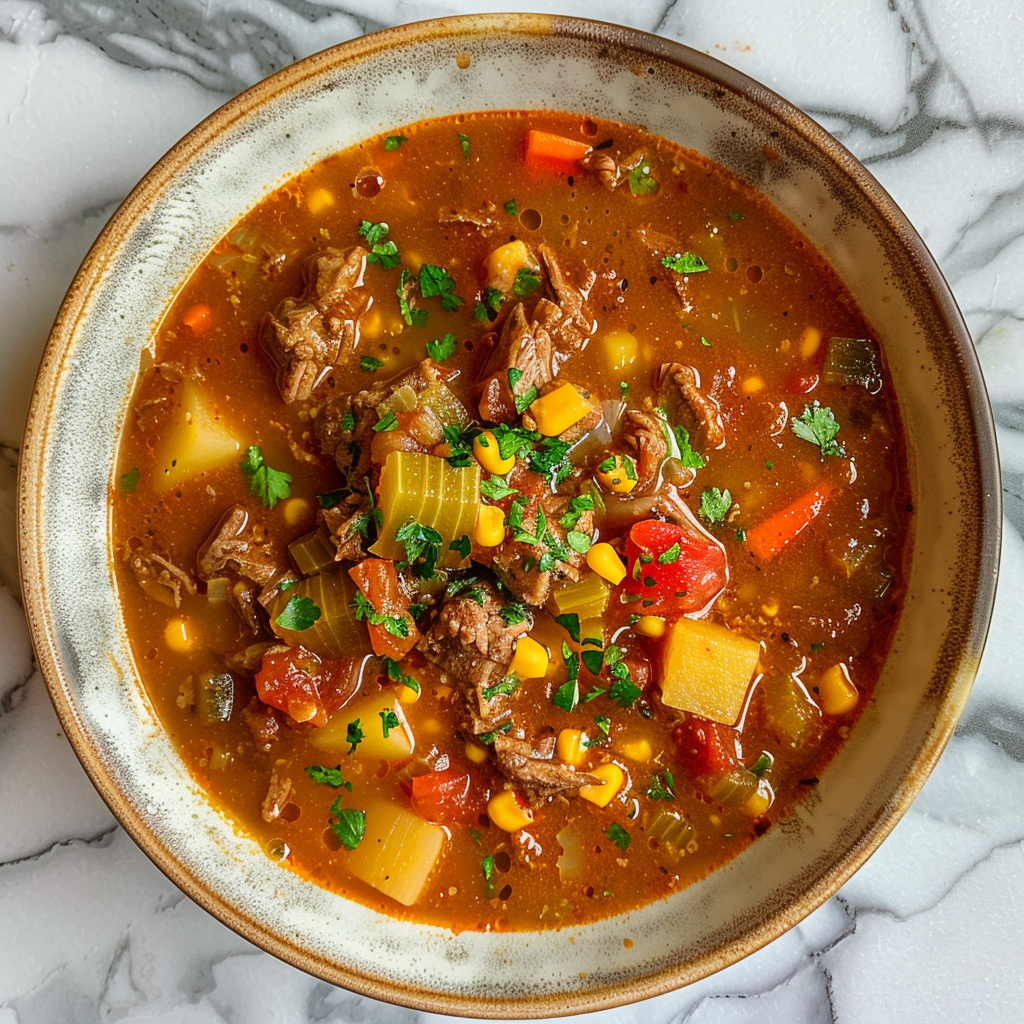
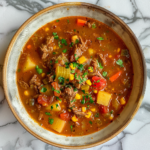
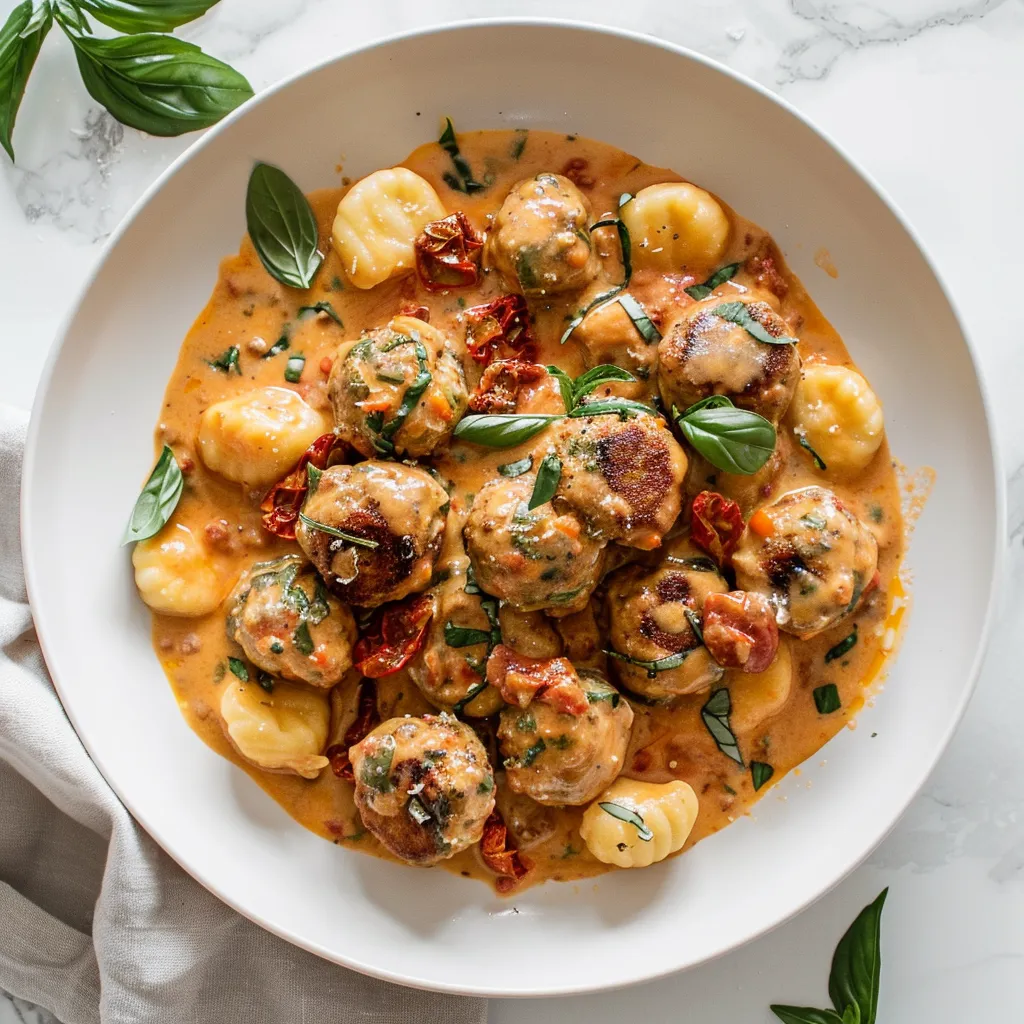
This recipe for Slow Cooker Tuscan Chicken Meatballs with Gnocchi is something you NEED to make right now. I KNOW you will love it! This dish has juicy chicken meatballs, soft pasta, and a creamy tomato sauce that tastes like sun-dried tomatoes. It’s great for busy nights when you want something tasty and healthy that takes little work. It’s great for busy nights when you want something tasty and healthy that takes little work.

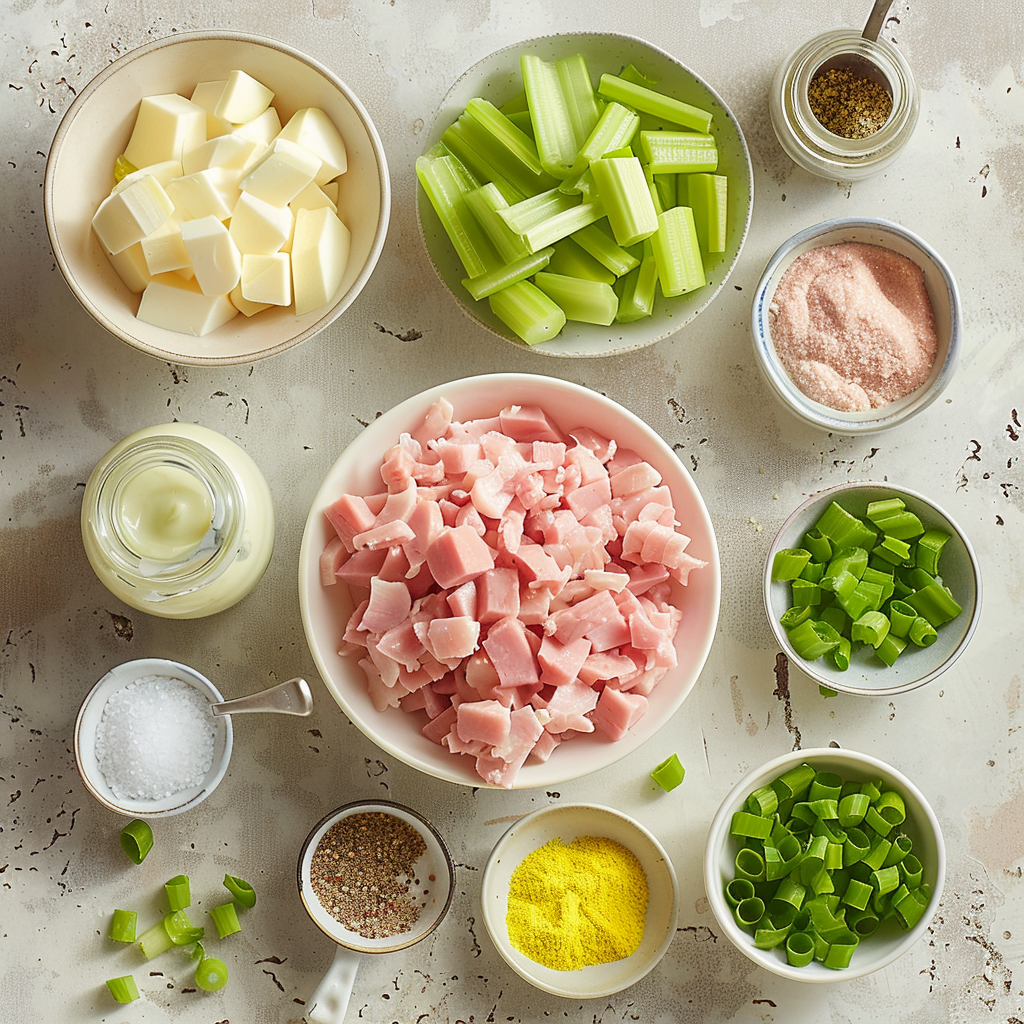
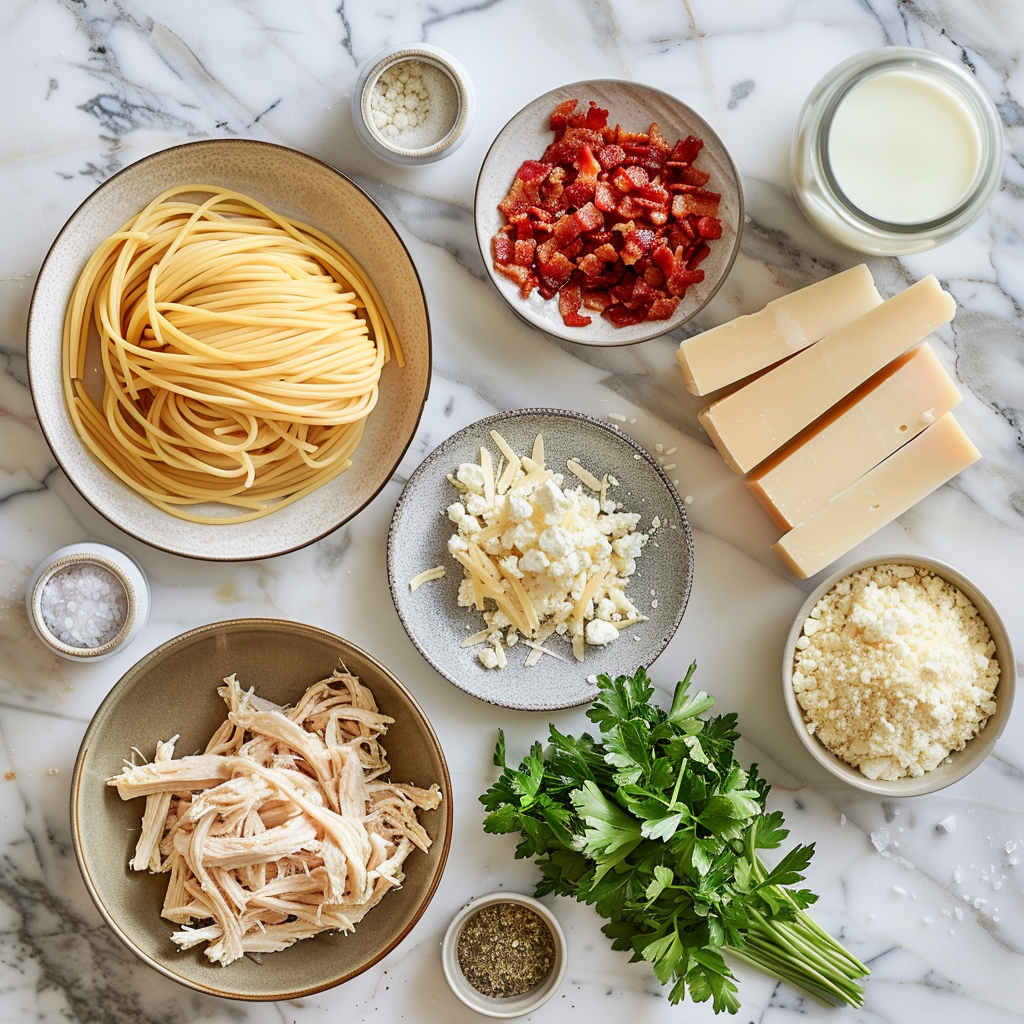
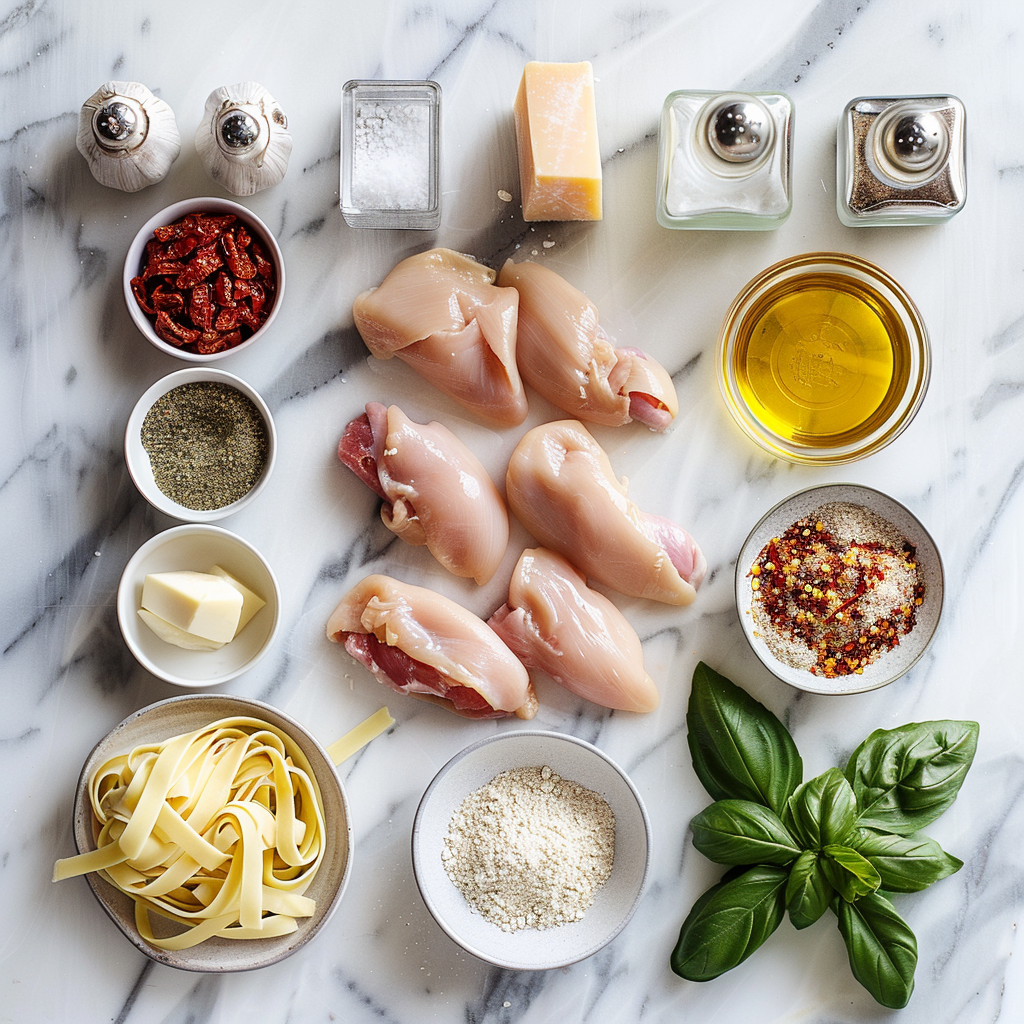
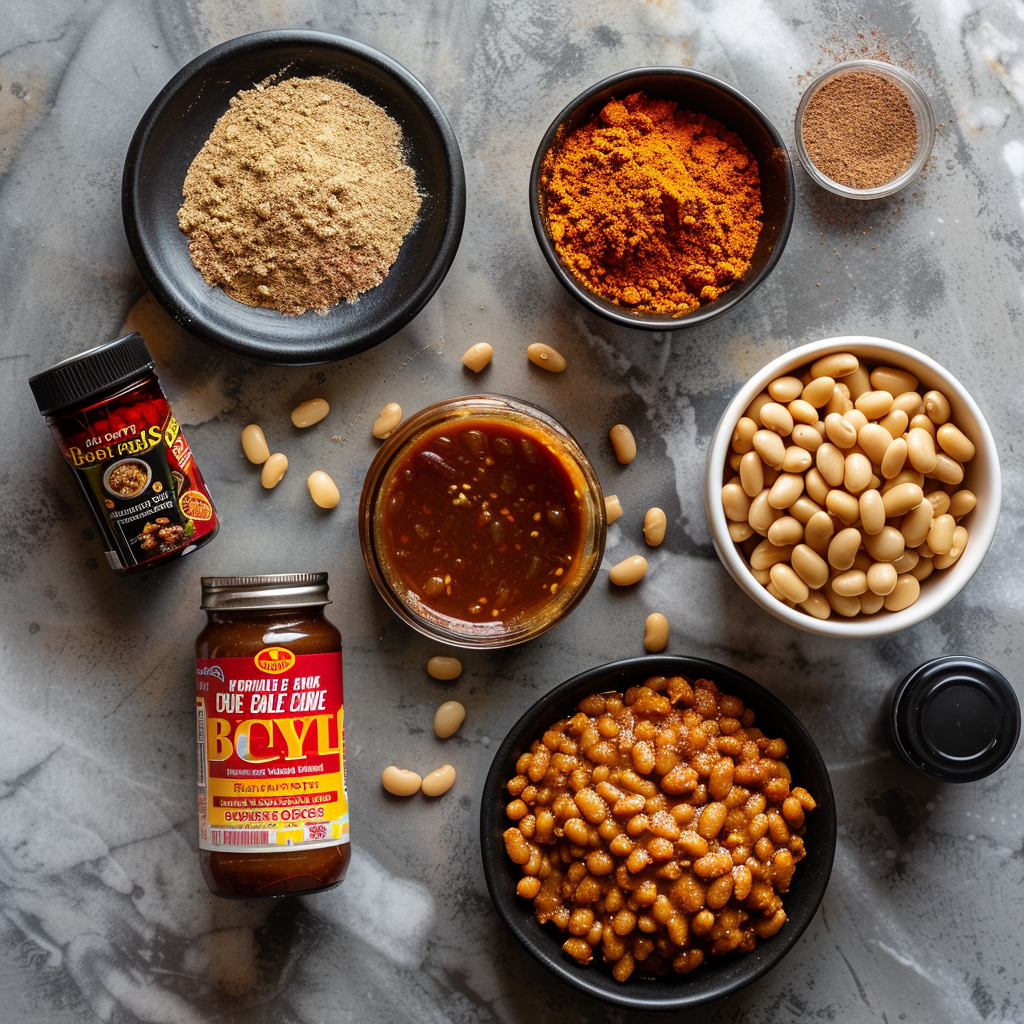
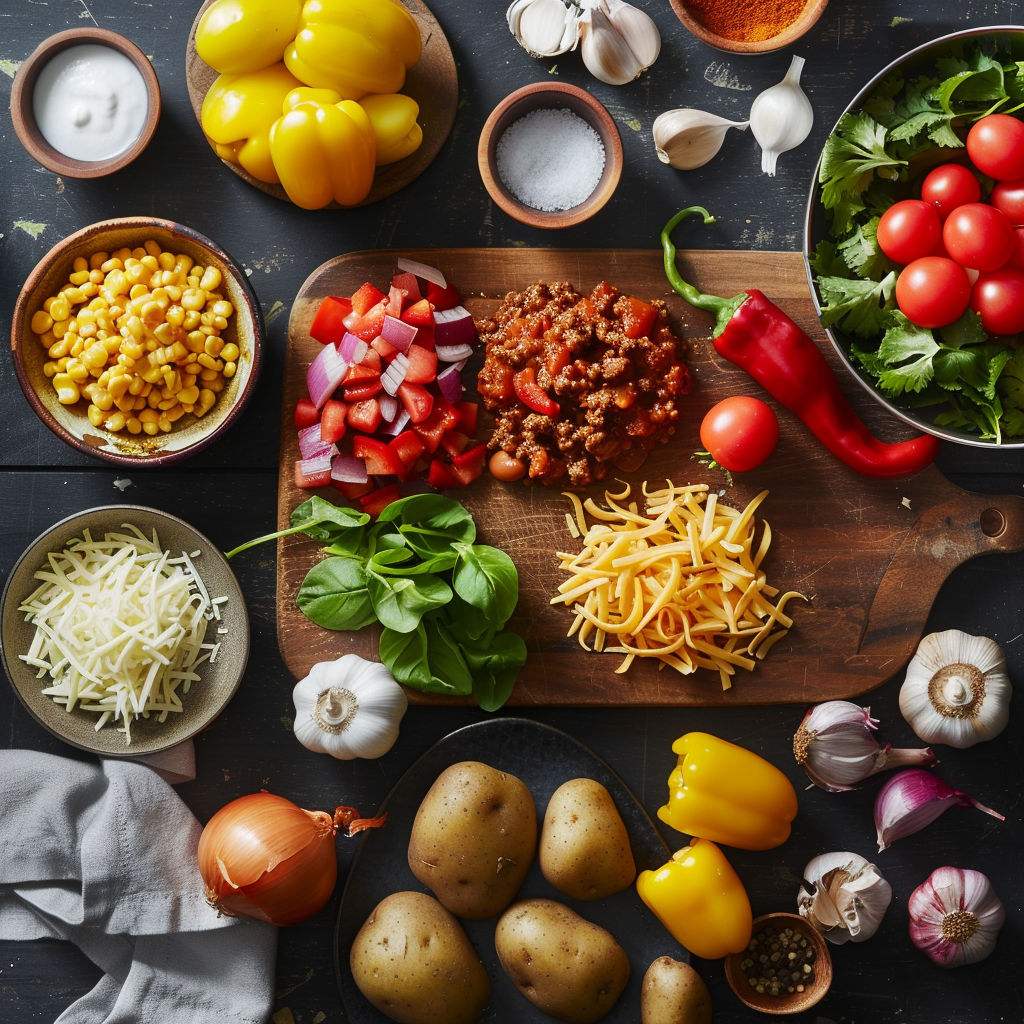
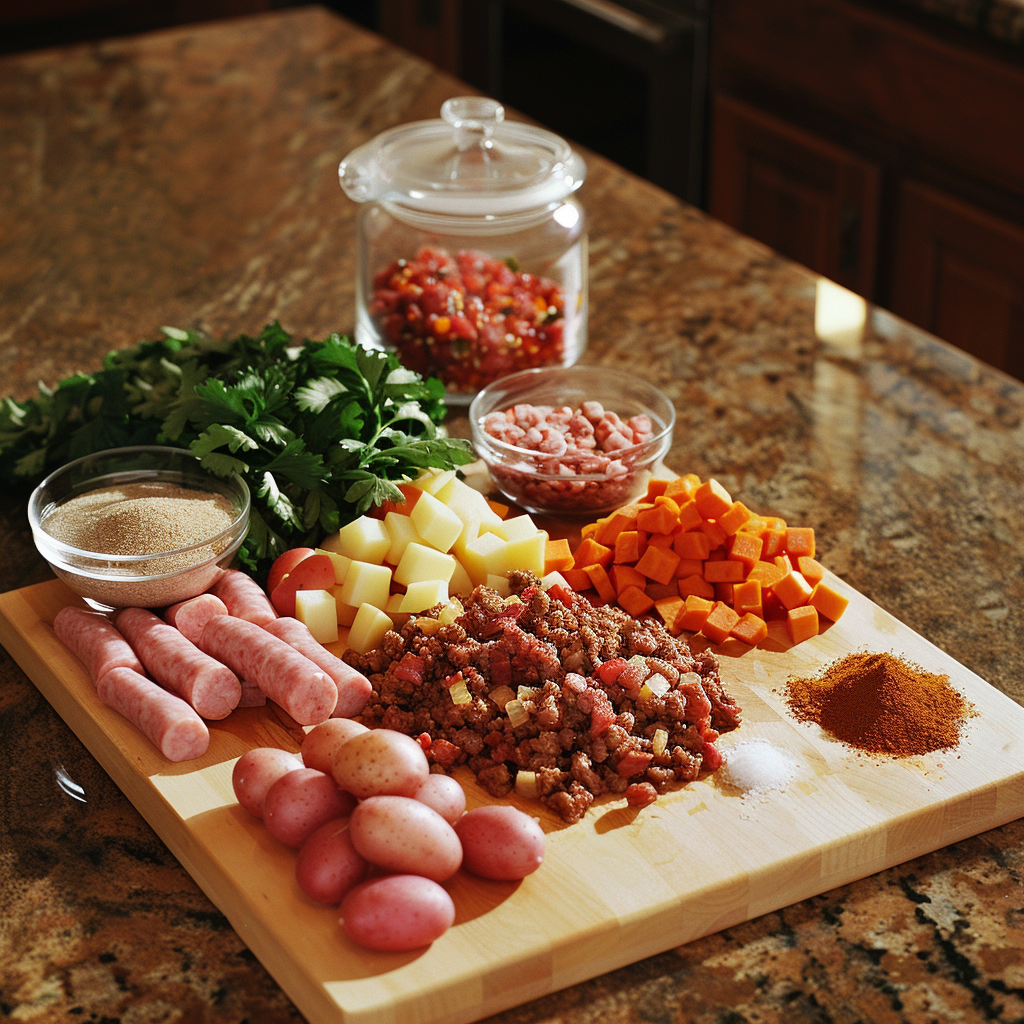
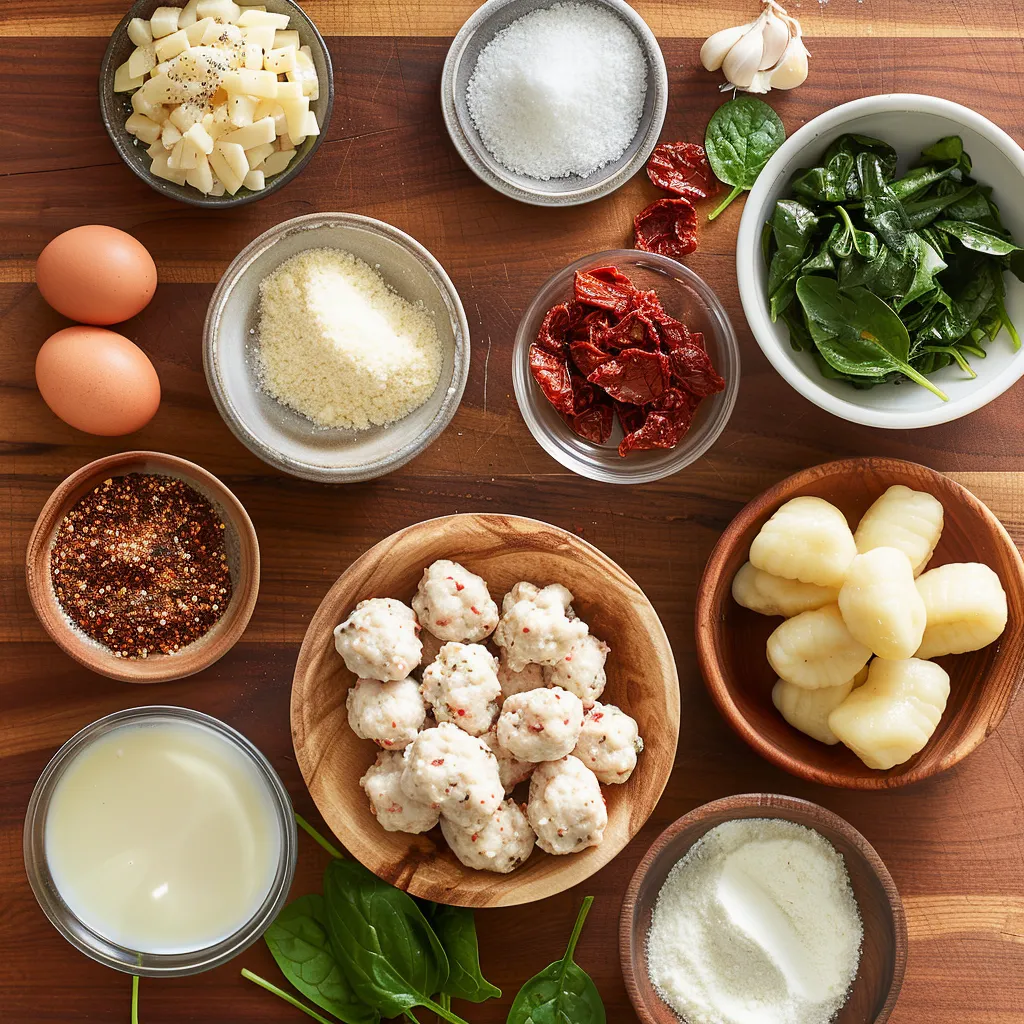
Before diving into the cooking process, ensure you have all the necessary ingredients. This recipe is perfect for carb lovers and those who adore rich, flavorful meals.

For the Meatballs:

Ground chicken or turkey, if you prefer a lighter option

Onion and garlic for foundational flavours

Sun-dried tomatoes in oil for that intense, tangy kick

Fresh basil to brighten up the mix

Garlic powder, Italian seasoning, salt, and pepper for depth

Grated Parmesan for a cheesy touch

An egg to bind all the ingredients

Panko or fresh breadcrumbs for texture

Olive oil, or even better, oil from the sun-dried tomatoes for frying

INGREDIENTS

For the Sauce:

A splash of dry white wine to deglaze and add acidity

Chicken broth for the base

Heavy cream or a lighter option like half-and-half

More sun-dried tomatoes for consistency in flavor

Fresh baby spinach leaves for color and nutrients

Grated Parmesan to finish with a cheesy richness

Fresh potato gnocchi, which cooks perfectly in the creamy sauce

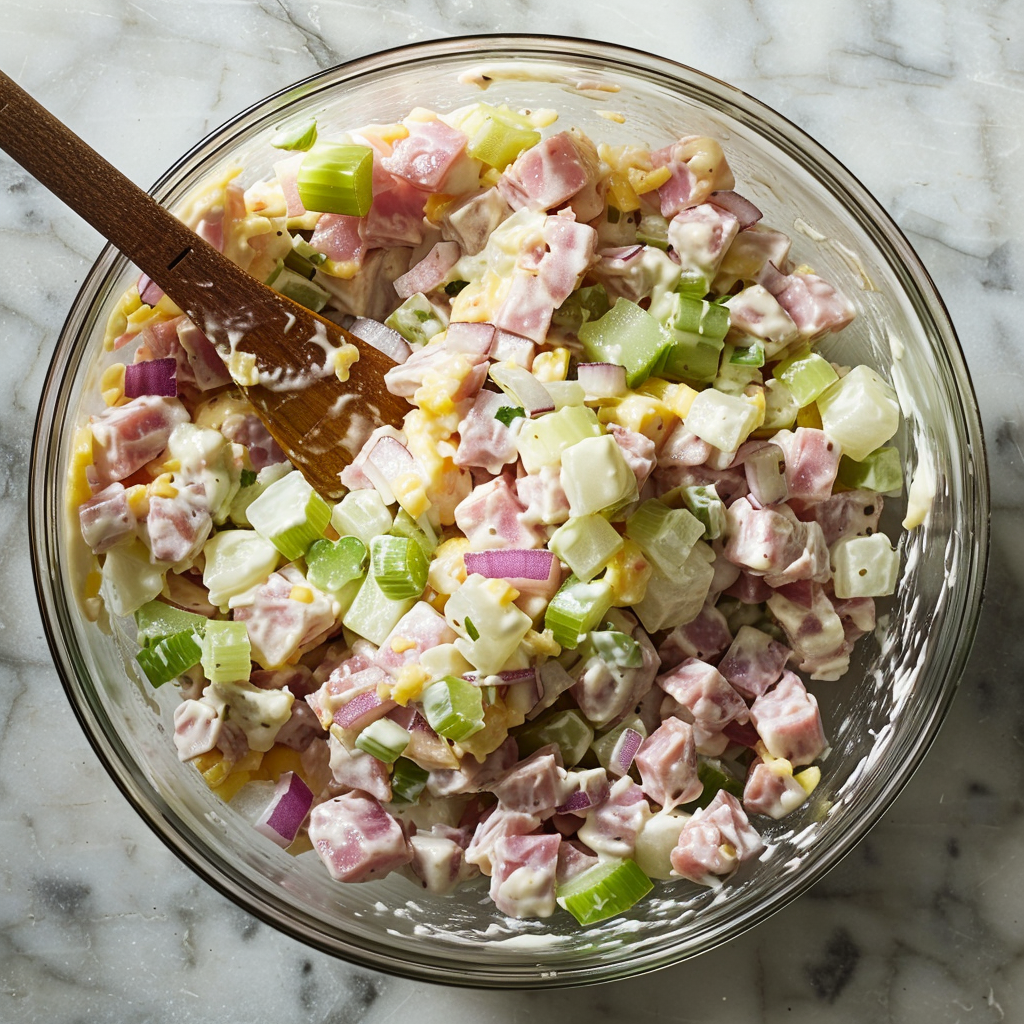
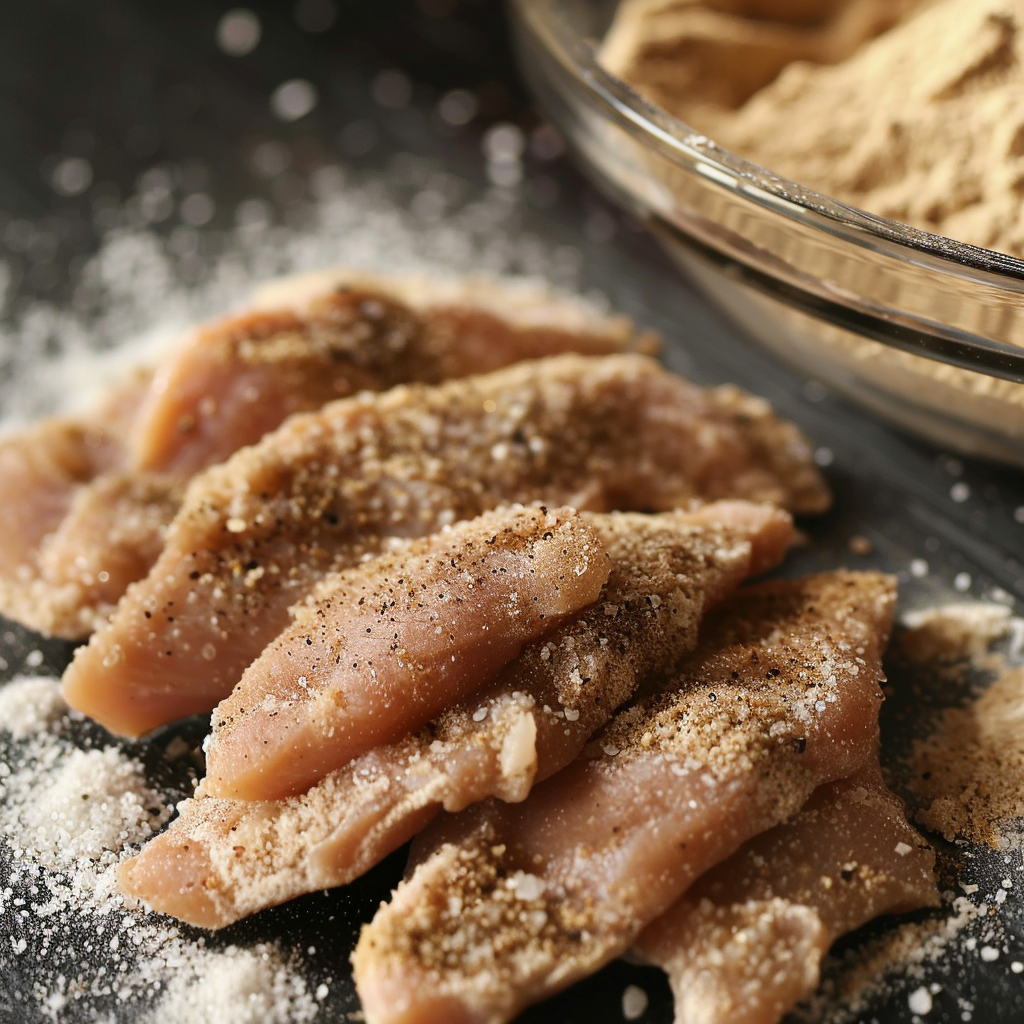
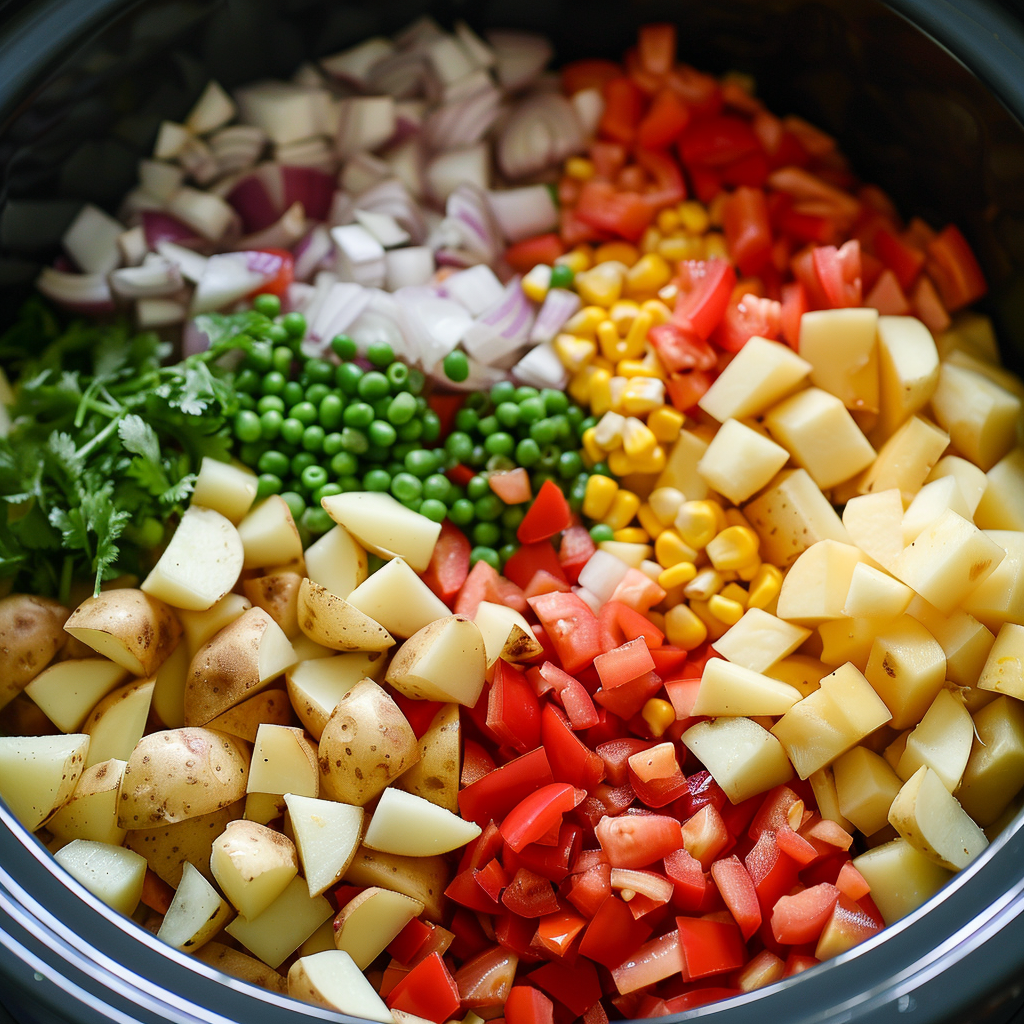
PREPARE THE MEATBALLS

Start by using a mini chopper to process the onion, garlic, and sun-dried tomatoes into a coarse paste. You could also finely chop these if you don’t have a processor. In a large bowl, combine this mixture with the ground chicken, egg, Parmesan, breadcrumbs, and seasoning. Mix well—your hands are the best tool here! Then, form the mixture into small, bite-sized meatballs using a cookie scoop for consistency.
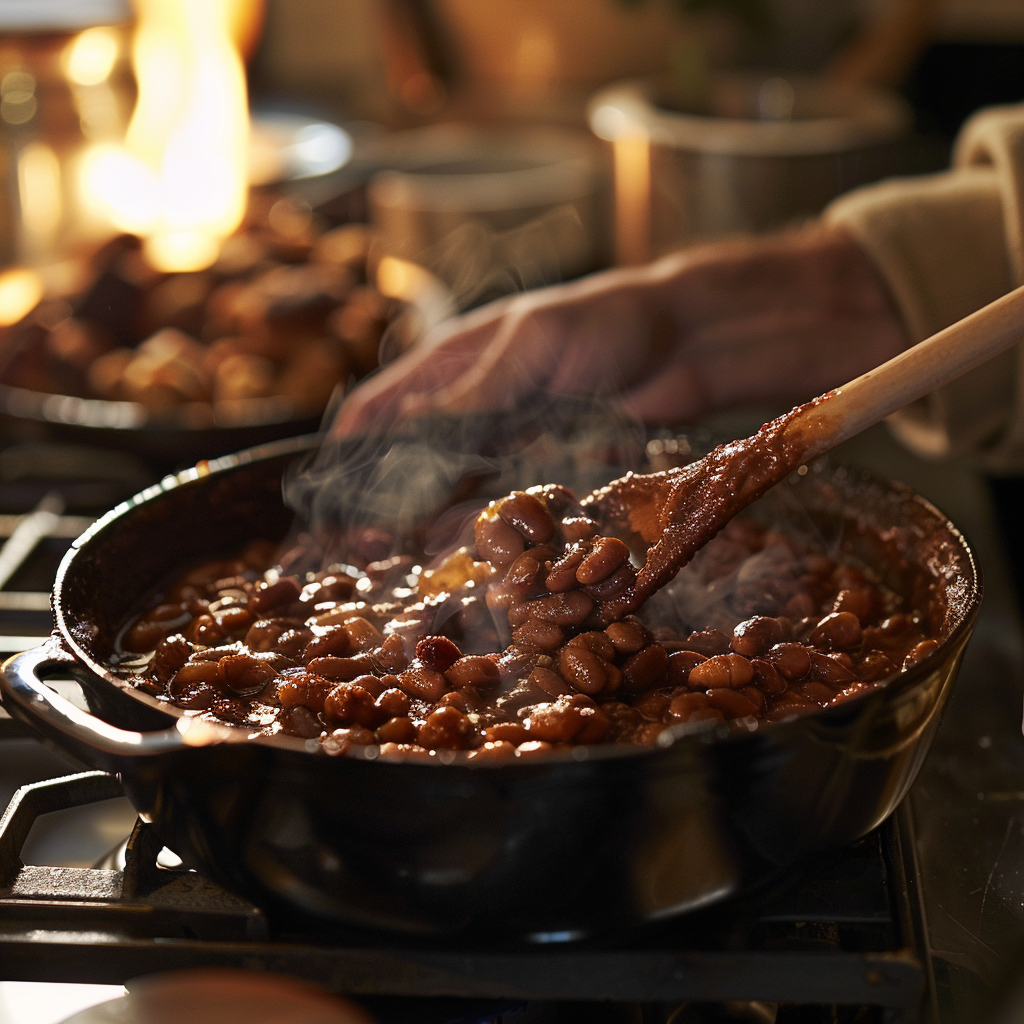
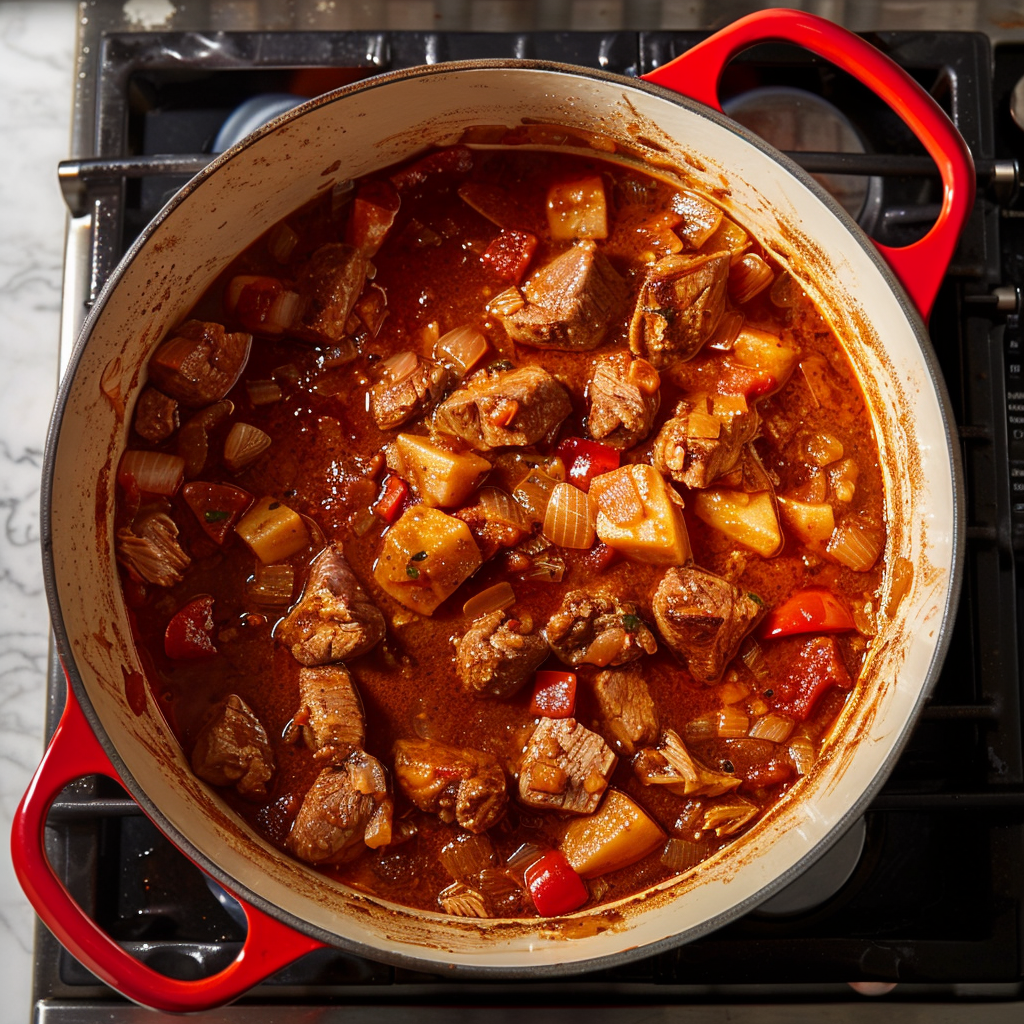
BROWN THE MEATBALLS

Heat the oil in a pan or directly in your slow cooker if it has a sauté function. Brown the meatballs for about five minutes; they should get some color but don’t need to cook through completely.
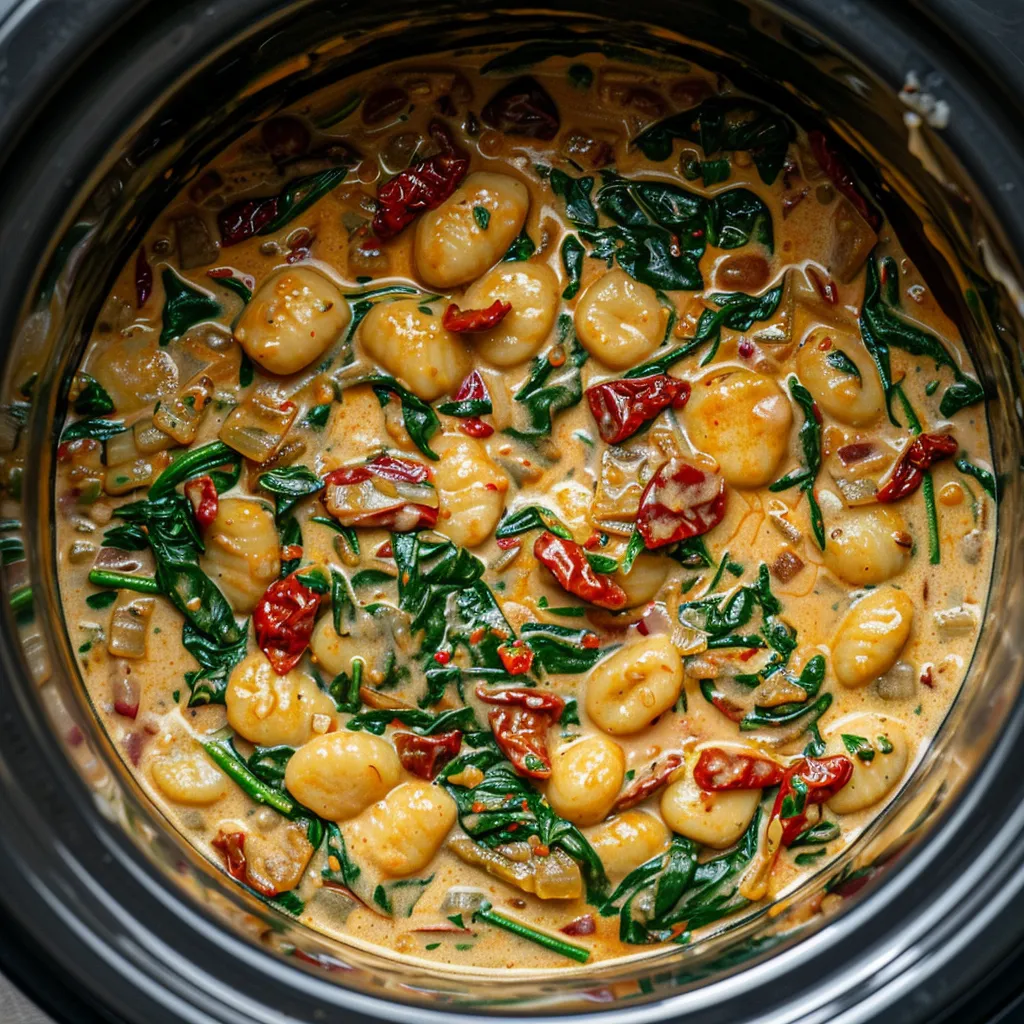
SLOW COOK

After browning:

  1. Add a splash of wine to the pot, let it simmer briefly to lift all those flavorful bits, then add the chicken broth.
  2. Transfer everything into the slow cooker if you still need to do so.
  3. Set your slow cooker on HIGH for 2-3 hours or on LOW for 4-5 hours.

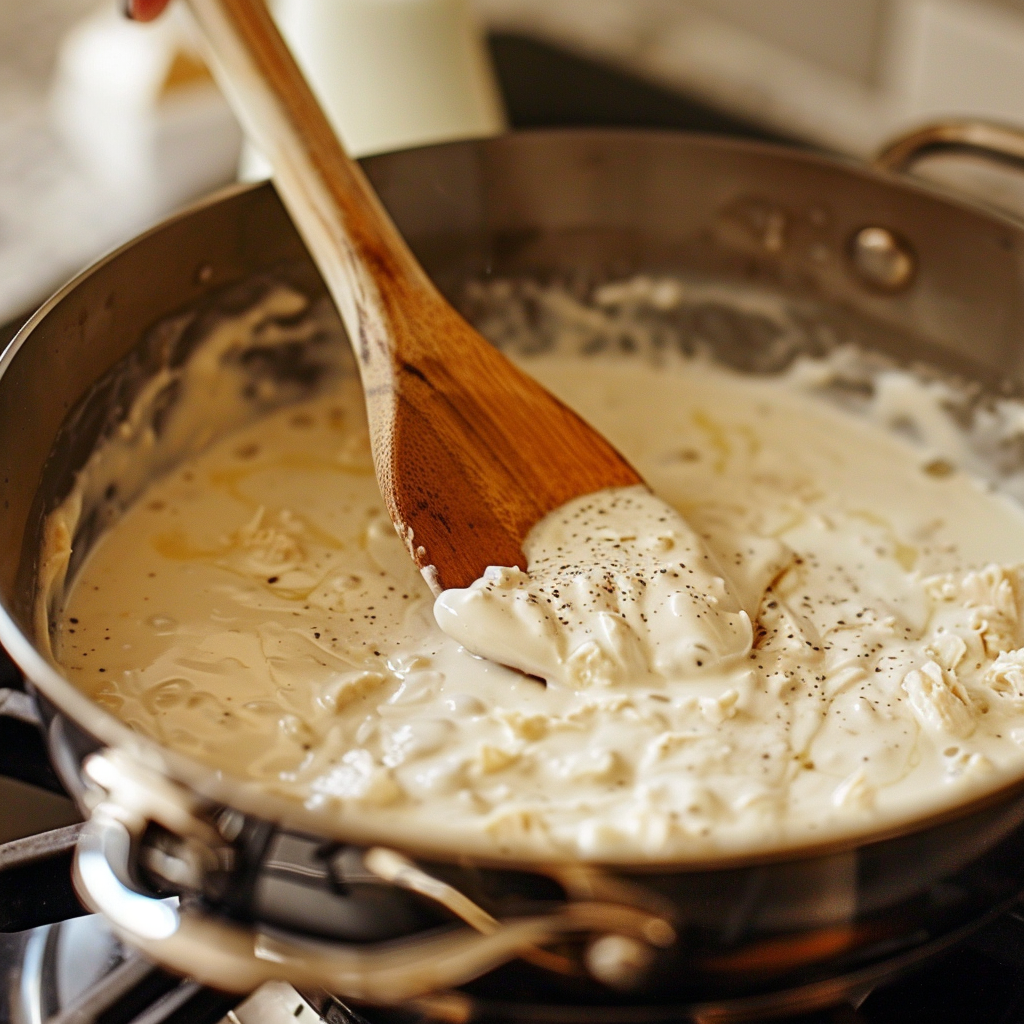
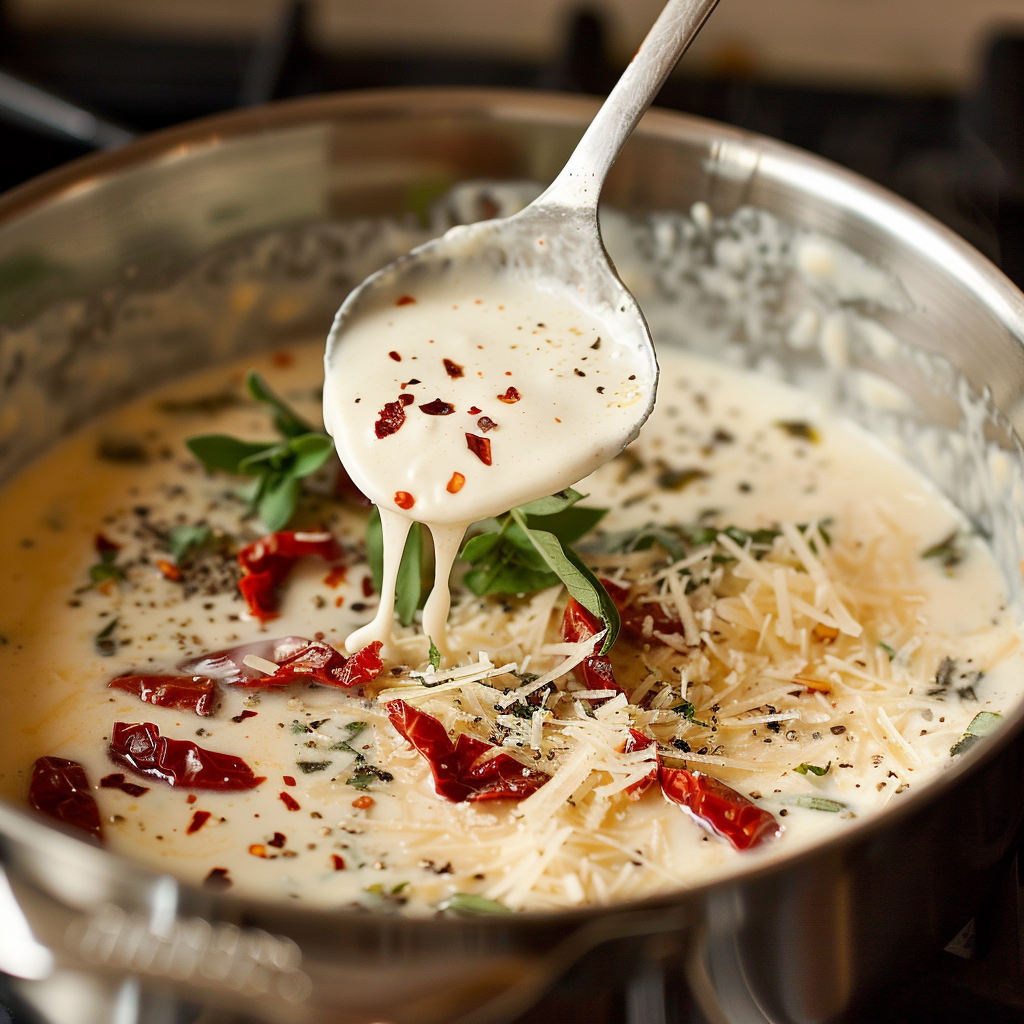
In the last 20 minutes of cooking, stir in the gnocchi, chopped sun-dried tomatoes, cream, and Parmesan. This is when your kitchen starts to smell amazing! Finally, add the spinach, stirring it through until it wilts. Check the seasoning and adjust if necessary.
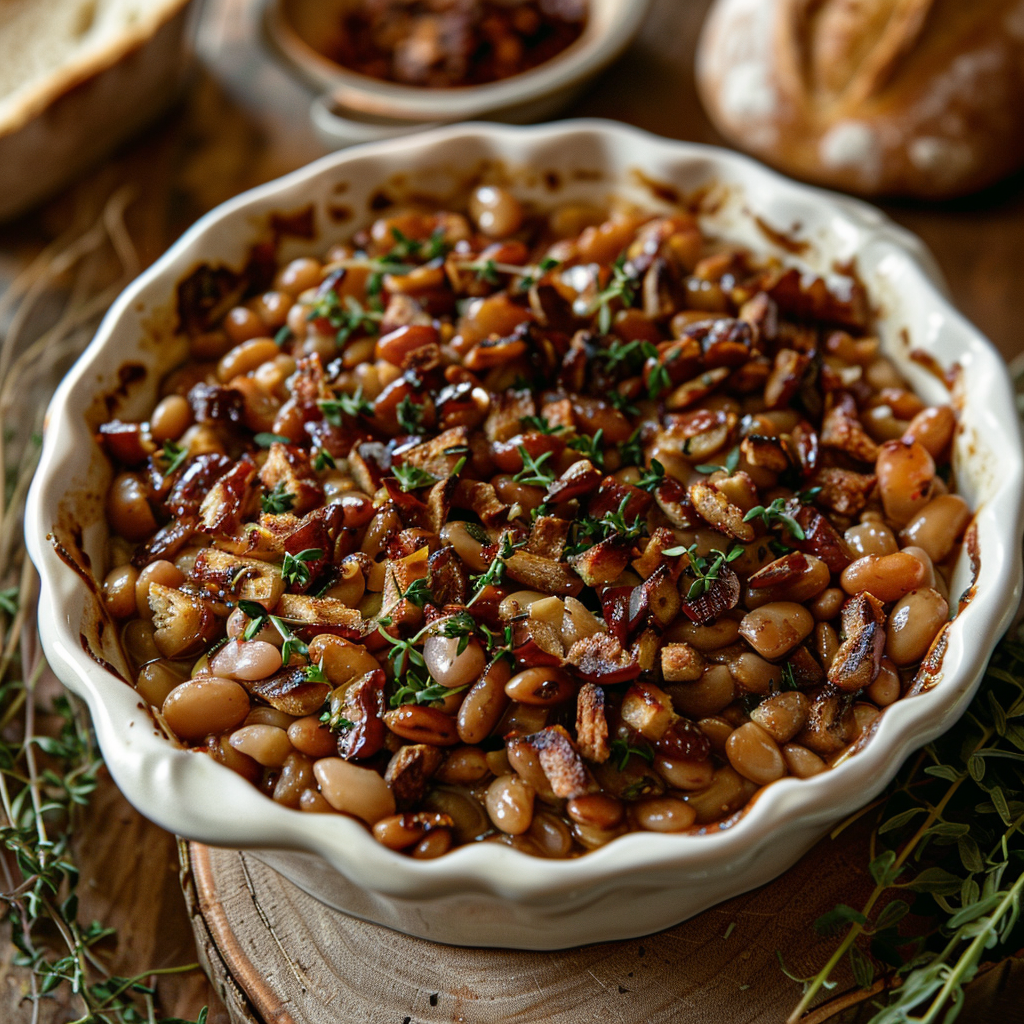
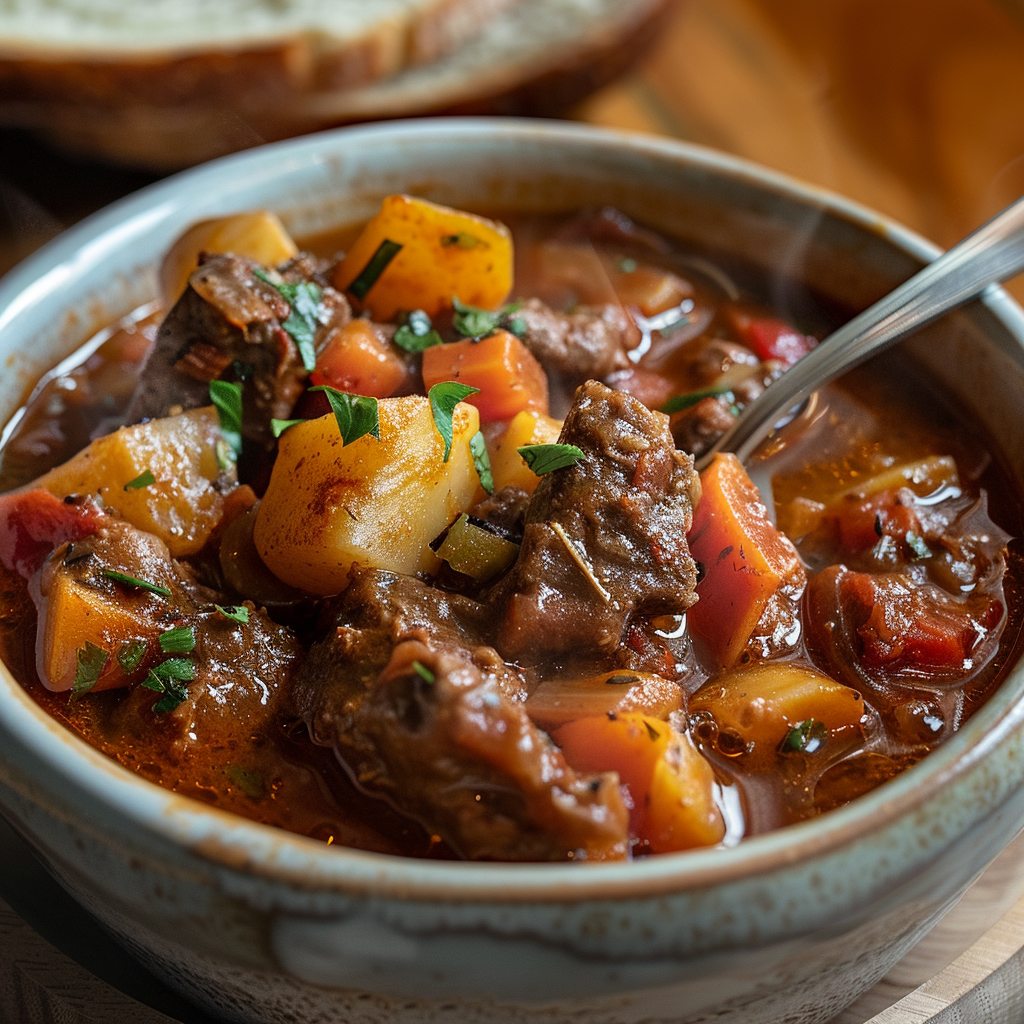
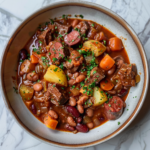
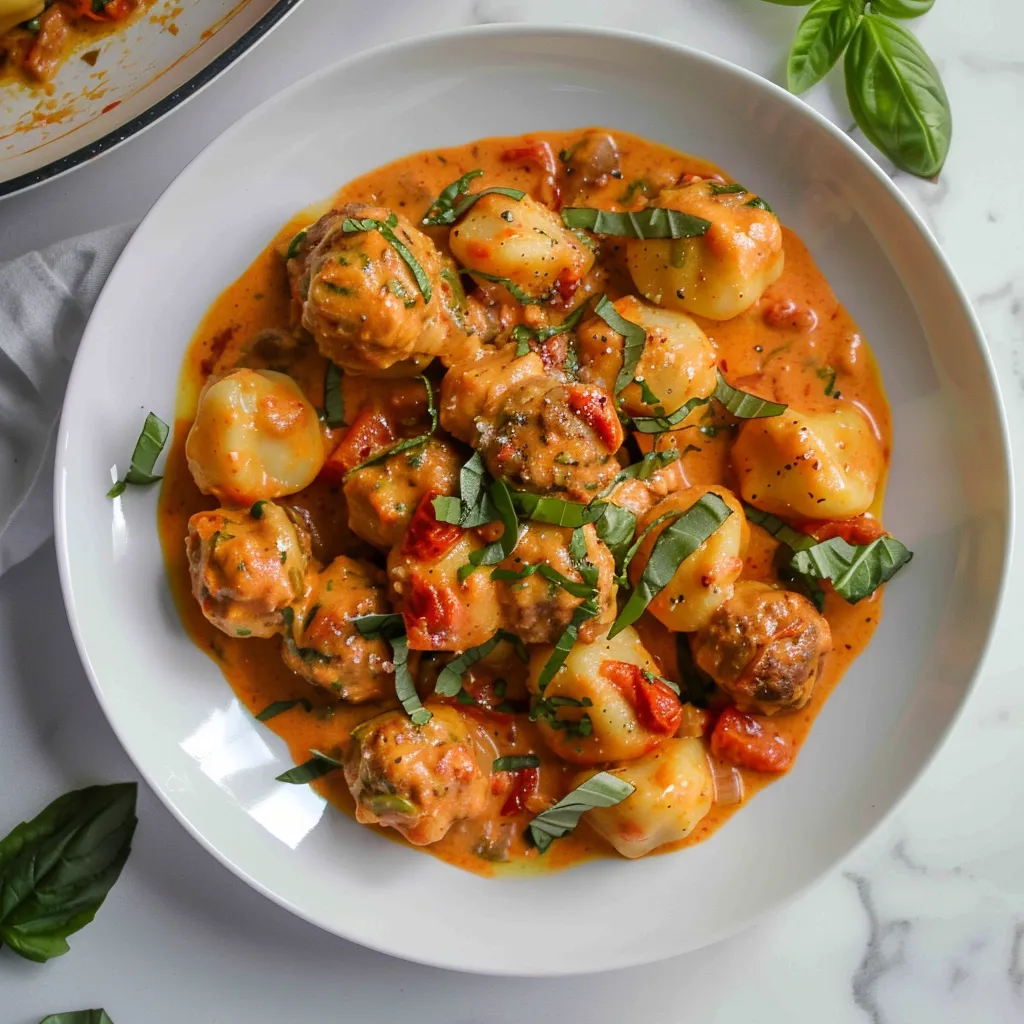
SERVE AND ENJOY

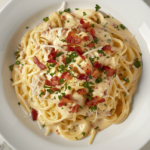
Ladle the hot, creamy meatballs and gnocchi into bowls, sprinkle with extra Parmesan, and watch your family dive in! The result is a wonderfully satisfying dish that combines the best of Italian flavors with the ease of slow cooking.

RECIPE TIPS

Store any leftovers in the fridge and reheat them gently; adding a splash of water or broth can help keep the sauce creamy.

Not a fan of sun-dried tomatoes? Swap them out for a few tablespoons of pesto for a different but equally delicious flavor profile.

What to Serve with Slow Cooker Tuscan Chicken Meatballs with Gnocchi

This hearty Tuscan dish is wonderfully versatile and pairs well with various sides that complement its rich flavors. Here are some ideas to round out your meal:

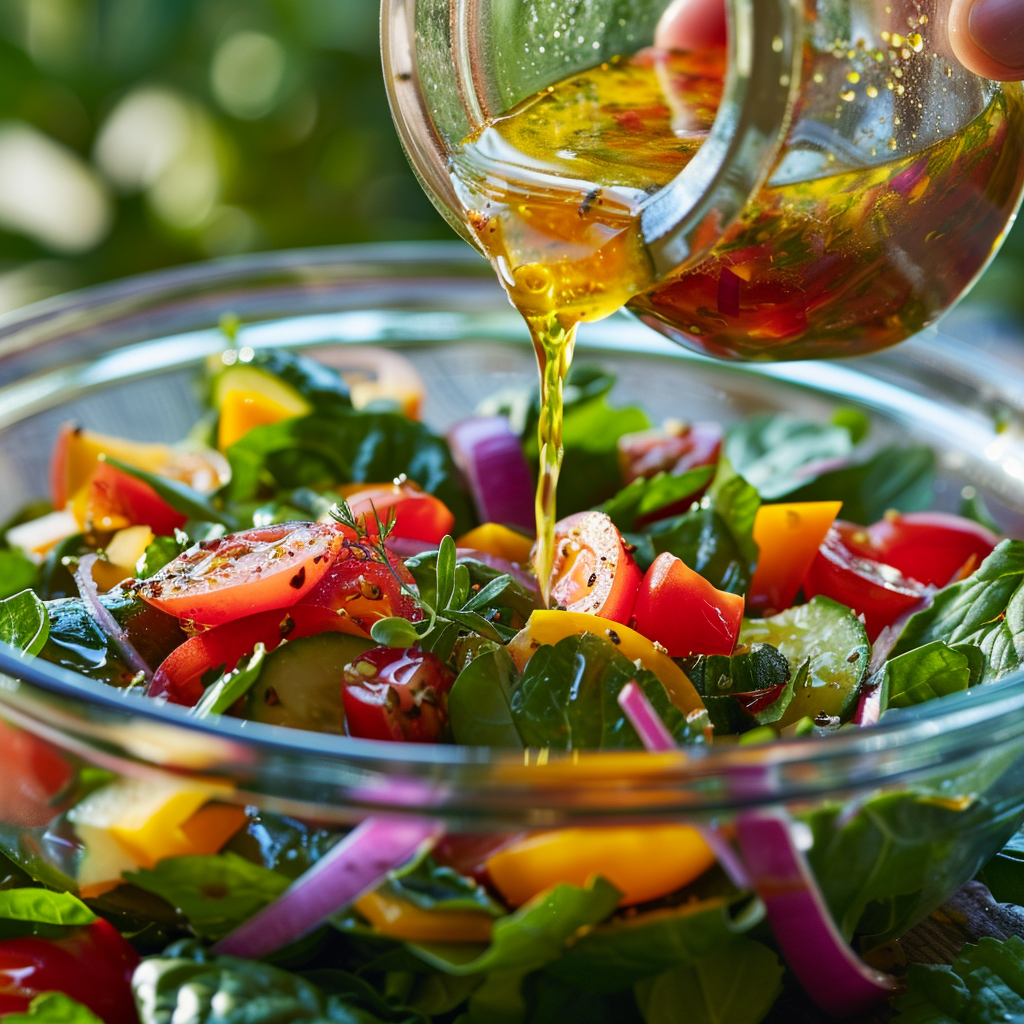
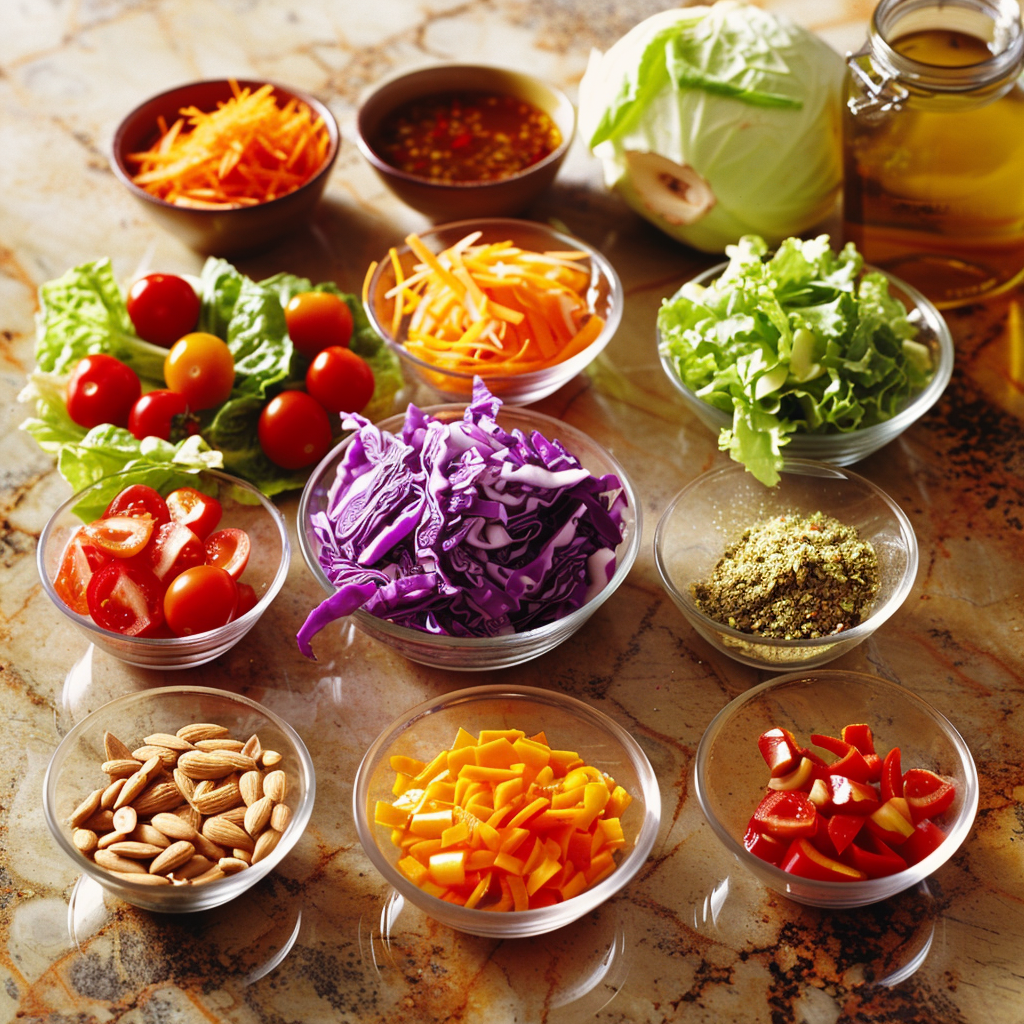
  1. Caesar Salad: Serve a fresh Caesar salad before the main course to add a touch of crispness and lightness to your meal. The tangy dressing will balance the richness of the Tuscan meatballs.
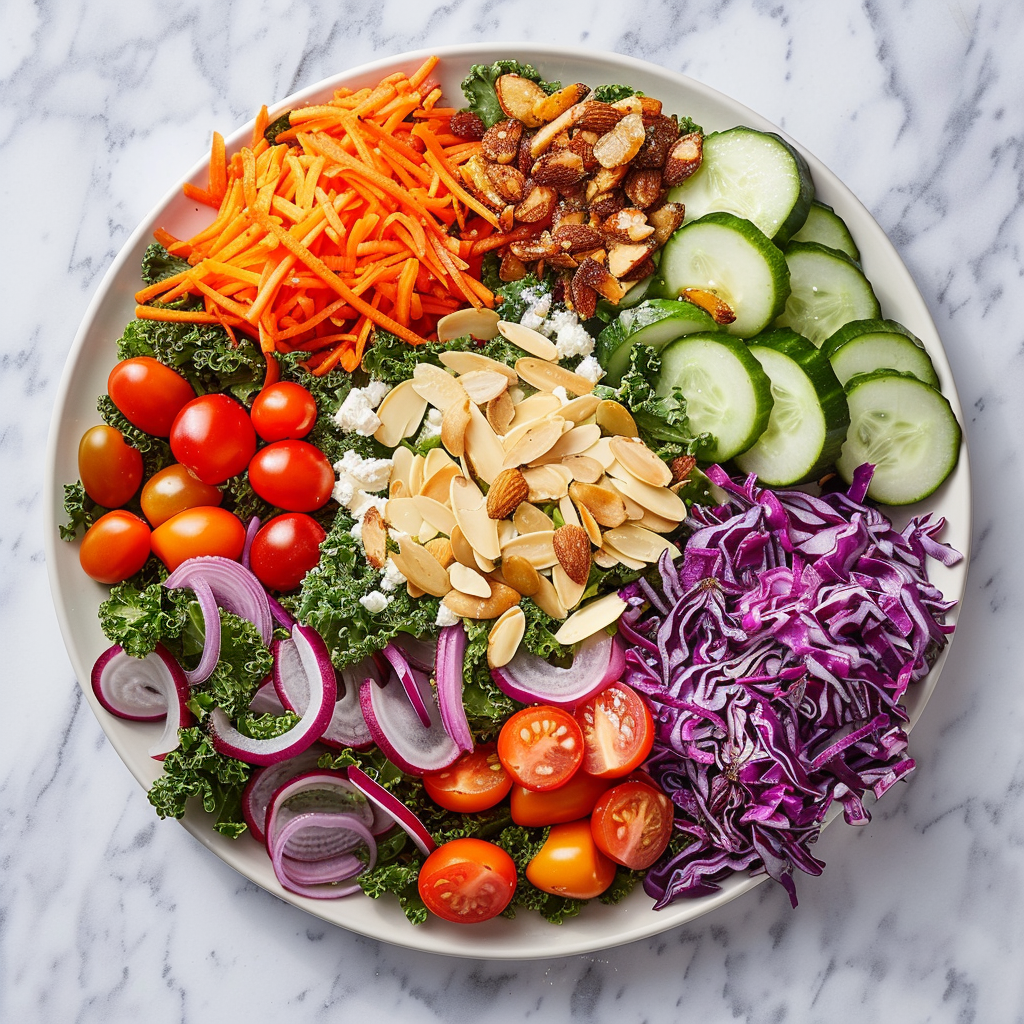
  2. Steamed Vegetables: For a healthier side, consider lightly steamed broccoli, asparagus, or green beans. These vegetables will provide a crunchy, fresh contrast to the creamy and savory flavors of the dish.
  3. Roasted Mediterranean Vegetables: Roasted bell peppers, zucchini, and eggplant seasoned with olive oil, garlic, and herbs can complement the Italian flavors in the Tuscan chicken meatballs.
  4. Polenta: Creamy polenta is another excellent base for this dish, especially if you prefer a gluten-free option to gnocchi.

Health Benefits of Slow Cooker Tuscan Chicken Meatballs with Gnocchi

This dish satisfies the taste buds and offers several health benefits, making it a wholesome choice for a family dinner.

  1. High in Protein: Both chicken and Parmesan cheese are good sources of high-quality protein, essential for muscle repair, growth, and overall health.
  2. Rich in Vitamins and Minerals: Spinach, a key ingredient in this recipe, is loaded with iron, magnesium, and vitamins AC, and K. Sun-dried tomatoes are high in antioxidants, vitamin C, and lycopene, an antioxidant known for its heart health benefits.
  3. Good Source of Fibre: If whole wheat or multigrain gnocchi is used, the dish can be a good source of dietary fiber, which is beneficial for digestive health.
  4. Customizable for Healthier Options: You can modify the recipe to fit dietary needs. For example, low-fat cream or milk can reduce the calorie content, while whole wheat breadcrumbs or gluten-free gnocchi can cater to different dietary restrictions.

HAVE YOU MADE MY COOKER TUSCAN MEATBALL AND GNOCCHI RECIPE?

I’d love to hear how it turned out for you! Leave a comment below, share a photo on social media, or save this recipe on Pinterest. If you enjoyed this dish, check out my other slow cooker recipes for easier, delicious meals.

Enhance your culinary experience by exploring related recipes. Consider pairing this dish with a vibrant Lemon Garlic Parmesan Chicken for a touch of citrus, or dive into the comforting embrace of a French Onion Mac and Cheese.

For those who adore the simplicity and richness of poultry, the Chicken and Yellow Rice or the healthful Chicken Quinoa Salad make excellent meals for other days of the week.

Print

slow cooker tuscan chicken meatballs with gnocchi

Indulge in a flavorful Tuscan dish with juicy chicken meatballs, creamy tomato sauce, and soft gnocchi. Perfect for busy nights!

  • Author: Gabriela cardenas
  • Prep Time: 20 minutes
  • Cook Time: 4 hours (on low) or 2 hours (on high)
  • Total Time: 4 hours 20 minutes (on low) or 2 hours 20 minutes (on high)
  • Yield: 4
  • Category: Main Course
  • Method: Slow cooke
  • Cuisine: Italian

Ingredients

For the Meatballs:

  • 1 pound ground chicken or turkey
  • 1 small onion
  • 3 cloves garlic
  • 1/4 cup sun-dried tomatoes in oil
  • 2 tablespoons fresh basil
  • 1 teaspoon garlic powder
  • 1 teaspoon Italian seasoning
  • Salt and pepper to taste
  • 1/4 cup grated Parmesan cheese
  • 1 egg
  • 1/2 cup Panko breadcrumbs
  • Olive oil for frying

For the Sauce:

  • Splash of dry white wine
  • 1 cup chicken broth
  • 1/2 cup heavy cream or half-and-half
  • 1/4 cup sun-dried tomatoes
  • 2 cups fresh baby spinach leaves
  • 1/4 cup grated Parmesan cheese
  • 1 pound fresh potato gnocchi

Instructions

  1. Process onion, garlic, and sun-dried tomatoes into a coarse paste. In a bowl, mix with ground chicken, basil, garlic powder, Italian seasoning, salt, pepper, Parmesan, egg, and breadcrumbs. Form into meatballs.
  2. Brown meatballs in olive oil. Deglaze pan with wine, then add broth. Transfer to slow cooker.
  3. Cook on HIGH for 2-3 hours or LOW for 4-5 hours. In the last 20 minutes, add gnocchi, sun-dried tomatoes, cream, and Parmesan. Stir in spinach until wilted. Adjust seasoning.
  4. Serve hot, garnished with extra Parmesan.

Notes

  • Store leftovers in the fridge; reheat gently with a splash of water or broth to maintain creaminess.
  • Substitute sun-dried tomatoes with pesto for a different flavor.
  • Pair with Caesar salad, steamed vegetables, roasted Mediterranean vegetables, or creamy polenta for a complete meal.

Keywords: Tuscan chicken meatballs, slow cooker gnocchi recipe, creamy tomato sauce, easy Italian dish, Slow Cooker Tuscan Chicken Meatballs

Did you make this recipe?

Share a photo and tag us — we can't wait to see what you've made!

Categories
Dinner Gluten-Free Lunch Recipes

Ham Salad Recipe

The ham salad recipe is a simple but elegant way to turn leftovers into a delicious supper and the ideal spread for a party. The flexibility of ham salad makes it popular in kitchens worldwide.Want to try something new with ham?Let’s see how to make the best ham salad.

What makes a ham salad recipe special?

The quality of the products and how well they work together are what make a ham salad recipe great.

To make salads taste great, you need to pick the right ham. To make them taste better, use smoked or honey-glazed kinds.

Smooth Dressing: This dressing is usually made with mayo and should be smooth and help the ham taste better without taking over.

Crunchy Add-Ins: The sauce should be creamy and well-balanced to bring out the great taste of the ham.

FAQs for Ham Salad Recipe

What kind of ham is best for ham salad?

The recipe is ideal for leftover holiday ham. Small boneless cooked ham or thick ham steaks are recommended for their texture and ease of preparation.

Do I need to use a food processor for ham salad?

While using a food processor is not mandatory, it helps to finely mince the ham, which is preferable for the texture of the salad. You can also finely chop the ham by hand or use a blender; just be sure to mince it in small batches to avoid clumping.

Should I add salt to my ham salad?

Try your ham salad before adding salt. Some hams are already salty, so more may not be needed. Adjust spice to taste.

What is the best way to serve ham salad?

Ham salad can be served in various ways: on rolls, biscuits, as pinwheels, in a sandwich, or as a spread for crackers. It’s versatile and can be adapted to casual or formal settings.

How should I store leftover ham salad?

Save leftover ham salad in an airtight container and consume within 4–5 days. Refreezing is not advised since mayonnaise might separate and damage salad texture.

Overview of Ingredients

A classic ham salad recipe might include:

Cooked ham, finely chopped

Celery, finely diced

Onion, minced

Mayonnaise

Mustard

Salt and pepper

Overview of Ingredients

Chef’s Tips for the Perfect Ham Salad.

Choosing the Right Ingredients:

Opt for a variety of textures. While ham is the main ingredient, adding crunchy elements like diced celery or chopped nuts and a bit of sweetness from relish or chopped apple can elevate the overall experience of the salad.

Enhancing Flavor with Mustard:

A little mustard adds depth and sharpness to ham salad. Try Dijon or whole-grain mustard to discover the perfect match for your ham.

Adding Fresh Herbs:

Parsley, dill, and chives add freshness and taste to any salad. To preserve color and flavor, chop them small and mix them in right before serving.

Adjust the seasoning carefully.

In addition to salt and pepper, add paprika for a light spice and color or onion powder for savouriness without raw onion crisp.

Consider the presentation:

Your ham salad presentation may also improve the experience. Use lettuce cups for a carb-free alternative or serve it on a tray with crackers and cucumber slices.

Chill before serving.

Leave your ham salad in the fridge for at least an hour before serving to blend the flavors and enhance the texture, making it more pleasurable.

What to Serve with Ham Salad

This salad exhibits versatility and can be presented in a multitude of ways, including:

As a Sandwich: Spread on whole-grain bread with lettuce and tomato.

With Crackers: As a dip with a side of crispy crackers or sliced cucumbers.

On a Bed of Greens: For a low-carb option, serve atop a bed of mixed greens.

For individuals in search of a supplementary dish, contemplate air-frying sesame chicken as a coupling with the ham salad. This preparation presents a pleasant juxtaposition of textures and flavors.

Health Benefits 

Protein: Ham is a good source of high-quality protein essential for muscle repair.

Vitamins and Minerals: Ingredients like celery and onions add vitamins C and K, plus fiber.

Calories and Fats: Mayonnaise adds creaminess but is high in calories and fats. Using low-fat or yogurt-based mayonnaise can reduce these.

Sodium: Ham and pickles can make the salad high in sodium. Opt for low-sodium ham and limit salty condiments to manage intake.

Tips for a Healthier Ham Salad

Add Vegetables: Increase fiber and nutrients by including more veggies.

Leaner Ham: Choose lower-fat ham to cut saturated fat.

Alternative Dressings: Try avocado or yogurt-based dressings to lower fat content and add healthful nutrients.

Conclusion: Enjoy Your Homemade Ham Salad

If you’re craving a delicious lunch or want to use leftover ham, this ham salad dish will satisfy. This recipe has several serving choices and personalization possibilities for every occasion. Our website has more creative recipes and cooking tips to improve your skills.

Print

Easy Ham Salad Recipe: Perfect for Quick Meals and Leftovers

Learn how to prepare a delectable ham salad using this straightforward recipe. Excellent for picnics or repurposing surplus ham!

  • Author: Gabriela cardenas
  • Prep Time: 10 minutes
  • Cook Time: 0 minutes (no cooking required, unless you choose to cook additional ingredients)
  • Total Time: 10 minutes
  • Yield: 4
  • Category: Salad, Spread
  • Method: Mixing
  • Cuisine: American
  • Diet: Gluten Free

Ingredients

  • 2 cups cooked ham, finely chopped
  • 1/2 cup celery, finely diced
  • 1/4 cup onion, minced
  • 2/3 cup mayonnaise
  • 1 tablespoon Dijon mustard
  • Salt and pepper to taste
  • Optional: 1/4 cup sweet pickle relish or chopped pickles

Instructions

  1. Combine Ingredients: In a large mixing bowl, combine the ham, celery, onion, mayonnaise, mustard, and optional relish.
  2. Mix Well: Stir the mixture until all ingredients are well combined and evenly coated with mayonnaise.
  3. Season: Taste and adjust seasoning with salt and pepper according to your preference.
  4. Chill: Refrigerate the salad for at least an hour before serving to enhance the flavors.

Notes

  • For a Healthier Option: Substitute half of the mayonnaise with Greek yogurt to reduce calories and add protein.
  • Enhance Flavor: Add a dash of paprika or a squeeze of lemon juice for an extra kick.
  • Serving Suggestion: Serve on fresh bread as a sandwich, use as a filling for wraps, or serve atop a bed of greens for a low-carb option.

Keywords: ham salad recipe, Leftover Ham Salad, Easy Ham Spread, Ham Salad Sandwich

Did you make this recipe?

Share a photo and tag us — we can't wait to see what you've made!

Categories
Breakfast Dinner Lunch Recipes

steak quesadillas

Many families rely on quesadillas for a quick and tasty lunch. Juicy, delicious beef, melty cheese, and a crunchy tortilla elevate steak quesadillas. How to make the ultimate steak quesadilla, with chef recommendations, nutritional information, and adjustable alternatives for any palette.

Overview of Ingredients

Delicious steak quesadillas depend on their components. The essentials:

For the finest flavor and texture, use flank or skirt steak.

Cheese: Queso asadero or a Mexican mix melts well.

Large, burrito-sized flour tortillas are used, although gluten-free corn tortillas are great.

Spices: Mix garlic powder, cumin, paprika, and a pinch of cayenne for the seasoning.

Overview of Ingredients

FAQs

What kind of meat is best for quesadillas?

It is often recommended to cook skirt steak because it can be heated quickly and easily cut into thin slices. Flanc steak is another great choice. It has a strong flavor and a firm texture. Ribeye and sirloin steaks are also good choices because they are known for being flavorful and versatile.

What kind of cheese melts well in a quesadilla?

When making quesadillas, the best cheeses are those that melt easily and go well with the other ingredients. The best cheese is oaxaca, which has a smooth texture and melts easily. Monterey Jack, Cheddar, and Pepper Jack cheese are also great options if you like your food with a little more kick.

How do I keep steak quesadillas fresh and ready to eat?

Before putting each sirloin quesadilla on its own piece of plastic wrap or foil, let it cool to room temperature. Keep it in the fridge in a safe container for three to four days. Put it in the oven at 350°F (175°C) for 10 to 15 minutes, or heat it up in a skillet until the cheese melts and the tortilla turns brown.

Gabriela’s Secrets to Perfect Steak Quesadillas


Perfect steak quesadillas require mastering a few techniques. What I’ve learned over time:

Steak Perfection: Use a good flank or skirt steak. Juicy, medium-rare to medium doneness is the goal. Let it rest before slicing to seal in the juices.

Precision: Cut steak thinly against the grain. This easy method tenderizes. Every mouthful is melt-in-your-mouth wonderful.

Taste Harmony: I adore enhancing flavors with spices. Infused with garlic powder, cumin, paprika, and a dash of cayenne, the steak is rich and flavorful.

Making layers for a quesadilla is a skill: carefully and uniformly layer the meat, cheese, and toppings. The result is just the proper amount of taste and texture in every bite.

Flip with finesse. Cook slowly. Sizzle the quesadillas, flipping halfway for golden-brown crispiness. Small details matter most.

Attention to Detail: Focus on the details. From selecting the proper meat to organizing the components, these simple details make quesadillas great.

Cook Quesadillas

Customizing Your Steak Quesadilla

Just by making a few small adjustments, you can make this steak quesadilla exactly how you want it:

For Gluten-Free Needs: Opt for corn tortillas instead of flour.

Vegan Options: Use plant-based cheese and meat substitutes.

Add-Ins: Consider incorporating sautéed onions, bell peppers, or mushrooms for extra flavor and texture.

A Healthier Way to Enjoy Steak Quesadillas

Here are some tips to make sure your steak quesadillas are as nutritious as possible:

Select lean cuts of meat, such as flank or sirloin steak, and trim off excess fat before cooking to reduce saturated fat.

Opt for whole-grain tortillas instead of refined-flour tortillas to enhance the fiber content of your quesadillas.

Add Vegetables: Add bell peppers, onions, spinach, or mushrooms to boost fiber and nutrients without adding calories.

Choose a melting cheese, but use it sparingly to save fat and calories. Cheese substitutes with less fat may be healthier

Assemble Quesadillas

What to Serve with Steak Quesadillas

A quesadilla supper can be a feast with the appropriate sides. Some excellent options:

Salads: A light, crisp salad balances the richness of the quesadillas.

Beans: A side of black or refried beans complements the flavors well.

Rice: A bowl of cilantro-lime rice or Mexican rice makes a hearty addition.

For a different take on sauces that could elevate your quesadilla, check out the Steak Frites Sauce.

Print

steak quesadillas

Discover how to make the perfect steak quesadillas with melty cheese and flavorful steak. Quick prep and cook time for a delicious meal!

  • Author: Gabriela cardenas
  • Prep Time: 15 minutes
  • Cook Time: 10 minutes
  • Total Time: 25 minutes
  • Yield: 4
  • Category: Main Course
  • Method: Pan-frying
  • Cuisine: Mexican
  • Diet: Gluten Free

Ingredients

  • 1 lb. flank or skirt steak, thinly sliced
  • 1 tbsp. olive oil
  • 1 tsp. garlic powder
  • 1 tsp. ground cumin
  • Salt and pepper to taste
  • 8 large flour tortillas
  • 2 cups shredded Oaxaca or Monterey Jack cheese
  • Optional: 1/2 cup diced bell peppers
  • Optional: 1/4 cup chopped onions

Instructions

  1. Preparation: Season the steak slices with garlic powder, cumin, salt, and pepper.
  2. Cook the Steak: Heat olive oil in a skillet over medium-high heat. Add steak and cook until browned, about 3-4 minutes per side. Remove from heat and set aside.
  3. Assemble Quesadillas: Lay out the tortillas on a flat surface. Sprinkle cheese on half of each tortilla, add cooked steak, bell peppers, and onions (if using).
  4. Cook Quesadillas: Fold the tortillas over and press gently. Heat a clean skillet over medium heat. Cook each quesadilla until golden brown on both sides and the cheese is melted, about 2-3 minutes per side.
  5. Serve: Cut into wedges and serve hot.

Notes

  • Cheese Choices: For the best melt, choose Oaxaca or Monterey Jack cheese, but feel free to experiment with different types of cheese like cheddar or mozzarella.
  • Adding Vegetables: Incorporating vegetables like bell peppers and onions not only adds flavor but also increases the nutritional value of the quesadillas.
  • Serving Suggestions: Serve with salsa, sour cream, or guacamole on the side for added flavor.

Keywords: steak quesadilla recipe, beef quesadilla, cheese quesadilla, Mexican quesadilla

Did you make this recipe?

Share a photo and tag us — we can't wait to see what you've made!

Categories
Dinner Lunch Recipes

Denver Steak Recipe

Denver Steak Recipe: When cooked properly, this lesser-known beef cut acquires a delicious flavor and a tender texture. This article provides authoritative recommendations for enhancing the aesthetic appeal of Denver steak in a formal dinner setting.

What Makes a Good Denver Steak Recipe?

Not only the cut but also the preparation and cooking method distinguish a Denver steak dish. Denver steak’s potential depends on understanding cow cuts. Important elements:

Selecting high-quality meat with good marbling

Proper marination to enhance tenderness and flavor

Cooking technique that suits the cut’s unique qualities

FAQs

What is a Bronx steak?

Denver steak is a less well-known cut of beef that comes from the underblade of the chuck. Some people compare its flavor and marbling to those of more popular cuts like the ribeye.

What’s the best way to cook Denver steak?

The best way to cook Denver steak is to grill it or sear it in a pan. If you want it to stay tender, cook it to medium-rare or medium. Overcooking it can make it tough.

Which spices work best with Denver steak?

You can season Denver steak with simple things like salt and pepper, or you can add stronger flavors like garlic, rosemary, or your own steak rub.

How long should each side of a Denver steak be cooked?

Denver steak should be cooked on a hot grill or pan for about two to three minutes on each side for medium-rare.

Is it possible to cook frozen Denver steak?

To make sure the steak cooks evenly and tastes great, you should let it thaw all the way before cooking it.

What are some great sides to go with Denver steak?

It goes well with roasted vegetables, mashed potatoes, or a fresh salad, which are all common steak side dishes.

How do I know when my Denver steak is done?

The best way to tell if meat is done is to use a meat thermometer. For medium-rare, make sure the meat is about 135°F (57°C) inside before letting it rest.

Overview of Ingredients

A standout Denver steak requires a few key ingredients to shine:

Denver steak: Look for well-marbled cuts for the best flavor and tenderness.

Salt and pepper are essential for basic seasoning.

Fresh herbs like rosemary and thyme are aromatics during cooking.

Garlic and butter are used to create a rich, flavorful pan sauce.

Overview of Ingredients

Chef’s Tips for a Perfect Denver Steak

Expert advice can make all the difference in preparing Denver steak.

Temperature matters: Before cooking, let the steak reach room temperature to ensure even cooking.

Don’t Overcook: Denver steak is best enjoyed medium-rare to medium.

Resting Time: To redistribute the juices, always let the steak rest after cooking.

Discover how to perfect your meat dishes with our steak sauce.

Customizing Your Dish

Denver steak is versatile and easily adapted to various tastes.

Spice Rubs: Try a coffee-based rub for a deep, robust flavor.

Marinades: A soy sauce and garlic marinade can add an Asian flair to the steak.

Cooking Methods: Grilling brings out a smoky flavor, while pan-searing offers a crispy exterior.

What to Serve with Denver Steak

Complement your Denver steak with side dishes that enhance its rich flavor:

Roasted vegetables

Garlic-mashed potatoes

A fresh garden salad

For more side dish ideas, explore our delicious and easy recipes.

Health Benefits and Nutrition Information for Denver Steak

Cow chuck produces tasty and nutritious Denver steak. Knowing these may help you integrate Denver steak into a balanced diet.

Nutritional Content

Denver steak is rich in several key nutrients:

Protein: Like most cuts of beef, Denver steak is an excellent source of high-quality protein, which is essential for muscle repair and growth.

Iron: It contains a lot of iron, which the body absorbs well. Iron is a vital component in the process of oxygen transportation via hemoglobin.

Zinc: This cut is also a good source of zinc, which is important for immune function, wound healing, and DNA synthesis.

B-Vitamins: Denver steak includes niacin, B12, B6, and riboflavin. These vitamins transform food into energy, protect the brain, and make new blood cells.

Considerations for a Balanced Diet

While Denver steak is nutritious, it’s also important to consume it in moderation.

Caloric Intake: Denver steak, like other red meats, is heavy in fat and calories. It may be balanced with vegetables and grains to reduce caloric consumption.

Fat Content: It includes saturated fats, which should be limited. Cutting fat and leaning out may lower saturated fat consumption.

Cooking Methods: How a steak is cooked affects its health. Grilling and broiling are healthier than frying because they use less fat and fewer hazardous chemicals.


With all the ideas and tactics, why not make Denver steak tonight? Comment with your experience or questions below.

Happy cooking!

Print

Denver Steak Recipe

Create flawless Denver sirloin using our straightforward recipe. Spicy, delectable, and ideal complement to any supper. “Attempt it immediately!

  • Author: Gabriela cardenas
  • Prep Time: 15 minutes
  • Cook Time: 10 minutes
  • Total Time: 30 minutes
  • Yield: 4
  • Category: Main Course
  • Method: Pan Searing
  • Cuisine: American

Ingredients

  • 4 Denver steaks (about 6 oz each)
  • Salt and pepper, to taste
  • 2 tbsp. olive oil
  • 4 cloves garlic, minced
  • 1 tbsp fresh rosemary, chopped
  • 1 tbsp fresh thyme, chopped
  • 2 tbsp butter

Instructions

  1. Prepare the Steaks: Season the steaks generously with salt and pepper on both sides.
  2. Heat the Oil: In a large skillet, heat the olive oil over medium-high heat.
  3. Cook the Steaks: Add the steaks to the skillet and cook for about 3-4 minutes on each side for medium-rare, or until desired doneness.
  4. Add Flavors: In the last minute of cooking, add garlic, rosemary, thyme, and butter to the pan. Spoon the melted butter and herbs over the steaks continuously.
  5. Rest the Steaks: Remove the steaks from the skillet and let them rest for 5 minutes before serving to allow the juices to redistribute.

Notes

  • Let Steaks Rest: Allowing the steaks to sit at room temperature for about 15-20 minutes before cooking can enhance their tenderness.
  • Don’t Overcrowd the Pan: Cook in batches if necessary to ensure each steak has enough space in the pan for even cooking.
  • Use a Meat Thermometer: To ensure perfect doneness, use a meat thermometer. Aim for 135°F for medium-rare.

Keywords: denver steak recipes ,Denver cut steak, grilled Denver steak, pan-seared Denver steak

Did you make this recipe?

Share a photo and tag us — we can't wait to see what you've made!

Categories
Dinner Lunch Recipes

crack chicken spaghetti

Crack Chicken Spaghetti, a hit meal in homes all over the world, has taken the culinary world by storm. Crack chicken spaghetti is a name that begs for its deliciousness and appeal. For many, this is their go-to comfort food because it combines the creamy, savoury flavour of chicken and cheese with the reassuring texture of spaghetti.

The Basics

Fundamentally, Crack Chicken Spaghetti is a nicely balanced combination of creamy cheese, savoury bacon, perfectly cooked spaghetti, and a robust ranch seasoning. This meal is proof of the enchantment that results from lovingly and simply combining basic ingredients.

A Look at the Ingredients for Crack Chicken Spaghetti

Spaghetti: Provides structure and texture. It absorbs flavors well.

Cooked Chicken: Adding shredded chicken makes the dish filling and tasty by adding a hearty protein source.

Cream Cheese: Softened cream cheese gives the sauce a smooth, flavorful base.

Bacon: Crumbled bacon adds a savory, smoky crunch to the dish’s soft textures.

Ranch Dressing Mix: Herbs and spices make this dish tangy and zesty.

Chicken broth thins the cream cheese and adds ranch flavor to the sauce.

Whole milk richens and smooths the sauce without overpowering the flavors.

Seasonings: Salt and pepper are used to taste and adjust flavors.

Garnish with chopped fresh parsley. It brightens and herbifies the dish.

FAQs for Crack Chicken Spaghetti

How should I store cracked chicken spaghetti?

Crack chicken spaghetti keeps well in the freezer for up to two and a half months or in the refrigerator for up to three or four days. This guarantees the meal stays delicious and fresh for later consumption.

What should I serve with this cheddar bacon ranch chicken spaghetti?

Given its rich and flavorful profile, crack chicken spaghetti pairs well with lighter sides. Consider these options:

A simple green salad with a light vinaigrette

Garlic bread or breadsticks

Roasted vegetables like broccoli, zucchini, or bell peppers

Steamed or roasted asparagus

Caprese salad with fresh tomatoes, mozzarella, and basil

Grilled corn on the cob

Caesar salad

Sautéed spinach with garlic

What substitutions could I make?

If you are on a diet or can’t get certain ingredients, try these instead:

Instead of chicken, use ground beef, pork, or turkey.

Please do not use spaghetti as the pasta. Spinach, fettuccine, or penne should be used instead.

You can eat different kinds of cheese.

Do not use cream of chicken or cheddar soup when making soup. Clam or mushroom soup should be used instead.

Spices: You can add oregano, basil, thyme, or other herbs to change the taste. Add spices to make it hotter.

Spice it up by sautéing spinach, bell peppers, mushrooms, or both. It will look better and be healthier.

best sauce for Crack Chicken Spaghetti

What makes crack chicken spaghetti good?

Unmatched Comfort: The creamy, hearty nature of this dish offers unparalleled comfort on any day.

Family Favourite: Its universally appealing flavours make it a hit among both adults and children.

Versatility: Easily adaptable, it can be tweaked to suit various dietary needs and preferences.

Easy to Make: This recipe is straightforward, making it perfect for weeknights or last-minute dinners.

Tips and Tricks for Perfect Crack Chicken Spaghetti

Mastering key techniques and tricks is the key to making perfect Crack Chicken Spaghetti. These detailed tips will help you make your dish great:

 Selecting Ingredients

Chicken: For best flavor and texture, choose boneless, skinless breasts or thighs. Thighs are tastier but fattier.

Quality pasta gives the best texture. Consider whole-wheat or gluten-free for a healthier twist.

Cheese: Cream cheese and sharp cheddar make the best creamy texture and flavor. Mix Parmesan or Gouda for a gourmet touch.

Preparation Tips

Chicken Cooking: Use broth to keep chicken moist and flavorful. Ranch seasoning in the cooking liquid adds flavor to chicken.

Shredding Chicken: Shred warm chicken for best texture. Using two forks or a low-speed hand mixer makes the process faster and easier.

Pasta Cooking

Al Dente: Cook spaghetti in salted water. It should be firm to the bite because it will cook slightly when baked with the other ingredients.

Save a cup of pasta water before draining. For a creamier sauce, add starchy water to the cheese mixture.

Dish Assembly

Layering: Start with spaghetti, then chicken, then cheese mixture in your baking dish for even flavor distribution. Layer until all ingredients are used.

Cheese Topping: Reserve some shredded cheese for topping before baking. It makes a delicious golden and crispy top layer.

Baking Perfectly

To maintain a consistent temperature during baking, preheat your oven.

To avoid burning the top, cover the baking dish with aluminum foil for the first half of baking. For golden, bubbly cheese, remove foil halfway through.

Serving Ideas

Crack Chicken Spaghetti should rest for a few minutes after baking. The cheese sets slightly, making it easier to serve.

For color and freshness, garnish with chopped parsley or green onions. A sprinkle of red pepper flakes adds heat for spice lovers.

Additional advice

After baking, let the dish rest for a few minutes. This helps flavors blend.

Extra cheese on top before the last few minutes of baking for a gooey, golden crust.

Before serving, garnish with fresh parsley or chives for color and freshness.

Crack Chicken Spaghetti is a culinary hug that warms and delights your table. Its simplicity and depth of flavor make it a classic you’ll return to. Every bite of this dish will satisfy and comfort you, whether you’re a chef or not.


HAPPY COOKING!


Print

crack chicken spaghetti

Crack Chicken Spaghetti recipe, a creamy, cheesy delight perfect for family dinners. Easy to make and irresistibly delicious!

  • Author: Gabriela cardenas
  • Prep Time: 20 minutes
  • Cook Time: 30 minutes
  • Total Time: 50 minutes
  • Yield: 6
  • Category: Main Course
  • Method: Baking
  • Cuisine: American

Ingredients

  • 1 lb spaghetti
  • 2 cups cooked and shredded chicken
  • 1 cup cream cheese, softened
  • 1 cup shredded cheddar cheese
  • 1/2 cup cooked and crumbled bacon
  • 1 packet ranch dressing mix
  • 2 cups chicken broth
  • 1/2 cup whole milk
  • Salt and pepper to taste
  • Chopped parsley for garnish

Instructions

  1. Preheat your oven to 375°F (190°C).
  2. Cook spaghetti according to package instructions; drain and set aside.
  3. In a large skillet over medium heat, combine chicken broth, cream cheese, cheddar cheese, ranch dressing mix, and milk. Stir until the cheeses are melted and the mixture is smooth.
  4. Add the cooked chicken and bacon to the sauce, mixing well.
  5. Combine the spaghetti with the chicken and sauce mixture, ensuring the pasta is evenly coated.
  6. Transfer the mixture to a greased baking dish.
  7. Bake for 20-25 minutes until bubbly and golden on top.
  8. Garnish with chopped parsley before serving.

Notes

  • For a lighter version, substitute cream cheese with Greek yogurt and use low-fat cheese.
  • Add vegetables like spinach or mushrooms for a nutritional boost.
  • Leftovers can be stored in an airtight container in the refrigerator for up to 3 days.

Keywords: crack chicken spaghetti,creamy chicken spaghetti, ranch chicken pasta

Did you make this recipe?

Share a photo and tag us — we can't wait to see what you've made!

Categories
Dinner Lunch Recipes

Puerto Rican Potato Salad Recipe | Ensalada de Papa

Puerto Rican cuisine is a lively mix of tastes and textures that reflects its culture. Puerto Rican potato salad is known for its deliciousness and ability to unite people during festivities. Ensalada de Papa, a holiday tradition, blends potatoes with apples’ surprising sweetness.

Ingredients for a Good Potato Salad (Overview)

Every good recipe starts with the right ingredients. For this Puerto Rican potato salad, you will need:

Russet potatoes: These are ideal because of their starchy quality and ability to absorb flavors.

Hard-boiled eggs add texture and richness.

Apples: Due to their crispness and subtle sweetness, people typically use Honey Crisp or Gala apples.

Mayonnaise and Dijon mustard are the bases for the creamy dressing.

Add onions, sweet bell peppers, and cilantro for crunch and freshness.

You can add optional ingredients like sofrito or olives for an extra flavor boost.

Recognizing component balance is key. The History of Puerto Rican Cuisine explains how this cuisine evolves and how each component fits together.

Ingredients for a Good Potato Salad (Overview)

FAQs About puerto rican potato salad

How do I prevent the apples in my potato salad from turning brown?

Toss them in lemon juice or apple cider vinegar immediately after cutting.

Can I make this salad a day ahead?

Yes, it tastes even better when the flavors have time to meld.

Is it possible to freeze Puerto Rican potato salad?

It is not recommended due to the mayonnaise and eggs.

A Review of the Recipe’s Qualities

The unexpected addition of apples to Puerto Rican potato salad sets it apart from its American cousin and complements the dish’s savory and creamy characteristics. Not only do apples improve the flavor, but they also completely transform the texture of the dish by adding a crunchy contrast to the creamy potatoes. In addition to keeping the apples from browning, the tart apple cider vinegar complements the fruit’s natural sweetness. If you want to know why apple cider vinegar is so beneficial,

A Master Chef’s Advice for Flawless Dishe

It takes more than just following a plan to make the perfect Puerto Rican potato salad. You need to get good at a few key techniques:

Avoid These Common Mistakes When Making Potato Salad

Overcooking the potatoes: This can make them mushy and break apart in the salad. Cook until just tender.

Underseasoning: Potatoes need a fair amount of salt. Season the water well, and taste the salad before serving to adjust.

Dressing the Potatoes When They’re Too Hot or Too Cold: For most potato salads, dressing the potatoes when they are warm (not hot) helps them absorb flavors better. However, if they’re too hot, the mayo or dressing can become oily and separate.

Using the Wrong Type of Potatoes: Some potatoes hold up better in salads than others. Choosing the wrong type can affect the texture.

Combining Ingredients

Not Drying the Potatoes: After boiling, let the potatoes drain and steam dry so they don’t water down the dressing.

For Potato Salad, Choose the Best Type of Potato

Waxy potatoes: They hold their shape after cooking and have a creamy texture. Red potatoes, new potatoes, and fingerlings are great choices.

All-purpose Potatoes: Yukon Gold potatoes are a good middle ground between waxy and starchy, offering a slightly waxy texture but a richer flavor.

Reasons Potato Salad Can Become Watery

Potato salad may end up watery due to several factors:

Overcooked potatoes: Potatoes can break down and release moisture into salad if overcooked.

Insufficient drying: If you don’t let the potatoes cool and drain all the way after boiling them, you might add too much water to the salad.

Type of Potatoes Used: Starchy potatoes like russets break down more during cooking, releasing moisture.

Dressing Application: Too much or a very liquid dressing can make the salad watery.

Vegetables Releasing Moisture: Salting cucumbers or tomatoes before adding them to the salad releases water.

Chilling the Salad

Traditional Puerto Rican Side Dishes

Bright flavors and hearty sides define Puerto Rican cuisine. Here are some popular Puerto Rican side dishes for main meals:

This is Puerto Rico’s national dish:This rice has pigeon peas. Sofrito, an herb and spice blend, season rice, pigeon peas, and pork.sofrito, herb-spice blend.

Tostones (Twice-Fried Plantains): We fry green plantain slices, smash them, and fry them again until crispy.Garlic sauce or dipping sauce are often served with them.

Yuca con Mojo (Cassava with Garlic Sauce): The garlic sauce on boiled yuca is olive oil, garlic, and sometimes citrus juice.

Papas Rellenas: In egg and bread crumbs, stuffed mashed potato balls with seasoned ground meat are deep-fried.

Escabeche: Pickled Vegetables with Fish or Chicken This vinegar-based dish includes marinated carrots, cauliflower, and peppers with chicken or fish.

Health Benefits of Potato Salad

Nutrient-Rich Potatoes: Potatoes are a great source of fiber, vitamins, and minerals, contributing to a balanced diet.

Protein and Fats from Eggs: Eggs in the salad provide essential proteins and fats, making it a more satisfying side dish.

Balanced Meal Addition: Despite its indulgent reputation, potato salad can be a healthy part of a meal.

Further Information: For detailed insights into the nutritional content and benefits of potatoes, explore Dietary Fiber in Potatoes.


More than a side dish, Puerto Rican potato salad celebrates culture and taste. Attend your next party and try other Puerto Rican dishes to enjoy this lively cuisine. Share your favorite dishes and experiences here or on social media!

HAPPY COOKING!

Print

Puerto Rican Potato Salad Recipe | Ensalada de Papa

With apples, eggs, and tasty dressings, you can make the best Puerto Rican Potato Salad ever. Great for getting together for a party!

  • Author: Gabriela cardenas
  • Prep Time: 20 minutes
  • Cook Time: 30 minutes
  • Total Time: 50 minutes
  • Yield: 4
  • Category: Side Dish
  • Method: Boiling, Mixing
  • Cuisine: Puerto Rican
  • Diet: Gluten Free

Ingredients

  • 4 large Russet potatoes, peeled and cubed
  • 3 hard-boiled eggs, chopped
  • 1 medium Honey Crisp or Gala apple, diced
  • 1/2 cup mayonnaise
  • 1 tablespoon Dijon mustard
  • 1/4 cup finely chopped onion
  • 1/4 cup diced sweet bell peppers
  • 1/4 cup chopped cilantro
  • Optional: 2 tablespoons sofrito or 1/4 cup sliced olives
  • Lemon juice or apple cider vinegar (for tossing apples)

Instructions

  1. Place potatoes in a large pot of salted water and bring to a boil. Cook until tender but still firm, about 15 minutes. Drain and let cool.
  2. In a large mixing bowl, combine mayonnaise, Dijon mustard, and sofrito (if using). Mix until smooth.
  3. Add the cooled potatoes, chopped eggs, apple (pre-tossed in lemon juice or vinegar), onion, bell peppers, and cilantro to the dressing. Gently mix until well combined.
  4. Chill in the refrigerator for at least one hour before serving to allow flavors to meld.

Notes

  • For a lighter version, substitute mayonnaise with Greek yogurt.
  • To add a crunch, include a handful of chopped walnuts or pecans.
  • If making ahead, add apples and cilantro just before serving to maintain their texture and freshness.

Keywords: Ensalada de Papa, Puerto Rican salad, festive potato salad. Puerto Rican Potato Salad

Did you make this recipe?

Share a photo and tag us — we can't wait to see what you've made!

Categories
Dinner Lunch Recipes Seafood

Ika Sansai Salad

Ika Sansai Salad is more than just a meal; it is a lively representation of Japanese culinary culture. This salad, known for its robust flavors and eye-catching presentation, is a Japanese cuisine standard and a favorite among seafood fans worldwide.

Overview of Ingredients

The squid, meticulously prepared to retain its texture and flavor, is the highlight of Ika Sansai Salad. Numerous essential ingredients complement this and improve the dish.

  • Ginger adds a sharp, spicy kick.
  • Vinegar provides a refreshing acidity.
  • Sesame oil infuses a nutty, rich aroma.
  • Soy sauce offers a deep umami flavor.
  • Various crisp vegetables like cucumber and radish complete the ensemble, making every bite a perfect harmony of flavors.

Overview of Ingredients for Ika Sansai Salad

FAQs

Can I use frozen squid for making Ika Sansai?

You can use frozen squid, especially if fresh squid is unavailable. Before marinating, make sure to thaw and dry the squid completely.

What are the best substitutes for sesame oil?

For those allergic to sesame, grapeseed oil or a mild olive oil can be good alternatives, though they will slightly alter the flavor profile.

What makes traditional Japanese salad good?

Traditional Japanese salad Chuka Ika Sansai uses marination to enhance squid tastes and textures. Key West uses fresh, high-quality ingredients. Our dish has squid seasoned in soy sauce, sesame oil, and vinegar with colorful veggies. This tenderizes and flavors the squid, making each mouthful delicious.

Chef’s Tips for a Perfect Ika Sansai Salad

To make the perfect Ika Sansai Salad, pay attention to detail and follow these insider tips:

  • When selecting squid, always opt for fresh squid. You can substitute fresh squid with well-thawed frozen squid if it is unavailable.
  • Marinating: Let the squid sit in the marinade for at least two hours to ensure full flavor absorption.
  • Balance of Flavors: Adjust the amount of ginger and vinegar based on your taste preference to strike the right balance between spicy and tangy.

Asian cooking techniques

Asian cooking techniques are diverse and intricate, reflecting the region’s rich culinary traditions. Here are a few key methods that are commonly used:

  • Stir-frying: This quick cooking method uses high heat and a small amount of oil. We continuously stir the ingredients in a wok, ensuring they cook evenly and maintain their flavor and texture.
  • Steaming, which involves cooking food with vapor without direct contact with water, is widely used for its health benefitsThis technique perfectly prepares vegetables, fish, and dumplings, preserving their nutrients and natural tastes.
  • Deep-frying: A popular technique in many Asian cuisines, deep-frying cooks food quickly in a large amount of hot oil, resulting in a crispy texture. Dishes like tempura and spring rolls utilize this technique.
  • Braising: This involves cooking ingredients slowly in a flavored liquid. It’s ideal for creating deep, complex flavors in dishes like stews and braised meats.

Each technique brings out unique flavors and textures, making Asian cuisine incredibly varied and exciting.

Customizing your Ika Sansai Salad

Ika Sansai is wonderfully versatile, and customizing it can help cater to personal tastes or make the dish suitable for various dietary preferences.

  • Spice Levels: To control the heat, adjust the amount of red pepper flakes.
  • Vegetable Varieties: Feel free to include additional vegetables, like bell peppers or carrots, for extra crunch and color.
  • Presentation: Serve in a clear glass bowl to showcase the layers and colors of the salad. Discover other creative salad presentations that can impress your guests.

Japanese Ika dishes

  • Ika Sashimi: freshly sliced raw squid, served with soy sauce and wasabi. This dish highlights the squid’s natural sweetness and soft, chewy texture, making it a favorite among raw seafood lovers.
  • Ika Geso Karaage: This dish consists of fried squid tentacles, often marinated in ginger and garlic, then lightly battered and deep-fried until crispy. People typically serve it with a squeeze of lemon or a side of mayonnaise for dipping.
  • Ika Yaki: Whole squid grilled over charcoal, seasoned with soy sauce, and brushed with a sweet mirin glaze. This cooking method enhances the squid’s flavor while achieving a delightfully charred exterior and tender interior.

These dishes showcase the versatility of ika in Japanese cooking, each offering a different taste and texture experience.

healthy squid salad ingredients

Ika Sansai is delicious and offers various health benefits, making it a great addition to a balanced diet.

  • Low in Calories: An excellent choice for those monitoring their caloric intake.
  • Rich in Protein: Squid is a good source of lean protein.
  • This product contains vitamins, providing nutrients like Vitamin C, calcium, and iron.

Discover more culinary delights.

If you liked learning about Ika Sansai Salad, you might like additional excellent meals that bring foreign cuisine to your home. Try Gabriela’s other recipes:

Please test these recipes and customize them. Share your recipes with us! We enjoy seeing how our readers customize their meals. What did you think of the Ika Sansai Salad? Add your unique ingredient.

Print

Ika Sansai Salad

Explore how to make Ika Yaki, a classic grilled squid dish, featuring simple steps and authentic Japanese flavors. Perfect for seafood lovers!

  • Author: Gabriela cardenas
  • Prep Time: 15 minutes
  • Cook Time: 10 minutes
  • Total Time: 25 minutes
  • Yield: 4
  • Category: Main Course
  • Method: Grilling
  • Cuisine: Japanese

Ingredients

  • 2 whole squid, cleaned and bodies scored
  • 2 tablespoons soy sauce
  • 1 tablespoon mirin
  • 1 teaspoon sugar
  • 1 garlic clove, minced
  • 1 tablespoon vegetable oil
  • Lemon wedges, for serving

Instructions

  1. Preheat your grill to medium-high heat.
  2. In a small bowl, mix soy sauce, mirin, sugar, and minced garlic to create the marinade.
  3. Brush the squid with vegetable oil and then coat evenly with the marinade.
  4. Place the squid on the grill and cook for about 5 minutes on each side, or until the squid is golden and slightly charred.
  5. Remove from the grill and let it rest for a couple of minutes before slicing.
  6. Serve hot with lemon wedges on the side.

Notes

  • Ensure the squid is not overcooked to maintain its tenderness.
  • Scoring the squid can help the marinade penetrate more deeply and also prevents curling during cooking.
  • For an added flavor, sprinkle some finely chopped green onions or sesame seeds before serving.

Keywords: Ika Yaki recipe,ika sansai salad, Grilled squid recipe," "Japanese squid dish

Did you make this recipe?

Share a photo and tag us — we can't wait to see what you've made!

Categories
Dinner Recipes

Chicken of the Woods : A Vegetarian Delight

The vibrant and flexible mushroom chicken of the woods brings intrigue to culinary excursions. This meaty wild fungus is popular with foragers and gourmet cooks because it tastes different from other grocery store mushrooms.

What Makes a Good Chicken of the Woods Recipe

Understanding the characteristics that make Chicken of the Woods stand out is crucial to cooking it properly. Here are some key points:

  • Texture and Flavor: The mushroom’s meaty texture is similar to that of chicken, hence its name. With the right spices, it can enhance its slight lemony tang and absorb flavors well.
  • Proper cleaning and preparation are essential, as the mushroom can trap dirt and debris. Before cooking, gently brush and wash it.

To learn more about preparing natural mushrooms and sustainable mushroom gathering, consult this exhaustive guide. National Wildlife Federation.

FAQs

Here are some frequently asked questions about Chicken of the Woods:

How do you identify and forage Chicken of the Woods safely?

Always forage with an expert or use a reliable guidebook.

Is the chicken of the woods mushroom edible?

Store in a breathable container and clean gently with a brush.

What are the nutritional benefits of Chicken of the Woods?

It’s high in protein and fiber, making it a healthy addition to any diet.

Overview of Ingredients

You can cook Chicken of the Woods in a variety of ways. Here are some common ingredients that go well with this mushroom:

  • For marinating, use buttermilk or kefir.
  • Spices such as cayenne pepper or paprika
  • Fresh herbs like thyme and rosemary


Chef’s Tips for Perfect Cooking

Achieving the perfect Chicken of the Woods dish goes beyond simple preparation; it involves understanding the unique characteristics of this mushroom and utilizing techniques that highlight its best qualities. Here are some expanded tips to help you master your dish:

  • Proper Cleaning: Because they grow on trees, Chickens of the Woods can accumulate dirt. Always use a soft brush to gently clean the mushrooms’ surfaces and crevices. Avoid soaking mushrooms in water, as they are porous and can become soggy.
  • Marinating: To infuse the mushrooms with more flavor, marinate for a minimum of 30 minutes or even overnight if possible. This not only improves the taste but also helps to tenderize the mushroom, making it juicier.
  • Controlled Cooking: Avoid high heat, as it can dry out the mushrooms quickly. Cook them on medium heat to ensure they retain their moisture and develop a nice caramelization without burning.
  • Using Fresh Herbs: Incorporate fresh herbs towards the end of cooking. This preserves their flavor and aroma, enhancing the overall taste of the dish.
  • Resting the Mushrooms: After cooking, let the mushrooms rest for a few minutes before serving. This allows the juices to redistribute throughout the mushrooms, ensuring that each bite is moist and flavorful.
  • Experiment with Textures: For a varied texture, mix in some crunchy elements like toasted nuts or crispy breadcrumbs just before serving. This adds a delightful contrast to the soft, meaty texture of the Chicken of the Woods.

For additional tips on cooking techniques for wild mushrooms, visit Serious Eats.

Customizing Your wild mushroom dish

Whether you’re catering to dietary requirements or just want to explore, here are ways to alter your Chicken of the Woods dishes:

  • BBQ Style: Marinate in a homemade BBQ sauce before grilling.
  • Buffalo Wings Style: Use a vegan buffalo sauce and bake until crispy.

What to Serve with Chicken of the Woods Recipes

Pairing this mushroom with the right sides can enhance your meal.

  • Starches: Roasted potatoes or a creamy polenta
  • Vegetables: Grilled asparagus or a fresh arugula salad

For another quick and delightful chicken recipe, check out this 4 Ingredient Chicken Salad, perfect for a healthy, light meal.


Health Benefits

Incorporating Chicken of the Woods into your diet offers several health benefits:

  • Nutritional Value: Rich in vitamins D and B, it supports bone and immune health.
  • Medicinal Properties: Known to reduce inflammation and support cholesterol management.

For more detailed health benefits of mushrooms, you might want to explore MycoMedicinals.


Share your cooking exploits and recipes online to encourage others to adopt this sustainable culinary practice!

Print

Chicken of the Woods : A Vegetarian Delight

Try our mouth-watering Chicken of the Woods recipe, perfect for vegetarians looking for a meaty texture. Simple, flavorful, and hearty!

  • Author: Gabriela cardenas
  • Prep Time: 20 minutes
  • Cook Time: 30 minutes
  • Total Time: 50 minutes
  • Yield: 4
  • Category: Main Dish
  • Method: Grilling/Sautéing
  • Cuisine: American
  • Diet: Vegetarian

Ingredients

  • 1 lb. Chicken of the Woods mushrooms, cleaned and sliced
  • 1/2 cup buttermilk or plain kefir (for marinating)
  • 2 tablespoons olive oil
  • 1 teaspoon salt
  • 1/2 teaspoon black pepper
  • 1/4 teaspoon cayenne pepper (optional for spice)
  • 2 cloves garlic, minced
  • 1 tablespoon fresh thyme, chopped

Instructions

  1. In a large bowl, mix the buttermilk or kefir, olive oil, salt, pepper, cayenne pepper, garlic, and thyme.
  2. Add the cleaned and sliced Chicken of the Woods mushrooms to the marinade. Ensure each piece is well coated.
  3. Cover the bowl and let it marinate for at least 30 minutes, or refrigerate for up to 2 hours for deeper flavor.
  4. Preheat the grill or a heavy skillet over medium-high heat.
  5. Grill or sauté the mushrooms for about 5-7 minutes on each side, or until they are golden brown and cooked through.
  6. Serve immediately, garnished with additional thyme if desired.

Notes

  • Ensure the mushrooms are thoroughly cleaned to remove any dirt or debris.
  • For an extra flavor boost, add a splash of white wine to the marinade.
  • If using a skillet, add a small amount of additional olive oil to prevent sticking.

Keywords: Chicken of the Woods cooking, fungal recipes, wild mushroom dishes. Chicken of the Woods recipe

Did you make this recipe?

Share a photo and tag us — we can't wait to see what you've made!

Categories
Dinner Lunch Recipes

Baked Beans and Ground Beef

For a long time, baked beans and ground beef have been thought of as the ultimate comfort foods, both in home kitchens and at busy restaurants. This food, which is full of history and taste, makes me think of the simple things that make life worth living.

How to Improve Baked Beans with Ground Beef Recipe?

Ingredient quality and balance are key to making the ultimate baked bean and ground beef entree. This dish works because ground beef’s flavorful depth balances baked beans’ sweet and acidic flavors.

  • Ground beef quality: For a healthier option without compromising flavor, opt for lean meat.
  • Balance of flavors: a harmony between the sweetness of the beans and the robustness of the beef.

Try Air Fryer Sesame Chicken for a delicious meal with the ideal flavors. Umami, salty, and sweet flavors may season ground beef and baked beans.

Frequently Asked Questions

How do I store leftover baked beans and ground beef?

Spoon the leftovers into an airtight container and refrigerate for up to 5 days. It’s not recommended to freeze the dish, as it can become mushy upon thawing.

What do baked beans and ground beef pair well with?

This hearty dish complements almost any main course, especially well with sandwiches and grilled meats like hot dogs, burgers, brats, pork chops, and chicken.

How do you enhance a can of baked beans?

Begin by cooking a pound of ground beef and 8 slices of bacon. Once prepared, combine the meats with the beans, onion, sugars, ketchup, mustard, and vinegar in your cooking vessel of choice (baking dish, slow cooker, or large saucepan) and cook until the beans are hot, the sugars dissolved, and the onions soft.

Can I cook baked beans and ground beef in a slow cooker?

Yes, this recipe is adaptable to various cooking methods, including slow cooking. Depending on your slow cooker, it may take a couple of hours. It’s recommended to cook on high for an hour, stirring occasionally, then on low for an additional 2–3 hours.

Overview of Ingredients

The beauty of baked beans and ground beef lies in their simplicity. The core ingredients are humble yet capable of creating a comforting and satisfying meal.

  • Ground beef is the star of the dish, providing rich, meaty flavors.
  • Baked beans add sweetness and texture.
  • Onions and garlic: for aromatic depth.
  • Tomato sauce brings tanginess and binds the dish together.
  • Spices: A blend of spices enhances the overall flavor profile.

Chef’s Tips for Perfect Baked Beans and Ground Beef

Select the Right Beans

While traditional recipes call for navy beans or pork and beans, experimenting with different types can add unique flavors and textures. Consider using a mix of beans such as kidney, cannellini, or black beans for a more complex dish.

Deglazing the Pan

After browning the beef, deglaze the pan with a little bit of broth, beer, or even coffee. This process lifts the flavorful bits stuck to the bottom of the pan, incorporating them back into the dish for an extra layer of taste.

Low and Slow Cooking

Whether in the oven, on the stovetop, or in a slow cooker, cooking your baked beans and ground beef slowly allows the flavors to meld and intensify. If time allows, a longer cooking period at a lower temperature will result in a more harmonious and rich dish.

Balancing Sweetness and Acidity

Baked beans can often lean towards the sweeter side. Balance this by adding a splash of apple cider vinegar or a squeeze of lemon juice. The acidity will cut through the sweetness and add a brighter note to the dish.

Herbs and Spices

Don’t be afraid to experiment with different herbs and spices. Smoked paprika, cumin, and dried mustard can add warmth and complexity, while a bay leaf or two during cooking lends a subtle aromatic flavor.

Customizing Your Hearty Bean Dish

This versatile dish can be tailored to suit various dietary preferences and tastes.

For a vegetarian twist, substitute ground beef with a plant-based alternative.

Add a kick with jalapeños or chipotle peppers for those who enjoy a bit of heat.

What goes best with baked beans and ground beef?

Choosing the right side dishes can turn your baked beans and ground beef into a feast. Take a look at these accompaniments:

Cornbread is a classic pairing that balances the flavors.

The green salad adds a fresh contrast to the hearty main dish.

Nutritional Information

The nutritional value of baked beans with ground beef depends on the ingredients and technique. Some general highlights:

  • Calories: A serving typically contains approximately 300–400 calories, making it a hearty choice for a meal.
  • Protein: Rich in protein, with about 20–25 grams per serving, primarily from the ground beef.
  • Fiber: Baked beans are a good source of dietary fiber, contributing to digestive health.
  • Fat: The fat content can vary; using lean ground beef helps reduce total fat intake.
  • Vitamins and Minerals: Provides iron from the beef and various B vitamins from both the beef and beans.
  • Sugar: Depending on the preparation, the sugar content can be high due to the added sugars in the sauce.

Adjusting the ingredients, such as using low-sugar beans or leaner cuts of meat, can make this dish suitable for various dietary needs.


Please share your baked beans and ground beef results! Leave comments with your experiences, suggestions, and variants. Your comment strengthens our community and motivates readers to reinvent traditional meals. Happy cooking!

Print

Baked Beans and Ground Beef

Make this hearty baked beans and ground beef recipe, perfect for any meal. Quick prep, full of flavor. Click to learn how!

  • Author: Gabriela cardenas
  • Prep Time: 15 minutes
  • Cook Time: 1 hour
  • Total Time: 1 hour 15 minutes
  • Yield: 6
  • Category: Main Dish
  • Method: Baking
  • Cuisine: American
  • Diet: Gluten Free

Ingredients

  • 1 pound ground beef (lean for a healthier option)
  • 3 cups baked beans
  • 1 medium onion, chopped
  • 2 cloves garlic, minced
  • 1/2 cup tomato sauce
  • 2 tablespoons brown sugar
  • 1 tablespoon apple cider vinegar
  • 1 tablespoon mustard
  • 8 slices of bacon, cooked and crumbled (optional)
  • Salt and pepper to taste

Instructions

  1. Preheat your oven to 375°F (190°C).
  2. In a skillet, brown the ground beef with the onion and garlic until the beef is fully cooked and the onions are translucent.
  3. Drain any excess fat and add the tomato sauce, brown sugar, vinegar, and mustard to the beef. Mix well.
  4. Stir in the baked beans and bacon (if using), and season with salt and pepper.
  5. Transfer the mixture to a baking dish and bake uncovered for 45-60 minutes until bubbly and slightly thickened.
  6. Serve hot and enjoy!

Notes

  • nhance Flavor: Consider adding a splash of Worcestershire sauce for deeper flavor complexity.
  • Spiciness: For a spicy kick, mix in some chopped jalapeños or chipotle peppers.
  • Slow Cooker Adaptation: Combine all ingredients in a slow cooker and set to low for 4-6 hours for tender, deeply melded flavors.

Keywords: ground beef and beans recipe, hearty bean and beef bake,Ground Beef Baked Beans, Hearty Bean Dish, Beef and Bean Casserole

Did you make this recipe?

Share a photo and tag us — we can't wait to see what you've made!

Categories
Dinner Main dish Recipes

Marry Me Chicken Pasta

Hello! Chef Gabriela Cardenas created this delicious Marry Me Chicken Pasta. I have loved this dish since I made it the night my husband proposed! From my kitchen to yours, it’s more than pasta—it’s love.

FAQs

Can I use chicken thighs instead of breasts?

Yes, though cooking times may vary.

What can I substitute for heavy cream?

A combination of milk and butter can be used, though the sauce may be less rich.

How can I make this dish vegetarian-friendly?

Swap the chicken for a hearty vegetable like portobello mushrooms.

overview of ingredients

  • Chicken Breasts: The star of the dish, chicken breasts, are lean and tender. They’re sliced into cutlets for even cooking and maximum flavour absorption.
  • Pasta: Typically, a long, flat pasta like fettuccine or tagliatelle is used to best capture the creamy sauce. However, penne or rigatoni can also work well for a different texture.
  • Sundried Tomatoes: These bring a sweet-tartness to the dish, adding a layer of complexity to the flavours. They’re also packed with umami, enhancing the overall taste.
  • Heavy Cream: Creates the rich, luxurious base of the sauce. Its thickness is ideal for coating the pasta and chicken, providing a velvety texture.
  • Parmesan Cheese: Adds a nutty, salty depth to the sauce. Freshly grated Parmesan melts better and incorporates more smoothly into the sauce.

Chef’s Tips for Perfect Marry Me Chicken Pasta

  • Choose the Right Pasta: Opt for pasta shapes that hold sauce well, such as fettuccine, tagliatelle, or penne. The choice of pasta can significantly impact the dish’s final texture and flavour profile.
  • Cook Pasta Al Dente: Ensure the pasta is cooked to al dente perfection. It should have a slight bite to it, which not only enhances the texture but also ensures it doesn’t become mushy when mixed with the sauce.
  • Simmer Slowly: Allow the sauce to simmer on a low heat after adding the cream and cheese. This slow simmering process helps the flavours meld together and the sauce thicken to the perfect consistency without separating.
  • Adjust Consistency: If the sauce is too thick, don’t hesitate to thin it with a bit of pasta water. The starchy water adds silkiness and helps adjust the sauce to your desired consistency.
  • Serve Immediately: Marry Me Chicken Pasta is best served immediately while the sauce is creamy and the pasta is perfectly al dente.
  • Pair with Wine: A glass of crisp white wine, such as Chardonnay or Pinot Grigio, complements the creamy sauce and enriches the overall dining experience.

What to Serve with Married me chicken pasta

Vegetables

  • Roasted Asparagus: The slight bitterness of roasted asparagus contrasts beautifully with the creamy pasta, adding a fresh and slightly crunchy element to the meal.
  • Garlicky Green Beans: Sautéed green beans with a hint of garlic add a vibrant colour and a crisp texture that pairs well with the softness of the pasta.
  • Caprese Salad: A simple salad with ripe tomatoes, fresh mozzarella, basil, and a drizzle of balsamic glaze offers a refreshing counterpoint to the hearty pasta.

Breads

  • Crusty Bread: A loaf of crusty bread, such as a baguette or ciabatta, is perfect for mopping up any leftover sauce, ensuring not a drop of the deliciousness goes to waste.
  • Garlic Bread: For a more flavorful option, garlic bread, with its buttery, garlicky crust, makes an excellent companion to Marry Me Chicken Pasta.

Starches

  • Parmesan Risotto: For an ultra-indulgent meal, serve alongside a creamy Parmesan risotto. Its rich texture and flavour complement the pasta without overpowering it.
  • Polenta: A creamy polenta can be a comforting alternative to pasta, especially if you’re serving the Marry Me Chicken as the main course without the pasta.

Lighter Options

  • Zucchini Noodles: For a lighter, low-carb alternative, zucchini noodles (zoodles) offer a fresh, crisp base that pairs well with the creamy chicken.
  • Cauliflower Mash: A creamy cauliflower mash provides a comforting, low-carb side that mimics the texture of mashed potatoes but with a lighter feel.

Wines

  • Chardonnay: A buttery Chardonnay complements the creamy sauce of the pasta, enhancing its richness.
  • Pinot Noir: If you prefer red wine, a light Pinot Noir with its fruity notes can balance the dish’s creaminess without overwhelming the flavours.

Nutritional Highlights of Marry Me Chicken Pasta

  • Protein-Rich: Chicken breasts provide a lean source of protein, crucial for muscle repair and growth.
  • Vitamins and Antioxidants: Sundried tomatoes add vitamin C and antioxidants, enhancing overall health.
  • Calcium and Vitamin D: Heavy cream and Parmesan cheese contribute to calcium and vitamin D intake, which are important for bone health.
  • Carbohydrates for Energy: Pasta offers carbohydrates, the body’s primary energy source, with the option to use whole-grain pasta for added fibre and nutrients.
  • Healthy Fats: Almonds and sunflower seeds provide healthy fats, vitamins, and minerals, boosting the nutritional value of the meal.
  • Moderation Tips: While flavorful, Parmesan cheese and heavy cream also add sodium and fats, which should be consumed in moderation to maintain a balanced diet.

Share Your Story

Did this dish add a spark to your dinner table? I’d love to hear about it! Share your stories, photos, or any modifications you made to the recipe. Connect with us on social media or leave a comment below. Let’s spread the love one recipe at a time!

Enjoy cooking, and may your meals be as filled with love as mine.

Print

Marry Me Chicken Pasta

how to make Marry Me Chicken Pasta, the perfect dish for a romantic dinner. Creamy, flavorful, and utterly irresistible.

  • Author: Gabriela cardenas
  • Prep Time: 15 minutes
  • Cook Time: 25 minutes
  • Total Time: 40 minutes
  • Yield: 4
  • Category: Main Course
  • Method: Sautéing
  • Cuisine: Italian-inspired
  • Diet: Gluten Free

Ingredients

  • 4 chicken breasts, sliced into cutlets
  • Salt and pepper, to taste
  • 1/2 cup all-purpose flour, for dredging
  • 2 tablespoons olive oil
  • 2 tablespoons unsalted butter
  • 3 cloves garlic, minced
  • 1 cup chicken stock
  • 1 cup heavy cream
  • 1/2 cup grated Parmesan cheese
  • 1/4 cup sundried tomatoes, chopped
  • 1 teaspoon chili flakes
  • 1 teaspoon dried oregano
  • Fresh basil leaves, for garnish
  • 8 oz fettuccine pasta, cooked al dente

Instructions

  1. Season chicken cutlets with salt and pepper, then dredge in flour, shaking off excess.
  2. In a large skillet, heat olive oil and butter over medium heat. Add chicken and cook until golden brown on both sides. Remove and set aside.
  3. In the same skillet, add garlic and sauté until fragrant. Pour in chicken stock to deglaze the pan, scraping up any browned bits.
  4. Stir in heavy cream, Parmesan, sundried tomatoes, chili flakes, and oregano. Bring to a simmer.
  5. Return chicken to the skillet, covering with sauce. Cook until the chicken is cooked through and the sauce has thickened, about 10 minutes.
  6. Serve the chicken and sauce over cooked fettuccine, garnished with fresh basi

Notes

  • For a thicker sauce, allow it to simmer and reduce before adding the chicken back into the skillet.
  • Use freshly grated Parmesan for the best flavor and texture in the sauce.
  • If the sauce thickens too much upon cooling, add a splash of pasta water to loosen it up when reheating.

Keywords: creamy chicken pasta, romantic dinner recipes, sundried tomato pasta

Did you make this recipe?

Share a photo and tag us — we can't wait to see what you've made!

Categories
Dinner Recipes

Super Crunch Salad

Super Crunch Salad is a symphony of textures and tastes to delight your taste buds. This salad blends crisp veggies, salty nuts, and refreshing dressings to create a healthy, substantial meal that is great for any occasion. The Super Crunch Salad is adaptable and delicious as a fast lunch or nutritious supper.

What Makes a Good Super Crunch Salad

A truly great Super Crunch Salad is all about the interplay of textures and flavors. Here’s what sets it apart:

Diverse Ingredients: Including various vegetables like kale, cabbage, and carrots ensures a mix of textures that keep each bite interesting.

Nut and Seed Crunch: Adding sunflower seedsalmonds, or walnuts gives that delightful crunch and boosts the nutritional value.

Balanced Dressings: The dressing can make or break your salad. Opting for something that complements the natural flavors of the vegetables without overwhelming them is key.

FAQs for Super Crunch Salad

What makes a salad ‘super crunch’?

A “Super Crunch” salad typically includes a variety of ingredients that provide a crispy texture, such as raw vegetables (cabbage, carrots, bell peppers), nuts (cashews, almonds), seeds (sunflower, pumpkin), and even crispy noodles or croutons.

What are some popular ingredients in a Super Crunch Salad?

Popular ingredients include cauliflower rice, kale, chopped nuts like cashews, raw vegetables like carrots and bell peppers, and a tangy or creamy dressing to combine all the flavors.

What dressings work best with a Super Crunch Salad?

Light vinaigrettes or creamy dressings both work well, depending on your preference. A homemade balsamic apple vinaigrette or a sesame dressing can enhance the salad’s freshness without overpowering the ingredients’ natural flavors.

Is Super Crunch Salad healthy?

Yes, Super Crunch Salad can be very healthy, providing a good source of fiber, vitamins, and minerals from its various vegetable components and healthy fats from nuts and seeds. It’s a nutritious option that can be tailored to fit various dietary needs.

ary needs.

Overview of Ingredients

The magic of Super Crunch Salad lies in its ingredients. Here’s what you’ll need:

  • Mixed greens (kale, romaine, arugula)
  • Red cabbage shredded
  • Carrots, julienned
  • Cucumber, sliced
  • Cherry tomatoes, halved
  • Red onion, thinly sliced
  • Almonds toasted
  • Sunflower seeds
  • Optional: crumbled feta or goat cheese
  • Dressing: olive oil, lemon juice, honey, mustard, salt, and peppe

Chef’s Tips for Crafting the Perfect Salad

To ensure that your Super Crunch Salad is both delectable and nutritious, take into account the following suggestions:

Balance Your Flavors

A great salad balances sweet, salty, sour, and bitter flavors. Use ingredients like fruits for sweetness, olives or cheese for saltiness, a vinegar-based dressing for sourness, and greens like arugula for a hint of bitterness. The contrast will enhance the overall taste and make your salad more complex and satisfying.

Use Fresh Ingredients

Fresh Ingredients might seem obvious, but the freshness of your ingredients is crucial in a salad. Fresh, crisp vegetables, vibrant greens, and quality nuts and seeds make a significant difference. Shop seasonally where possible, as this supports local producers and guarantees the best taste and nutrient content.

Cut Ingredients Uniformly

Chopping your vegetables and greens in uniform sizes makes your salad easier to eat and ensures that each forkful is a balanced bite. It is especially important in a Super Crunch Salad, where the enjoyment comes from experiencing the symphony of textures and flavors together.

Add Protein for Balance

Including a protein source such as grilled chicken, tofu, or beans can transform a simple salad into a complete meal. Protein also helps balance the carbohydrates in vegetables and fruits, providing longer-lasting satiety and energy.

Customizing Your Super Crunch Salad

The beauty of Super Crunch Salad lies in its versatility. Here are a few ways to make it your own:

Protein Addition: Add grilled chicken or tofu for a protein boost—check out our Hawaiian Chicken in a Crock Pot recipe for a flavorful protein option that complements this salad beautifully.

Cheese Options: A sprinkle of feta or shaved Parmesan can add a rich, salty touch.

Seasonal Vegetables: Swap in seasonal veggies to keep the salad refreshing and new throughout the year.

Nutritional Profile

The Super Crunch Salad is not only tasty but also packed with nutrients.

Fiber-Rich: This salad is full of vegetables and great for digestion and satiety.

Vitamins and Minerals: Loaded with vitamins A, C, and K, and minerals like iron and potassium.

Healthy Fats: Nuts and seeds add omega-3 and omega-6 fatty acids, which benefit heart health.

Serving Suggestions

Super Crunch Salad pairs wonderfully with various dishes. For a more filling meal, serve it alongside a protein-rich dish like our popular Air Fryer Sesame Chicken, which provides a delightful contrast with its savory and tender profile against the crispness of the salad.


Have questions or suggestions about the recipe? Comment below! We value your input and enjoy discussing new ideas and improvements.


Print

Super Crunch Salad

Take a look at this recipe for the ideal Super Crunch Salad, which is loaded with fresh vegetables, almonds, and a light dressing for a dinner that is both nutritious and delicious.

  • Author: Gabriela cardenas
  • Prep Time: 15 minutes
  • Cook Time: 0 minutes (no cooking required)
  • Total Time: 15 minutes
  • Yield: 4
  • Category: Salad
  • Method: Tossing/No Cook
  • Cuisine: International
  • Diet: Vegetarian

Ingredients

  • 2 cups chopped romaine lettuce
  • 1 cup shredded purple cabbage
  • 1 large carrot, julienned
  • 1 red bell pepper, thinly sliced
  • 1/2 cup cherry tomatoes, halved
  • 1/4 cup sliced almonds, toasted
  • 1/4 cup sunflower seeds
  • 1/4 cup crumbled feta cheese (optional)
  • For the Dressing:
    • 3 tablespoons olive oil
    • 1 tablespoon apple cider vinegar
    • 1 teaspoon honey
    • 1 teaspoon Dijon mustard
    • Salt and pepper to taste

Instructions

  1. Combine Salad Ingredients: In a large salad bowl, toss together romaine, cabbage, carrot, bell pepper, and cherry tomatoes.
  2. Add Crunch: Sprinkle the toasted almonds, sunflower seeds, and optional feta cheese over the top.
  3. Prepare Dressing: In a small bowl, whisk together olive oil, apple cider vinegar, honey, mustard, salt, and pepper until emulsified.
  4. Dress the Salad: Drizzle the dressing over the salad just before serving and toss well to coat evenly.

Notes

  • Enhancing Flavor: For a deeper flavor, you can lightly toast the sunflower seeds along with the almonds.
  • Protein Addition: For a heartier meal, add grilled chicken breast or chickpeas.
  • Serving Suggestion: Serve this salad as a standalone meal for lunch or as a vibrant side dish for dinner.

Keywords: super crunch salad, Crunchy Vegetable Salad, Nutty Salad Recipe, Fresh Veggie Salad

Did you make this recipe?

Share a photo and tag us — we can't wait to see what you've made!

Categories
Baking Dinner Lunch Recipes

Apple Pie Baked Beans

Apple Pie Baked Beans combine BBQ familiarity with apple pie sweetness. This unusual mix offers a delicious touch to BBQ dinners and starts family conversations. For chefs and amateur cooks alike, this dish offers simplicity and taste in every mouthful.

The Special Allure of Baked Beans with Apple Pie

Apple Pie Baked Beans succeeds by combining old and fresh flavors. Why this recipe stands out:

  • Simplicity: With just a few ingredients, this dish is both easy to prepare and delicious to enjoy.
  • Unique Flavor Combination: The integration of apple pie filling with the savory depth of baked beans yields a truly memorable dish.

FAQs

What is the baking soda trick for beans?

Adding a little bit of baking soda—roughly one teaspoon per cup of dried beans—to your soaking or boiling water will actually speed up the cooking process.

Does putting a potato in beans reduce gas?

Supposedly to “absorb” the gas from the beans, she also added an entire potato to the pot and cooked it. As a consequence, although eating the potato will make you very gassy, eating the beans should make you less so.

What can I add to beans to make them taste better?

While sea salt and water-cooked dried beans are great, adding an onion, garlic, or other aromatic to the pot can enhance their taste!

Overview of Ingredients

The key to this dish lies in its ingredients, which are both minimal and impactful.

  • There is no sugar-added apple pie filling (16 ounces).
  • Bush’s original baked beans, also known as Showboat (55 ounces), are available.
  • Your favorite BBQ sauce (½ cup)
  • Favorite BBQ rub/seasoning (2 tablespoons)

Tips for excellent apple pie-baked beans 

Achieving the perfect batch of apple pie baked beans is easier than you might think. Here are some expert tips:

Ingredient Enhancements

Adding additions to canned baked beans may turn them from a basic side dish into a gourmet experience. Apple pie filling gives a distinct sweetness, and a little of your favorite BBQ sauce enhances the taste. A dusting of BBQ rub may give even another dimension of flavor, balancing the savoury and the sweet just so.

The Role of Apples

Cooking beans with apples adds a delicious touch. The beans have a rich, delicious richness from the caramelization of the natural sugars in apples. When apples are sweet and the beans are salty, like in Apple Pie Baked Beans, this combination works very well.

Elevating Techniques

The addition of various flavors is one way to improve baked beans. Sautéing onions and garlic before adding the beans can create an aromatic base. The richness of the meal is increased with smoked bacon or spices like cumin and paprika.

Flavor Enhancements

The addition of more spices and condiments is essential to improving the taste of canned beans even more. Spices like bay leaves and thyme, as well as mustard and chili powder, add aroma to the beans. A spoonful of molasses or a splash of vinegar may provide sweetness and acidity to balance things out and provide a more interesting and filling meal.

Additional Tips for Better Apple pie baked beans

Look at both texture and taste improvements when adding more to your beans. Ingredients like chopped tomatoes, crispy bacon, or even dark chocolate may offer new flavor aspects. The simple beans may also become a spectacular side dish by adding tart ingredients like apple cider vinegar or BBQ sauce.

Readers who want to try different ways to cook beans might want to check out Air Fryer Baked Beans for a quick and easy option.

Customizing Your Dish

Tailor this dish to suit your taste or dietary preferences with these simple modifications:

  • Vegan Adaptation: Use vegan-friendly beans and a plant-based BBQ sauce.
  • Additional Flavors: Consider adding smoked paprika or a pinch of cinnamon for a deeper flavor profile.

Ideal Pairings for Apple Pie Baked Beans

This dish pairs beautifully with various main courses and sides. For a perfect BBQ menu, consider:

  • Grilled meats, like chicken or pork
  • A fresh coleslaw or green salad
  • Cornbread or crusty bread

Why not serve the Sloppy Joe recipe at your BBQ? For a particular touch, serve smoked potato salad.

Health Benefits

Apple Pie Baked Beans are not just tasty—they’re also nutritious.

  • Fiber-Rich: Both apples and beans are great sources of dietary fiber.
  • Vitamin-Packed: Apples provide vitamin C, while beans offer protein and iron.

Want to make sweet baked beans? Share your ingredients and experiences! Show us your projects and tell us about any changes. Share your images and comments here or on social media using #UniqueBBQTwist.

Print

Apple Pie Baked Beans

Make your BBQs unforgettable with our Apple Pie Baked Beans recipe. Quick prep, rich flavors, and health benefits in every bite.

  • Author: Gabriela cardenas
  • Prep Time: 15 minutes
  • Cook Time: 1 hour 30 minutes
  • Total Time: 1 hour 45 minutes
  • Yield: 6
  • Category: Side Dish
  • Method: Baking/Smoking/Grilling
  • Cuisine: American
  • Diet: Gluten Free

Ingredients

  • 1 (16 oz) can of no sugar added apple pie filling
  • 1 (55 oz) can of Bush’s Original Baked Beans or Showboat
  • ½ cup of your favorite BBQ sauce
  • 2 tablespoons of your favorite BBQ rub/seasoning
  • Optional for extra flavor: chopped bell pepper, chopped onion, jalapeno slices, bacon on top, minced garlic

Instructions

  1. Preheat your oven to 325°F (163°C).
  2. In a large baking dish, combine the apple pie filling with the BBQ sauce and BBQ rub/seasoning.
  3. Gently blend the mixture using an immersion blender or pulse a few times in a food processor to slightly break up the apples.
  4. Stir in the canned baked beans until well mixed.
  5. Bake in the preheated oven for 1.5 hours, stirring occasionally to ensure even cooking.
  6. Serve warm as a side dish at your next BBQ

Notes

  • Flavor Variations: Feel free to experiment with different pie fillings like cherry or peach for a unique twist.
  • Vegan Option: Omit bacon or use a vegan alternative for a plant-based version.
  • Storage: Store leftovers in an airtight container in the fridge for up to 3 days.

Keywords: apple pie baked beans

Did you make this recipe?

Share a photo and tag us — we can't wait to see what you've made!


Categories
Dinner Recipes

Smoked Potato Salad

The basic potato is elevated to a smoky, creamy treat with smoked potato salad, which is more than just another side dish. Ideal for summertime barbecues and get-togethers, this recipe presents a delectably unique twist on classic potato salad.

A Great Recipe for Smoked Potato Salad

The unique taste of smoked potato salad enhances a favourite. Creating a meal that appeals to a broad audience requires finding the right smoke-to-creaminess ratio and using complementary ingredients.

Potato Selection: Choose potatoes that absorb smoke well but maintain their texture after cooking, such as russets or Yukon golds.

Smoky Flavour: Balance the smoking process to enhance rather than overwhelm.

Creamy Elements: A blend of mayonnaise, mustard, and perhaps a touch of vinegar creates a rich, tangy base that complements the smoky potatoes.

Frequently Asked Questions 

How long should I smoke the potatoes for smoked potato salad?

The potatoes should be smoked for one to two hours at 225 degrees Fahrenheit for optimal results. Make sure they have a decent bite that makes them ideal for salad, but not so much that they break apart.

What are the best potatoes to use for smoked potato salad?

Potatoes that maintain their shape after cooking are the finest for smoking. Red potatoes or Yukon Gold are excellent options because they don’t quickly become mushy and have a buttery quality.

Can smoked potato salad be made ahead of time?

It’s true that smoked potato salad tastes better when prepared ahead of time. To enable the flavours to mingle together, prepare it the day before and refrigerate. Just make sure it is stored in a covered container.

Overview of Ingredients

For smoked potato salad, every component is essential. What you’ll need is as follows:

Potatoes: Perfectly smoked potatoes are the main attraction.
Mustard and Mayonnaise: For the tart, creamy dressing.
Bacon: Offers a salty, crunchy touch.
Eggs: Hard-boiled eggs provide texture and protein.
Celery and Onions: Offer taste and crunch.
Seasonings: To taste, add salt, pepper, and other herbs.

Expert Chef Advice for the Best Smoked Potato Salad

A perfect smoked potato salad calls for a little technical skill and intimate knowledge. Here is some professional advice:

Choice of Potatoes: When it comes to smoking, not all potatoes are created equal. Yukon gold and russet make great options because of their flavor-absorbing properties and texture.
Method of Smoking: The kind of wood used for smoking has a flavor-transfer effect. Applewood or hickory chips are suggested due to their subtle but unique flavour characteristics.
Dressing: To give your dressing a unique touch, experiment with adding a pinch of smoky paprika or garlic powder.

Customising Your Dish

It can be creative and enjoyable to modify the recipe to accommodate dietary restrictions or varied tastes.

Vegan Version: Omit the bacon and use vegan mayonnaise instead.
Add Heat: For a fiery touch, incorporate chopped jalapeños or chilli flakes.

Recommended Side Dishes with Smoked Potato Salad

Smoked potato salad pairs beautifully with a variety of dishes, making it a versatile choice for any meal.

Grilled Meats: Perfect alongside BBQ ribs, chicken, or steak.

Other Salads: Complement it with a green salad or a tomato salad for a lighter meal option.

Nutritional Data and Health Benefits 

Depending on the ingredients, smoked potato salad not only adds taste to any meal but also has a number of health advantages. Here’s a deeper look at the nutritional value and health benefits of a standard smoked potato salad.

Nutritional Components:

Potatoes: The main ingredient in the salad, potatoes are a good source of vitamins C and B6, potassium, and dietary fibre, especially when the skins are left on. These nutrients are important for heart health, maintaining blood pressure, and supporting digestive health.

Eggs: Hard-boiled eggs add protein to the salad, essential for muscle repair and growth. They also provide vitamin D and B12.

Mayonnaise: Often used in the dressing, mayonnaise adds a creamy texture. While it is high in fat, opting for versions made with olive oil can provide healthier monounsaturated fats.

Bacon: If included, bacon contributes protein and fat. Using turkey bacon, or a smaller amount, can reduce the overall fat content.

Onions and celery: These vegetables add fibre, vitamins, and a minimal amount of calories, contributing to the overall crunch and flavour profile without significantly altering the calorie count.

Health Benefits

Energy Provision: Potatoes are a high-carbohydrate food, making this salad a good source of energy.

Supports Immunity: The vitamin C in potatoes and celery helps support the immune system.

Aids Digestion: The fibre in potatoes and celery promotes regular bowel movements and helps maintain a healthy digestive system.

Considerations for a Healthier Salad:

Reducing Fat Content: Consider using low-fat mayonnaise or substitutes like yoghurt or sour cream to decrease the overall fat content.

Adding More Vegetables: Increase the nutritional value and fibre content by including more vegetables like radishes, bell peppers, or cucumbers.

Consider Protein Variations: Adding chickpeas or beans can provide an additional protein boost and fibre, making the salad more filling and nutritious.


Print

Smoked Potato Salad

Discover how to prepare a smoked potato salad. Perfect for barbecues in the summer! Find out about ingredients, timings, and cooking advice.

  • Author: Gabriela cardenas
  • Prep Time: 20 minutes
  • Cook Time: 2 hours (including smoking time)
  • Total Time: 2 hours 20 minutes
  • Yield: 4-6
  • Category: Side Dish
  • Method: Smoking
  • Cuisine: American
  • Diet: Gluten Free

Ingredients

  • 2.5 lbs of Yukon Gold potatoes
  • 1 cup mayonnaise
  • 1 tablespoon apple cider vinegar
  • 1 tablespoon yellow mustard
  • 4 slices of bacon, cooked and crumbled
  • 4 hard-boiled eggs, chopped
  • 1/2 cup diced red onion
  • 1/2 cup chopped celery
  • 1 teaspoon smoked paprika
  • Salt and pepper to taste

Instructions

  1. Prepare the Potatoes:Pat potatoes dry and clean. After rubbing them with olive oil, add salt and pepper for seasoning. The potatoes should be smoked for two hours, or until they are very tender, at 225°F in your smoker.
  2. Make the Dressing: In a large bowl, mix the mayonnaise, vinegar, mustard, and smoked paprika.
  3. Combine Ingredients: Once the potatoes are smoked and cooled, chop them into bite-sized pieces. In the large bowl with the dressing, add the chopped potatoes, eggs, bacon, red onion, and celery.
  4. Mix and Season: Toss everything to coat evenly with the dressing. Season with salt and pepper to taste.
  5. Chill: Refrigerate the salad for at least one hour before serving to allow the flavors to meld together.

Notes

  • Smoking Wood: Use wood like hickory or applewood for a mild, sweet smoke flavor that complements the potatoes.
  • Alternative Ingredients: For a lighter version, substitute half the mayonnaise with Greek yogurt.
  • Extra Crunch: Add extra vegetables like chopped bell peppers or radishes for more texture.

Keywords: BBQ potato salad, smoked salad recipe, summer potato salad

Did you make this recipe?

Share a photo and tag us — we can't wait to see what you've made!

Categories
Dinner Recipes

Cowboy Soup

With this one-pot Cowboy Soup, sample the rich, smokey tastes of the Wild West. Not only is this cheap and simple meal satisfying, but it also adds a classic cowboy culinary experience to your dinner table. For those cold nights, our Cowboy Soup offers a filling, easy-to-make dinner.

Also, check out this hearty recipe for Texas Cowboy Stew.


Overview of Ingredients

  • Proteins: ground beef, chicken, or turkey—rich in iron and perfect for muscle repair.
  • Vegetables: onions, garlic, potatoes, bell peppers, and corn—packed with vitamins and fiber for immune health.
  • Beans and Tomatoes: Add depth, texture, and additional protein.
  • Spices and herbs: cumin, chili powder, cayenne, cilantro, or parsley—for antioxidants and a burst of fresh flavor.
  • Broth: the hydrating base of the soup, rich in minerals.
  • Cheese (optional) adds creaminess and calcium.

FAQs

Can I make cowboy soup in a slow cooker?

Absolutely, cowboy soup is ideal for slow cooking.

How can I thicken my cowboy soup?

A roux or a slurry of cornstarch and water can add body to your soup.

Is cowboy soup freezer-friendly?

Yes, it freezes and reheats well.

Chef’s Tips for Perfect Cowboy Soup

Choose the Right Cut of Meat

Opt for chuck roast or stew meat over leaner cuts. The fat marbling contributes to a richer broth and tender meat. Consider browning the meat in batches to ensure a deep, caramelized flavor foundation.

Deglaze the Pot

After browning the meat, use a bit of broth or beer to deglaze the pot. This step helps to lift the browned bits off the bottom, which are packed with umami and deep flavors.

Slow Cooking is Key

Allow your cowboy soup to simmer on low heat for several hours. Slow cooking melds the flavors together and tenderizes the meat, making the soup richer and more cohesive.


Balance Your Spices

Cowboy soup benefits from a robust spice profile. Don’t shy away from cumin, chili powder, smoked paprika, and even a pinch of cayenne for heat. Start with small amounts and adjust as you go, tasting frequently.

Incorporate Fresh Herbs at the End

Fresh cilantro or parsley can add a burst of freshness to the hearty soup. Stir in these herbs right before serving to preserve their vibrant color and flavor.

Thicken with Purpose

If you prefer a thicker soup, consider mashing some of the beans or vegetables directly in the pot. Alternatively, a cornstarch slurry or a roux can thicken the broth without altering the flavor significantly.

Don’t Rush the Roux

If using a roux to thicken your soup, cook it until it’s a deep golden brown. This not only thickens the soup but also adds a layer of nutty flavor.

Making Cowboy Soup in a Crockpot

Deep flavors are easiest to achieve with hearty crockpot cowboy soup. The ingredients blend beautifully over extended cooking to provide a thick, comforting soup. Do it this way:

Preparation

Begin by browning the meat (beef, chicken, or turkey) in a skillet over medium heat. This step is crucial, as it adds a rich flavor to the soup. Once browned, transfer the meat to the crockpot.

Layering Ingredients

Add the chopped onions, garlic, potatoes, bell peppers, and any other vegetables you are using to the crockpot. Top these with the cooked meat. Then, add the beans and tomatoes. Sprinkle the chili powder, cumin, cayenne, and other spices over the ingredients.

Adding Liquids

Pour enough beef or vegetable stock into the crockpot to cover the ingredients. If you like your soup a bit thinner, you can add more stock or some water.

Cooking

Set your crockpot to low and let the soup cook for 6–8 hours. This slow cooking process helps tenderize the meat and integrate the flavors of the spices and vegetables.

Final Touches

About 30 minutes before serving, check the seasoning and adjust if necessary. If the soup is too thin for your liking, you can thicken it with a cornstarch slurry or by mashing some of the beans and vegetables directly in the pot. Add freshly chopped cilantro or parsley for a burst of color and freshness.

Serving

Serve the soup hot, with optional toppings like shredded cheese, sour cream, or sliced jalapeños. Cowboy soup made in a crockpot is especially comforting on cold days and usually tastes even better the next day.

Customizing Your Cowboy Soup

One of the beauties of cowboy soup is its versatility. Here are a few ideas to make it your own:

Swap out ground beef for chicken or pork for a different flavor profile.

Add in whatever vegetables you have on hand—the more, the merrier.

Adjust the spice level to suit your taste, from mild to fiery.

What to Serve with Cowboy Soup

To round out your meal, consider these accompaniments:

Cornbread or crusty bread for dipping

A simple green salad

A dollop of sour cream or shredded cheese on top

Print

Cowboy Soup

Our simple Cowboy Soup recipe makes a warm one-pot supper. Rich tastes, quick prep!

  • Author: Gabriela cardenas
  • Prep Time: 15 minutes
  • Cook Time: 2 hours (slow cooking for deeper flavor)
  • Total Time: 2 hours 15 minutes
  • Yield: 6
  • Category: Soup
  • Method: Slow Cooking
  • Cuisine: American

Ingredients

  • 1 lb ground beef, chicken, or turkey
  • 1 onion, chopped
  • 2 cloves garlic, minced
  • 2 large potatoes, diced
  • 1 bell pepper, chopped
  • 1 cup corn
  • 1 can (15 oz) pinto or kidney beans, drained
  • 1 can (15 oz) diced tomatoes
  • 4 cups beef or vegetable broth
  • 1 teaspoon cumin
  • 1 teaspoon chili powder
  • 1/2 teaspoon cayenne pepper
  • Optional: shredded cheese for topping
  • Salt and pepper to taste

Instructions

Directions for Stovetop Cowboy Soup

1. Brown the Meat:

  • In a large pot over medium heat, cook the meat (beef, chicken, or turkey) until it’s browned thoroughly.

2. Sauté Vegetables:

  • To the same pot, add onions and garlic. Sauté until they are translucent. Then add potatoes, bell peppers, and corn, cooking until slightly softened.

3. Add Dry Ingredients:

  • Stir in the beans, tomatoes, cumin, chili powder, cayenne pepper, salt, and pepper.

4. Pour in the Broth:

  • Add enough broth to cover all the ingredients. Increase the heat and bring the mixture to a boil.

5. Simmer:

  • Once boiling, reduce heat to low and let the soup simmer for about 1-2 hours, stirring occasionally until the vegetables are tender and the flavors have melded together.

6. Thicken and Adjust Seasonings:

  • If the soup is too thin, thicken it with a roux or cornstarch slurry. Adjust the salt, pepper, and spices according to taste.

7. Serve:

  • Garnish with optional shredded cheese, sour cream, or fresh herbs like cilantro or parsley. Serve hot with a side of cornbread or crusty bread.

Directions for Crockpot Cowboy Soup

1. Brown the Meat:

  • In a skillet over medium heat, cook the meat until it’s fully browned. This enhances the flavor of the soup.

2. Transfer to Crockpot:

  • Place the browned meat into the crockpot.

3. Add Vegetables and Spices:

  • Add the chopped onions, garlic, potatoes, bell peppers, and corn to the crockpot. Include the beans and tomatoes.

4. Season:

  • Sprinkle the cumin, chili powder, cayenne, salt, and pepper over the ingredients in the crockpot.

5. Add Liquids:

  • Pour in the broth until all ingredients are well covered.

6. Slow Cook:

  • Set the crockpot on low and cook for 6-8 hours. The long cooking time allows for deep flavor development and tender vegetables.

7. Thicken and Final Adjustments:

  • About 30 minutes before serving, check the consistency and flavor. Thicken if necessary using a cornstarch slurry or by mashing some of the beans or vegetables. Adjust seasoning as needed.

8. Serve:

  • Ladle the soup into bowls, topping with optional garnishes such as cheese or fresh herbs. Serve warm, perfect for a cozy meal.

Notes

  • Enhancing Flavor: For an added flavor boost, try deglazing the skillet with a splash of broth or beer after browning the meat and add these juices to the crockpot.
  • Freshness: Add a handful of chopped cilantro or parsley before serving to infuse a fresh taste.
  • Storage: Cowboy Soup can be stored in the refrigerator for up to 4 days or frozen for up to 3 months.

Keywords: Cowboy Soup Recipe,cowboy stew, wild west soup, one-pot cowboy soup,crockpot cowboy soup.hearty crockpot cowboy soup,cowboy crockpot soup

Did you make this recipe?

Share a photo and tag us — we can't wait to see what you've made!

Categories
Dinner Lunch Recipes

Easy Texas Cowboy Stew – Hearty & Flavorful

Delicious Texas-inspired Cowboy Stew awaits! This guide will walk you through selecting the best meats and vegetables, seasoning them properly, and cooking them into a scrumptious stew perfect for any Texan occasion. Let’s get started on creating this tasty, nutritious dish.

FAQs

What is the best meat for Texas cowboy stew?

Chuck or brisket for their flavor and tenderness.

What is cowboy Texas stew made of?

Crisp bacon, browned ground beef, Kielbasa smoked sausage, robust vegetables, and beans in a tomato-based broth seasoned with chili powder, cumin, and smoky paprika make cowboy stew delicious.

How do I make stew nice and thick?

Flour thickens stews.Make a slurry of a teaspoon of flour in cold water and add it to the stew. Avoid adding dry flour to stew since it may clump. Boil the stew after adding the slurry.

Overview of Ingredients

A classic cowboy stew includes:

  • Ground beef
  • Beans (pinto or kidney)
  • Potatoes
  • Carrots, onions, and garlic
  • Tomatoes (diced or sauced)
  • Spices: chili powder, cumin, salt, and pepper

Chef’s Tips for Perfect Texas Cowboy Stew

A highly suitable cut of meat for cowboy stew

Cowboy Stew is best with tougher cuts of beef that boil slowly to tenderize and flavor. Here are some top cuts:

  • Chuck Roast: This cut is a popular choice for stews. It’s from the shoulder area, so it has a good amount of connective tissue and marbling, which breaks down during cooking to create tender, juicy pieces of meat.
  • Brisket: known for its rich flavor, is another excellent choice for stews. It requires a longer cooking time to tenderize, making it perfect for a slow-simmering dish like Cowboy Stew.
  • Round: Cuts from the round (like the bottom round or top round) are leaner but become very tender when cooked slowly in liquid. They are a more budget-friendly option.
  • Short Ribs: You can also use boneless short ribs for a decadently rich stew because the fat and connective tissues provide a lot of flavors and a melt-in-your-mouth texture when cooked slowly.

Layer Your Flavors

  • Saute Your Vegetables: Before adding them to the stew, sauté onions, garlic, and other vegetables. This step enhances their natural sweetness and complexity, providing a richer flavor base.
  • Use Quality Stock: A good-quality beef or vegetable stock can make a significant difference in the depth of flavor in your stew. Homemade stock is best, but a high-quality store-bought version can work well too.
  • Herbs and Spices: Don’t be afraid to experiment with herbs and spices. Bay leaves, thyme, and smoked paprika can add wonderful undertones. Fresh herbs should be added towards the end of cooking to preserve their flavor.

Cooking Technique

  • Low and Slow: The essence of a great cowboy stew lies in its slow cooking process. A low, gentle simmer allows the flavors to meld together and the meat to become fork-tender without falling apart.
  • Skim the Fat: As your stew simmers, fat will rise to the surface. Skimming off this excess fat will result in a cleaner-tasting broth that’s rich but not greasy.
  • Thicken with Care: If you prefer a thicker stew, you can thicken it with a slurry of cornstarch and water or by mashing some of the potatoes and beans directly in the pot. Be sure to introduce these thickeners towards the end of the cooking process to avoid over-thickening.

Presentation and Serving

  • Garnish Wisely: A sprinkle of fresh chopped parsley or cilantro just before serving can add a fresh contrast to the rich stew.
  • Serve with the Right Accompaniments: A side of crusty bread, cornbread, or a simple green salad can balance the hearty richness of the stew, making for a well-rounded meal.

Cowboy Stew Side Dishes

This stew pairs wonderfully with:

Cornbread

Biscuits

A simple green salad

Health Benefits of Cowboy Stew

Despite its hearty nature, cowboy stew can be a wellspring of nutrition.

  • Protein and Fiber: Thanks to its meat and beans, the stew is packed with protein and fiber, essential for muscle repair and digestive health.
  • Vitamins and Minerals: The variety of vegetables used not only adds flavor but also provides vitamins and minerals, making it a balanced meal.

Understanding the healthiest beans and legumes to use in your stew can further enhance its nutritional profile.

Check out the Steak Nachos Recipe too.
Print

Texas Cowboy Stew

Use this easy recipe to learn how to make Texas Cowboy Stew. Great for a filling meal that makes your table feel warm and cozy in the South.

  • Author: Gabriela cardenas
  • Prep Time: 20 minutes
  • Cook Time: 2 hours
  • Total Time: 2 hours 20 minutes
  • Yield: 4-6
  • Category: Stews
  • Method: Stovetop
  • Cuisine: American, Texan
  • Diet: Gluten Free

Ingredients

  • 1 lb ground beef
  • ½ lb Kielbasa sausage, sliced
  • 4 slices bacon, chopped
  • 2 cups pinto or kidney beans, drained
  • 3 potatoes, peeled and diced
  • 2 carrots, peeled and diced
  • 1 onion, chopped
  • 2 cloves garlic, minced
  • 2 cups diced tomatoes (canned or fresh)
  • 1 teaspoon chili powder
  • 1 teaspoon cumin
  • ½ teaspoon smoked paprika
  • Salt and pepper to taste
  • 4 cups beef or vegetable stock

Instructions

  1. In a large pot, cook bacon over medium heat until crisp. Remove bacon and set aside.
  2. In the same pot, brown the ground beef and sausage. Once browned, remove excess fat.
  3. Add onions and garlic to the pot and sauté until translucent.
  4. Return bacon to the pot along with beans, potatoes, carrots, tomatoes, chili powder, cumin, paprika, salt, and pepper.
  5. Pour in the stock and bring to a boil. Reduce heat and simmer covered for 1.5 to 2 hours, or until vegetables are tender.
  6. Adjust seasoning to taste and serve hot.

Notes

  • For a thicker stew, mash some of the potatoes right in the pot during the last 30 minutes of cooking.
  • Serve with cornbread or crusty bread for a complete meal.
  • This stew tastes even better the next day as the flavors have more time to meld together.
  • Consider adding a bay leaf during the simmering process for additional flavor depth

Keywords: Texas Cowboy Stew.Cowboy Stew, Texas Stew, Hearty Beef Stew

Did you make this recipe?

Share a photo and tag us — we can't wait to see what you've made!

Exit mobile version